What is Motor Mounting? A Comprehensive Guide to Proper Installation and Its Importance
- Table of Contents
- What is Motor Mounting? A Comprehensive Guide to Proper Installation and Its Importance
- Why does motor mounting matter so much?
- What are the common types of motor mounting?
- How do you prepare the foundation and baseplate?
- How do shimming and leveling work?
- How do you align the motor shaft the right way?
- What about heat, forces, and vibration?
- What happens when motor mounting goes wrong?
- What tools and tech help with precision mounting?
- Who sets the rules and best practices?
- What do the numbers say? Real data you can use
- How do I mount a motor step by step?
- FAQs
- Key takeaways
Motor mounting means how you set and fix a motor on a base so it can run smooth and safe. It is the first step to good machine health. Do it right and your plant runs better. Do it wrong and costs rise fast.
I have seen it both ways. I have watched a pump hum like a kitten after a solid install. I have also seen a fan shake like a washing machine on spin. Let me show you what works. I will keep it plain and simple. You can use this today.
Why does motor mounting matter so much?
Here is the big idea. The motor must sit on a strong motor support structure. It must be square and level. It must hold steady under load. When you do that you get less vibration and less noise. You also protect bearings, couplings, and shafts. That is how you get equipment lifespan extension.
Bad mounting hurts motor efficiency. Friction rises. Heat builds. Energy goes to waste. With good mounting you get energy consumption reduction. You also get operational costs optimization. Your uptime goes up. Your downtime goes down. Your team can breathe.
Think about shaft alignment importance. You cannot hold a good align if the base is weak or out of level. So mounting is not only about bolts. It is about the foundation requirements motor, the base plate design, and the path to precision alignment techniques. Good mounting sets up the win.
What are the common types of motor mounting?
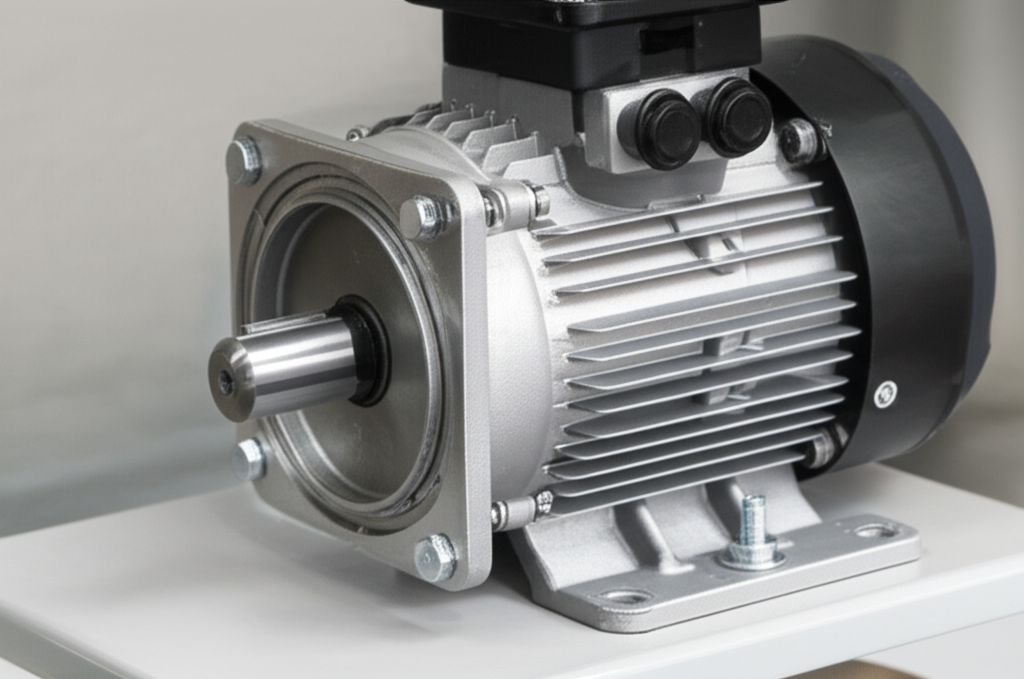
You can mount a motor in many ways. The most common is foot-mounted (B3/IM B3) on a base. It sits horizontal. You see it on pumps, fans, and gearboxes. It works well in industrial motor mounting where space is open and the drive is simple.
You also see flange-mounted (B5, B14/IM B5, B14) motors. These are face-mounted. You will hear about C-Face (NEMA) and D-Flange (IEC) types. They fit right to a gearbox, pump, or fan housing. You can run them vertical or horizontal. They save space. They make change-outs fast.
Some systems use resilient or cradle mount systems to cut vibration. You see anti-vibration/ isolation mounts like rubber isolation mounts and spring isolators. You might choose an adjustable motor mount to set belt tension and position. You can also find stud mount applications, integral motor mounts, and motor pedestal mounting for special jobs. Always check motor frame size compatibility, motor foot configurations, and mounting dimensions calculation first.
How do you prepare the foundation and baseplate?
Start with a rigid base. You want rigidity, levelness, and flatness. The baseplate flatness should meet spec. The structural integrity motor support must be strong. No flex. No twist. Think of a table with no wobble.
Large machines use sole plates installation and sole blocks leveling. The plates sit on the foundation. You level them. Then you set the Baseplate. For harsh duty you use grout. You might use epoxy grout application or cementitious grouting compounds. The grout installation motor base fills gaps. It supports the base. It damps vibration. It guards against corrosion.
Plan the anchor bolt design. Pick the right size. Place them right. Use bolted connection strength rules. Follow fastener torque specifications. Use the right anchor bolt tightening torque. You can welding motor base for some frames yet bolts give better service and make motor remounting process and re-grouting procedures easier later.
How do shimming and leveling work?
Shims are thin pieces of metal. You use shims for alignment to set the height and angle of the motor feet. Start with base leveling techniques. Use a level or a laser. Then use leveling screws adjustment to get close.
Watch for soft foot correction. A soft foot happens when a motor foot does not sit flat. It bends when you tighten the bolt. That hurts parallelism alignment and angular alignment principles. You can fix soft foot with shims and good practice. You can use chocking procedures or epoxy chocks too. The goal is initial base flatness so you can align the shaft and keep it that way.
How do you align the motor shaft the right way?
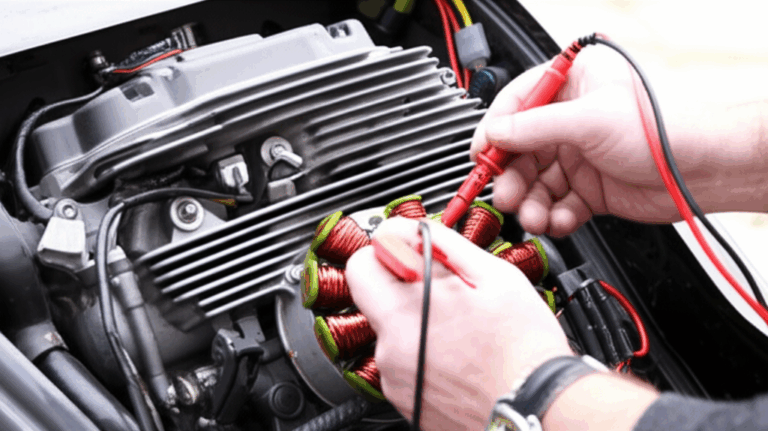
Your goal is shaft alignment. Start with a rough align. Then move to precision alignment techniques. You can use a dial indicator alignment method. You can use laser alignment tools. You can measure both angular and parallel misalign. You can make a temporary alignment during build. Then lock in a permanent alignment when you grout and torque.
Pick the right coupling types and alignment plan. A flexible coupling can forgive a bit. A rigid coupling needs a perfect align. You can get help from laser alignment systems. They are fast and very clear. They save time and money.
Good align brings power transmission efficiency. It lowers load on bearings and seals. It cuts heat and stress. It makes your drive system run smooth. That is the heart of motor installation guide best work.
What about heat, forces, and vibration?
Motors feel dynamic forces on motors when they start and stop. They feel static forces motor mounting from weight and pull. They also grow with thermal expansion effects. You must plan for these. Leave space where needed. Use stress management rotating equipment to avoid warp and bind.
You can use vibration analysis principles to test your setup. Check for resonance identification so you do not match the natural bounce of the base. Add vibration isolation pads or shock absorption mounts if needed. Use motor balancing services if the rotor shows imbalance. Check noise reduction machinery results. Your ears do not lie.
Hot motors fail fast. Improve cooling system efficiency. Use the right lubrication system impact plan. Align the shaft and mounts to cut heat load. Less vibration means less heat in windings. That helps energy efficiency and life.
What happens when motor mounting goes wrong?
Let me paint the picture. The base is not flat. The bolts are loose. The shaft sits out of align. The machine shakes. You get excessive vibration and noise. You see effects of vibration machinery like worn pads and cracked paint.
Soon you get misalignment. That is the silent killer. Bearing failure causes pile up. Premature bearing and seal failure follows. The couplings fail early. Your energy consumption rises. Bills go up. You get more stops. That is frequent breakdowns and unscheduled downtime.
It can hurt the whole line. You may see structural damage to connected equipment. You add risk. You add safety hazards. No one wants a coupling to let go. That is why equipment safety guidelines matter. That is why we mount right the first time.
What tools and tech help with precision mounting?
Old school works. Dial indicators and feeler gauges can do the job. They are simple and cheap. You can align to fine numbers if you take your time.
New school is fast. Laser alignment systems give you live values. They help you capture angular and parallel moves in one pass. You also have vibration analysis tools for checks. You can use thermal imagers for hot alignment checks to see heat rise and fix it. You can choose specialized grouting and chocking materials that hold tight and damp shock.
Use machinery health monitoring to track the machine in service. Add predictive maintenance strategies to see faults early. Keep a log for preventative maintenance motors. That is smart rotating equipment maintenance.
Who sets the rules and best practices?
Good work follows standards. NEMA (National Electrical Manufacturers Association) sets many rules for NEMA motor mounting and frames. ISO (International Organization for Standardization) sets ISO standards vibration and quality. API (American Petroleum Institute) has strong API standards machinery for oil and gas. You also see IEC (International Electrotechnical Commission) and ASTM (American Society for Testing and Materials) codes in many plants. Follow OSHA (Occupational Safety and Health Administration) for safe work.
Use manuals from top brands like GE (General Electric), Siemens, and Baldor Electric Company. Learn from Rockwell Automation guides. For bearings check SKF (Svenska Kullagerfabriken). For research you can read IEEE papers. For training see the Vibration Institute or Mobius.
Follow best practices. Use bolted connection strength tables. Always follow fastener torque specifications for torque. Set anchor bolts with care. Keep a clear motor installation guide on the wall. Train on best practices motor maintenance. That is how you win.
What do the numbers say? Real data you can use
You want proof. Here are facts that I share with teams, along with what they mean.
I saw the same in my work. A simple fix to soft foot and a new set of shims stopped a pump from chewing seals. A fan dropped 1.2 mm/s in vibration after we re-grouted the Baseplate and set the anchor bolt tightening torque right. Small steps big gains.
How do I mount a motor step by step?
Here is a simple path you can use today. Use it on a pump, fan, gearbox, or compressor motor installation. Adjust for your site.
1) Plan the job
- Confirm motor frame size compatibility and the mounting dimensions calculation.
- Pick the types of motor mounts you need. Choose foot-mounted or flange-mounted. Consider resilient or anti-vibration/ isolation mounts if needed.
- Check foundation requirements motor and the motor support frame.
2) Prepare the base
- Verify rigidity, levelness, and flatness of the baseplate design.
- Install sole plates and do sole blocks leveling where needed.
- Set and level the Baseplate. Use base leveling techniques and leveling screws adjustment.
3) Grout and bolt
- Choose grouting compounds. Use epoxy grout application or cement grout per duty.
- Do grout installation motor base and let it cure.
- Set anchor bolts per the anchor bolt design. Tighten to fastener torque specifications.
4) Place the motor
- Set the motor and check for soft foot correction.
- Add shims for alignment to correct height and angle.
- Install the couplings. Choose flexible coupling or rigid coupling per design.
5) Align the shafts
- Do rough alignment. Then use dial indicator alignment or laser alignment tools.
- Fix parallelism alignment and angular alignment principles.
- Lock in permanent alignment solutions when in spec.
6) Check the drive system
- For belts use an adjustable motor mount benefits to set tension.
- Review drive system integration. Check guards. Confirm rotation.
- Verify power transmission efficiency and that cooling system efficiency looks good.
7) Test and verify
- Run vibration analysis principles and check for resonance identification.
- Balance the rotor if needed with motor balancing services.
- Take a heat scan with thermal imagers for hot alignment checks.
- Log values for predictive maintenance strategies and machinery health monitoring.
8) Maintain
- Set preventative maintenance motors. Plan oil checks and lubrication system impact tasks.
- Build a best practices motor maintenance checklist. Share it with the team.
- Review uptime improvement strategies and downtime reduction methods each quarter.
How design and materials support good mounting
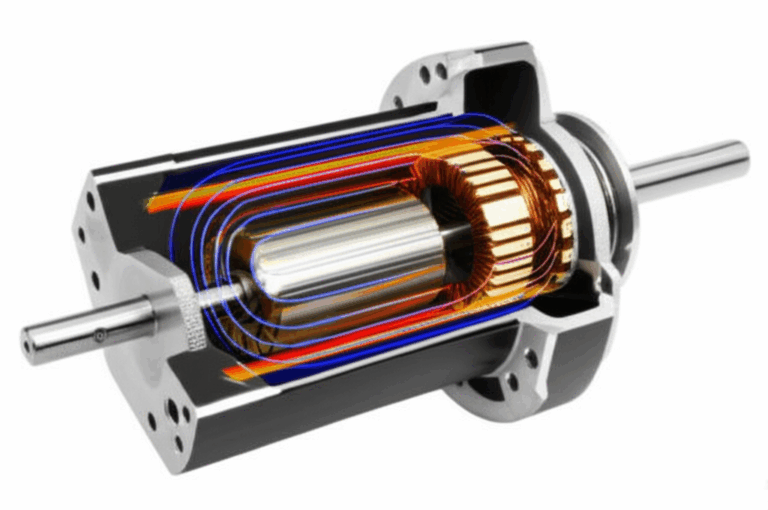
Mounting does not stand alone. Good motor design helps. High quality cores run cooler which makes mounting easier. Better cores can cut loss and energy waste.
If you build or repair motors consider the quality of the stator core lamination. The stator core sets the stage for low loss and low heat. Pair it with a well-made rotor core lamination so the rotor spins true and balanced.
The steel you use matters too. Premium electrical steel laminations can lift energy efficiency and cut stray heat. When you combine great cores with good mounting you make a strong system for the long haul. For a complete range of options see quality motor core laminations that match many frames and duties.
Real-world uses across equipment
You do not mount motors in a vacuum. You mount them to work. Here are common setups.
- Pump motor mounting techniques: Keep foot-mounted bases rigid. Watch soft foot. Align to the pump shaft. Use guards. Check seals after align.
- Fan motor mounting solutions: Use isolation pads if the duct makes the fan ring. Balance the wheel. Check belt alignment on adjustable motor mount frames.
- Gearbox mounting procedures: Face-mount with flange-mounted units for tight space. Align the gearbox input. Verify bolted connection strength.
- Compressor motor installation: Use a strong base. Monitor heat. Verify cooling system efficiency. Check vibration isolation mounts if floors are thin.
These steps raise machinery health in industrial automation lines. Your operational costs fall. Your energy efficiency rises. Your team wins.
A quick look at motor mounting setups
Short notes on risk and cost
- The cost of misalignment hurts. I have watched a line eat bearings in weeks due to tilt.
- The wear and tear prevention you get from good mounts is real.
- Downtime reduction methods start with a base that is true and tight.
- Operational costs drop when the machine runs smooth.
PAS woven through your plan
- Problem: Poor mounting leads to misalignment, vibration, heat, and short life.
- Agitate: You pay more for parts. You burn more power. You face safety risks and lost uptime. Noise goes up and morale goes down.
- Solution: Follow the steps in this guide. Use strong foundation and Baseplate work. Shim and align right. Test and monitor. Use quality cores and parts. Follow NEMA, ISO, API, OSHA, IEC, and ASTM rules.
References
- NEMA MG 1, Motor and Generator standards, and NEMA mounting practices.
- ISO standards on vibration measurement and evaluation for rotating machinery.
- API standards for pumps and compressors in petroleum service.
- OSHA guidance on machinery and machine guarding.
- SKF rolling bearing catalogs and alignment guides.
- IEEE papers on motor reliability and insulation life.
- Vibration Institute and Mobius Institute training materials on alignment and vibration.
FAQs
Q: What is motor mounting in simple words
A: It is how you fix a motor to a base so it can run smooth and safe.
Q: Do I need laser tools to align a motor
A: No you can use dial indicators. Laser tools make it faster and often more precise.
Q: How tight should anchor bolts be
A: Follow fastener torque specifications from the maker or standards. Do not guess.
Q: What is soft foot
A: It is when a motor foot does not sit flat on the base. It bends when you tighten the bolt. You fix it with shims or chocks.
Q: How often should I check alignment
A: Check after install then after a few days of run then at set PM times. Check after moves or big thermal cycles too.
Key takeaways
- Build on a strong foundation with a flat Baseplate and good grout.
- Use shims, fix soft foot, and torque anchor bolts to spec.
- Align with dial indicator or laser alignment for both angular and parallel errors.
- Plan for thermal expansion, dynamic forces, and resonance.
- Cut vibration to protect bearings, couplings, and shafts.
- Follow NEMA, ISO, API, OSHA, IEC, and ASTM standards.
- Use predictive maintenance and machinery health monitoring to stay ahead.
- Pick quality cores and parts to boost energy efficiency and life.
- Good mounting lifts uptime, lowers downtime, and trims operational costs.
- Do it right the first time and your machines will thank you.