What Does a Stator Do on an ATV? My Hands-On Guide to the Part That Keeps Your Ride Alive
Table of Contents
- Introduction: The day a “simple” stator laid my ATV flat
- What an ATV stator actually is
- Where the stator lives and what it looks like
- How the stator works: plain-English science
- Electromagnetic induction in action
- AC to DC: the rectifier/regulator partnership
- The stator’s core jobs on your ATV
- Recharging and maintaining the battery
- Powering the ignition system
- Running lights, gauges, and accessories
- Why a healthy stator makes or breaks your ride
- Symptoms of a failing stator you should not ignore
- How I test an ATV stator step by step
- Safety checks and tools
- Resistance tests
- AC output tests
- Ground tests
- Battery and regulator checks
- What causes stators to fail and how I prevent it
- DIY vs pro repair: tools, steps, and costs
- Brand notes: Honda, Yamaha, Polaris, Can‑Am, Kawasaki, Suzuki, Arctic Cat
- Stator vs alternator vs magneto: clearing up the terms
- Quick answers to common questions
- Final thoughts: Keep your charging system healthy and your rides drama‑free
Introduction: The day a “simple” stator laid my ATV flat
I learned what a stator does the hard way. One fall night I was halfway down a fire road when my headlights dimmed to candlelight. The engine stumbled then died. The battery had nothing left. I got towed home by a buddy who laughed the whole way. I didn’t. That night I dug into the charging system. The culprit was the stator. It wasn’t obvious at first because my battery took the blame. The battery was fine. The stator wasn’t feeding it enough juice.
Since then I’ve tested, replaced, and nursed more stators than I can count across Honda, Yamaha, Polaris, Can‑Am, Kawasaki, Suzuki, and Arctic Cat machines. The stator is the unsung hero of your ATV’s electrical system. It makes power while you ride. It keeps your battery alive. It gives your ignition the energy to keep sparking. If it falters your ride does too.
Let me break it down in simple terms. I’ll show you how it works, what symptoms to watch for, how I test it with a multimeter, and how to decide between DIY and a shop repair. I’ll add the tips that saved me time and money. You’ll walk away knowing exactly what a stator does on an ATV and what to do when it doesn’t.
What an ATV stator actually is
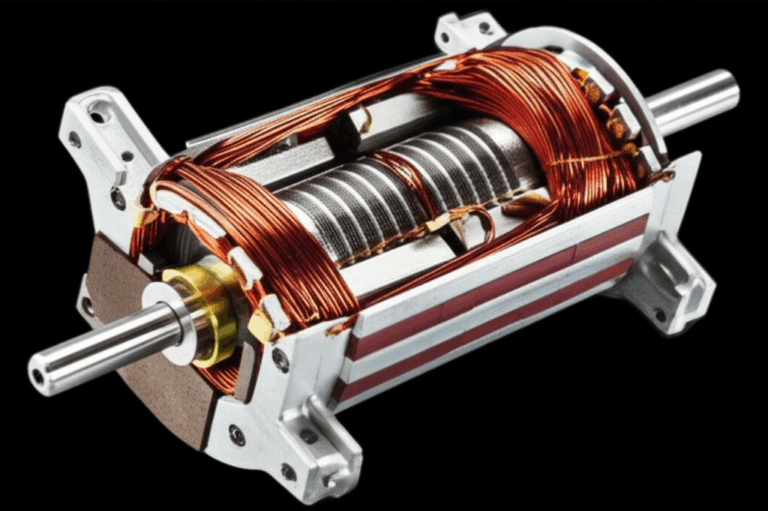
Think of the stator as the stationary half of a small generator inside your engine. It’s a set of copper windings wrapped around an iron core. The engine turns a flywheel with strong magnets. As those magnets sweep past the stator coils they induce electricity. That’s your power source. It’s not a battery. It’s a generator that works only when the engine spins.
On paper it’s part of a magneto or alternator system. In the real world it’s the heart of your ATV charging system. No stator output means no charging. No charging means your battery slowly dies then the engine quits.
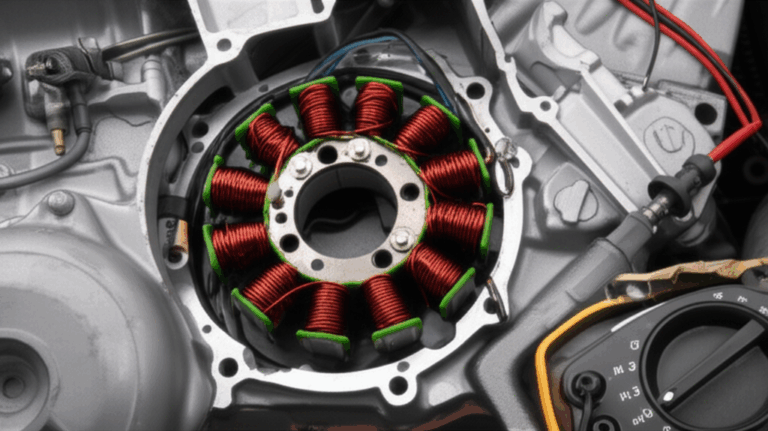
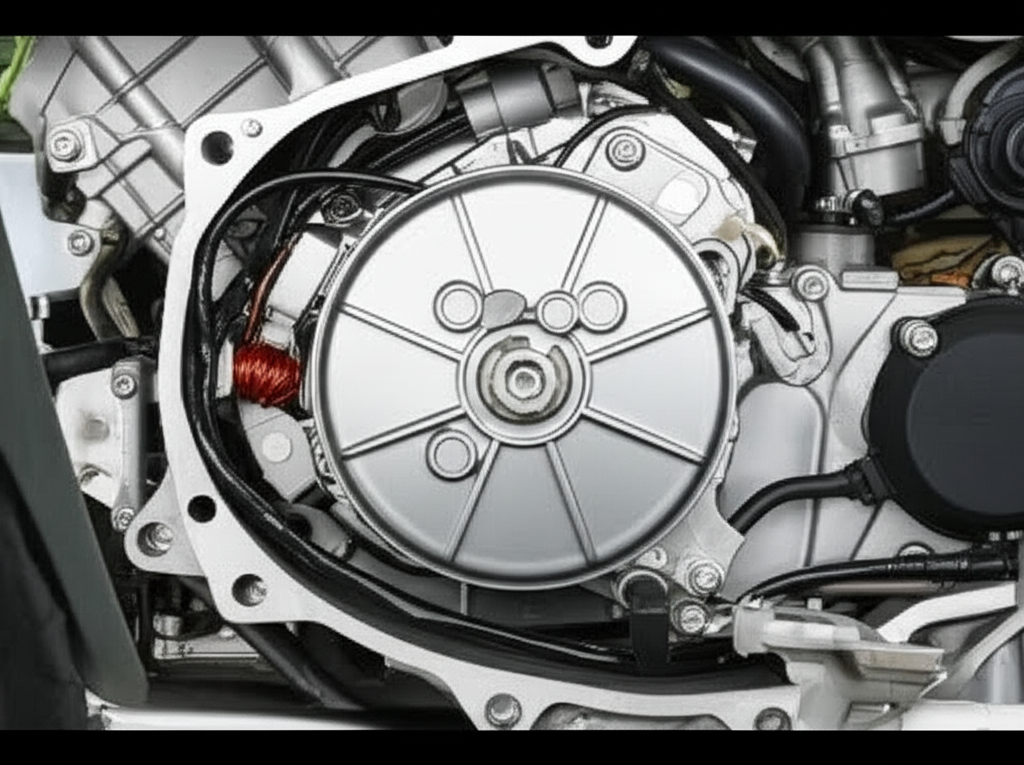
Where the stator lives and what it looks like
You’ll usually find the stator behind a side engine cover near the crankshaft. It bolts to the engine case so it doesn’t move. The flywheel or rotor spins around it on the end of the crank. Most modern ATVs tuck this assembly behind a sealed cover that may hold engine oil. Some designs are oil‑cooled and others are air‑cooled. That matters during service because you might need to drain oil and replace a gasket.
The stator has:
- A laminated iron core shaped like a ring with teeth
- Multiple coils of copper wire wrapped around those teeth
- Output leads that run through the wiring harness to the regulator/rectifier and sometimes to the ignition system or CDI
The quality of the core and laminations affects efficiency and heat. If you want to dig deeper into construction the materials used for the stator core lamination and the matching rotor core lamination play a big role in performance and durability. Those laminations come from specialty steels. If you’ve ever heard a tech talk about electrical steel laminations or seen references to motor core laminations this is the stuff.
How the stator works: plain-English science
Electromagnetic induction in action
Here’s the nutshell version. Magnets on the flywheel move past the stator coils. Moving magnetic fields create electrical current in nearby wires. That’s Faraday’s law at work. The output is Alternating Current or AC. More engine RPM equals faster magnet movement. Output voltage rises with RPM. So a stator that makes 20–30 VAC per phase at idle might make 50–70 VAC at 5,000 RPM. Your service manual lists the spec for your machine. The exact number varies by brand and model.
Some stators have multiple “phases” for more output and smoother delivery. Many ATVs use a three‑phase stator with three output wires. You test those wires in pairs.
AC to DC: the rectifier/regulator partnership
Your battery and most electronics want Direct Current or DC. The rectifier/regulator converts the stator’s AC to DC then clamps the voltage to a safe level. If the regulator fails it can overheat the stator or starve the battery. I always test both together because they live in a feedback loop. A bad battery can stress a good stator and a bad regulator can cook both.
In some models the stator also feeds the CDI or ECU to drive the ignition coil. No stator power means no spark. Some systems use a separate source coil on the stator for the ignition trigger. Different design. Same consequence when it fails.
The stator’s core jobs on your ATV
Recharging and maintaining the battery
The stator keeps your battery from slowly discharging while you ride. It supplies current to replenish what the starter motor pulled then it keeps voltage up as you run lights, fans, fuel pumps, and ECUs. I like to see 13.5–14.5 V DC at the battery on most ATVs when the engine runs. Some systems sit a bit lower or higher. Check your spec. If you see 12.2 V with the engine running the battery isn’t charging.
Powering the ignition system
On many ATVs the stator feeds the CDI or ECU. The ignition coil uses that energy to fire the spark plugs. If the stator’s source coil goes weak you can see misfires at high RPM or a dead‑no‑spark condition. I’ve chased air leaks and fuel problems that turned out to be weak stator output under load. Lesson learned. Don’t skip electrical checks.
Running lights, gauges, and accessories
Headlights, taillights, dashboards, and winches all pull power. The stator and regulator must keep up. Heavy accessory loads can push a marginal system over the edge. If your lights dim when the winch works that’s a hint the charging system is at its limit. I’ve seen riders add heated grips and a big light bar then wonder why the battery keeps dying. The stator can only deliver so much at idle.
Why a healthy stator makes or breaks your ride
A strong stator means reliable starts and steady running. It means bright headlights at night and a gauge cluster that does not flicker. It also protects other components. A weak stator makes the regulator work harder and it can overheat the battery. A bad regulator can overwork the stator and cook the windings. Ignore a failing charging system and you often pay twice.
Safety matters too. On the trail you need lights. You need a strong spark when you cross water or climb a hill at low RPM. If the stator fades your engine can stumble at the worst time.
Symptoms of a failing stator you should not ignore
Here are the signs I watch for first:
- Battery issues: a weak or dead battery after a ride or an ATV that won’t charge while running
- Dim or flickering headlights that brighten with RPM then fade at idle
- Engine problems like misfires, rough idle, random stalls, or a no‑start with no spark
- Electronics that drop out like gauges resetting or accessories that act strange
- A hot smell from the stator cover or signs of melted connectors
- A regulator/rectifier that runs scorching hot while voltage at the battery stays low
Most riders see the battery die first. They replace the battery. The new one dies soon after. That’s classic charging system trouble. Test the stator before you burn through another battery.
How I test an ATV stator step by step
You can learn a lot with a basic multimeter. I do three core tests on the stator. Resistance, AC output, and ground leakage. I also check the battery and the regulator because they link together.
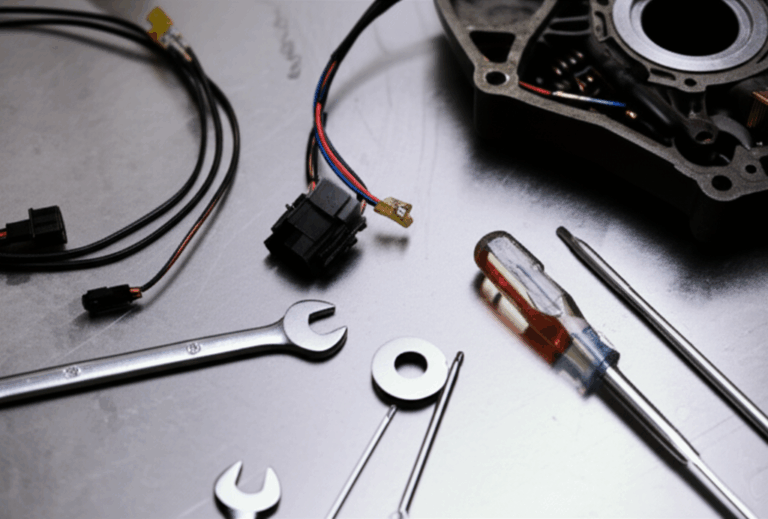
Safety checks and tools
- Multimeter with AC voltage and ohms
- Back‑probe pins or paper clips for connectors
- Service manual for your model’s specs
- Eye protection and gloves
- If you need to access the stator physically you may need a flywheel puller, a torque wrench, a new gasket, gasket sealant, and a drain pan
Start with a visual inspection. Look for chafed wires, melted connectors, or oil wicking through a harness. Clean and tighten grounds. A bad ground will send you chasing ghosts.
Resistance tests
With the engine off disconnect the stator plug that goes to the regulator. On a three‑phase stator you’ll see three similar colored wires often yellow. Measure resistance between each pair. You should see a very low reading like 0.1–0.7 ohm per phase on many models. Infinite resistance means an open winding. Near zero can mean a short. Check your manual for exact numbers. Then measure each wire to engine ground. You should see no continuity. Any reading to ground means a shorted winding.
AC output tests
Reconnect your meter to the stator output wires. Set the meter to AC volts. Start the engine. Measure between each pair of stator wires. You should see AC voltage that rises with RPM. Many healthy systems show 20–30 VAC per phase at idle and 50–70 VAC at higher RPM. The phases should match within a couple of volts. If one phase is low the stator is suspect. If all phases look good but the battery still isn’t charging the regulator may be the issue.
Ground tests
I like to check for leakage to ground with the engine running too. Put one meter lead on a stator wire and the other to a clean ground. You should see no AC voltage. Any voltage here hints at a breakdown in insulation.
Battery and regulator checks
At the battery with the engine off you should see around 12.6 V on a healthy fully charged battery. Start the engine. Most systems should jump to roughly 13.5–14.5 V DC at a fast idle. Rev the engine a bit. The voltage should climb slightly then stabilize. If battery voltage does not rise with engine speed the charging system is not doing its job. Check the regulator/rectifier connections and grounds. Check for heat sink blockage and cracked plugs. On many machines the regulator fails more often than the stator. On others the stator is the weak link. Test both.
What causes stators to fail and how I prevent it
The big four killers are heat, vibration, shorts, and dirty oil.
- Heat: A failing regulator can overvoltage the stator and cook the enamel on the windings. High accessory loads at low RPM also push the system hard. Keep the regulator’s fins clean so it can shed heat. Replace weak batteries because a bad battery stresses the system.
- Vibration: Wires rub. Insulation cracks. Mounting screws back out. I check harness routing after any crash or rough ride.
- Shorts: Oil contamination in a connector, water intrusion, or pinched wires can short coils. Use dielectric grease on plugs that see water. Inspect after deep mud runs.
- Dirty oil: If your stator runs in the engine oil the oil helps cool it. Sludge is a thermal blanket. Change oil on schedule. Cheap insurance.
I also avoid stacking too many electrical accessories on a small charging system. A big winch plus a light bar plus heated grips can outrun the stator at idle. If you must run extras consider a battery with higher reserve capacity and use the extras only when the engine is spinning fast enough to keep up.
DIY vs pro repair: tools, steps, and costs
You can test a stator easily. Replacement ranges from straightforward to swear‑jar depending on the model. Some covers come off cleanly with no oil loss. Others require draining oil and removing a stubborn flywheel.
Tools I keep handy:
- Flywheel puller made for your model
- Torque wrench with the correct torque specs
- New stator cover gasket and a dab of gasket sealant if the manual calls for it
- Thread locker for the flywheel bolt if specified
- Shop rags and brake cleaner to clean mating surfaces
- Multimeter and service manual
Basic steps I follow:
Costs I see often:
- Aftermarket stator: roughly $50–$200
- OEM stator: roughly $150–$450 or more on some models
- Shop labor: 2–4 hours at local rates which lands in the $150–$400+ range
- Total out the door: $300–$850 for OEM and professional install on many machines
DIY can be as low as $50–$250 if you have tools and patience. On some high‑end or cramped models the total can break $1,000.
When do I go pro? If the flywheel refuses to budge or the service manual calls for special alignment tools I let a shop earn their keep. If I see metal shavings or fried wiring in the harness I also bring in a pro because the damage likely runs deeper.
Brand notes: Honda, Yamaha, Polaris, Can‑Am, Kawasaki, Suzuki, Arctic Cat
Across brands the basics stay the same. The stator sits near the crankshaft and feeds AC to a regulator/rectifier. Specs differ by model. Some Honda and Yamaha units are famously stout yet age catches all windings. I’ve seen Can‑Am and Polaris machines with strong output that still suffer from connector corrosion. Kawasaki and Suzuki models follow the same playbook with similar test numbers. No matter the badge your service manual is your best friend. Wire colors, connector locations, and AC output specs vary. Follow the book.
Stator vs alternator vs magneto: clearing up the terms
Riders toss these words around like they mean different things. On an ATV they often point to the same system.
- Stator: the stationary windings that generate AC power when magnets pass by
- Rotor or flywheel: the spinning magnet assembly attached to the crank
- Magneto: a generator that uses permanent magnets rather than an electromagnet
- Alternator: a generator that produces AC power
ATVs generally use a permanent‑magnet alternator which many people call a magneto. The stator is the windings inside that system.
Quick answers to common questions
Where is the stator on my ATV?
Usually behind a left or right side engine cover near the crankshaft. Look for the wiring harness that disappears under a cover.
How do I test an ATV stator?
Measure resistance between stator leads and make sure none short to ground. Then measure AC voltage output per phase with the engine running and watch it rise with RPM. Compare against the spec in your service manual.
What should stator resistance be?
Often 0.1–0.7 ohm per phase on a cold stator. Numbers vary by machine. Infinite means open. Zero means a short.
How much AC should I see?
A healthy system often shows 20–30 VAC at idle and 50–70 VAC at higher RPM per phase. Some models show more or less. The phases should match.
Can I ride with a bad stator?
You can limp along until the battery dies. Then you walk or tow. It risks damage to the battery and regulator. I don’t recommend it.
Why does my ATV battery keep dying?
Common causes include a weak stator, a failing regulator/rectifier, corroded connectors, or too much accessory load. Test the charging system before you buy another battery.
What’s the difference between oil‑cooled and air‑cooled stators?
Oil‑cooled designs sit in engine oil which helps shed heat. Dirty oil traps heat. Air‑cooled designs sit in a dry cover and rely on airflow and the engine case for cooling. Both fail if overheated or shorted.
What tools do I need to replace a stator?
A multimeter to diagnose. A flywheel puller made for your model. A torque wrench. A new gasket. Some sealant if the manual calls for it. A drain pan if oil sits behind the cover.
Final thoughts: Keep your charging system healthy and your rides drama‑free
I used to see the stator as a mysterious brick of copper. Then it stranded me and I learned fast. Now I check three things before every long ride. Battery health. Clean tight grounds. Charging voltage at a fast idle. It takes five minutes and it has saved trips more than once.
If your ATV shows dim lights, a weak battery, or random stumbles don’t guess. Test the stator and the regulator together. Use your model’s specs. Replace bad parts with quality components. Route wires carefully. Keep oil clean on oil‑cooled systems. Go easy on accessories at idle. These simple habits keep the stator happy which keeps your battery charged and your engine sparking.
I want your rides to end at the trailhead not on a tow strap. A healthy stator makes that happen.