What Does a Stator Do on a Lawn Mower? Your Essential Guide to its Charging Role
Table of Contents
- Introduction: The Unsung Hero of Your Lawn Mower’s Electrical System
- The Stator’s Core Function: Generating Electricity
- How It Works: Electromagnetic Induction in Plain English
- A Simple Analogy: The Mini Power Plant Under Your Flywheel
- The Stator’s Role in the Mower’s Charging System
- From AC to DC: Rectifier and Regulator
- Charging the Battery and Powering Accessories
- Why a Functional Stator Matters
- Symptoms of a Failing or Bad Stator
- Diagnosing Stator Problems: A Step-by-Step Approach
- Tools and Safety
- Basic Battery Check
- AC Output Test
- Stator Resistance and Short-to-Ground Tests
- DC Output Test at the Regulator and Battery
- Visual Inspection
- Stator vs Alternator: What’s the Difference
- Types of Lawn Mower Stators and Output Options
- Common Causes of Stator Failure and How to Prevent Them
- How to Remove and Install a Stator Safely
- Charging System Diagram Explained
- Maintenance Tips That Keep Your Charging System Healthy
- Quick Answers to Common Charging System Questions
- Conclusion: Don’t Underestimate Your Stator
Introduction: The Unsung Hero of Your Lawn Mower’s Electrical System
When I started fixing small engines in my own garage I didn’t care about stators. I cared about dead batteries. A mower that wouldn’t crank on a Saturday morning will turn you into an electrical detective real fast. Over time I learned that the stator sits at the center of most charging mysteries. It’s not flashy. It has no moving parts. Yet it quietly generates power anytime the engine runs.
So what does a stator do on a lawn mower? In short, it creates electricity. The flywheel spins around it. Magnets sweep past coil windings. Alternating current (AC) gets produced. That AC then feeds a rectifier regulator which turns it into direct current (DC) and controls voltage. Your battery charges. Your headlights glow. Your electric PTO clutch engages without drama. When the stator or its partner fails the battery drains and the electrical system limps.
I’ll walk you through how it works, what can go wrong, and how I test these systems step by step. I’ll also share hard-earned lessons from real-world diagnostics on Briggs & Stratton, Kohler, Honda, Kawasaki, John Deere, Husqvarna, Craftsman, and zero-turn mowers. Stick with me and you’ll be able to tell whether the stator is your hero or your headache.
The Stator’s Core Function: Generating Electricity
How It Works: Electromagnetic Induction in Plain English
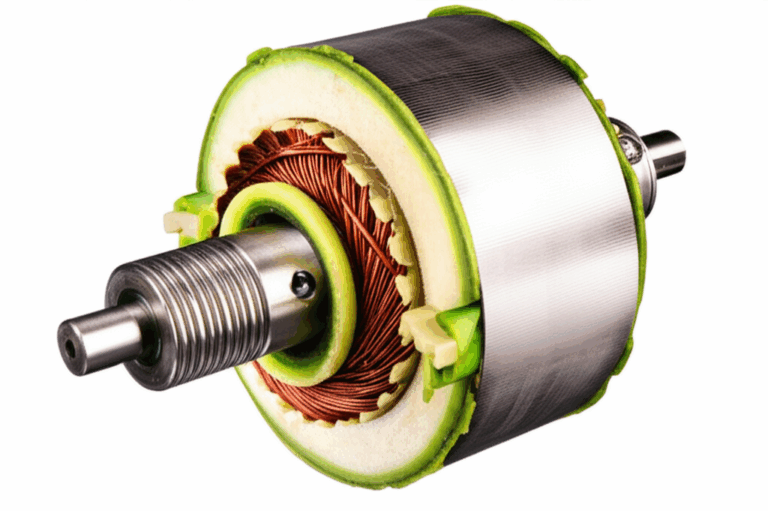
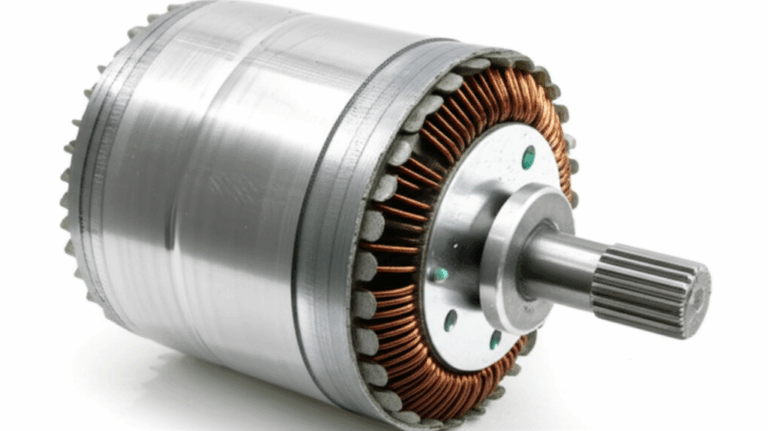
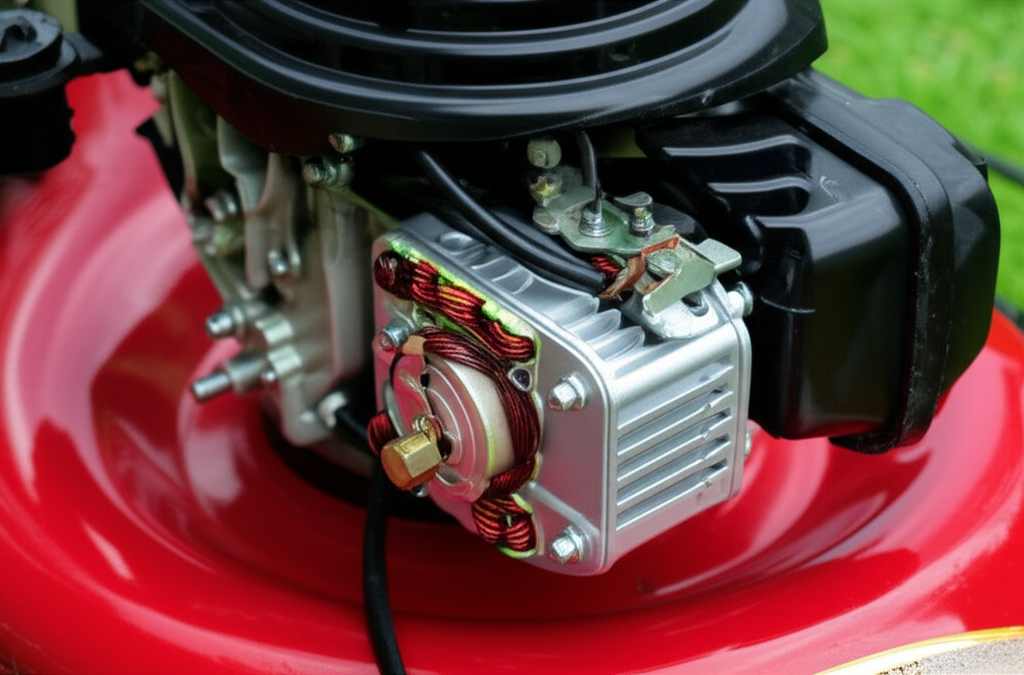
The stator lives under the flywheel on the top of the engine near the crankshaft. It’s a set of electrical coils mounted to a fixed plate. The flywheel carries permanent magnets. When the engine runs the flywheel rotates around the stator. As magnets sweep past the stator coils they push and pull electrons in the copper wire. That motion creates alternating current thanks to electromagnetic induction and Faraday’s Law. No belts. No brushes. No complicated moving parts.
Key points I watch in practice:
- Higher engine RPM increases stator output. More rotations per minute mean more magnetic field changes per second. Output rises with RPM.
- Different stator designs produce different power. Some have separate lighting and charging coils. Some feed a combined high-output rectifier regulator.
- The raw output is AC. Your battery and most accessories need DC, so the rectifier regulator must convert and control it.
The physics sounds academic. In the shop it’s simple. Spin magnets past coils and you get AC voltage.
A Simple Analogy: The Mini Power Plant Under Your Flywheel
I treat the stator like a tiny hydroelectric dam. The flywheel magnets flow past the coils like water past a turbine. The coils grab that flow and turn it into usable energy. The faster the “river” runs the more energy you get. That’s why you test output with the engine at operating RPM. Idle speed won’t tell the full story.
If you want to peek into the materials side, the quality of the core and laminations inside any stator matters. Manufacturers stack thin sheets of electrical steel to reduce eddy currents and heat. If you’re curious about how that works in motors and generators you’ll find a quick primer here on stator core lamination and more background on electrical steel laminations. I don’t wind stators on my bench, yet understanding the metal stack helps explain why cheap aftermarket parts sometimes run hotter or fail sooner.
The Stator’s Role in the Mower’s Charging System
From AC to DC: Rectifier and Regulator
The stator can only make AC. Your battery needs DC. That’s where the rectifier regulator steps in. This box usually hides on the engine shroud or near the frame with cooling fins. It does two jobs.
- Rectifier: Converts AC from the stator into DC. Think of diodes acting like one-way valves.
- Regulator: Holds the DC voltage in a safe range so the battery doesn’t get cooked by overcharging. It clamps the output when RPM climbs.
Some mowers combine both in one R/R module. Others use separate pieces. Wiring harness color codes vary by brand, so I always check the workshop manual for my exact engine model number.
Charging the Battery and Powering Accessories
When everything works the system does three things at once.
- Keeps the battery charged for reliable starting.
- Powers live loads like headlights, an electric PTO clutch, or an electric fuel pump while the engine runs.
- Prevents undercharging and overcharging so the lead-acid battery lives a long, quiet life.
I test this at the battery with a multimeter. Engine off gives me the resting voltage. Engine running at full throttle gives me charging voltage. If the R/R and stator play nice I see a healthy rise in DC voltage at the battery terminals with RPM.
Why a Functional Stator Matters
A healthy stator saves you from slow cranking and dead batteries. It also keeps accessories from dimming and protects the battery from abuse. If you run a garden tractor with headlights, electric PTO, and a fuel pump you need steady charging to hold the line against that power draw. Weak stator output makes everything struggle. A bad regulator makes everything risky.
Bottom line. You want a charging system that produces enough current at mowing RPM and keeps voltage in check. That balance keeps the machine starting on the first turn all season.
Symptoms of a Failing or Bad Stator
Here’s what I watch for before I ever grab the meter:
- Dead or weak battery after normal use. You park it charged then it’s flat after mowing. Classic undercharging.
- Dim or flickering headlights as RPM changes. The lights brighten when you rev and fade at idle. Some fluctuation is normal yet big swings hint at trouble.
- Battery warning light glowing on the dash. Not every riding mower has one yet some do.
- Electric PTO slipping out under load. The clutch needs steady voltage. Low charging can cause weak engagement.
- Visual damage under the flywheel. Burnt stator coils, frayed wires, cooked insulation.
- Battery overcharging. You smell sulfur from the battery or see bulging sides. The regulator may be stuck high or miswired which is just as bad as no charge.
Not every power issue points to the stator. Starters and solenoids fail. Grounds corrode. Fuses blow. I always rule out the basics before I blame the stator.
Diagnosing Stator Problems: A Step-by-Step Approach
Tools and Safety
You need:
- A decent digital multimeter that reads AC and DC voltage and resistance.
- Basic hand tools.
- A flywheel puller if you plan to inspect or replace the stator.
- Your workshop manual for wiring diagrams and specs.
Safety first. Disconnect the negative battery cable before pulling connectors. Disable the engine by removing the spark plug wire when you work near the flywheel. Secure the mower on level ground.
Basic Battery Check
I start at the battery because a bad battery can mimic a bad stator.
- Resting voltage after the mower sits: A fully charged 12 V lead-acid battery should read around 12.6 V. Much lower suggests a weak or discharged battery.
- Load test if possible. A battery can show good voltage yet collapse under load. A load tester or starter draw test reveals that.
- Terminals and grounds: Clean and tight beats corroded and loose every time.
If the battery fails the basics you fix that first. Then you retest the charging system.
AC Output Test
Now I want to know if the stator generates power.
- Find the two wires that carry AC from the stator to the rectifier regulator. They may be the same color. They do not connect to ground.
- Unplug them from the R/R. Set your meter to AC volts.
- Start the engine. Measure AC volts across the two stator leads at idle then at higher RPM. Output should climb with RPM. You should see a meaningful increase as the engine speeds up.
I don’t quote hard numbers because Briggs & Stratton, Kohler, Honda, and others publish different specs for different stators. Some low-output coils only support battery maintenance and headlights. High-output coils feed heavy loads like a strong PTO clutch. I check the manual for my engine model and compare.
If output does not rise with RPM or stays near zero the stator likely has an open coil or a short.
Stator Resistance and Short-to-Ground Tests
Before I condemn the stator I test the windings with the engine off.
- Resistance across the two stator leads: Set the meter to ohms. You’ll likely read a small value that can be less than an ohm or a few ohms. Compare to the manual. Infinite resistance means an open circuit. Zero means a shorted coil.
- Short to ground: Check each stator lead to engine ground. You want no continuity. Any reading to ground usually means a short in the stator or damaged insulation.
These two quick tests separate a healthy coil from a toast one.
DC Output Test at the Regulator and Battery
If the stator passes you move down the line.
- Plug the stator back into the R/R.
- Set your meter to DC volts and probe the R/R DC output or simply test at the battery terminals with the engine running. You should see the voltage rise from resting battery voltage to a higher charging voltage as RPM goes up.
- If you get good AC into the R/R yet weak or no DC out the rectifier regulator is the likely culprit.
I also look for blown fuses, a corroded fuse holder, or a broken circuit breaker where fitted. Bad grounds create no-charge conditions too. Don’t skip the harness and ground points.
Visual Inspection
If tests point to the stator I pull the flywheel for a look.
- Check the stator coils for burnt spots, flaking varnish, or melted wires.
- Inspect the flywheel magnets. Weak or damaged magnets reduce output.
- Look for wires pinched under the shroud or chewed by vibration. One torn insulation spot can short a healthy stator.
A flywheel puller tool saves knuckles and crankshaft threads. I never pound on the flywheel with a hammer because that can crack the magnet ring or damage the crank.
Stator vs Alternator: What’s the Difference
People ask me if a lawn mower has an alternator. Yes in spirit. A car’s alternator is a complete assembly with a rotor, stator, and built-in regulator. A small engine usually uses a fixed stator and a flywheel with permanent magnets. The flywheel acts like the rotor. The rectifier regulator sits separate from the stator. We still say “stator” in the small engine world because that’s the fixed coil pack you can see once you pull the flywheel.
If you enjoy getting into the weeds on rotating parts you can read more about how a rotor core influences performance in larger machines here: rotor core lamination. It’s a good mental model for what your flywheel magnets and rotor mass do at speed.
Types of Lawn Mower Stators and Output Options
Over the years I’ve seen a few common setups:
- Single-phase charging stator: A simple two-wire coil that feeds a single-phase rectifier regulator. Good for baseline battery charging on riding mowers.
- Dual-circuit stator: One coil for battery charging and a separate lighting coil for headlights. Some older garden tractors used this split.
- High-output stator: More poles or heavier windings for machines with electric PTO clutches, headlights, and electric fuel pumps. Greater output at mowing RPM.
Different engines use different connectors and color codes. Briggs & Stratton, Kohler, Honda, and Kawasaki each publish small engine parts diagrams and wiring harness maps. I pull the engine model and spec number to look up the exact stator type before I test or order parts.
If you’re comparing OEM to aftermarket coils pay attention to core stacks and laminations. Better laminations shed less heat and cut core losses which helps reliability. If you want a broader view of laminations in motors and generators this resource on motor core laminations gives a solid overview.
Common Causes of Stator Failure and How to Prevent Them
What kills stators in real life?
- Heat and vibration: A small engine lives a rough life. Coils cook under the shroud if airflow is blocked by grass or debris.
- Shorted or pinched wiring: The stator itself may be fine yet the lead wires chafe on the flywheel or shroud and short to ground.
- Oil or corrosion on connectors: The AC leads and the R/R plug corrode. The connection adds resistance and heat which hurts charging and melts connectors.
- Failed regulator feeding back: A shorted rectifier regulator can overload the stator. You replace the stator then the new one cooks again because the R/R stayed bad.
Prevention I use:
- Keep the engine shroud and cooling fins clear. Airflow keeps the stator cool.
- Zip-tie stator leads so they don’t rub. Add sleeving where they pass near edges.
- Clean grounds and connectors every season. A minute with a wire brush beats hours of diagnostics later.
- Replace the R/R if the stator burned up without an obvious wire short. It’s cheap insurance.
How to Remove and Install a Stator Safely
You can replace a stator in a home shop with basic tools and patience. Here’s how I do it.
- Disconnect the battery negative cable. Remove the spark plug wire. Safety first.
- Remove the engine shroud and blower housing. Take photos as you go so reassembly is easy.
- Pull the flywheel. Use a proper flywheel puller. Thread the puller into the flywheel hub and tension it. Hold slight tension then rap the puller bolt with a dead blow mallet. It’ll pop loose. Don’t pry under the rim near the magnets.
- Unplug the stator leads. Remove the stator mounting screws and lift the stator off the crankcase.
- Install the new stator. Route the wires cleanly with stand-offs or clips. Replace any ripped grommets.
- Reinstall the flywheel and torque the nut to spec. I always use a torque wrench because overtightening can stretch threads and undertightening can let the flywheel wobble on the crank taper.
- Refit the shroud. Reconnect the R/R. Reconnect the battery. Test charging at idle and high RPM.
Torque specs and special notes vary by engine. Your workshop manual is your best friend here. It lists torque values, wiring color codes, and any timing keys or alignment marks for the flywheel.
Charging System Diagram Explained
Most small engine charging diagrams look like this:
- Stator coils under the flywheel produce AC.
- Two AC wires run to the rectifier regulator.
- The R/R outputs DC to the battery positive through a fuse or circuit breaker.
- The battery negative ties to engine ground with a dedicated ground wire.
- Loads like headlights or an electric PTO connect to the DC side through switches and relays or a solenoid where applicable.
- The starter motor and solenoid live on a separate high-current starting circuit, yet they rely on a healthy battery that the stator keeps charged.
That layout doesn’t change much across brands. Wire colors and connector shapes change. The principles stay the same.
Maintenance Tips That Keep Your Charging System Healthy
I keep a simple routine that saves headaches:
- Clean battery posts and grounds every spring. Dab dielectric grease on clean terminals.
- Inspect the wiring harness where it crosses metal edges. Add abrasion sleeves if needed.
- Blow out the engine shroud and cooling fins after dusty mowing. Better cooling equals longer stator and regulator life.
- Test battery voltage a few times during the season. A weak battery forces the charging system to work harder.
- Fix small overheating issues quickly. A slipping deck belt can throw debris into the shroud. A missing shroud screw can open a gap that steals airflow.
- Use a smart battery charger in winter. Don’t let a lead-acid battery sit discharged. That kills capacity.
If you’re curious how the material science supports the electrical reliability behind the scenes here’s a broader look at core lamination stacks used in motors and transformers. It’s the same idea at play in your mower stator. Thin insulated sheets reduce losses and heat.
Quick Answers to Common Charging System Questions
- Why is my lawn mower battery not charging?
In my experience the usual suspects are a bad rectifier regulator, a broken ground, or a stator with an open coil. Test AC output from the stator then test DC output at the R/R and battery.
- Can a bad stator cause the engine to die while running?
Not directly on most models. The ignition system has its own magneto and ignition coil or module. The engine can keep sparking with a dead battery on many small engines. It will die if the battery powers critical accessories like an electric fuel pump or if the PTO clutch drops due to low voltage.
- How do I know if the regulator is bad?
You see good AC from the stator but low or zero DC at the battery. Or you see very high DC voltage which points to an overcharging condition. Either way the R/R likely failed.
- What’s a safe charging voltage at the battery?
Check the manual for your specific engine and R/R. In general you’ll see resting voltage around 12.6 V and a rise in DC voltage with the engine running. The regulator should hold the top end within a safe band so the battery does not boil.
- Do headlights and an electric PTO affect charging?
Yes. They draw current. A high-output stator helps if you run multiple loads. If lights dim badly at idle that can be normal. If they stay dim at high RPM you likely have a charging problem.
- Should I buy an OEM or aftermarket stator?
I use OEM on machines that work hard and carry heavy loads. Aftermarket can be fine if you buy from a trusted brand. Watch the coil quality, wire gauge, and connector fit. Poor lamination stacks and cheap insulation tend to run hot.
Extra Notes on Electrical Basics That Help Diagnosis
A little theory goes a long way in troubleshooting:
- Ohm’s Law ties voltage, current, and resistance together. If you see voltage present yet nothing flows the circuit might be open. If a connector cooks it often hides high resistance that wastes power as heat.
- AC vs DC testing matters. Measure the stator leads with AC. Measure battery and R/R output with DC.
- RPM matters. Many stators barely charge at idle. Test at mowing RPM to see the real story.
- Watts are volts times amps. A 55 watt headlight pair can tax a low-output stator. Balance loads with what your system can supply.
If you want more context on materials that shape losses in electric machines this resource on silicon steel laminations explains how silicon content cuts core losses. Lower losses mean less heat which is exactly what you want inside a compact engine shroud.
A Real-World Diagnostic Story
A Husqvarna riding mower rolled into my garage with a dead battery complaint. The owner replaced the battery twice. It still died every week. I checked resting battery voltage which looked okay at 12.5 V. I started the engine and measured DC at the battery. It stayed flat. No rise at all.
I unplugged the stator and measured AC at the two yellow wires with the engine at full throttle. The meter barely moved. Resistance across the stator leads read infinite which meant an open coil. I pulled the flywheel and found a scorched section of the stator. The coil varnish had cracked and separated. The flywheel magnets looked fine.
I checked the rectifier regulator for shorts to make sure I wouldn’t fry the new stator. The R/R wasn’t shorted. I replaced the stator, rerouted the harness with a better clip away from a sharp edge, and buttoned it up. Charging returned to normal. The quick lesson stuck with me. Always verify AC output first. Don’t assume the regulator is to blame until the stator passes.
Troubleshooting Checklist You Can Follow Today
- Battery resting voltage healthy
- Grounds clean and tight
- AC output from stator rises with RPM
- Stator ohms within spec and no short to ground
- DC output from the regulator rises at the battery
- Connectors clean and not heat damaged
- Fuses and circuit breakers intact
- Harness not pinched or rubbed through
That simple flow has saved me countless hours.
Conclusion: Don’t Underestimate Your Stator
I used to think a mower’s charging system was a black box. It isn’t. The stator makes AC whenever the engine spins. The rectifier regulator turns that into clean DC and keeps voltage safe. The battery stores energy for starting and stabilizes the system under load. When one piece fails the whole orchestra falls out of tune.
If your lawn mower’s battery keeps dying or your lights flicker start with a few smart tests. Check battery health. Measure stator AC at speed. Verify DC at the regulator and battery. Look hard at grounds and connectors. You’ll either confirm a bad stator or you’ll catch the true culprit like a failed regulator or a corroded harness.
Keep the cooling shroud clean. Route wires carefully. Use quality parts when you replace the stator or the R/R. Do that and your mower will charge reliably for years which means you can focus on straight stripes and sharp blades instead of jump starts and trickle chargers.