The Definitive Guide: How to Safely Remove a Stator (Motorcycle, ATV, Marine, & More)
Here is the simple truth. If your bike or boat will not charge the battery, you may need to remove the stator. In this guide I walk you through it step by step. You learn what tools to use, what to watch out for, and how to avoid the big mistakes that cost time and money.
- Problem: No charge, dim lights, and a dead battery.
- Agitate: You get stranded. You miss a ride or a fishing day. You worry the fix will be hard and expensive.
- Solution: Follow these steps. Use the right stator removal tool. Test the charging system. Remove the stator with care. Rebuild it right the first time.
Table of Contents
- Why remove a stator?
- What tools and materials do you need?
- How do you stay safe before you start?
- How do you access the stator cover?
- How do you drain engine oil and coolant?
- How do you remove the stator or primary cover?
- How do you disconnect the wiring the right way?
- How do you pull the flywheel or rotor?
- How do you unbolt and remove the stator assembly?
- What should you inspect after removal?
- How do you handle common problems during removal?
- What happens next after stator removal?
- Should you DIY or hire a pro?
- Quick FAQs
- Summary
Why You Might Need to Remove Your Stator
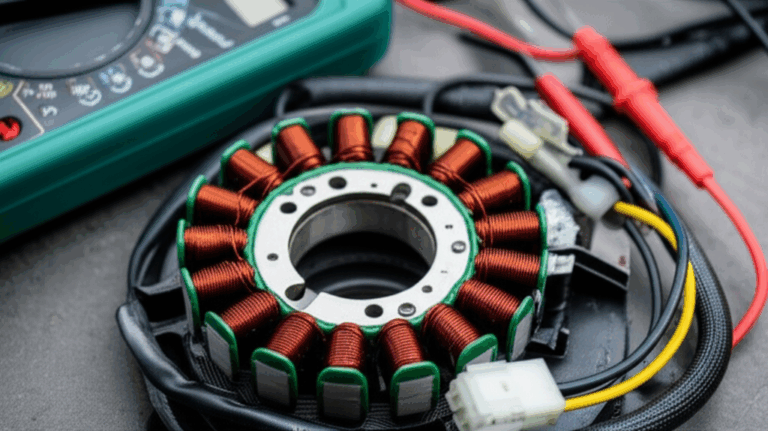
I like clear signs. You do too. Common signs of a failing stator include a no charge condition, low voltage output, dim headlights, engine stalling, and dead battery symptoms. Sometimes you smell a burnt stator. You may see melted wires. You may also get battery drain issues and voltage drops under load.
Before you pull parts, run basic tests. A simple multimeter testing procedure can confirm a stator fault. Do an AC voltage test on the stator leads. Do a resistance test and a stator continuity test. Check phase wire resistance. Look for an electrical short to ground. If you have a regulator rectifier replacement on hand, test it too. A rectifier diode test can rule out the regulator/rectifier.
Problem: You do not want to tear down the engine for nothing.
Agitate: Every bolt you touch adds risk of stripped threads and oil leaks.
Solution: Test first. Confirm the shorted stator or open circuit stator before removal.
What Tools & Materials Do You Need?
Do not start without the right tools. You will save time. You will save skin on your knuckles too.
- Basic hand tools: socket set, wrenches, screwdrivers, pliers.
- Specialized tools: flywheel puller, impact wrench, torque wrench, stator removal tool.
- Safety gear: eye protection, gloves.
- Consumables: new gasket, RTV sealant, Loctite threadlocker, parts cleaner, dielectric grease.
- Electrical tools: multimeter, wire strippers, wire crimping tools, heat shrink tubing, heat gun.
You may also need a pry bar, a gasket scraper, and retaining clips pliers. For some models, gather an engine stand, an exploded view diagram, and the service manual. If a marine engine or outboard motor needs work, plan for coolant drain procedure on water cooled units.
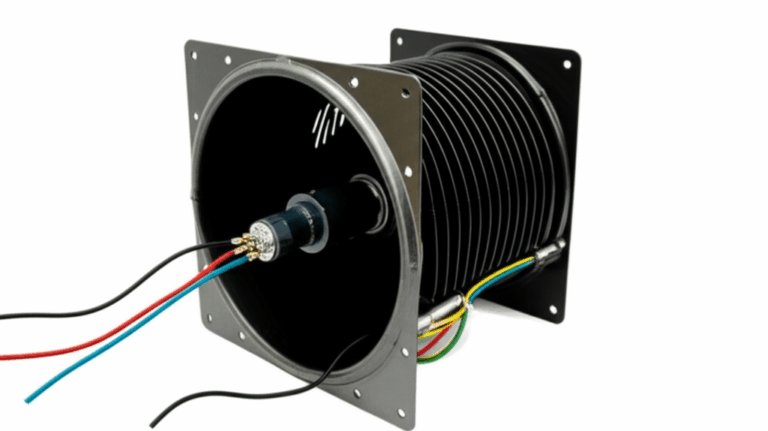
If you replace the stator, look at the core quality. It all starts with the laminations. You can learn more about motor core laminations and why they matter for long life and steady voltage.
How Do You Stay Safe Before You Start?
You fix machines. You protect yourself too. Start with these simple moves.
- Disconnect the battery. Always. This step prevents sparks and shorts.
- Secure the motorcycle or ATV. Use a stand or lift. Set the parking brake on a side by side. Block the wheels on a trailer or generator.
- Let the engine cool. Hot oil burns. Hot rotors bite.
Drain fluids as needed. Many motorcycle engines hold oil behind the stator cover. Some ATV engines share gear oil in the primary. Some marine units use coolant jackets. Follow the service manual steps for engine oil drain and coolant drain procedure.
How Do You Access the Stator Cover?
Every machine hides the stator behind an engine cover. On a motorcycle engine you may remove the seat, side panel, and fuel tank lifting may help. You might pull the exhaust pipe. On a sport bike you remove fairings. A dirt bike stator sits under a small cover. A Harley-Davidson stator hides behind the primary cover. An outboard motor stator sits under the flywheel near the alternator system.
- Remove anything that blocks access. Seat removal and side panel removal come first.
- On some bikes you remove the radiator. Radiator removal is rare but sometimes needed.
- Note wire routing for sensor wire routing and stator lead wires now. Take a photo. It helps later.
Brands differ. A Honda motorcycle stator cover pattern is not the same as a Yamaha stator repair layout. A Kawasaki stator or a Suzuki stator replacement may need different clearances. A Polaris ATV stator sits deep in some cases. OMC and Mercruiser marine units use unique magneto removal and rotor removal process steps. The basics stay the same.
How Do You Drain Engine Oil and Coolant?
If the cover holds oil, drain it. Put a drain pan under the engine oil drain plug. Remove the plug. Let oil flow until it stops. Replace the plug with a new crush washer if needed. If your unit has gear oil in the primary, do a gear oil change now.
Some engines route coolant near the stator cover. If the service manual says to drain coolant, open the petcock or pull the lower hose. Catch coolant. Dispose of it right.
Problem: Oil pours out when you pop the cover.
Agitate: Oil on the floor makes a mess and risks a fall.
Solution: Drain first. Clean as you go. Keep rags handy.
How Do You Remove the Stator or Primary Cover?
Now the real fun starts. The engine cover holds with bolts and dowel pins. Take it slow.
- Locate the stator cover bolts. Use the correct bit. Do not round them off.
- Crack each bolt loose in a cross pattern. Keep track of bolt length. Some bolts differ.
- Pry the cover gently. Use the pry points only. Watch the dowel pins. A stuck cover may need a soft mallet tap.
If the cover fights you, stop. An impact driver on stubborn screws can help avoid stripped bolts. Heat can loosen old sealant. Do not force it with a pry bar in a thin spot.
You will replace the gasket. Old gasket removal can take time. Use a gasket scraper. Scrape old sealant with care. Do not gouge the aluminum. Clean the mating surfaces with parts cleaner.
How Do You Disconnect the Wiring the Right Way?
Inside the cover you will see the stator, the windings, magnets in the rotor, and maybe the pickup coil or crankshaft position sensor. You may see a grommet where the stator lead wires exit the cover.
- Identify the stator output wires and pickup coil wires. Trace them to the wiring harness.
- Unplug electrical connectors. Clean corroded electrical contacts with contact cleaner. Use dielectric grease on reassembly.
- Free the wire grommet from the cover. Grommet replacement is smart if it is hard or cracked.
Check the wiring harness and electrical connectors for damage. If you see a burnt stator symptom like melted insulation or a winding insulation breakdown, note it. This helps with diagnosis later.
How Do You Pull the Flywheel or Rotor?
On many engines the rotor or flywheel sits in front of the stator. You remove it to reach the stator mounting bolts.
- Lock the crankshaft or use a holding tool on the flywheel.
- Remove the flywheel nut. Some flywheel nuts use reverse thread. Check the service manual.
- Attach a flywheel puller. Use the correct bolts. Thread them fully. Keep the puller square.
- Tighten the puller. Use an impact wrench with care. Tap the puller center bolt if needed.
Stuck flywheel removal takes patience. Do not pry on the magnets. Do not hit the flywheel with a hammer. Some rotors are very strong. These units use magnetic rotor removal techniques and steady pressure.
Curious about how rotors get their strength and accuracy? The steel stacks matter. See how rotor core lamination design improves balance and reduces losses.
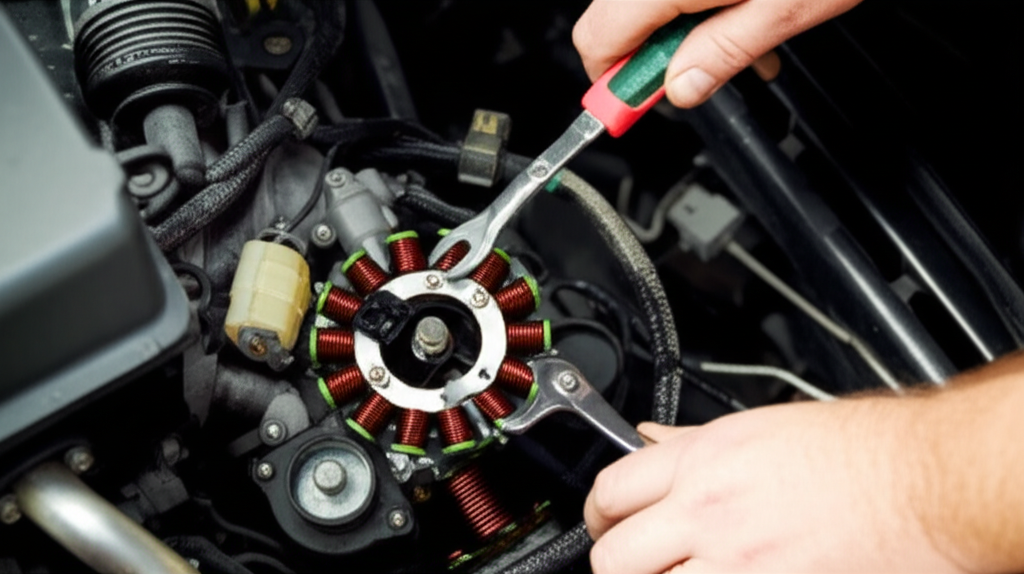
How Do You Unbolt and Remove the Stator Assembly?
Once the rotor is off, the stator sits right there. You can see the bolt pattern stator layout. The stator mounting plate may use several stator mounting bolts.
- Remove the stator mounting bolts. Use steady pressure. If you feel a flare in the head stop and switch to better bits.
- Lift the stator coil assembly out. Watch for retaining clips or O-rings.
Inspect the stator coil. Look for damaged stator winding, frayed wires, and dark or burnt spots. Feel for overheated areas. A shorted stator diagnosis often shows black windings and burnt smell.
What Should You Inspect After Removal?
You can learn a lot now. Use both your eyes and your meter.
- Visual inspection: burnt stator, melted insulation, broken leads, and oil contamination. Look for stator core damage. Note any winding insulation breakdown.
- Electrical tests: resistance test on each phase, continuity test between phases, and a short to ground test. Check phase wire resistance values against the service manual.
- Rotor check: inspect the magnets. Remove debris. Clean the inner face. A cracked magnet can cause low voltage output.
I also test the regulator/rectifier. You can try a voltage regulator bypass for a quick test, but use care. A proper rectifier diode test tells you more. If you replace parts, match specs for your Honda, Yamaha, Kawasaki, Suzuki, Harley-Davidson, Polaris, OMC, or Mercruiser unit.
The quality of the metal stack inside the stator matters too. That is the lamination pack. Good laminations cut eddy currents and heat. If you want to go deep, read about stator core lamination and why tight tolerances keep charging systems happy.
How Do You Handle Common Problems During Removal?
Every job throws a curve ball. Here is how I handle the usual ones.
- Stuck flywheel or cover: Apply steady puller pressure. Add heat to the hub. Tap the puller bolt. Recheck threads. Do not pry on magnets.
- Stripped bolts: Use a manual impact driver. Step up to extractor bits only when needed. Heat the boss if threadlocker holds tight.
- Damaged wiring harness connectors: Replace the connector. Crimp new pins with the right wire crimping tools. Use heat shrink tubing and a heat gun. Seal with dielectric grease.
- Oil leaks post-removal: Clean the mating surfaces. Use a new gasket. Add RTV sealant only where the service manual says. Use a small bead. Do not overdo it at the case seams. Replace the grommet. Use thread locker on bolts if the manual calls for it.
Problem: You rush and make a mess or break a part.
Agitate: The bike sits for days. The bill grows.
Solution: Slow is fast. Follow each step. Use proper torque specifications. Check the stator cover bolts torque in the service manual.
What Happens Next After Stator Removal?
If you replace the stator, prep the surfaces and plan the build.
- Clean all surfaces. Remove old gasket material and scraping old sealant. Wipe with parts cleaner.
- Inspect the crankshaft seal and O-rings. Replace any worn oil seal. Replace the crankshaft position sensor if the pickup coil tests bad.
- Install the new stator. Follow the bolt pattern. Use thread locker like Loctite on stator mounting bolts if the manual says so. Use proper reassembly tips from the book.
Reinstall the rotor. Torque the flywheel nut. Some units want threadlocker. Some call for oil on threads. Secure the crankshaft during torque. Refit the cover with a new gasket or RTV sealant. Route wires with the correct retaining clips. Seat the grommet. Reconnect the wiring harness. Refill engine oil and coolant. Reconnect the battery.
Before you fire it up, I always check the charging system. Start the engine. Measure AC voltage from the stator. Measure DC charging voltage at the battery. Watch for voltage drops under load as you turn on lights or a fan.
If you ever build or source stators at scale, learn how electrical steel laminations and motor core laminations drive efficiency and heat control. Better steel means cooler windings. Cooler windings mean longer life.
Should You DIY or Hire a Pro?
You can do this job at home with the right tools. A flywheel puller can turn hours of struggle into minutes of calm work. DIY can save you 50% to 70% in labor. I get it. That adds up.
Here are typical costs:
- Motorcycle or ATV stator replacement: $300 to $800+ total. Parts $100 to $350. Labor $200 to $500.
- Outboard motor stator replacement: $400 to $1200+. Parts $150 to $500. Labor $250 to $700.
Time wise a first timer might need half a day. A pro can do it in one to three hours. Most stator removal jobs happen because testing confirms failure. About 70% to 85% of stator faults end in removal and replacement.
Remember heat kills stators. A rule of thumb says each 10°C increase can halve insulation life. Keep oil fresh. Keep the engine cool. Clean your connectors to lower resistance and heat.
Data You Can Use
Here is a quick table with useful facts to help you plan.
| Category | Description/Value |
|---|---|
| Typical stator failures that lead to removal | 70% to 85% |
| Time saved with a flywheel puller | From hours to minutes |
| Common failure modes | Burnt or melted windings 40% to 50% • Shorted windings 25% to 30% • Open circuit 10% to 15% • Oil contamination 5% to 10% |
| Average stator lifespan | 50,000 to 100,000 miles or 5 to 10 years |
| Heat impact | Every 10°C rise can cut insulation life in half |
| Tool budget for DIY | $50 to $150 for basics and the right puller |
| Gasket or sealant need after removal | Nearly 100% of jobs |
Sources: OEM service manuals, standard electrical testing practice, and the Arrhenius principle for insulation life.
Real World Examples Across Machines
- Harley-Davidson stator removal: Pull the primary cover. Drain primary fluid. Remove the clutch shell and compensator per the book if needed. Follow torque specs. Refill with primary fluid.
- Honda motorcycle stator: Small covers and tight wire grommets are common. A flywheel puller fits the rotor hub. Use a holding tool.
- Yamaha stator repair: Many units place the pickup coil near the stator. Test it. Replace it if readings are out. Watch for reverse thread nuts on some models.
- Kawasaki stator issues: Look for corroded electrical contacts in the regulator/rectifier plugs. Clean and re-grease.
- Suzuki stator replacement: Follow the bolt pattern and grommet seating. These engines like a clean seal.
- Dirt bike stator: Simple and fast. Use care with dowel pins. Keep dirt out of the case.
- Scooter stator removal: Tight spaces call for small tools. Mark wire routing before you pull parts.
- Jet ski stator: Water and salt can corrode plugs. Rinse and dry. Use dielectric grease.
- Outboard motor stator: Under the flywheel. Use the correct puller and a strong holding tool. Check the charging system repair after.
Pro Tips, Best Practices, and Mistakes to Avoid
- Use the service manual steps for your model. It lists torque specifications and special notes like reverse thread warnings.
- Photograph everything. Wire routing and sensor wire routing matter.
- Replace gaskets. Do not reuse old ones. Use sealant only as called out.
- Clean and test connectors. Use dielectric grease on reassembly.
- Use a torque wrench. Guessing invites leaks and broken bolts.
- Treat magnets with respect. They are strong and brittle.
For builders and buyers who care about the heart of the alternator, lamination quality matters. If you need educational resources on cores, explore core lamination stacks to see how tight stacks reduce heat and raise efficiency.
Step-by-Step Stator Removal Checklist
Use this short checklist as you work.
Parts and Tools Table
| Item | Use |
|---|---|
| Flywheel puller | Pulls rotor without damage |
| Impact wrench | Loosens tight nuts fast |
| Torque wrench | Sets accurate torque specifications |
| Multimeter | AC voltage, resistance, continuity tests |
| Gasket scraper | Removes old gasket material |
| Loctite threadlocker | Secures bolts where needed |
| RTV sealant | Seals cover corners and seams as called out |
| Dielectric grease | Protects electrical connectors |
| Parts cleaner | Cleans mating surfaces |
| Eye protection and gloves | Safety first |
Quick FAQs
- What is a stator?
The stator is the fixed part of the alternator. It has windings or coils. The rotor spins around it and creates AC voltage.
- Can a bad regulator/rectifier look like a bad stator?
Yes. Always test both. A regulator can fail and still give you low voltage output and charging problems.
- Do I need a flywheel puller?
Yes in most cases. It protects parts. It saves time. It reduces risk of damage to the crankshaft.
- Should I use sealant or a gasket?
Use what the service manual calls for. Many covers use a gasket. Some call for RTV sealant at seams only.
- What about the crankshaft seal?
Inspect it. Replace if it leaks or feels hard. A new oil seal is cheap insurance.
References
- OEM Service Manuals for Honda, Yamaha, Kawasaki, Suzuki, Harley-Davidson, Polaris, OMC, and Mercruiser
- Standard Meter Tests for Charging Systems: AC voltage, resistance, continuity, and diode tests
- Arrhenius Equation Principle: Relationship between temperature and insulation life
- Best Practices in Alternator and Magneto Service from industry training guides
- Material Insight: stator core lamination design and electrical steel laminations selection
Summary: Most Important Things to Remember
- Test first. Confirm a failing stator with AC voltage, resistance, and continuity tests.
- Use the right tools. A flywheel puller and a torque wrench save time and parts.
- Stay safe. Disconnect the battery and drain fluids before you pull the cover.
- Keep it clean. Remove old gasket and sealant. Clean mating surfaces well.
- Follow the manual. Use proper torque specifications and correct sealant points.
- Protect the wiring. Route stator lead wires right. Seat the grommet. Grease connectors.
- Inspect everything. Check magnets in the rotor and pickup coil or crankshaft position sensor.
- Replace smart. Use quality parts with good laminations for long life.
- Verify the fix. Test charging voltage after reassembly and under load.
- Build it to last. Use Loctite where needed. Use new gaskets and O-rings. Keep oil fresh.
If you follow these steps you remove a stator the right way. You save money. You gain skill. You get back to riding or boating with a charging system you can trust.