Master Your AC: A Step-by-Step Guide to Using Orion Motor Tech Manifold Gauges for Automotive Diagnostics & Recharging
Table of Contents
- Introduction: Why These Gauges Help You Fix AC Fast
- What Is in Your Orion Motor Tech AC Gauge Set?
- Is It Safe To Work on Car AC?
- How Do I Get Ready Before I Connect the Gauges?
- How Do I Hook Up the Blue, Red, and Yellow Hoses?
- How Do I Read the Gauges and Know What Is Normal?
- What Do My Gauge Readings Mean? Common Problems Explained
- How Do I Pull a Vacuum the Right Way?
- How Do I Add Refrigerant Without Damage?
- How Do I Check for AC Leaks?
- How Do I Disconnect and Store the Gauge Set?
- How Do I Care for and Calibrate My Gauges?
- Quick Tools, Parts, and Terms You Will Use
- FAQs
- References
- Key Takeaways
You want cold air. Your car blows warm air. You feel stuck. I get it. I have been there. In this guide I show you how to use your Orion Motor Tech AC manifold gauge set to test, diagnose, and recharge your car’s AC with care. You will learn how to connect the gauges, read pressures, spot problems, pull a deep vacuum, and add the right amount of refrigerant. I keep it simple. I keep it safe. You can do this.
What Is in Your Orion Motor Tech AC Gauge Set?
Problem: Many DIYers open the case and feel lost. The colors, valves, and fittings look strange. You wonder which hose goes where.
Agitate: If you guess wrong you can vent refrigerant. You can hurt your AC system. You can even get frostbite on skin.
Solution: Let’s walk the kit. Your manifold block has two hand valves, a sight glass, and three ports. The left side is the low side. It uses the blue gauge and the blue hose. The right side is the high side. It uses the red gauge and the red hose. The yellow hose is the center service hose. You use it for the vacuum pump, a refrigerant can tap, or a refrigerant tank. The kit includes quick disconnect couplers made for R134a or R1234yf. The couplers match the service ports on your car so you cannot mix them up.
The gauges can be analog manifold gauges or digital manifold gauges. Most Orion Motor Tech sets are analog. They show PSI, and sometimes kPa or bar too. The block also has service valves and a pressure relief valve for safety. Many kits include extra O-rings, seals, and a little bag for parts. Keep a Schrader valve tool or valve core removal tool handy. You will use it when a valve core leaks.
Is It Safe To Work on Car AC?
Problem: AC work can hurt your skin and eyes. Refrigerant can burn. Pressure can explode a hose. You can also get in trouble if you vent refrigerant to the air.
Agitate: A small error causes damage. A big error causes injury. You do not want that.
Solution: Wear safety glasses and gloves. Work in the open with good ventilation. Keep kids away. Do not smoke. Follow EPA rules for proper refrigerant disposal methods. Use recovery gear if you must remove refrigerant. Do not vent it. New cars use R1234yf. It is mildly flammable. Follow SAE guides for safe use. Park on level ground. Set the brake. Know when the engine should be off or on. You will connect with the engine off. You will read pressures with the engine on and the AC on max.
How Do I Get Ready Before I Connect the Gauges?
Problem: You want to connect fast. You want a DIY AC recharge now. Slow down. Prep saves time and money.
Agitate: If you skip prep you misread pressures. You damage threads. You charge the wrong gas.
Solution: First identify the refrigerant type. Is it R134a or R1234yf. Check the sticker under the hood. That label also shows the refrigerant charge amount by vehicle and AC system capacity information. Next find the service ports. The low side port is smaller and on the suction line near the accumulator or receiver drier. The high side port is larger and near the condenser. Inspect the hoses, couplers, and O-rings on your gauge set. Replace any cracked parts. Close both manifold valves. Set the engine off for connection. You will turn it on later for readings.
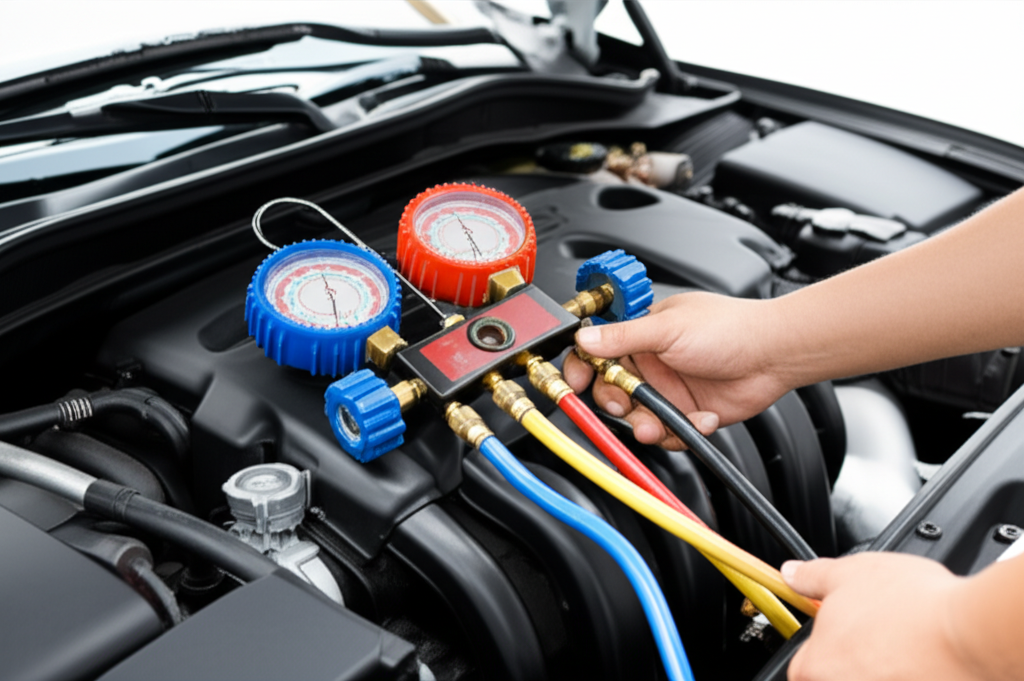
How Do I Hook Up the Blue, Red, and Yellow Hoses?
Problem: Wrong hookup can spray refrigerant. It can also trap air in the lines.
Agitate: Air and moisture ruin cooling. They corrode parts. They confuse gauge readings.
Solution: Keep both manifold valves closed. Snap the blue quick coupler onto the low side service port. Snap the red quick coupler onto the high side port. Connect the yellow service hose to your vacuum pump or refrigerant can tap or recovery machine, based on the task. If you will add refrigerant then “purge” the yellow hose. Crack the hose at the manifold for a half second to let air out. This prevents air from entering the automotive AC system.
Tip: Learn the roles. The blue hose red hose yellow hose function is simple. Blue reads suction. Red reads discharge. Yellow services the system.
How Do I Read the Gauges and Know What Is Normal?
Problem: Numbers dance on the dials. You do not know what they mean.
Agitate: If you guess you overcharge or undercharge. The AC still blows warm.
Solution: Start the engine. Turn the AC to max. Fan on high. Doors open. Let it run a few minutes. Watch both gauges. The low side high side pressure will shift with ambient temperature and RPM. Use a temperature/pressure chart for your gas. Here is a simple R134a AC pressure chart.
R134a Normal Operating Pressures (70–90°F / 21–32°C)
| Category | Range | Notes |
|---|---|---|
| Low Side (Blue Gauge) | 25–45 PSI | Higher temp raises pressures |
| High Side (Red Gauge) | 200–250 PSI | Condenser airflow changes readings |
| Vacuum Level (Evacuation) | 500 microns or lower | Use a micron gauge for best results |
Conversions:
- 1 PSI ≈ 6.89 kPa
- 1 bar ≈ 14.5 PSI
R1234yf runs a bit different but close. Expect slightly lower high-side at the same temp due to different properties. Always check the OEM chart.
Note: Desired AC pressures by temperature shift with weather. A cool day shows lower numbers. A hot day shows higher numbers. That is the ambient temperature effect on AC pressure.
What Do My Gauge Readings Mean? Common Problems Explained
Problem: Your AC does not cool. You want to know why.
Agitate: You try to add a can. It still blows warm. You fear you broke the compressor.
Solution: Use typical patterns. Here are key car AC system diagnostics with gauges.
- Low Refrigerant Charge (Undercharged): Low side very low (0–20 PSI). High side low (100–150 PSI). Air at the vents feels weak. This points to a leak. Do not keep charging if you have a big leak.
- Overcharged System: Low side high (50–70 PSI). High side very high (275–350+ PSI). The system may cycle off. This is risky. Stop and recover refrigerant.
- Compressor Malfunction: Both sides read close to each other. The compressor clutch may not engage. Or the pump makes no compression. Check power, fuses, and the AC system pressure sensor.
- Clogged Orifice Tube/Expansion Valve: Low side very low (0–10 PSI). High side very high (275–350+ PSI). Cooling drops. The expansion valve or orifice tube may be blocked with debris.
- Clogged Condenser/Restricted Airflow: High side goes very high. Low side may rise too. Check the condenser fan operation and clean fins.
- Air/Moisture in System: Readings jump around. Cooling is poor. You need a full AC system evacuation procedure and a new desiccant bag in the receiver drier/accumulator.
Also look at the cabin vents. If the AC blows cold then warm then you may have low charge or a sticky valve. If the compressor clutch not engaging check power to the clutch, the relay, and the pressure switch. You can do bypassing AC pressure switch for testing for a moment to confirm clutch function but do it with care.
How Do I Pull a Vacuum the Right Way?
Problem: You want to skip the vacuum. You think you can just add gas.
Agitate: Air and water kill cooling. Water turns to ice at the expansion valve. Acid forms and eats seals.
Solution: Always do a vacuum after opening the system. Hook the yellow hose to the vacuum pump. Open both manifold valves. Run the pump for at least 30–45 minutes on a warm day. Watch the blue gauge go to inHg vacuum. For true depth use a micron gauge. Aim for 500 microns or less. Shut the pump. Close both manifold valves. Do a vacuum hold test for 15–30 minutes. The needle should not rise. If it rises you have a leak. Fix it first. This is performing an AC vacuum correctly. It protects your automotive HVAC parts.
How Do I Add Refrigerant Without Damage?
Problem: You want to add a can fast. You fear overcharging.
Agitate: Too much refrigerant raises pressure. Parts fail. Cooling gets worse not better.
Solution: Check the label for the exact charge by weight. Charging AC system by weight vs pressure matters. Weight is best. Use a refrigerant scale if you can. Connect the refrigerant can tap to the yellow hose. Purge the yellow hose. Start the engine. AC on max. Open the low side valve a bit. Feed vapor into the low side. Do not add liquid into the low side unless you have a liquid charging method and you meter it. Watch the low side and high side readings. Use your temperature/pressure chart. Stop when you reach the target weight or the pressures look normal and vent temps are cold. This is the safe DIY AC recharge guide.
Tip: Some jobs need refrigerant oil. Check the OEM spec. Use PAG oil with R134a. Some older retrofits use Ester oil. You may add oil and UV dye with a special injector.
How Do I Check for AC Leaks?
Problem: Your AC worked last month. Now it does not. You think the system leaks.
Agitate: A slow leak wastes time. A fast leak wastes money.
Solution: Try a UV dye leak detection guide. Add dye and run the system. Use a light to spot leaks at O-rings, hoses, service ports, the compressor, the condenser, and the evaporator drain. An electronic leak detector usage method also works. For a quick test do a pressure decay test. With the engine off measure static pressure on both sides. Come back in an hour. If it drops and the temp did not change then you have a leak. Replace bad O-rings or seals. Sometimes you need to AC system hose replacement. If the system is dirty you may need an AC system flush. That is the flushing AC system procedure. Replace the receiver drier/accumulator after a flush so the desiccant can do its job.
How Do I Disconnect and Store the Gauge Set?
Problem: You want to pull the hoses and go. That can spray refrigerant.
Agitate: A fast pull can burn skin. It can also draw air in.
Solution: First close both manifold valves. Then close the service port valves on the quick couplers if they have knobs. With the AC off remove the red high side coupler first. Then remove the blue low side coupler. This order helps prevent spray. Cap the ports. Coil the hoses. Store the manifold gauge set in its case. Keep the lenses clean. You will thank yourself next time.
How Do I Care for and Calibrate My Gauges?
Problem: Gauges drift. Hoses crack. Readings go off.
Agitate: Bad readings cause bad calls. You waste refrigerant.
Solution: Do cleaning hoses and couplers with mild soap. Keep dust out of the sight glass. Replace O-rings when they flatten. Check zero on both gauges. If they do not sit at zero with no pressure then gently reset per the manual. This is calibrating AC manifold gauges. Store your set in a cool dry place. This is proper storage to prevent damage. If a valve core leaks change it with a valve core removal tool. Use a light twist of oil on threads to keep seals happy. Follow best practices for AC maintenance to avoid common AC repair mistakes.
Quick Tools, Parts, and Terms You Will Use
You will hear these words as you work. This simple list ties them to what you do. It also shows you how your Orion Motor Tech tools fit the job.
- Manifold Gauge Set and Orion Motor Tech R134a manifold gauges: The heart of your test kit. Great for AC manifold gauge set tutorial and AC manifold gauge set for beginners.
- R134a and R1234yf: Understanding refrigerant types and the refrigerant type compatibility chart matter. Many cars use R1234yf now.
- Low Side and High Side: You need interpreter skills for reading AC manifold gauge readings and interpreting AC gauge readings.
- Vacuum Pump and Micron Gauge: These tools let you do a true AC system evacuation procedure and a vacuum hold test.
- Refrigerant Can Tap and Refrigerant Tank: You use them to recharge by weight. This is refrigerant charging steps DIY.
- Thermometer: You do an evaporator temperature measurement and an AC performance test at the vents.
- Leak Detector and UV dye: Use them for a leak test and AC leak detection methods.
- Recovery Machine and Refrigerant Identifier: Use them if you must remove or confirm gas. Follow EPA rules.
- AC Compressor, Condenser, Evaporator, Receiver Drier / Accumulator, Expansion Valve / Orifice Tube: These automotive AC system parts must work together.
- Units: PSI, kPa, bar. Know pressure conversion factors.
- Standards and rules: SAE and EPA.
- Parts that often fail: O-rings, seals, desiccant bag, AC system pressure switch, compressor clutch.
- Helpful charts: Automotive HVAC pressure chart, AC pressure chart lookup R134a.
- Extra tips: Operating manifold gauge valves, purging air from AC hoses, center service hose uses, service valves on the manifold.
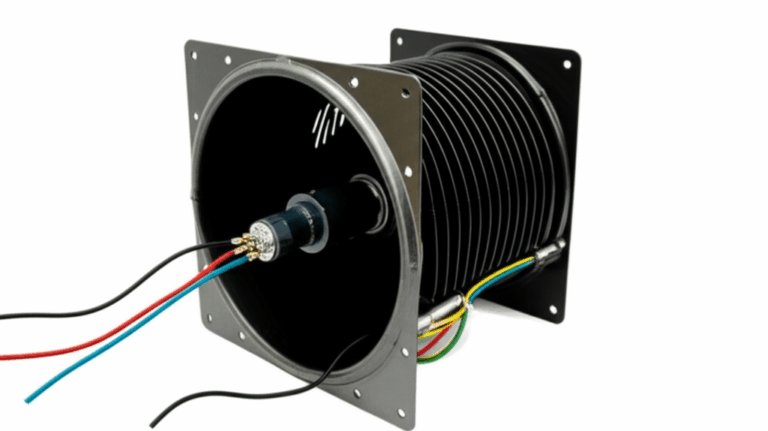
Note on motors: Your condenser fan and blower motor depend on the steel stacks inside. Good electrical steel laminations cut heat and improve life. If you want to learn how these stacks work see this guide on electrical steel laminations. Inside every motor sits a shaped core. The fixed half is the stator core lamination. The spinning half is the rotor core lamination. Together these motor core laminations set how smooth the motor runs which helps keep your condenser cool at idle. Curious how builders stack and stamp them for motors in many sizes see more on motor core laminations.
FAQs
Q: Can I use these gauges for home AC?
A: No. Home AC uses a different setup. These are for cars and trucks. They are made for automotive AC only.
Q: What if my pressures do not match the chart?
A: Check ambient temperature, condenser fan operation, and that doors are open and RPM is steady. Read automotive HVAC pressure chart notes. If you still see odd readings you may have air/moisture in system, a clogged orifice tube/expansion valve, a weak compressor, or a bad pressure sensor.
Q: Do I need a vacuum pump?
A: Yes if you opened the system. A pump lets you remove air and water. Aim for below 500 microns. A micron gauge helps you confirm.
Q: How do I know if my system has a leak?
A: Use UV dye and a light or an electronic leak detector. Also try a static pressure check and a vacuum hold test.
Q: Can I overcharge my system? What happens?
A: Yes. It is easy. Overcharging raises high side pressure. Cooling drops. Parts can fail. Charge by weight when you can.
Q: Where are the service ports on my car?
A: The low side is on the bigger cool line near the accumulator or drier. The high side is near the condenser by the front.
Q: Can I fix a compressor that does not engage?
A: Check the compressor clutch, fuses, relay, and the AC system pressure switch. Make sure the charge is not too low. Low charge can keep the clutch off.
Q: Do I need to replace O-rings when I open a line?
A: Yes. Replace O-rings and lightly oil them. It prevents leaks.
Q: What oil should I use?
A: Most R134a systems use PAG oil. Some retrofits use Ester oil. Check the OEM chart.
Q: Is there an Orion Motor Tech gauge manual online?
A: Yes. Check Orion Motor Tech customer support and warranty information on the brand site. You can also see Orion Motor Tech AC kit components there and a helpful AC manifold gauge set tutorial.
References
- EPA MVAC (Section 609) Program: https://www.epa.gov/mvac
- SAE Standards for R1234yf Service (overview): https://www.sae.org
- R134a Temperature Pressure Charts: Major OEM service manuals and reputable HVAC references
- Orion Motor Tech Product Support: https://www.orionmotortech.com
A Simple Case and What We Learned
Problem: My sedan blew warm air at idle. It cooled a bit while driving. I saw warm air from AC vents at stoplights.
Agitate: I wasted a can last summer. The air felt cold for a week then went warm again. I felt stuck.
Solution: I hooked up the Orion Motor Tech gauges. With AC on max I read 20 PSI low side and 110 PSI high side on an 85°F day. That is low charge. I pulled a vacuum to 400 microns and it held for 20 minutes. No big leak now. I charged by weight to the hood label spec. Low side rose to 35 PSI. High side to 220 PSI. Vent temp dropped to 42°F. I also checked the condenser fan operation and cleaned fins. I replaced two O-rings at a slow seep. The system stayed cold all summer.
Using PAS Across the Job
- Problem: You do not know what your AC needs. You fear common AC repair mistakes.
- Agitate: Guesswork costs cash and time. You may damage parts like the expansion valve or the compressor.
- Solution: Use your Orion Motor Tech manifold gauge set to do a fast diagnostic. Read low side and high side pressures. Use a refrigerant charging steps DIY plan. Follow safety precautions for AC work. Use best practices for AC maintenance. When in doubt check the AC system troubleshooting flow chart in your service manual.
Extra Tips That Make You Look Pro
- Check ambient temperature and use the right automotive HVAC pressure chart.
- Use a refrigerant identifier if you suspect mixed gas.
- Confirm the condenser fan runs. High pressure with a dead fan is common.
- Measure evaporator temperature at the vents with a thermometer for an AC performance test.
- If the compressor is noisy or weak see troubleshooting AC compressor issues before you add charge.
- Replace the receiver drier/accumulator after any long open repair. The desiccant bag fills with moisture.
- Know your AC system diagram. It helps you find service ports and parts.
- Keep a basic automotive AC service tools list. Add quick disconnect couplers, hose replacements, and O-ring kits.
- If you buy tools read a buying AC manifold gauges guide. I like how Orion Motor Tech bundles valve core tools and solid hoses.
- Want a second opinion on gear see an Orion Motor Tech AC gauge review from real users.
What About Charging by Pressure Only?
Problem: You do not own a scale. You want to charge until the gauges look “right.”
Agitate: Pressure-only charging can be off by 2–4 oz. A small system holds only 1.0–1.5 lbs. A few ounces matter.
Solution: You can watch low side and high side rise to normal and measure vent temp. This method works in a pinch. For best results charge by weight vs pressure. A scale gives a proper fill within ± 0.5 oz. That can mean the difference between cold and not quite cold.
When Should I Call a Pro?
- If the system holds no vacuum at all.
- If you need to recover a full charge with a recovery machine.
- If the expansion valve or orifice tube is stuck and you cannot access it.
- If your car uses rare parts or dual evaporators.
- If the pressure relief valve opens. High pressure can be dangerous.
Pros also follow SAE standards and EPA rules. They have tools like a full refrigerant identifier and deep micron gauges.
Common Scenarios You Can Solve With Your Gauges
- The AC pressure readings too high? Check airflow and overcharge.
- The AC pressure readings too low? Check charge and the compressor clutch.
- The AC system not cooling? Use the patterns above.
- Symptoms of undercharging AC system? Weak cooling and low pressures.
- Symptoms of overcharging AC system? High pressures and cycling.
- Diagnosing expansion valve issues? Think very high high side and very low low side.
- AC compressor troubleshooting? If both sides equalize the pump is weak.
- AC system leak detection methods? UV, electronic, and pressure decay.
- When to use AC pressure gauges? Any time you diagnose or recharge.
- Checking AC performance with gauges? Compare to the desired AC pressures by temperature.
Final Word on Brand and Support
I like Orion Motor Tech because the sets include sturdy quick disconnect couplers, clear gauges, and well-made hoses. You can get Orion Motor Tech customer support if you need help and ask about Orion Motor Tech warranty information for peace of mind. These sets work with R134a and many include R1234yf couplers or adapters. They are a solid pick for beginners and also fine for seasoned DIYers.
Summary Table: Fast Reference (R134a Example)
| Task | Steps | Tools |
|---|---|---|
| Check Pressures | Connect blue to low, red to high, yellow to service. Engine on, AC max, read. | Manifold set, chart, thermometer |
| Diagnose | Compare to patterns for low charge, overcharge, compressor, valve, airflow. | Gauges, chart |
| Evacuation | Hook yellow to pump, open both valves, pull to 500 microns, hold test. | Vacuum pump, micron gauge |
| Recharge | Connect can tap, purge, add vapor to low side, watch weight and pressures. | Scale, can tap, refrigerant |
| Leak Test | UV dye or electronic sniffer, pressure decay or vacuum hold. | UV kit, leak detector |
Key Takeaways
- Wear safety glasses and gloves. Follow EPA rules.
- Identify R134a or R1234yf before you start.
- Connect blue to low side and red to high side. Yellow goes to the pump or refrigerant.
- Use charts. Ambient temperature changes pressure.
- Read patterns to spot low refrigerant, overcharged system, compressor malfunction, and clogged orifice tube/expansion valve.
- Pull a deep vacuum to under 500 microns and do a vacuum hold test.
- Charge by weight for best results. Watch PSI, kPa, or bar as you work.
- Use UV dye or an electronic leak detector to find leaks.
- Close valves and remove the high side hose first when you disconnect.
- Store and calibrate your gauges so your readings stay true.