Is There Oil in Your Stator Cover? Understanding Normal vs. Problematic Leaks & Fixes
Table of Contents
- Introduction
- Is There Oil in Your Stator Cover?
- Wet Stator vs. Dry Stator: What’s the Difference?
- What Is a Wet Stator?
- What Is a Dry Stator?
- How Do I Spot a Stator Cover Oil Leak?
- What Should I Look For After Removing the Cover?
- Why Is There Oil in My Stator Cover?
- What Can Happen If I Ignore It?
- How Do I Test the Stator With a Multimeter?
- How Do I Fix a Stator Cover Oil Leak?
- DIY or Mechanic: Which Should You Choose?
- Preventing Stator Failure and Oil Leaks
- Materials Matter: Laminations, Steel, and Better Parts
- Case Notes and Useful Numbers
- Frequently Asked Questions
- Summary: Key Things to Remember
- References
You found oil in the stator cover. Is that normal or bad news. The short answer is this. It depends on your engine. Some stators live in oil. Others do not. In this simple guide I show you how to tell the difference, how to diagnose leaks, and how to fix them. I also share clear steps you can use today. If you ride a motorcycle, ATV, or work on small engines, this will save you time and money.
Outline at a Glance
- The stator and why it matters
- Oil inside the stator cover: normal or leak
- Wet stator vs. dry stator
- Symptoms of a stator cover oil leak
- What to check after you remove the cover
- Common causes and what to do
- Risks if you do nothing
- Stator tests with a multimeter
- Repair steps and torque specs
- DIY vs. pro help
- Maintenance to prevent failure
- Better parts for better charging
- Table of data and cost ranges
- FAQs and final tips
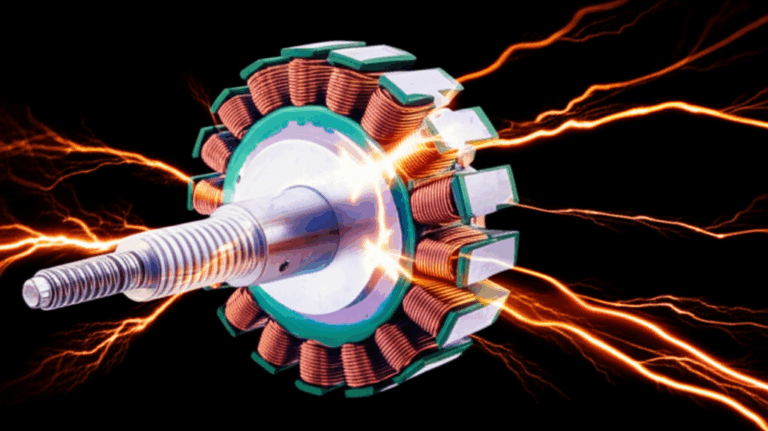
Introduction: The Stator – Powering Your Ride
I like simple systems that work every day. Your stator sits at the heart of the charging system. It makes AC power when the flywheel spins on the crankshaft. The rectifier/regulator changes that AC into DC to charge the battery. Then the battery runs lights, ignition, and your accessories.
Here is the big question I hear all the time. “Is there oil in the stator cover.” Sometimes yes. Sometimes no. Some engines use a wet stator for cooling and lubrication. Other engines use a dry stator that runs in air. Oil leaks are a concern in both cases if oil shows up where it should not.
Problem. You see oil and you worry.
Agitate. Oil can point to a failed gasket, a bad oil seal, or worse.
Solution. Learn which design you have, check for leaks, test the stator, then fix the root cause.
Is There Oil in Your Stator Cover?
It depends on design. Many modern motorcycles use wet stators. In those engines oil inside the stator cover is normal. Some smaller engines and older designs use dry stators. In those, any oil inside that cover points to a problem.
Ask your service manual for your exact model. Suzuki, Honda, Yamaha, Kawasaki, KTM, Polaris, Can-Am, Harley-Davidson, and others use both designs across different years. The service manual stator section and the engine diagram stator view will tell you if yours is wet or dry.
Wet Stator vs. Dry Stator: What’s the Difference?
A wet stator sits in engine oil by design. Oil flows around the stator and flywheel. Oil removes heat and helps with lubrication. That is why oil inside a wet stator cover is normal.
A dry stator sits in a sealed chamber. Air cools it. If you find oil here you likely have a leaking crankshaft oil seal or a cover gasket issue. That needs fast attention.
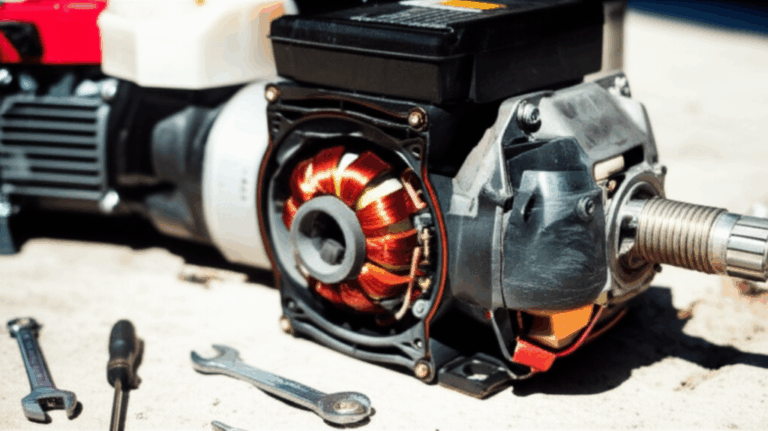
What Is a Wet Stator?
A wet stator works submerged in engine oil. Many motorcycles and ATVs use this layout. Does oil cool the stator. Yes. Oil helps remove heat from stator windings, the alternator area, and the flywheel magnets. This keeps the charging system stable.
What does normal look like. You see a thin film of clean engine oil in the stator housing. You may see light oil on stator windings, the pick-up coil, and the inside of the stator cover. That is fine in a wet design. Just make sure the gasket seals the edge so oil does not seep out. If you see oil seepage stator cover edges or oil on the ground motorcycle after parking, you likely have a stator cover gasket leak.
What Is a Dry Stator?
A dry stator runs in air. The cover keeps dust out. You should not see any oil inside. If you do, you have a problem. A crankshaft oil seal leak can push engine oil in past the flywheel. You may also have internal engine leak paths from pressure. In a dry stator any oil inside the stator chamber is a clear problem.
If you notice burning smell from engine, reduced charging capacity, or dim headlights stator issues, check the stator fast. Oil can damage insulation and cause a grounded stator winding or an open circuit stator fault over time.
How Do I Spot a Stator Cover Oil Leak?
You can spot leaks with a quick visual check.
- Look for visible oil drips or seepage around the stator cover.
- Check for oil on the ground beneath the engine after a ride.
- Smell for burnt oil if it drips on the exhaust.
- Track engine oil level dropping on the dipstick.
- Watch for paint changes. Stator cover paint bubbling can show hot oil under the paint.
Leaking stator cover symptoms often show up with charging system oil leak signs as well. Battery not charging. Dim lights. Slow or unreliable starts. Sometimes the engine sputtering stator symptom appears due to low voltage at idle.
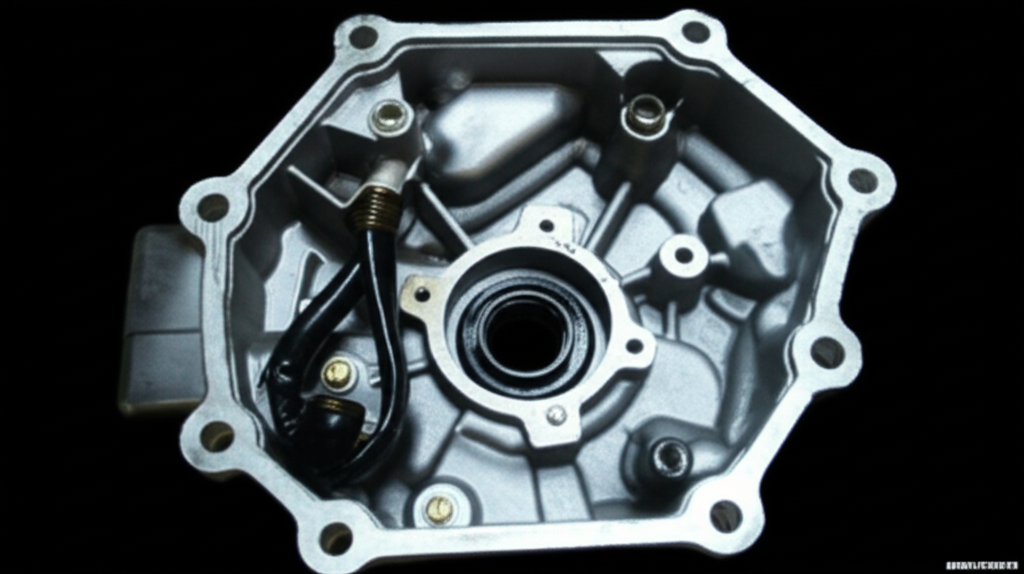
What Should I Look For After Removing the Cover?
If your manual says it is safe, remove the stator cover. Use a drain pan to catch engine oil in wet stator setups.
Here is what to check.
- Excessive oil accumulation or sludge in a dry stator system. That is not normal.
- Oil on stator windings. Light oil is okay in wet setups. Burnt oil on stator windings points to heat or short issues.
- Discoloration or melting on stator windings or insulation. That signals overheating stator oil damage.
- Damaged or brittle insulation on wiring harness runs or the pick-up coil lead.
- Oil-soaked electrical connectors. Clean them.
- Loose stator bolts. Tighten to spec.
- Debris in stator cover like magnetic particles stator shavings from rotor magnets. Clean that out.
- Cracked stator cover or poor casting flaws that let oil seep.
While the cover is off, inspect the flywheel, crankshaft end, and the oil seal area. Also look for a stator cover vent or vent hose on some designs. Check the engine breather hose and the crankcase breather system. A blocked vent can raise engine case pressure.
Why Is There Oil in My Stator Cover?
Let’s break down the most common causes.
- Failed stator cover gasket. This is the most frequent culprit. Age, heat cycles, overtightening, or improper installation can crush or tear the gasket. Gasket material stator covers vary. Use the right material.
- Damaged crankshaft oil seal. This seal sits behind the flywheel. A worn lip or shaft groove lets oil pass into the stator chamber. You may see a flywheel oil leak pattern.
- Cracked or damaged stator cover. A fall or debris strike can crack it.
- Loose stator cover bolts. Insufficient torque allows gaps.
- Internal engine pressure issues. Excessive crankcase pressure from blow-by or a PCV system oil leak can push oil past seals.
- Engine breather or vent hose blocked. That can drive oil past gaskets.
If you own a wet stator engine, oil inside the cover can be normal. Oil outside the cover never is. If you own a dry stator engine, any oil inside points to a leak or seal failure.
What Can Happen If I Ignore It?
Ignore a leak and it can snowball.
- Charging system failure. Oil and heat can break stator insulation. That leads to inter-winding shorts, reduced or erratic electrical output, and a battery drain.
- Electrical damage. Oil can wick up wires and reach electrical connectors. It can cause corrosion of electrical connectors. It can also stress the rectifier/regulator and cause a voltage regulator issue.
- Engine oil loss. Continued leaks lower oil level. Low oil can raise engine temperature or even cause engine seizure oil risk if you keep riding.
- Fire hazard. This is rare but a severe oil leak on a hot exhaust can ignite.
Problem. A small leak looks harmless today.
Agitate. Tomorrow you face a dead battery, dim headlights, and a tow.
Solution. Find the source and fix it right now.
How Do I Test the Stator With a Multimeter?
You can test the stator with a multimeter or an ohmmeter. Follow your service manual stator steps and safety rules.
- Resistance test. Unplug the stator connector. Check between the stator phases A-B, B-C, and C-A. Typical values range from 0.1 to 0.5 ohms. Values vary by brand like Bosch, Denso, Kokusan, and OEM spec. If you see an open circuit stator reading or very high resistance on any pair, the winding likely broke.
- Ground test. Check each phase to ground. You should see no continuity. If you see continuity to ground, you have a grounded stator winding. Replace it.
- AC voltage test. Start the engine. At idle, measure AC voltage across pairs. Many systems show 20 to 30 VAC at idle and 60 to 80 VAC at 5,000 RPM. Values vary. If one pair is low, suspect a bad phase.
- Visual inspection stator oil. If you see burnt oil, dark varnish, or melted coating, the stator likely overheated.
If the stator checks out yet the battery not charging persists, test the rectifier/regulator. Check all wiring harness runs and electrical connectors for oil contamination effects. Clean and dry them.
How Do I Fix a Stator Cover Oil Leak?
Start clean. Oil hides the truth.
- Step-by-step diagnosis. Clean the area. Brake cleaner works on metal parts. Let it dry. Run the engine and watch for the first sign of oil. Trace it back to the highest dry spot.
- Gasket replacement steps. Remove the cover. Scrape old gasket material without gouging the engine case. Wipe clean. Use a new gasket. In some models you use RTV sealant stator cover sealant or a liquid gasket stator cover product. Follow the cure time.
- Stator cover bolt torque. Use a torque wrench. Tighten in a crisscross pattern. Follow torque specs stator cover numbers from your service manual. Do not overtighten.
- Oil seal replacement steps. This repair needs more work. You often must remove the flywheel with a puller tool. Replace the crankshaft oil seal. Lube the lip with fresh engine oil before install.
- Stator cover repair/replacement. If the cover is cracked, replace or repair it.
- Stator replacement. If the stator windings are burnt or shorted, replace the stator. Consider OEM vs aftermarket stator parts. Some riders like Rick’s Motorsport Electrics stator repair kits or other brands. Match the connectors and specs.
- Cleaning stator windings. If you have a wet stator and the windings are only lightly dirty, you can clean with contact-safe cleaner. Do not damage the insulation.
If you run a wet stator, use the correct engine oil type stator recommendation and oil viscosity stator grade in the manual. Wrong oil can foam or run too thin when hot.
DIY or Mechanic: Which Should You Choose?
You can handle some jobs at home.
- DIY friendly. Gasket replacement is often DIY. So is cleaning, bolt torque, and connector checks.
- Pro level. Oil seal replacement steps need tools and skill. It can require flywheel pullers and a way to hold the crank. Complex charging system faults, internal engine leak checks, or a regulator diagnostic may be better for a mechanic.
Professional stator repair can save time when you face hidden issues. A shop can test with more diagnostic tools. They can also spot wiring harness oil damage that is easy to miss.
Preventing Stator Failure and Oil Leaks
You can stack the deck in your favor.
- Routine maintenance stator checks. Check the cover for oil seep. Listen for odd sounds at the flywheel.
- Keep oil fresh. Clean oil removes heat better and protects insulation.
- Check crankcase breather. Make sure the vent hose is clear. A clogged system builds pressure and pushes oil past seals.
- Address heat. Overheating cooks oil and windings. Watch high engine temperature and do not lug the engine in traffic.
- Monitor charging. Use a multimeter to confirm healthy voltage at the battery.
- Use correct parts. Quality gaskets, proper RTV sealant use, and correct torque protect the seal line.
- Inspect after falls. A tip-over can crack a cover.
- Consider cooling methods. Some designs use a stator oil cooler, though most do not. Keep airflow clear around the engine.
Dry stator vs wet stator designs both benefit from smart care. A little time now prevents big bills later.
Materials Matter: Laminations, Steel, and Better Parts
Here is a secret that pros know. The quality of the metal parts inside your alternator matters a lot. The stator core, the rotor, and the laminations set the base for good output.
- The quality of the stator core lamination affects magnetic flow and heat. Better laminations reduce losses and improve charging.
- Full systems use precise motor core laminations to keep the flux strong and stable.
- A smooth rotor core lamination stack helps the flywheel or rotor run true. That protects the crankshaft and the oil seal next to it.
- Good electrical steel laminations keep eddy currents low. That keeps heat down.
If you build or refurbish motors, these parts help a lot. They help prevent stator magnetism issue complaints and reduce overheating. They also protect the insulation on windings. That limits short circuits and keeps the charging system healthy.
Case Notes and Useful Numbers
Here is a simple table that sums up what I see in the field. Values vary by model. Always check your manual.
| Aspect | Description / Data / Insights | Implications |
|---|---|---|
| Prevalence of wet vs dry | Wet stators dominate in modern motorcycles, ATVs, and many small engines. Dry stators show up in some older or very small engines. | Oil is normal inside a wet stator cover. Oil is abnormal inside a dry stator cover. |
| Primary cause of leaks | Stator cover gasket failure is common due to age, heat, overtightening, or wrong install. | Gasket replacement often fixes the problem fast. |
| Secondary cause | Crankshaft oil seal leak behind the flywheel. | Needs flywheel removal and a new seal. |
| Stator failure from oil/heat | Insulation breakdown and short circuits. Overheating drives a vicious cycle. | Leads to reduced charging capacity, dim lights, battery drain. |
| Typical stator lifespan | 20,000 to 100,000+ miles. Oils and heat swing this wide. | Fix small leaks fast to protect the stator. |
| Repair cost estimates | Gasket DIY $10–$50. Gasket in shop $100–$300+. Stator DIY $100–$500. Stator in shop $200–$900+. | Early detection saves money and time. |
| Diagnostic tools and values | Multimeter for resistance 0.1–0.5 ohms typical. AC voltage 20–30 VAC idle, 60–80 VAC at 5,000 RPM. | Confirms health of stator after an oil event. |
Frequently Asked Questions
Q: Why is there oil in my stator cover
A: If you have a wet stator, oil is normal inside. If you have a dry stator, any oil points to a leak. Check the stator cover gasket and the crankshaft oil seal.
Q: How do I know if my stator is bad
A: Do a resistance test and an AC voltage test with a multimeter. Look for open circuit stator readings or a grounded stator winding. Watch for battery not charging, dim headlights, and sputtering.
Q: Can oil ruin the stator windings
A: Yes if the oil is burnt or contaminated. Oil can attack insulation on the windings. That can lead to short circuits and reduced output.
Q: What sealant should I use on the cover
A: Use the sealant your service manual lists. Some covers use a paper gasket. Others call for RTV sealant or a liquid gasket stator cover bead. Follow cure times.
Q: What else can look like a stator leak
A: An oil filter housing leak, a clutch cover oil leak, or a transmission oil leak can run toward the stator area. Clean well and trace the source.
Q: My oil looks milky. Is that related
A: Milky oil can point to engine coolant in oil. That is a different problem. Fix it fast to avoid engine damage.
Q: What if the problem is not oil at all
A: You might have a voltage regulator issue or a wiring harness problem. Test the rectifier/regulator and inspect every electrical connector.
Summary: Key Things to Remember
- Oil inside a wet stator cover is normal. Oil inside a dry stator cover is not.
- Leaks often come from a failed stator cover gasket or a crankshaft oil seal.
- Look for oil drips, burnt smells, and dropping oil levels.
- Test the stator with a multimeter for resistance and AC output.
- Use correct torque specs stator cover values with a torque wrench.
- Fix small leaks fast. Protect the charging system and the battery.
- Keep breather and vent hose lines clear to control pressure.
- Use quality parts. Good laminations and steel reduce heat and loss.
- When in doubt, see a mechanic for professional stator repair.
References
- Honda, Yamaha, Suzuki, Kawasaki, KTM, Polaris, Can-Am, and Harley-Davidson official service manuals.
- Rick’s Motorsport Electrics: Stator testing and charging system guides.
- Bosch, Denso, and Kokusan technical data sheets for alternator and stator systems.
- Industry best practices on RTV sealant and liquid gasket use from OEM service literature.
Below you will find a quick index of related ideas and tasks that you might run into as you work. I include them here because they come up often when riders search and troubleshoot. They tie back to what we covered above and help you move faster.
- Stator cover oil leak and oil seepage stator cover checks at each oil change.
- Oil inside stator cover normal for wet designs on many motorcycle stator systems and ATV stator oil leak inspections after a spill.
- Generator stator oil checks and alternator stator oil in small engine stator oil systems that run wet.
- Dry stator vs wet stator designs across brands like Suzuki, Honda, Yamaha, Kawasaki, Harley-Davidson, KTM, Polaris, and Can-Am.
- Does oil cool the stator and stator cooling methods like airflow and rare stator oil cooler setups.
- Visual inspection stator oil for burnt oil on stator windings, damaged insulation, and debris in stator cover.
- Stator electrical short oil risk, open circuit stator findings, and grounded stator winding tests with a multimeter or ohmmeter.
- Charging system oil leak effects on the rectifier/regulator, regulator rectifier oil contamination cleanup, and voltage regulator issue diagnosis.
- Battery not charging symptoms, dim headlights stator checks, engine sputtering stator low voltage effects, and reduced charging capacity worries.
- Stator resistance test oil context and stator voltage test oil results at idle and at 5,000 RPM using a multimeter stator oil process.
- Engine case oil leak ruling out oil filter housing leak, clutch cover oil leak, or transmission oil leak.
- RTV sealant stator cover vs liquid gasket stator cover choices, gasket material stator selection, torque specs stator cover use of a torque wrench, and stator cover bolt torque sequence.
- Service manual stator reading, engine diagram stator layout, tools for stator cover removal, and removing stator cover oil handling.
- Cleaning stator windings, stator repair kits, OEM vs aftermarket stator pros and cons, and professional stator repair timing.
- Engine oil type stator guidance, oil viscosity stator notes, engine breathing system oil and PCV system oil leak checks, blow-by stator oil forces, and crankcase breather vent hose checks.
- Stator magnetism issue root causes, stator cover corrosion, stator cover pressure spikes from blocked vents, internal engine leak risks, and magnetic particles stator cleaning.
- Engine performance and charging system links, overheating stator oil mix, burning smell from engine clues, engine coolant in oil as a separate fault, high engine temperature risks, engine seizure oil risk if you let oil run low.
- Stator output oil present expectations for wet systems and inspection cycles that keep you ahead of trouble.