How to Winterize an Outboard Motor: A Complete DIY Guide (Protect Your Engine!)
Table of Contents
- Introduction: Why Winterizing Your Outboard Is Crucial
- What Problem Does Winterization Solve?
- What Do You Need Before You Start?
- How Do You Prepare the Fuel System?
- How Do You Flush the Cooling System the Right Way?
- How Do You Change Engine Oil and Filter on a 4‑Stroke?
- How Do You Change Lower Unit Gear Lube?
- Should You Fog the Engine and How?
- What Should You Grease and Inspect Outside?
- How Do You Care for the Battery in Winter?
- How Should You Store the Motor and Boat?
- What Mistakes Should You Avoid?
- How Do You Get Ready for Spring Start‑Up?
- Brand and Region Notes You Should Know
- Electric Motors and Laminations: A Quick Note for Boat Tech
- DIY vs Pro: Costs, Time, and Warranty
- Data and Proof: Why Winterization Pays
- References
- Summary of Key Points
- Optional FAQ
You worked hard all season. Now protect your outboard. In this guide I show you how to winterize a 2‑stroke or 4‑stroke outboard motor step by step. You will see clear steps, simple tools, and smart tips so your spring start feels easy. You save money. You prevent damage. You get peace of mind.
Introduction: Why Winterizing Your Outboard Is Crucial
I winterize my own boats every fall. I do it because I like a smooth spring start. I also do it because freeze damage is real. Water can expand and crack parts. Old fuel can gum up carburetors or fuel injectors. Rust can build inside a powerhead. Good care now protects your engine block, cooling system, gearcase, and wallet.
This is a full boat winterization guide for outboards. It covers winterizing 2‑stroke outboards and winterizing 4‑stroke outboards. You will find an outboard winterization checklist. You will learn about flushing outboard motor systems. You will see how to change engine oil outboard and how to do a lower unit oil change. I also cover fogging outboard engine parts, greasing an outboard, inspecting anodes outboard, and battery trickle charger tips. Use this to protect your fuel system, fight corrosion, and prevent freeze damage.
What Problem Does Winterization Solve?
- Problem: Water and cold do not mix in motors. Water in the lower unit or cooling passages can freeze. Freeze damage can crack the gearcase or powerhead. That leads to big repair bills.
- Agitate: Old fuel goes bad. Ethanol can pull in water. That causes phase separation. Carburetors varnish. Fuel injectors clog. Hoses crack. Engines stall in spring. You waste trips and money.
- Solution: You winterize now. You add a marine fuel conditioner or fuel stabilizer for outboard engines. You flush with fresh water. You change gear lube. You fog cylinders. You grease fittings. You store the motor right. You start clean in spring.
Winterization fights corrosion in both saltwater and freshwater. It protects rubber components and wiring. It reduces wear on bearings and seals. It boosts engine lifespan. It raises resale value because you have records of end of season boat care.
What Do You Need Before You Start?
Set up your tools for winterizing outboard so you do not stop halfway.
- Fluids and parts:
- Marine‑grade engine oil for 4‑stroke models
- Gear lube for the lower unit
- Fuel stabilizer or marine fuel conditioner like Sta‑Bil or Seafoam
- Marine fogging oil
- Marine grease
- Non‑toxic antifreeze if your storage plan calls for it
- Oil filter for 4‑stroke engines
- Water separator filter and fuel filter
- Gaskets or washers for gear case drain plug
- Spark plugs if you plan on replacement
- Tools:
- Basic hand tools and a torque wrench for spark plugs
- Spark plug wrench and oil filter wrench
- Gear lube pump
- Grease gun or marine grease gun
- Flushing muffs or a barrel
- Garden hose attachment for flushing
- Funnel, drain pan, and marine shop towel
- Battery trickle charger
- Manuals and safety:
- Your outboard service manual
- Eye protection and gloves
- Fire safety in the work area
I keep extras like silicone spray for rubber, anti‑corrosion spray, and CRC Marine or WD‑40 for light tasks. I also keep Permatex for sealing drain screw gaskets if needed. I use Quicksilver parts on Mercury Marine models. I use NGK Spark Plugs or Champion Spark Plugs based on model. Sierra Marine and XPS Marine offer reliable options as well.
How Do You Prepare the Fuel System?
Fuel needs attention first. It matters in both short term storage outboard and long term storage outboard.
- Add fuel stabilizer to the tank. Follow the label. Many brands like Sta‑Bil or Seafoam work well. This helps preventing ethanol damage. It keeps gas fresh. If you can find ethanol‑free fuel for storage use it.
- Run the engine long enough to pull stabilized fuel through the entire fuel system. This protects carburetor jets and fuel injectors.
- Change your water separator filter and your inline fuel filter. A clean filter helps protect fuel system parts all winter.
- For carbureted engines drain carburetor float bowls. Draining carburetor bowls prevents varnish. For EFI models you can run a fuel system treatment and plan for fuel injector cleaning only if you had signs of rough idle.
Do not forget to inspect fuel lines. Squeeze the primer bulb and check for leaks. Look for cracks. Cleaning fuel tank vents also helps. Replace brittle parts before they fail.
How Do You Flush the Cooling System the Right Way?
Cooling systems trap salt and sand. You want to flush them well.
- Attach flushing muffs to the water inlets or submerge the lower unit in a barrel. Use a garden hose. Open the water full. Start the engine. Let it idle.
- Run fresh water through for 10 to 15 minutes. Watch for a steady tell‑tale stream. That shows water pump impeller flow. If the stream is weak do a water pump impeller check. Check the thermostat too. A thermostat check outboard can save headaches.
- Most outboards drain themselves. You do not use antifreeze for outboard cooling passages in most cases. If your manual calls for non‑toxic antifreeze use it as directed. Many owners use antifreeze only for complex inboard or stern drives. Outboards rarely need it.
Cool days help here. The motor stays cool while you work. You keep the fresh water flush outboard steady. You keep sand and salt out of your engine block and exhaust port passages. Do a quick exhaust port inspection while it runs.
How Do You Change Engine Oil and Filter on a 4‑Stroke?
If you own a 4‑stroke you change the oil and filter at the end of the season.
- Warm the engine first. Warm oil drains faster. Shut it down. Remove the cowl. Place a drain pan. Open the drain as your service manual shows. Catch used oil. Check for water in oil which can look milky.
- Replace the oil filter. Wipe the mount. Oil the new filter gasket. Spin it on by hand. Tighten to spec.
- Refill with marine‑grade engine oil. Use the right weight. Use your dipstick to confirm level. Start the engine. Check for leaks.
Four strokes love fresh oil in winter. You reduce acid and moisture inside the crankcase. You protect bearings and cams. If you use Mercury Marine, Yamaha Outboards, Suzuki Marine, Honda Marine, Evinrude (BRP), or Tohatsu consult the outboard service manual for specs.
How Do You Change Lower Unit Gear Lube?
Lower unit care is vital. You can lose a whole gearcase to ice if water gets inside.
- Place a pan. Remove the lower drain screw first. Then remove the upper vent screw. Let old lube drain. Watch for signs of water in gear lube. Milky oil points to leaks. Metal shavings point to wear.
- Install a gear lube pump at the lower hole. Pump fresh marine gear lube in until it flows from the top vent. Replace gaskets or washers on both screws. Torque to spec.
- Spin the prop. It should feel smooth. If you see water in the old lube call a professional marine mechanic. You likely need seals.
This step prevents freeze cracks in the gearcase. It also keeps gears and bearings healthy. If you fish in the Great Lakes or the Pacific Northwest this matters even more due to cold. It matters in the Florida Keys too due to salt. Freshwater or saltwater both need care.
Should You Fog the Engine and How?
Yes. Fogging coats parts inside the engine. It fights rust.
- Remove spark plugs. Spray marine fogging oil into each cylinder. Crank the engine briefly to spread oil. Replace plugs. Use a torque wrench for spark plugs so you hit spec.
- Some owners fog through the air intake while the engine runs. Check your manual. On EFI models use caution. I prefer cylinder fogging on many modern engines.
Fogging outboard engine parts protects rings, cylinder walls, and bearings. It is cheap insurance. Use marine fogging oil and follow directions.
What Should You Grease and Inspect Outside?
Grease makes moving parts last longer.
- Remove the propeller. Remove the prop nut with the right socket. Inspect for fishing line around the prop shaft. Grease the propeller shaft with marine grease. Reinstall the prop. Decide on aluminum prop vs stainless prop if you plan an upgrade in spring.
- Grease all zerks. Hit steering pivots, tilt tube, and prop shaft splines. Do power trim cylinder lubrication if your model has fittings. Check power trim and tilt fluid level.
- Inspect and replace anodes. Zinc anode replacement or aluminum anodes protect against galvanic corrosion. Inspect wiring for rubs and wear. Spray electrical connections with a dielectric protectant. Use silicone spray for rubber grommets and seals.
- Check the gear case drain plug screws again. Check throttle and shift linkage. Lube cables. Clean the exterior. Apply an anti‑corrosion spray to the powerhead and brackets.
Small steps here fight rust prevention outboard wide. They keep trim moving free. They guard against seized bolts and stuck parts in spring.
How Do You Care for the Battery in Winter?
Batteries die when left low.
- Disconnect battery terminals. Clean them. Coat with protectant.
- Store the battery indoors in a cool dry place. Use a smart battery trickle charger or maintainer. Up to 70% of marine battery failures happen due to poor storage. A maintainer prevents sulfation.
Label your battery cables so spring hook‑up is easy. Check the date sticker. Replace weak batteries before fishing season.
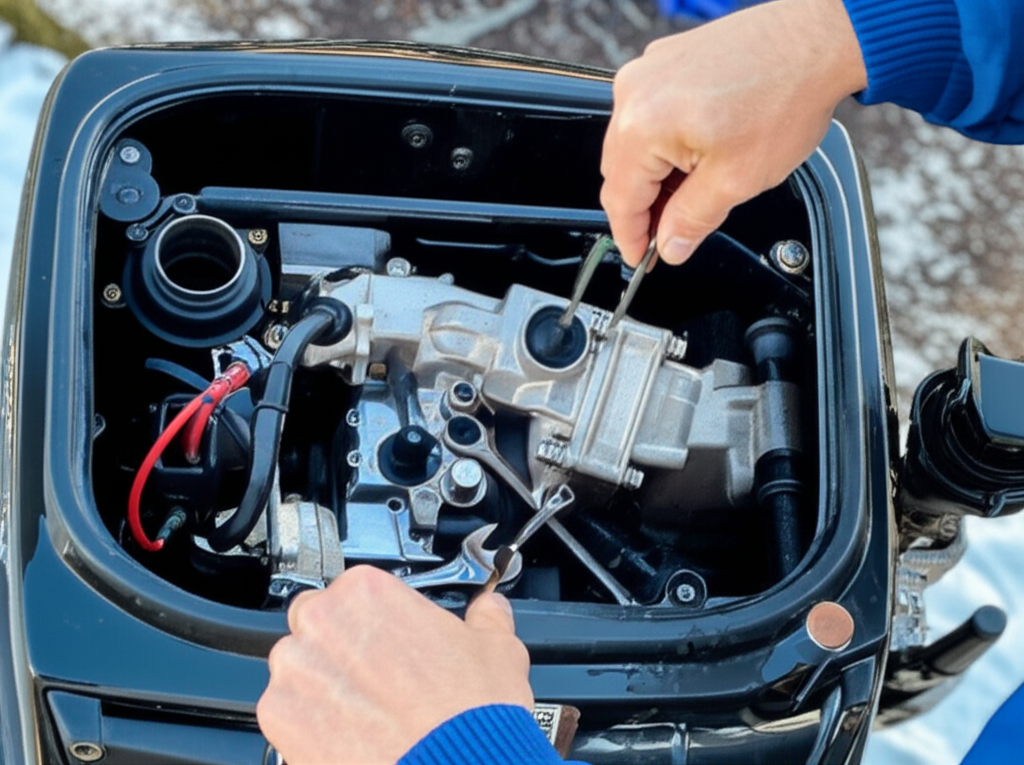
How Should You Store the Motor and Boat?
Storage position matters.
- Trim the motor all the way down. Gravity drains water from the lower unit and exhaust. Vertical vs horizontal storage is no contest. Vertical wins.
- Use an engine cover for storage. Use breathable covers. Add ventilation for stored boat areas. Use marine desiccant or desiccant packs for boat cabins and lockers. Reduce moisture.
- Rodent protection matters. Use deterrents. Keep food off the boat. Seal gaps.
- Boat covering: A breathable waterproof motor cover helps. Shrink wrapping boat hulls protects the whole rig if you store outside. Leave vents to avoid mold.
- Think location. Boat lift storage works if you cover and secure. Trailer storage for outboard is fine if you chock wheels and support the transom. Preparing a pontoon boat for winter or winterizing a jon boat uses the same engine steps. Just add hull care as needed.
If you plan winter boat show prep you want your boat clean and safe. Good storage makes it easy to show or sell.
What Mistakes Should You Avoid?
- Skipping fuel stabilization leads to gummed carbs or injectors.
- Not fogging the engine invites rust.
- Forgetting lower unit oil change can trap water and crack a gearcase.
- Improper battery storage kills batteries.
- Leaving water in the engine risks freeze damage.
- Ignoring a water pump impeller check hurts cooling system maintenance.
- Leaving old anodes fails corrosion protection outboard wide.
- Not checking for leaks or signs of water in oil builds hidden risk.
What happens if you don’t winterize? You pay more. You lose time on the water. Avoid that stress.
How Do You Get Ready for Spring Start‑Up?
Preparing for spring start‑up starts now with good notes.
- In spring check engine oil, gear lube, and power trim and tilt fluid. Check coolant flow from the tell‑tale. Confirm thermostat opens as water warms.
- Reconnect the battery. Tighten cables. Test voltage.
- Prime the fuel system. Squeeze the bulb. Start the engine on muffs. Listen. Look for leaks. Replace spark plugs if you planned that change. Do a quick spark plug inspection either way.
Keep your winterization records. Engines with documented maintenance and winterization records often sell for 10 to 20% more.
Brand and Region Notes You Should Know
Models vary. Mercury Marine, Yamaha Outboards, Suzuki Marine, Honda Marine, Evinrude (BRP), Tohatsu, and Volvo Penta each have unique steps. Read the outboard service manual. Quicksilver parts match many Mercury models. XPS Marine parts fit BRP. Sierra Marine offers cross‑reference parts. NGK Spark Plugs and Champion Spark Plugs list the right numbers in their guides.
Shopping is easy today. You can buy at West Marine, Bass Pro Shops, Academy Sports + Outdoors, Napa Auto Parts, Autozone, or Amazon. Use quality marine grade lubricants every time.
Water type matters. Saltwater boating in the Florida Keys needs heavy flushing and strong anti‑corrosion spray. Freshwater in the Great Lakes or Pacific Northwest still needs care due to cold. PWC owners follow a similar plan for personal watercraft engines.
Rules matter too. The Coast Guard, EPA, NMMA, and ABYC offer guidance on fuel, oil, and safety. Follow local rules for waste oil and fuel disposal. Keep records for warranty considerations winterization because some makers require proof. Talk to a professional marine mechanic if you find leaks or metal on magnets.
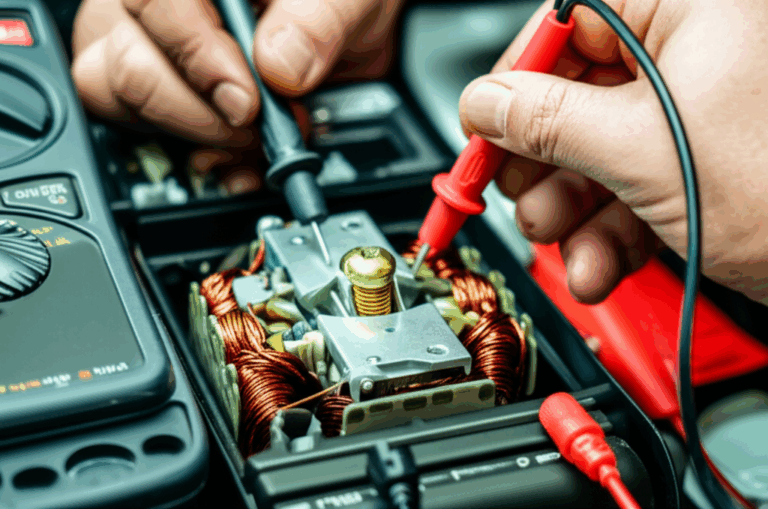
Electric Motors and Laminations: A Quick Note for Boat Tech
Many boats also run electric trolling motors or onboard alternators. The quality of the steel laminations inside those motors affects heat, noise, and efficiency. Better laminations reduce eddy currents and loss. That means longer run time for your batteries and cooler operation.
If you geek out on motor design you can learn how the stator core lamination shapes the magnetic field. You can also see how the rotor core lamination impacts torque. In many electric drives the stack quality matters a lot. If you want a big picture view on materials start with electrical steel laminations and how they cut loss. For a wider catalog look at modern motor core laminations. This is advanced. It still helps you understand why some motors feel smoother and last longer.
DIY vs Pro: Costs, Time, and Warranty
DIY outboard winterization supplies cost about $50 to $200. Professional service runs about $200 to $600 or more based on engine size. DIY saves labor. It also helps you learn your rig. Pro service can protect your warranty and includes pressure tests and reports.
If your lower unit shows signs of water in gear lube get help. If your oil looks milky get help. If your thermostat sticks or your impeller looks worn schedule service. Many makers suggest an impeller replacement interval of 2 to 3 years for average use. Heavy use can mean annual changes. Check the manual.
Boat insurance for winter storage may require certain steps. Some plans want proof of storage indoors or shrink wrap. Ask your agent. Keep photos. Keep receipts.
Data and Proof: Why Winterization Pays
Here is what the numbers say from marine shops and user reports.
| Category | Data or Case Point | What It Means for You |
|---|---|---|
| Cost of freeze damage | Repair for cracked engine block or lower unit can run $2,500 to $8,000+ | Proper draining and flushing prevent ice damage and save thousands |
| Fuel system neglect | Ethanol‑related clean and repair can cost $300 to $1,500 | Fuel stabilization and ethanol‑free fuel for storage reduce clogs and hard starts |
| Corrosion damage | Seized parts like powerhead or trim/tilt can cost $1,000 to $5,000+ | Flushing, fogging, and greasing stop rust and extend life |
| Engine lifespan | Proper winterization can extend life by 25% to 50% or more | You get more hours and delay replacement |
| Resale value | Documented maintenance often adds 10% to 20% to sale price | Keep records and receipts |
| Battery failures | Up to 70% due to poor charging or storage | Disconnect and maintain on a smart charger |
| Spring issues | 90% of no‑start problems are preventable with fall care | Do the steps now for easy spring starts |
This is why steps to winterize outboard engines pay off. You protect your investment. You save time and money.
References
- ABYC standards and technical guidance
- NMMA maintenance overviews
- BoatUS articles on winterizing boat engines
- EPA guidance on fuel and storage safety
- Mercury Marine, Yamaha, Suzuki, Honda, Evinrude, Tohatsu service manuals and bulletins
- West Marine Advisor articles on fuel and corrosion control
Summary of Key Points
- Add fuel stabilizer. Run the engine to protect carburetor and fuel injector parts.
- Flush with fresh water. Confirm a strong tell‑tale. Check the water pump impeller and thermostat.
- Change engine oil and filter on 4‑stroke models. Check for water in oil.
- Drain and refill lower unit gear lube. Watch for signs of water in gear lube.
- Fog cylinders with marine fogging oil. Coat inside parts.
- Grease zerks. Remove prop. Grease prop shaft. Inspect anodes and wiring. Spray electrical connections.
- Disconnect and store the battery. Use a battery trickle charger.
- Store motor trimmed down. Cover the engine. Add ventilation and rodent protection.
- Keep records for warranty considerations winterization and resale.
- Use your outboard service manual. Call a professional marine mechanic when needed.
Optional FAQ
Q: Do I need antifreeze for outboard motors?
A: Most outboards self drain when stored vertical. Non‑toxic antifreeze is rarely needed. Follow your manual if it calls for it.
Q: What about small vs large outboards?
A: Winterizing small outboard engines and winterizing large outboard engines follow the same steps. Small portables with carburetors need fuel stabilizer and bowl drain. Large motors need the full plan.
Q: How often should I change the impeller?
A: Many makers suggest every 2 to 3 years. Heavy sand use or high hours may need yearly changes. Follow the impeller replacement interval in your manual.
Q: Can I skip fogging on EFI engines?
A: You should still fog the cylinders through the spark plug holes. This protects rings and walls.
Q: What about PWC?
A: PWC engines need similar steps. Stabilize fuel. Flush. Fog. Battery care. Check the PWC manual for details.
Q: Any special tips for pontoon boats or jon boats?
A: Preparing a pontoon boat for winter and winterizing a jon boat use the same engine steps. Keep the deck and storage dry. Use marine desiccant to fight moisture.
Q: Should I do an engine block drain?
A: Most outboards do not have an engine block drain. Store vertical to drain fully.
Q: Where can I buy parts?
A: West Marine, Bass Pro Shops, Academy Sports + Outdoors, Napa Auto Parts, Autozone, and Amazon all carry parts. Use quality brands like Quicksilver, Sierra, NGK, and Champion.
Q: Any difference between freshwater and saltwater care?
A: Saltwater needs strong flushing and more anti‑corrosion spray. Freshwater still needs the full plan due to cold and storage time.
Q: How can I boost corrosion protection?
A: Replace anodes, use anti‑corrosion spray, wash salt off, and keep metal dry. Zinc anode replacement or aluminum anodes both work based on water type.
Q: Can I use WD‑40 on everything?
A: WD‑40 helps displace water on parts. Use true marine grease and anti‑corrosion spray for long term protection.
Q: Can I do winter boat show prep after winterization?
A: Yes. Clean the engine cowl. Clean wiring. Shine the prop. Keep the boat shrink wrapped or covered. Your rig will show well.
The Full DIY Winterization Walkthrough at a Glance
Below is your quick outboard winterization checklist to keep handy:
- Steps to winterize outboard
- Fuel: Add fuel stabilizer. Run engine. Change water separator filter and fuel filter. Drain carburetor on carb models. Plan fuel injector cleaning only if needed.
- Cooling: Fresh water flush outboard with flushing muffs or barrel. Confirm tell‑tale. Consider thermostat check outboard and water pump impeller check.
- Oil: Changing engine oil outboard on 4‑stroke engines with new oil filter.
- Gearcase: Lower unit oil change. Inspect for leaks. Replace gear case drain plug gaskets.
- Fogging: Fogging outboard engine through spark plug holes. Reinstall plugs to spec.
- Grease: Greasing an outboard at all fittings. Propeller shaft grease. Power trim cylinder lubrication. Check power trim and tilt fluid.
- Inspect: Removing propeller outboard and removing prop nut to check for line. Inspecting anodes outboard. Anti‑corrosion spray on the powerhead. Inspecting wiring. Spraying electrical connections. Protecting rubber components with silicone spray for rubber. Cleaning fuel tank vents. Inspecting fuel lines and checking for leaks. Exhaust port inspection.
- Battery: Battery disconnect outboard. Store on a maintainer or trickle charger.
- Storage: Vertical vs horizontal storage. Trim down. Engine cover for storage. Shrink wrapping boat if outside. Rodent protection. Ventilation for stored boat. Use marine desiccant or desiccant packs for boat.
Good storage also includes trailer storage for outboard or boat lift storage as needed. Keep boat insurance for winter storage info on file. Keep warranty considerations winterization documents. That way you are set for spring. You can even use this plan for winterizing small outboard or winterizing large outboard. The steps scale up or down.
Remember the goal. You want a quick spring start. You want smooth power. You want to spend time on the water not in the shop.
Bold move time. You now know the “what” and the “why.” You also know the “how.” So take one fall afternoon. Follow this guide. Use your tools and a few supplies. If you run electric drives or care about the tech inside motors read up on laminations too. That curiosity pays off in better gear choices.
Stay safe. Work smart. Then enjoy that perfect first day back on the water next spring.