How to Troubleshoot Your Dishwasher Diverter Motor: A Step‑by‑Step DIY Guide From My Workbench
Table of Contents
- Introduction: The Day My Upper Rack Stayed Dirty
- What the Diverter Motor Does and Why It Matters
- Is It Really the Diverter Motor? Pinpoint the Problem First
- Quick Fixes Before You Grab the Screwdrivers
- Tools, Safety, and Access: Getting to the Diverter Motor
- Visual Inspection: What I Look For Right Away
- Electrical Tests: Continuity, Resistance, and Voltage Checks
- Mechanical Checks: Stuck Valves, Gears, and Manual Movement
- Common Diverter Motor Problems and What I’ve Seen Work
- Replacing the Diverter Motor: Step‑by‑Step
- Costs, Parts, and Repair vs Replace
- Brand Notes and Error Codes: What They Can and Can’t Tell You
- When I Call a Pro
- Preventative Maintenance That Actually Helps
- FAQs I Get From Friends and Clients
- Conclusion: Clean Dishes and Peace of Mind
Introduction: The Day My Upper Rack Stayed Dirty
The first time I suspected a diverter motor problem I didn’t own a fancy meter. I just owned a sink full of dirty cups from the top rack. The bottom rack looked fine. The top rack felt like it never saw water. I ran another cycle. Same result. Then I heard it. A strange clicking under the tub that repeated every minute or so. Not a loud grind. More like a plastic gear trying and failing to bite.
That was my wake‑up call. Since then I’ve troubleshot and replaced several diverter motors for family and clients. Some were Whirlpool or KitchenAid. A couple were Bosch. One was a stubborn GE. The pattern stayed the same. Poor water distribution. Odd noises. Spray arms that looked lazy. Today I’ll walk you through the process I use from first suspicion to final test. You can do most of it with basic tools. Stay safe. Work methodically. You’ll either fix it or know exactly what to ask a technician to do.
What the Diverter Motor Does and Why It Matters
Think of your dishwasher like a conductor. It decides where the water “music” plays. The diverter motor drives a valve that routes pressurized wash water to one spray zone at a time. Upper rack. Lower rack. Sometimes a middle or specialty arm. By switching zones the system maintains strong pressure with a smaller pump. When the diverter fails the water show falls out of tune.
You might see this as:
- The upper spray arm not rotating while the lower arm blasts away
- Weak pressure at the bottom spray arm while the top is fine
- Dishes still dirty after a full cycle
- Humming or clicking from under the tub
- Intermittent washing where one cycle looks fine then the next falls flat
Some dishwashers run a “zone wash” feature by design. Others simply alternate to manage pressure. Either way the diverter valve and motor sit at the heart of water distribution.
Quick tech note for the curious: small dishwasher motors use stator and rotor stacks made from thin electrical steel laminations. Those laminations reduce eddy current losses which keeps motors efficient and quiet. If you want to nerd out you can skim clear explainer pages on stator core lamination, rotor core lamination, and broader motor core laminations. They sit at the core of most appliance motors. Manufacturers rely on high‑grade electrical steel laminations for a reason.
Is It Really the Diverter Motor? Pinpoint the Problem First
Before I touch a screw I try to confirm the symptom points to the diverter motor not something else.
Here’s my quick diagnostic path:
- Upper rack dirty while the lower rack looks ok
- Either the upper spray arm or the lower spray arm isn’t spinning after a cycle
- I hear periodic clicking or buzzing near the sump while the wash motor runs
- The cycle completes but performance is poor especially on one rack
- Washing seems intermittent like one load cleans well and the next doesn’t
Rule out these common imposters first:
- Clogged spray arms: Hard water and food debris block tiny spray holes
- Dirty filters or sump screens: Restricted flow kills pressure to all arms
- Weak circulation pump or wash motor: If overall spray is weak on all racks suspect the pump not the diverter
- Low water level: A weak water inlet valve or closed supply valve starves the wash motor
If one rack consistently underperforms while the other looks fine the diverter motor and valve jump to the top of my list.
Quick Fixes Before You Grab the Screwdrivers
I like to try a few simple things up front. They cost nothing. Sometimes they fix the issue outright.
- Clean spray arms and filters: Pop off the spray arms. Rinse them in the sink. Use a toothpick to open clogged nozzles. Rinse the filter screen and check valve area
- Verify water supply: Make sure the shutoff valve is fully open. Run the hot water at the sink so the dishwasher starts with hot water
- Reset the dishwasher: Turn off the breaker for 5 minutes. Power it back up. Control boards sometimes get confused and a hard reset can restore diverter indexing
- Run a cleaning cycle: If you have hard water try a citric acid or dishwasher cleaner cycle. Mineral buildup can bind the diverter valve
If performance improves for a load then drops again a sticky diverter valve may be the culprit. Keep going.
Tools, Safety, and Access: Getting to the Diverter Motor
Safety first. Water and electricity don’t play nice.
- Turn off power at the breaker. Unplug the power cord if your model has one
- Shut off the water supply under the sink
- Remove dishes and racks. Mop up standing water with towels or a shop vac
- Protect your floor with a towel or tray before tilting the unit
Tools I use most:
- Phillips and flat screwdrivers
- Torx bits for many European brands
- Nut driver set
- Pliers
- Multimeter with continuity, resistance, and AC voltage settings
- Flashlight or headlamp
- Towels and gloves
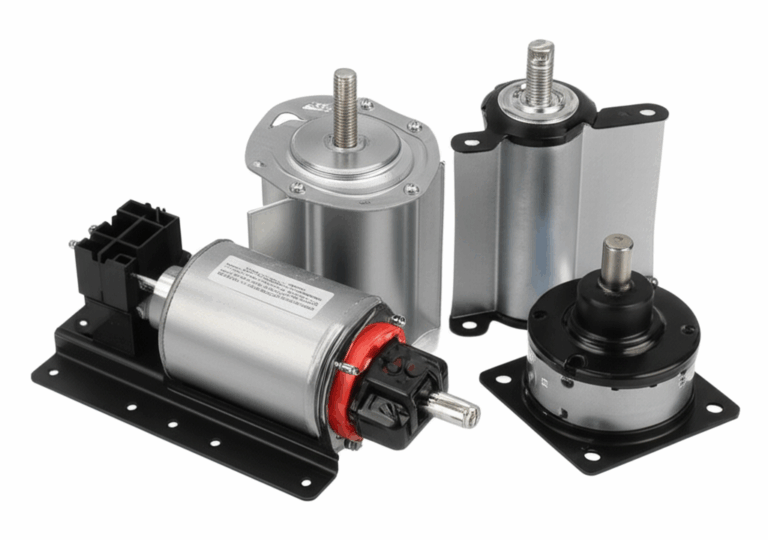
Locating the diverter motor:
- It usually sits under the tub mounted to the sump or water manifold
- On many Whirlpool and KitchenAid models it’s a small round motor on the side of the sump with a wiring connector
- Bosch and other European designs often integrate it near the circulation pump assembly
- Look for a compact motor with a short shaft connected to a valve or cam
Access tips:
- Remove the toe‑kick panel at the bottom front
- Some models require you to pull the dishwasher out a few inches to reach side or bottom components
- Others let you work from underneath after tilting the unit back slightly
- Take photos as you go so reassembly won’t feel like a jigsaw puzzle
Visual Inspection: What I Look For Right Away
I don’t test anything until I look for obvious problems. Visual checks save time.
- Wiring and connectors: Look for loose plugs, corroded spades, scorch marks, or broken insulation on the wiring harness
- Motor housing: Any melted plastic, cracks, or water stains suggest overheating or leaks
- Diverter valve path: Shine a light in the valve area. Look for debris like toothpicks, glass, seeds, or scale that could jam the mechanism
- Gaskets and seals: A bad shaft seal or sump gasket can leak water onto the motor. Leaks often cause noisy operation or early failure
- Brackets: Make sure the diverter motor bracket holds solid. Vibration can loosen fasteners over time
If I spot a jam or obvious debris I fix that first. A stuck valve can mimic a dead motor.
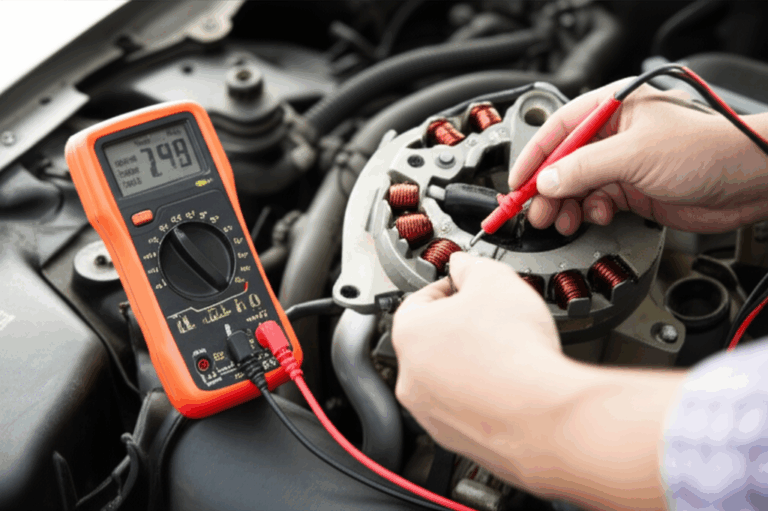
Electrical Tests: Continuity, Resistance, and Voltage Checks
Now we test. If you’re not comfortable with a meter stop here and consider calling a pro. Live voltage tests demand serious caution.
Continuity and resistance with power off:
- Disconnect the dishwasher from power at the breaker
- Unplug the diverter motor connector
- Set your multimeter to resistance (ohms)
- Touch the probes to the motor terminals
- You want a stable resistance reading not infinite (open circuit) and not zero (short)
- Expected resistance varies by brand and model so check your service manual or online resources for your model
What the readings mean:
- Open circuit: Internal winding break. The motor needs replacement
- Very low resistance near zero: Internal short. Replace the motor
- Reasonable stable resistance: The winding may be ok. Continue testing
Voltage test with extreme caution:
- Only attempt this if you know how to work around live circuits safely
- Reconnect the motor plug
- Restore power with the unit partially reassembled and safe to run
- Start a wash cycle and wait for the point when the diverter should move
- Carefully back probe the connector to measure for the expected voltage at the diverter motor
- Some models supply 120V AC. Others drive a low‑voltage DC motor. Always check your wiring diagram or service manual
If the motor never receives voltage the problem likely sits upstream in the control board or wiring harness. If you see correct voltage yet the motor doesn’t move the motor has failed or the valve is jammed.
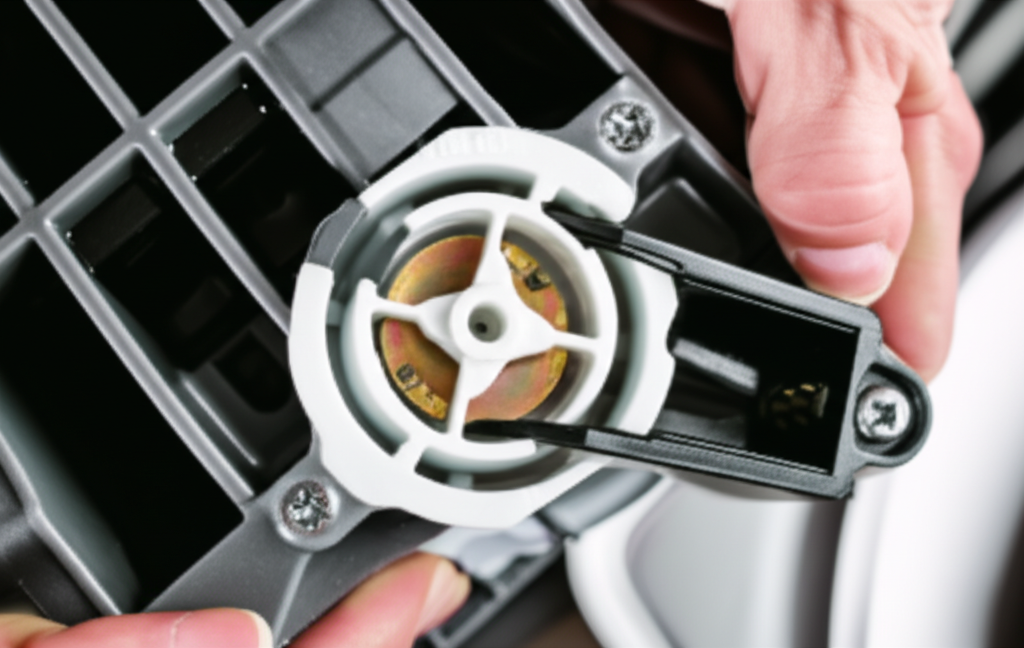
Mechanical Checks: Stuck Valves, Gears, and Manual Movement
Diverter motors do more than spin. They index a valve through gears or cams. That means two failure types show up: electrical and mechanical.
- Gentle movement test: With power off try to gently rotate the diverter valve shaft or cam by hand if accessible. Don’t force it. You’re checking for smooth motion not strength training
- Listen for grinding: Turn the motor by hand if possible. Gritty grinding suggests worn gears or debris
- Re‑seat the motor: On some models the diverter motor must align to an index. If it’s misaligned it may stall. Remove it then reinstall in the correct indexed position per the manual
- Clean the path: Flush the valve area with warm water. Remove debris you can see with needle‑nose pliers or tweezers
If a manual check frees the movement then run a cycle again. You might hear the diverter re‑index and begin switching zones properly.
Common Diverter Motor Problems and What I’ve Seen Work
Here’s what I see most often along with the fixes that stick.
Problem: Stuck diverter valve
- Likely causes: Food debris, glass, mineral scale, or worn plastic shavings
- Fix: Clean the valve path. Run a descaling treatment if you have hard water. Reindex the motor if required by your brand
Problem: Faulty motor windings
- Likely causes: Age, heat, or water intrusion
- Symptoms: No movement, open or shorted resistance, buzzing without motion
- Fix: Replace the diverter motor. Repairing windings isn’t practical for these units
Problem: Worn actuator or gears
- Likely causes: Mechanical wear over years of cycling
- Symptoms: Clicking repeats without successful switching. You may hear the motor run but the valve never changes zones
- Fix: Replace the diverter motor or the entire diverter assembly if the gearing lives inside the module
Problem: Control board not sending power
- Likely causes: Failed relay, burned trace, or software glitch
- Symptoms: Motor tests good. No voltage at the motor during the expected time. Reset doesn’t help
- Fix: Trace the wiring. If wiring checks out consider a control board replacement. That’s an advanced DIY call
Problem: Damaged or loose wiring harness
- Likely causes: Vibration, rodent damage, or a past repair that didn’t lock the connector
- Fix: Repair the harness. Replace terminals or sections of wire as needed. Reinstall connectors firmly
Leak at the diverter motor shaft seal
- Symptoms: Water under the tub near the motor. Rust, mineral trails, or wet housing
- Fix: Replace the seal if it’s available as a separate part. Otherwise replace the diverter assembly
Replacing the Diverter Motor: Step‑by‑Step
If you’ve diagnosed a bad diverter motor here’s how I handle the swap. Your exact steps may vary but the flow stays similar.
1) Get the correct part
- Use your dishwasher model number to order the exact diverter motor or diverter assembly
- I prefer OEM parts when possible. Aftermarket can work if well reviewed
- Expect the part cost to fall between about $50 and $200 depending on brand and model
2) Prepare the workspace
- Kill power and water
- Remove lower panels and pull the unit forward if needed
- Keep small containers handy for screws. Label as you go
3) Disconnect and remove
- Unplug the diverter motor connector
- Remove mounting screws or release tabs on the motor bracket
- Note the orientation or indexed position for reassembly
- Gently wiggle the motor off the valve shaft
4) Inspect mating parts
- Look at the valve shaft and seals. If you see chewed teeth or heavy wear you may need the full assembly
- Clean the area. Remove debris and mineral buildup
5) Install the new motor
- Align the shaft to the correct index position per the service info
- Seat the motor fully. Replace screws or snap the bracket in place
- Reconnect the wiring harness firmly
6) Reassemble and test
- Reattach panels loosely at first so you can observe for leaks
- Restore water and power
- Run a diagnostic or quick wash cycle
- Watch for leaks around the diverter area. Listen for clean indexing without chatter
- Confirm both upper and lower spray arms run at different times during the cycle
If everything looks and sounds right button it up fully and enjoy that fresh top rack sparkle.
Costs, Parts, and Repair vs Replace
Here’s how I coach friends through the money side.
- Diverter motor part: Commonly $50 to $200 depending on brand and availability
- Professional repair: Usually $150 to $450 including parts and labor depending on your region and the model’s complexity
- DIY difficulty: Moderate. You need to be comfortable with access, basic electrical tests, and tidy reassembly
My general “repair vs replace” guideline:
- If the dishwasher is less than 10 years old and the repair costs less than half the price of a similar new unit I repair it
- If the machine has multiple issues or it’s aging out past a decade I weigh the value more carefully
I’ve seen diverter motors last anywhere from 5 to 10 years. Water quality and usage matter. Hard water shortens the odds for mechanical parts because scale builds up everywhere.
Brand Notes and Error Codes: What They Can and Can’t Tell You
Every brand uses its own logic and lingo. Error codes can point you in the right direction but they don’t always call out the diverter by name.
A few practical tips:
- Bosch codes like E24 often refer to drain issues not diverter problems. Don’t assume a code equals a diverter failure
- Whirlpool and KitchenAid sometimes show water distribution or spray arm errors on certain models. The diverter is part of that path
- Always check your model’s tech sheet or user manual for the exact meaning of any code. The same letters can mean different things across brands
If your dishwasher shows a “water distribution” or “spray arm” error look at the diverter plus the spray arms, filters, and the circulation pump. The system works as a team.
When I Call a Pro
I enjoy DIY. I still call a pro sometimes.
- If live voltage testing makes you nervous stop and call someone. No shame in that
- If you suspect the main control board and you’re not comfortable swapping electronics call it in
- If your machine is under warranty even a partial one stop and check your coverage
- If the dishwasher has repeated failures across different systems a seasoned tech can spot patterns faster
A good technician brings experience, model‑specific tricks, and diagnostic tools. You’re paying for speed and accuracy not just part swapping.
Preventative Maintenance That Actually Helps
I’m not big on magic potions. These tips work.
- Clean filters monthly if you cook often. A clean sump protects the pump and the diverter
- Inspect and clean spray arms quarterly. Keep those tiny nozzles open
- Use the right detergent and a rinse aid. Don’t overdose pods or powder
- If you have hard water run a citric acid cleaning cycle every month or two. Scale is the enemy of moving parts and seals
- Scrape plates before loading. You don’t need to prewash but big scraps don’t help anyone
- Check for leaks under the sink and along the dishwasher regularly. Catch seal issues early
A little maintenance extends the life of the diverter, the pump, and the heating element. It keeps noise down too.
FAQs I Get From Friends and Clients
What are the most obvious signs of a bad diverter motor?
- Persistent poor cleaning on one rack. Clicking or humming under the tub. The cycle finishes yet dishes stay dirty especially on the top rack
Can a diverter motor hum but not turn?
- Yes. I’ve seen motors get voltage and only hum because the valve jammed or the internal gears stripped. That points to a mechanical failure or a stuck valve
How do I test the diverter motor with a multimeter?
- Power off. Disconnect the motor. Measure resistance across the terminals. Compare to model‑specific specs. Open or near‑zero readings are bad. If resistance looks normal and the motor still won’t run under power the issue may be mechanical or upstream
Where is the diverter motor located?
- Under the tub near the sump or circulation pump. Often on the side of the sump on Whirlpool or KitchenAid. Many Bosch models hide it near the pump assembly
Can I clean the diverter valve?
- Sometimes. If debris or scale causes the sticking you can clear it and run a descaling cycle. If gears are worn or the motor is shot cleaning won’t fix it
What if the diverter motor gets no power?
- Check the harness for continuity. If wiring checks out the main control board may not be sending power. That becomes an advanced repair
Is there a fuse for the diverter motor?
- Some dishwashers include thermal fuses for protection but not always directly tied to the diverter circuit. Check your wiring diagram
How long does replacement take?
- Usually 45 to 90 minutes if access is straightforward. Add time if you need to pull the dishwasher out or if fasteners are corroded
Conclusion: Clean Dishes and Peace of Mind
I’ve chased plenty of phantom dishwasher issues. The diverter motor sits near the top of that list because it fails in sneaky ways. One rack cleans. The other doesn’t. The pump sounds normal. The results say otherwise. When I slow down and follow this path I find the root cause without guesswork.
- Confirm the symptom points to water distribution not general pump weakness
- Clean obvious blockages and reset the control board
- Inspect wiring, seals, and the valve path
- Test continuity and voltage with care
- Free a stuck valve or replace the diverter motor if windings or gears fail
- Reassemble with intention then test for leaks and proper indexing
Do the basics well and you’ll solve most diverter issues at home. If you hit a wall hand it to a pro with a clear description of what you tested and what you found. That alone can shave an hour off a service call.
And when your top rack finally comes out sparkling again you’ll smile. I always do.