How to Test Stator Windings: A Step-by-Step Guide for Accurate Diagnostics
Testing a stator does not have to be scary. In this guide I show you how to run simple checks with a multimeter or megohmmeter. You will learn what the numbers mean and what to fix next. If your battery is not charging or your motor runs weak this can save your day and your wallet.
Table of Contents
- What is a stator and why does it matter?
- How do I know if the stator is the problem?
- What safety steps should I take first?
- What tools do I need for stator testing?
- How do I access and disconnect the stator?
- How do I do a stator continuity test?
- How do I check stator resistance the right way?
- How do I run an insulation resistance test and a stator ground test?
- What do my readings mean in plain English?
- What should I test next if the stator is good?
- Why do stators fail and how do I prevent it?
- Are there advanced tests for pros?
- How much does it cost to fix or replace a stator?
- Tips for rock solid readings
- References
- FAQ
- Key takeaways
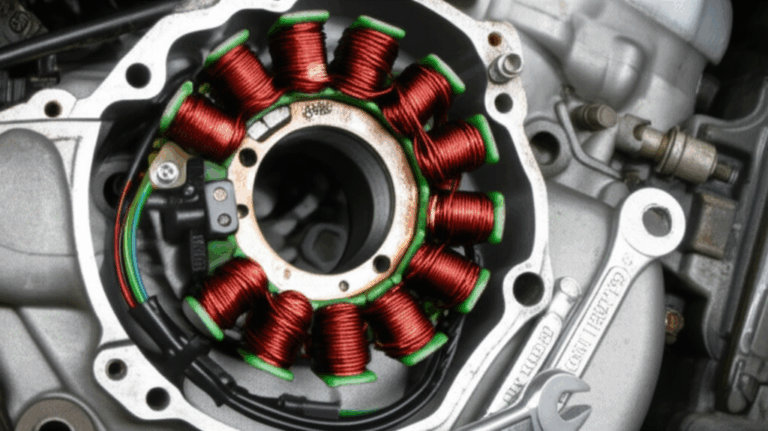
What is a stator and why does it matter?
Here’s the big picture. The stator is the still part of an electric motor, an alternator, or a generator. It holds coils called windings. The rotor spins inside it. Together they make voltage and current. This powers your charge system and your load. Think of the stator as the heart of your electric circuit. It does not move yet it makes the magic with magnetism.
Now the Problem. A weak stator can stop a motorcycle engine from charging. It can make a small engine fail to light a lamp. A generator can drop output. Your battery not charging test fails. You get a no charge stator test. You smell a burnt stator smell. It is not fun.
Let’s Agitate it. You swap parts at random. You waste time and cash. You miss the real fault. The lights stay dim. The job runs late.
Here is the Solution. Do a simple motor stator winding test. Use a digital multimeter. Use a megohmmeter if you have one. Follow this stator troubleshooting guide. You will run a stator continuity test, a phase to phase resistance test, and an insulation resistance test stator. You will see if you have a short circuit, an open circuit, or a ground fault. Then you can fix the right thing.
How do I know if the stator is the problem?
I ask one key question. What does a bad stator do? It drives a few classic signs. Shorted stator symptoms show up as low output. You may see the battery light on. You may see a drop in voltage at idle and at speed. You may see engine misfires in a motorcycle engine. You may get a weak spark on small engines. You may get no AC out of the alternator.
I also look for stator failure warning signs. Listen for odd noise. Watch for heat. Look for dark or burnt windings. Check for melted end winding insulation. Smell the varnish. If it smells burned you likely have winding degradation symptoms. Use your eyes and nose. Then confirm with tests.
If you run a vehicle charging system test and it fails the stator could be bad. Yet it could be the regulator/rectifier or a bad battery. So we test step by step. That is smart electrical system troubleshooting.
What safety steps should I take first?
I keep safety first. It is not optional. Follow these safety precautions electrical.
- Disconnect the power source. Pull the battery negative cable. Open the main breaker. Wait a minute for caps to drain.
- Wear PPE. Use safety glasses. Use insulated gloves if you work near live circuits. Do not touch bare metal parts.
- Understand electrical hazards. A megohmmeter can output 500 V to 1000 V. That can bite. A live alternator can cut you. Moving rotors can hurt your hands.
I follow basic electrical safety for stator testing. I also read the service manual and wiring diagram before I touch anything. It shows the stator connection types and the stator wiring diagram. It shows where to unplug. It lists stator winding resistance specifications and acceptable stator resistance values.
What tools do I need for stator testing?
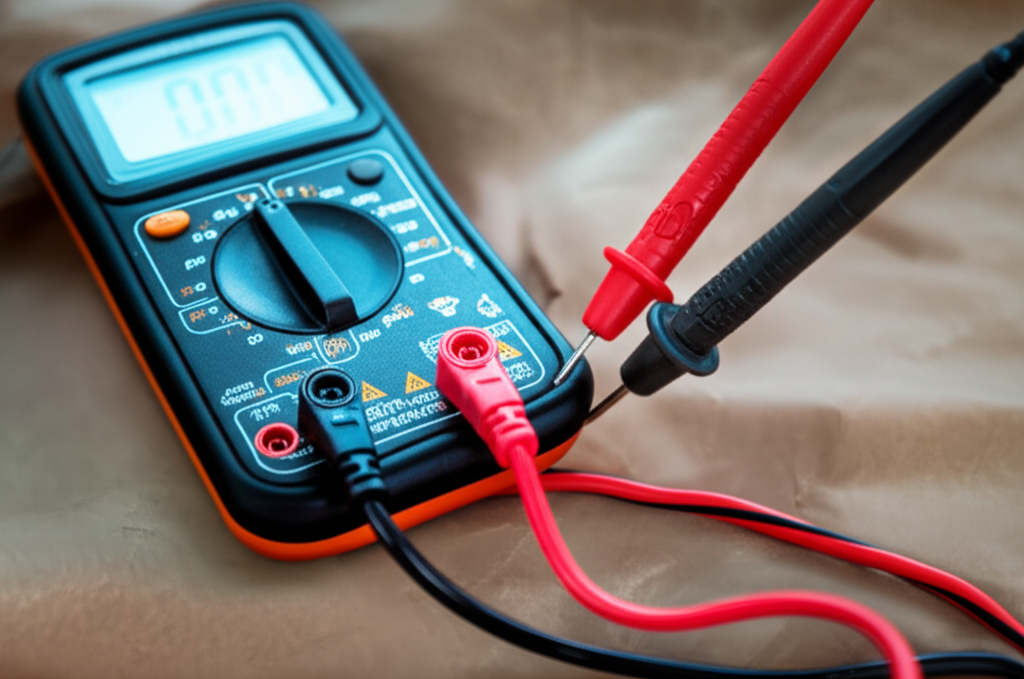
You do not need a lab. You need a small kit. Here are the tools for stator testing and motor diagnostic tests.
- Digital Multimeter (DMM). Make sure it has a low Ohms range and a beep for continuity. This gives proper multimeter settings for stator tests. You can test stator with ohmmeter too if it is analog.
- Megohmmeter (Megger). This is for insulation resistance testing (IRT). You can run a dielectric strength test and a polarization index test (PI) and a dielectric absorption ratio (DAR) if needed.
- Test leads for stator windings with sharp tips. Clean clips help a lot. Use good test leads.
- Hand tools. Screwdrivers and wrenches. You will need them for accessing stator windings.
- Service manual. It shows the motor winding resistance chart and NEMA standards for windings where needed. It also lists acceptable insulation resistance if given.
If you work on boats get a meter that handles moisture. If you work on bikes get small probes. It helps on tight spaces during motorcycle stator testing or outboard motor stator test.
How do I access and disconnect the stator?
I like a clean work area. Dirt makes bad readings. Here is how to disconnect a stator the easy way.
- Locate the stator. In an alternator it sits inside the case. In a small engine it sits under the flywheel. On a generator it sits in the frame.
- Disconnect stator wires from the regulator/rectifier. You want the stator floating. This gives you true readings.
- Clean the plugs. Do a quick wipe on the pins. Cleaning stator terminals gives better contact and more honest numbers.
- Take a photo. Snap the stator wiring diagram as you see it. You will plug it back the same way.
I treat this like prep in Small Engine Repair. A little time here saves a lot later.
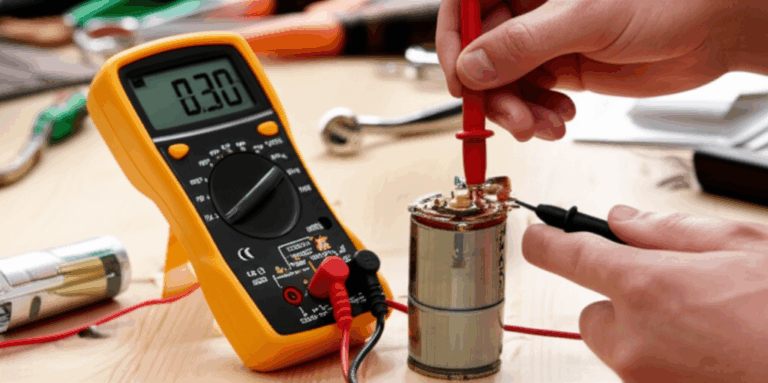
How do I do a stator continuity test?
A continuity check is fast. It catches an open stator winding test. It also gives a hint of short problems. I call it a winding integrity test. Here is how to do checking for open circuits the right way.
- Set your meter to Continuity or the lowest Ohms range.
- Touch the probes together. Make sure it beeps. That proves your leads work.
- Place the probes across each winding or phase pair. On a three phase stator test touch A to B, B to C, and C to A. On a single phase motor stator test touch the two coil ends.
- Listen for a beep or watch for a low reading.
Interpreting stator readings is simple here. If the meter shows OL or 0L or it does not beep you have an open circuit. That is bad. If you get a low value like 0.1 to 2 Ohms the circuit is continuous. That is good.
This quick stator coil test finds a broken wire. It will not catch a turn-to-turn fault. So we keep going.
How do I check stator resistance the right way?
Now we go deeper. You want to know how to check stator resistance with a DMM. This shows shorts and damage. It also helps with comparing phase resistances.
- Zero your meter leads if it has REL mode. Low resistance winding test needs a clean baseline.
- Set the meter to Ohms on a low range.
- For a three phase stator test measure phase to phase resistance test. Touch A to B. Then B to C. Then C to A.
- For a single phase or delta or wye winding test measure each coil as the manual shows.
- Note the values. Use the motor winding resistance chart or the service manual to check the good stator resistance range.
Here is what I look for. Consistent low resistance readings across phases show balance. That is good. A significantly lower reading than spec or than the other phases shows a winding turn-to-turn short. That is bad. A significantly higher reading or OL shows damage or an open winding. That is bad. Watch for winding temperature effects on resistance. A hot winding reads higher. Test at room temp if you can.
If you wonder when to test a stator do it after a battery not charging test or when you see low AC out of the stator. That timing helps you catch faults early.
How do I run an insulation resistance test and a stator ground test?
This step checks for leaking current from the coil to the stator core. It is also called a phase to ground resistance test. You can use a DMM for a quick check. A megohmmeter gives better data. Here is how to use a megohmmeter for stator checks.
Using a multimeter:
- Set it to the highest Ohms range in MΩ.
- Clip one lead to the winding end. Clip the other to the stator core metal.
- You want infinite or very high resistance. If you see a low value you likely have a ground fault.
Using a megohmmeter:
- Pick a test voltage. 500 V fits many low voltage machines. Some tests use 1000 V. Check the insulation class and the service manual.
- Clip one lead to the winding. Clip the other to the core.
- Press test. Read the value in MΩ. This is a stator ground test and an insulation resistance test stator in one.
Acceptable insulation resistance depends on standards. IEEE 43 insulation test gives guidance. A common rule of thumb for low voltage gear says readings below 0.5 MΩ are not OK. For higher voltage machines IEEE and NEMA give formulas. When in doubt follow the service manual.
If you want more detail you can run a polarization index test (PI) and a dielectric absorption ratio (DAR). These track the ratio of IR at one minute to IR at ten minutes. Low ratios point to moisture ingress damage or dirt.
What do my readings mean in plain English?
I like a simple map. Use this table to match your numbers with health.
| Test | Good Reading | Bad Reading | What It Means |
|---|---|---|---|
| Continuity | Low Ohms or beep | OL or no beep | Open circuit if bad |
| Phase-to-phase Ohms | All phases match within spec | One low or one high vs spec | Low means short. High means open or damage |
| Phase-to-ground (IR) | Very high MΩ | Below 0.5 MΩ on low voltage | Ground fault or wet winding |
| Stator voltage output test | AC volts rise with RPM | No rise or very low | Short or open in coils or bad magnets |
If all basic tests pass the stator may be fine. Now you test other parts. If the stator fails you repair or replace it.
What should I test next if the stator is good?
If the stator tests good move on. Run a rectifier regulator test. Check the regulator/rectifier for proper DC output and ripple. Run a vehicle charging system test from end to end. Inspect the battery (vehicle) for health and state of charge. Check the electrical circuit for loose grounds and broken wires. Use a wiring diagram to trace each path.
On motorcycles and small engines check the flywheel magnets. On generators check the field. On alternators check the armature and brushes if used. Stator vs rotor problems can look alike. A weak rotor can mimic a weak stator.
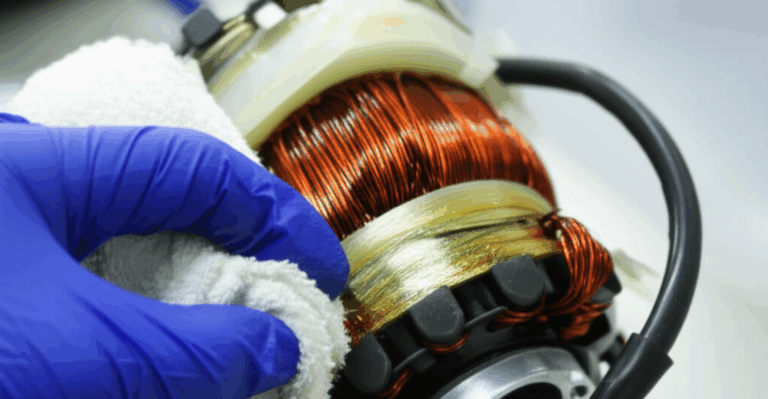
Why do stators fail and how do I prevent it?
I ask why stator fails before I replace it. Common stator failures come from heat, moisture, dirt, and vibration. Causes of stator failure include thermal overload, lubricant contamination stator, slot insulation failure, and end winding rub. Vibration analysis motors can reveal issues early.
Preventative stator maintenance is smart. Keep vents clean. Fix cooling fans. Seal leaks. Use thermal imaging stator scans to spot winding hot spot detection. Clean connectors. Check winding insulation with regular IRT. Schedule preventive maintenance per NEMA and IEEE good practice.
Core quality matters too. A good stator core helps lower heat and loss. If you ever rebuild or upgrade look at the quality of the stator core lamination. High grade motor core laminations with tight stacks and clean slots support the winding and the slot insulation. A well made rotor core lamination and premium electrical steel laminations reduce eddy losses and heat. This helps the winding live longer. It also boosts efficiency and output.
Are there advanced tests for pros?
Yes. Professional stator testing goes beyond static checks. Shops use dynamic motor testing with power on. They watch current and voltage under load. They compare phases. They record waveforms. They run static motor winding testing with high end meters.
They may use a growler test for stators and rotors in older designs. They can run surge comparison testing to spot interturn fault detection. They can run partial discharge testing on high voltage windings. They can measure inductance testing windings and capacitance testing windings phase by phase. They can do magnetic field testing stators to check field balance.
Core tests matter. Stator core testing checks the core for shorts. Lamination insulation test finds hot spots due to poor insulation between laminations. Eddy current testing stators can spot cracks and flaws in metal. These tests need skill and care.
How much does it cost to fix or replace a stator?
Stator replacement cost varies a lot. A motorcycle stator can be a few hundred dollars. A large electric motor stator can cost much more. You can rewind coils or buy new. A shop can advise you. Professional stator testing costs less than a new stator most of the time. If your winding is burned and the core is fine a rewind can work.
Do not forget the hidden cost. Downtime hurts. Preventive Maintenance based on IEEE and NEMA guidance can cut unscheduled shutdowns by a large amount. Many plants report big savings when they add routine insulation resistance tests and trend the data.
Tips for rock solid readings
I have learned a few simple habits. They help a lot.
- Test at room temp. Winding temperature effects on resistance can trick you.
- Use clean probes. Sand light corrosion. Tighten clips.
- Use a calibrated Digital Multimeter (DMM) and a trusted megohmmeter.
- Note ambient humidity. Moisture ingress damage lowers IR. Dry the stator and retest if IR is low.
- Read the Service Manual. Follow NEMA standards for windings and IEEE practices when given.
- Record results. Build your own troubleshooting guide. You will solve the next fault faster.
References
- IEEE Std 43-2013. Recommended Practice for Testing Insulation Resistance of Rotating Machinery. IEEE.
- NEMA MG 1. Motors and Generators. National Electrical Manufacturers Association.
- IEC 60034-1. Rotating electrical machines. Rating and performance. IEC.
- Major OEM Service Manuals for alternators, generators, and motorcycle engines.
- Fluke and Megger application notes on IRT, PI, and DAR.
- Reliabilityweb.com articles on preventive maintenance.
FAQ
Q: Can I test stator windings without taking the motor apart?
A: Yes. You can unplug the stator leads and test at the connector. That works for an alternator stator test, an ac generator stator test, a motorcycle stator testing job, or a small engine stator test.
Q: What if I see low but not zero Ohms to ground with a DMM?
A: Try a megohmmeter. A DMM may not show leakage well. If the megger shows below 0.5 MΩ on a low voltage system you likely have a ground fault.
Q: Do I need to know Ohm’s Law for stators?
A: A little helps. Ohm’s Law says V = I × R. If R drops due to a short then current climbs. Heat goes up. That can cause more damage fast.
Q: What if only one phase in a three phase stator is off?
A: That is a red flag. One bad phase can cause overload on the others. Fix it before you run the machine again.
Q: Should I use a motor winding resistance chart?
A: Yes. Charts and the service manual give targets. They help you see drift over time.
Extra help across machines
You can use the same steps on many machines.
- Alternator and generator stator diagnostics: Run continuity, resistance, and insulation tests. Then run the stator voltage output test.
- Outboard motor stator test: Salt and moisture are common. Focus on insulation resistance testing (IRT).
- DC motor stator winding and armature checks: The stator is often a field coil. Test resistance and test generator windings for shorts if it is a compound or shunt field.
- Single phase and three phase machines: Follow the delta winding test or wye winding test per the drawing.
Clear walk-through with PAS
Problem: Your engine runs yet the battery dies. Your generator hums yet lights are dim.
Agitate: You swap the regulator/rectifier. No change. You buy a new battery. No joy. Time runs out.
Solution: Grab your multimeter. Unplug the stator. Run the continuity test. Run the phase to phase resistance test. Run the stator ground test with a megohmmeter. Compare to specs. Decide with facts.
Problem: Your stator keeps failing every season.
Agitate: Repairs eat your budget. Downtime ruins your schedule.
Solution: Add preventive tests. Clean connectors. Improve cooling. Choose quality laminations and cores when you rebuild to lower losses and heat. Strong cores and clean slots protect end winding insulation and reduce slot insulation failure.
Data you can use today
Here is a quick stats table you can use on the job.
| Category | Data | Notes |
|---|---|---|
| Common failure modes | Insulation breakdown can account for about 30–40% of motor failures | Heat ages insulation. Keep it cool |
| Typical phase-to-phase resistance (small engines/motorcycles) | 0.1–1.5 Ω | Check your service manual for exact values |
| Typical larger AC motor resistance | 0.5–5 Ω | Varies with design |
| Insulation resistance guideline | Above 0.5 MΩ for low-voltage machines | Follow IEEE 43 and OEM specs |
| Temp effect on copper | ~0.39% per °C | Test cold when you can |
| Maintenance impact | Routine testing can cut downtime a lot | Many shops report large savings |
Note: Always follow the OEM and standards for your exact machine.
Meet the need with better cores
When you test and repair you want the winding to live long. The core under the winding matters. Tight laminations reduce eddy losses and heat. Smooth slots protect slot insulation. Good steel cuts stray losses. That keeps your winding safe. If you rewind or design a motor look at premium laminations and cores. High quality stacks and clean stampings help you reach long life and strong output. Your winding can run cooler and work harder with less stress.
DIY stator testing tips you can trust
- Start with visual checks. Look for dark spots, loose lacing, or cracked varnish.
- Check connectors. Corrosion causes heat and voltage drop.
- Set proper multimeter settings for stator work. Use the low Ohms range.
- Keep notes. Trend resistance and IR over time. You will catch winding degradation symptoms early.
- Do both static and dynamic tests. Static tests find opens and shorts. Dynamic tests find problems under load.
Advanced notes for curious readers
If you like to dig deeper here are more tests and ideas from Electrical Engineering practice.
- Surge comparison testing can find tiny interturn shorts that DC Ohms cannot see.
- Partial discharge testing helps on high voltage machines where small defects can grow.
- Thermal imaging stator scans let you spot hot joints and loose connections.
- Vibration analysis motors can point to looseness that chews on winding lacing.
- Magnetic field testing stators reveals unbalanced phases.
- Inductance testing windings and capacitance testing windings can show shorted turns.
- Lamination insulation test and eddy current testing stators can show core faults that cause extra heat.
These tests often need pro gear and skill. Use a trusted shop for professional stator testing when the job calls for it.
Tables you can print and use
Quick method guide:
| Method | Purpose | Meter | Target |
|---|---|---|---|
| Continuity | Find opens | DMM | Beep or low Ω |
| Resistance | Find shorts or damage | DMM | Phases match within spec |
| Insulation to ground | Find ground faults | Megger | High MΩ |
| Output AC check | Confirm under run | DMM AC | Volts rise with RPM |
Output symptoms cheat sheet:
| Symptom | Likely Cause | Next Step |
|---|---|---|
| No charge at battery | Open stator or bad regulator/rectifier | Continuity test then rectifier regulator test |
| Low AC from stator | Shorted turns or weak rotor magnets | Resistance test then rotor check |
| Hot stator and smell | Ground fault or overload | IR test then load check |
| Intermittent output | Loose connector or cracked solder | Inspect and reflow |
A note on standards and specs
Standards exist to guide you. IEEE and NEMA documents support good practice. IEEE 43 insulation test methods and NEMA MG 1 winding guidelines help you decide what is safe. OEM specs rule for your machine. Always check your model in the Service Manual and Wiring Diagram.
Close the loop: Fix the real problem
You came here to fix a charging or power problem. Now you can. You ran checks. You saw the numbers. You know if you have checking for short circuits, checking for open circuits, or checking for ground faults. You know if you face high resistance winding test or low resistance winding test issues. You can move with confidence.
If the stator is bad you can replace it or rewind it. If the stator is fine you can chase other faults. Either way you win because you found the truth fast.
Summary: Most important things to remember
- Disconnect power before you test
- Run three core tests: continuity, resistance, and insulation to ground
- Compare your readings to the service manual specs
- Watch for heat, moisture, and dirt. These cause most failures
- Use good tools and clean probes for accurate numbers
- Check the regulator/rectifier and wiring if the stator tests good
- Choose quality cores and laminations when you rebuild to reduce heat and extend life
- Follow IEEE, NEMA, and OEM guidance for safe limits and methods
Bold terms used in this guide: Stator, Winding, Multimeter, Ohmmeter, Megohmmeter, Alternator, Electric Motor, Generator, Resistance, Continuity, Insulation, Ground Fault, Short Circuit, Open Circuit, Phase, Rotor, Armature, Ohm’s Law, Electrical Safety, Magnetism, Motorcycle Engine, Outboard Motor, Small Engine Repair, Diagnostic Tools, Preventive Maintenance, Electrical Engineering, Voltage, Current, Inductance, Capacitance, Thermal Overload, Dielectric Strength, Insulation Resistance Testing (IRT), Polarization Index (PI), Dielectric Absorption Ratio (DAR), Growler Test, Test Leads, Wiring Diagram, Service Manual, Battery (Vehicle), Regulator/Rectifier, Charge System, Electrical Circuit, Fault Diagnosis, Troubleshooting Guide, NEMA, IEEE, Digital Multimeter (DMM), Insulation Class, Coil.