How to Test a Stator Without Removing It: A Comprehensive Guide to In-Vehicle Diagnosis
You can test a stator fast without pulling it out. In many cases you should. This guide shows you how. You’ll learn the simple steps. You’ll also learn what the numbers mean. If you want to fix a no-charge problem and save time this article is worth your read.
Table of Contents
- Can you test a stator without removing it
- What is a stator and how does it work
- What symptoms point to a bad stator
- What tools do I need for a DIY stator test
- What should I check first before I blame the stator
- How do I run the AC voltage output test
- How do I test stator resistance with the engine off
- How do I test for a short to ground
- How do I read the results and know if the stator is good or bad
- What if the stator tests good yet the battery still does not charge
- When do I need to remove the stator
- Safety tips you should follow
- Real world results and time savings
- Quick diagnostic chart for charging problems
- Do I need better parts and better steel laminations
- FAQ
- Summary
Can you test a stator without removing it
Yes. You can test a stator in place on a motorcycle or ATV or generator or scooter or lawn mower. I do it all the time. It saves time and money. It also avoids new gaskets and long labor. For a first check you should test in-vehicle.
Here is the Problem. Your battery keeps dying. Lights flicker. The engine runs rough. You think the stator failed. You fear a big repair. Here is the Agitate. You need the ride for work or fun. You do not want to wait for parts or pay for a tear down that you may not need. Here is the Solution. Do three simple tests with a multimeter. You will know if the stator is bad. You can do this with the engine in the frame.
What is a stator and how does it work
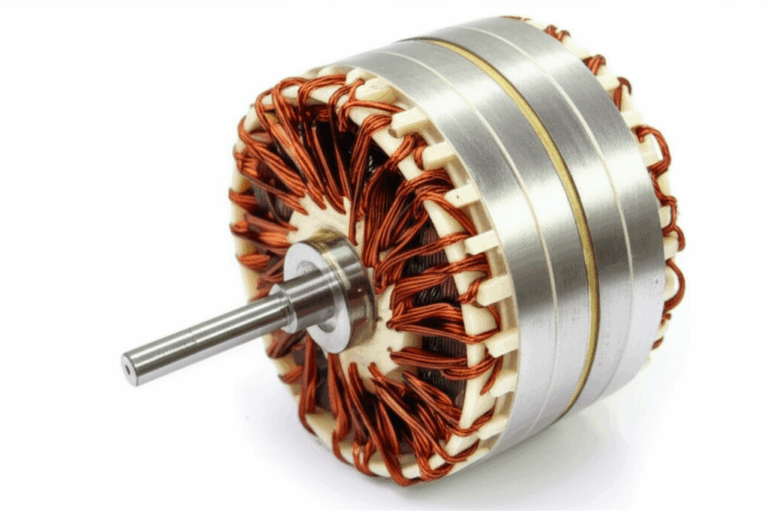
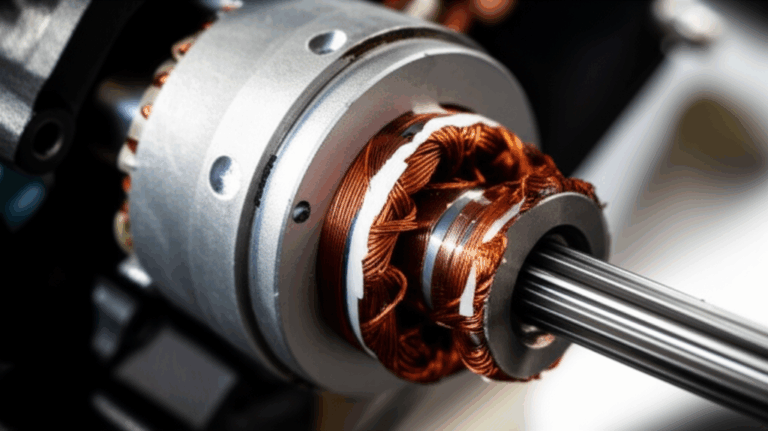
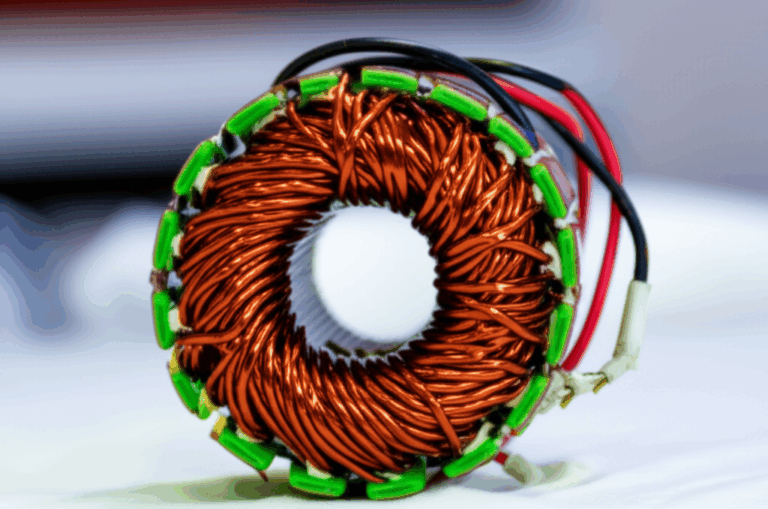
A stator is the fixed set of copper windings that makes AC voltage when the engine turns the flywheel. The flywheel holds permanent magnets. As magnets spin past coils they make power. A rectifier/regulator changes AC to DC and keeps voltage safe. That DC charges the battery and runs lights and the electrical system.
Some people ask how a stator differs from an alternator. On many bikes the stator and magneto sit inside the engine. On many cars an alternator sits outside with a belt. Both make power. The stator is the still part. The rotor is the spinning part. In a three-phase system you see two or three yellow or white stator wires at a stator connector. In a single-phase system you may see two wires.
Good stator cores use tight stator core lamination stacks. Laminations help cut losses and heat. That matters for long life at high RPM. The rotor also uses precise steel stacks. You can learn more about rotor core lamination and how it helps smooth output and cut noise.
What symptoms point to a bad stator
Watch for these common signs:
- Dead or weak battery after a ride.
- Flickering lights or dim lights at idle.
- Engine misfires or poor running from low voltage.
- No charging voltage at the battery.
- A burnt smell or discolored wires near the stator area.
You may also see a voltage drop at the battery with the engine running. Or you feel heat at the cover near the flywheel. In some cases the bike cranks but will not start. That can be a stator trigger issue on some ignition coil systems. On many Harley-Davidson, Honda, Yamaha, Kawasaki, and Polaris models a shorted stator can shut down the charging system and drain the battery fast.
What tools do I need for a DIY stator test
You do not need special tools. Use this list:
- A digital multimeter that reads AC volts, DC volts, ohms and continuity.
- A service manual with specifications and a wiring diagram.
- Basic hand tools to reach the wiring harness and stator plug.
- Alligator clip test leads. These make hands-free tests easy.
- A battery charger to top off the battery.
- Optional tools: a test light, an ammeter for charge current, and an ohmmeter with low-range accuracy.
If you wonder about the best meter look for a clear screen and good low-ohm range. Many techs like meters from Fluke or Klein. Make sure it reads at least 200 VAC and shows tenths of an ohm.
What should I check first before I blame the stator
Start with the battery condition. Charge it. Then load test it. A bad battery can fake a stator fault. Check battery DC voltage at rest. Check DC voltage at idle and at 3,000 to 5,000 RPM. A healthy system shows about 13.5 to 14.8 volts at the battery at speed.
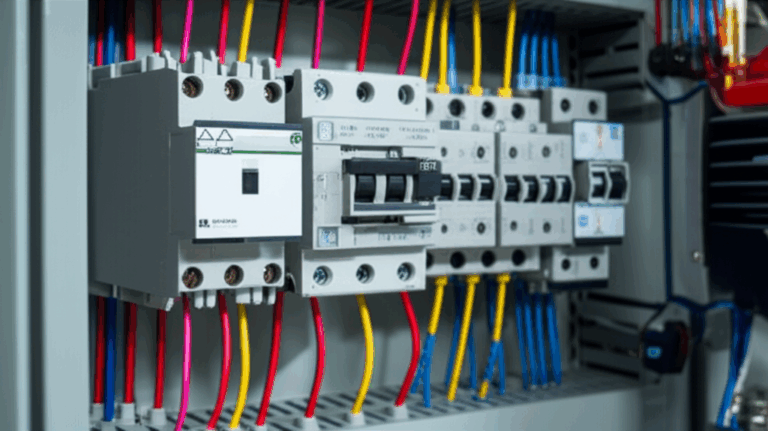
Next look at the rectifier/regulator. It changes AC to DC and keeps voltage stable. A bad reg/rec can cause no charge or overcharge. If your stator makes good AC and the battery still sees no rise in DC then the reg/rec may be bad.
Now look at wiring & connections. Check the ground wire. Look for green crust at plugs. Tug gently on the test leads and harness. Fix loose or burnt pins. Many no-charge cases come from dirty plugs and a broken wiring harness.
How do I run the AC voltage output test
Test 1: AC Voltage Output Test (Engine Running)
Purpose: Check raw stator AC voltage before it hits the reg/rec.
Procedure:
Interpreting results:
- At speed you often see about 40 to 70 VAC per pair. Some systems read higher. Check your specifications in the manual.
- The three pairs should be close to the same. A pair that reads low points to a faulty winding.
- No output on one pair can mean an open circuit. Near zero on all pairs can mean a failed rotor magnet or a broken ground.
Note: Some meters show peak voltage. That helps on magneto testing and some ignition tests. For charging you just need steady AC volts.
How do I test stator resistance with the engine off
Test 2: Resistance (Ohms) Test (Engine Off)
Purpose: Check for open circuits or shorts between windings.
Procedure:
Interpreting results:
- Most stators read very low. Often 0.1 to 1.0 Ω. Check the service manual.
- An “OL” reading means an open circuit. That is bad.
- A value way off from the spec means a problem. If one pair reads much higher or lower than the others that phase is bad.
- Results should be consistent across all pairs in a three-phase stator. A single-phase stator will have just one pair.
Pro tip: Touch the meter leads together to note lead resistance. Subtract that from very low readings if your meter does not auto-compensate.
How do I test for a short to ground
Test 3: Ground Fault or Short-to-Ground Test (Engine Off)
Purpose: Check if a winding has shorted to the engine block.
Procedure:
Interpreting results:
- You want “OL” or no beep on every wire. That means no ground fault.
- A beep or a near-zero ohm reading shows a short circuit to ground. The stator is bad.
Ground faults often come with burnt stator smell or stator wire discoloration. If you smell burnt varnish you likely have heat damage.
How do I read the results and know if the stator is good or bad
A good stator passes all three tests. It makes strong and even AC volts at idle and at higher RPM. It shows ohms that match the spec. It shows no continuity to ground.
A bad stator shows one or more failed signs. Low or no AC output on a pair. An open loop ohm reading on a pair. A short to ground. Or results that do not match the service manual. If your tests show faults you can plan a stator replacement or generator stator repair.
I also like a quick DIY stator test that uses a test light across pairs while revving. The light should glow bright and even. A dim or dead pair hints at a bad phase. Use a meter for final numbers.
What if the stator tests good yet the battery still does not charge
Don’t panic. Work the rest of the system.
- Check the regulator/rectifier. Many no-charge cases trace back to this box. If AC input is strong and DC output is weak the reg/rec is suspect. Follow the OEM stator testing guide and the reg/rec test in your manual.
- Check the main wiring harness. Do a voltage drop test on the ground and the charge wire. High drop means a bad connection.
- Inspect flywheel magnets. On some bikes magnets can crack or slip. If the stator passes yet AC output seems low at all pairs you may have a rotor issue.
- Test charging system voltage readings at the battery with an ammeter. If the system shows volts but not amps you may have a battery issue.
If all tests pass and the battery still dies you might have a parasitic draw. Or a faulty ignition coil that pulls power. Track it with your meter.
When do I need to remove the stator
You remove the stator when the in-vehicle tests point to a bad winding. You also remove it when you see melted epoxy or broken wires. If tests are inconclusive and you smell burnt windings you should pull the cover for a visual inspection.
On some ATV, snowmobile, and marine engine setups the stator sits deep. Removal can be slow. In those cases the in-vehicle tests can save 30 to 90 minutes per job. If you confirm the fault you can order parts once and do the job once.
If you choose a new stator pick quality parts. Good steel and tight stacks run cooler. If you build or rebuild motors you can learn about full motor core laminations and why they matter in the long run.
Safety tips you should follow
- Work in a well-ventilated area.
- Keep fingers and clothes away from hot parts and spinning parts.
- Secure the bike or generator before you start it.
- Disconnect the battery when you work on the wiring.
- Wear gloves and eye protection.
- Use insulated alligator clips so your hands stay clear.
Real world results and time savings
Shops and riders use these tests every day. In my experience and from what techs share in manuals and forums the method works fast. You can spot open windings and shorts to ground and low output in minutes. You also avoid unnecessary stator removal when the real fault sits in the regulator/rectifier or the wiring harness.
Here is a simple table of typical results and gains. These numbers reflect common shop observations and published tool specs.
| Metric or Finding | Typical Value or Observation | Source or Context |
|---|---|---|
| Diagnostic success rate | 85% to 95% of stator faults found with in-vehicle multimeter tests | Shop workflows, OEM diagnostic guides |
| Time saved per job | 30 to 90 minutes saved vs full removal | Tech estimates and DIY reports |
| Cost savings | $50 to $200+ in labor saved before teardown | Average shop rates |
| Common failure modes | Open circuits 40% to 50%. Short to ground 30% to 40%. Low AC output 10% to 20% | Field failures and service notes |
| Other culprits | 60% to 70% of no-charge cases come from battery or reg/rec or wiring | Diagnostic flow practice |
| Multimeter accuracy | ±1% to ±2% is enough for ohms and volts in stator ranges | DMM tool specs |
Quick diagnostic chart for charging problems
Below is a small chart you can use as a stator diagnostic chart or charging system flowchart.
| Symptom | Likely Cause | Test to Run |
|---|---|---|
| Battery does not charge | Bad reg/rec or stator or wiring | AC output test then DC battery test |
| Lights flicker at idle | Low AC output at idle or weak battery | AC idle test, battery load test |
| Battery dies overnight | Parasitic draw or bad battery | Key-off draw and battery test |
| Hot cover and burnt smell | Short to ground or overheated windings | Ground fault test, visual check |
| High volts at battery | Failed regulator | DC volt check at RPM |
This flow will work for motorcycle, ATV, generator, outboard motor, scooter, and lawn mower. It also works for Briggs and Stratton engines and many Harley-Davidson and Polaris setups.
Do I need better parts and better steel laminations
Strong charging starts with strong cores. The quality of the steel and the stack can make or break your stator. Tight stacks and clean edges reduce eddy currents and heat. That helps stop stator overheating symptoms and boosts stator longevity.
If you build motors or spec parts take a look at high grade electrical steel laminations. These laminations go into stators and rotors. Many motor builders also use silicon steel laminations or CRGO and CRNGO grades in transformer lamination cores and EI core or UI lamination core designs. Good cores improve stator output consistency, reduce voltage drop, and fight stator resistance too high from hot windings. Good parts also support single-phase and three-phase designs across small engines and BLDC stator cores used in e-bikes and tools.
If you buy a replacement stator look for OEM specs and a solid warranty. If you choose aftermarket parts make sure the specifications match your service manual. Use a wiring diagram to confirm wire color and pin order. If you test and confirm a fault you can replace with confidence and stop the guesswork.
FAQ
Q: Can I test a stator with the engine off only
A: You can do the resistance test and the ground fault test with the engine off. You still need the AC output test with the engine running. That shows power the stator makes at idle and at higher RPM.
Q: What AC voltage should I see
A: Many systems show 40 to 70 VAC per pair at about 3,000 to 5,000 RPM. Some read higher. Always check your service manual for the exact stator output voltage specification.
Q: My readings change a lot when I rev. Is that normal
A: Some rise is normal. They should rise smooth. A big jump or a dead spot can mean a weak phase or rotor issue.
Q: Can I test a magneto the same way
A: Yes. The steps are the same for most small engine magnetos and alternators that feed a rectifier/regulator.
Q: What if I do not own a meter
A: Borrow one or buy a simple meter. You can try a test light for a quick stator bypass test yet a meter gives you real numbers.
Q: Will this work on a Yamaha or Kawasaki or Honda or Harley-Davidson or Polaris ATV
A: Yes. The steps work for many brands. Always confirm the specifications in your book.
Q: Can a bad stator cause an engine crank no start
A: Yes on some systems. If the stator also feeds the ignition trigger a failed winding can kill spark.
Q: How do I prevent stator failure
A: Keep the battery healthy. Fix loose plugs. Use tight grounds. Choose quality parts and solid laminations. Good airflow and clean oil help remove heat.
References
- OEM Service Manuals for Honda, Yamaha, Kawasaki, Harley-Davidson, Polaris, Briggs & Stratton
- Fluke Digital Multimeter User Guides
- Electrical Machine Design texts on laminated cores and losses
- Manufacturer charging system diagnostic guides
Summary
- You can test a stator in place fast.
- Run three tests: AC output, ohms, and ground fault.
- Charge and load-test the battery first.
- Check the rectifier/regulator and wiring harness.
- A good stator shows even AC volts across all pairs.
- A bad stator shows open windings or a short to ground or low output.
- Use your service manual for specifications.
- Quality laminations and parts boost life and cut heat.
- If the stator passes you likely have a reg/rec or wiring issue.
- Stay safe. Use a good multimeter and wear PPE.
At-a-Glance: Who This Helps
- Riders with a no charge diagnosis stator issue.
- DIYers doing a quick stator check on a motorcycle, ATV, dirt bike, snowmobile, outboard motor, generator, scooter, or lawn mower.
- Owners facing a dead battery stator check or weak battery stator test.
- Techs comparing reg/rectifier vs stator failure and looking at charging system voltage readings at idle and at speed.
- Anyone who wants clear steps for multimeter test for stator, stator AC voltage test procedure, stator open circuit test, stator short to ground test, testing windings for open circuits, and testing windings for short circuits.
As you test and troubleshoot remember this. Good design and good steel make good power. If you ever rebuild or spec cores go deeper and study quality stator core lamination stacks and precise rotor core lamination builds. And if you work in motor design or repair look into premium electrical steel laminations and full motor core laminations for long run reliability and cooler windings.