How to Test a Stator: A Comprehensive DIY Guide to Diagnose Charging Issues
Table of Contents
- Understanding Your Vehicle’s Stator: What It Does and Why It Fails
- Essential Tools for Stator Testing
- Safety First: Before You Begin Stator Testing
- Step-by-Step Stator Testing Procedures
- Step 1: Visual Inspection for Obvious Damage
- Step 2: Resistance (Continuity) Test for Open or Shorted Windings
- Step 3: Ground Fault Test (Short to Ground)
- Step 4: AC Voltage Output Test (Engine Running)
- Platform-Specific Notes: Motorcycle, ATV, Car, Generator, Marine
- Interpreting Your Stator Test Results and Next Steps
- FAQs and Troubleshooting Tips
- Preventative Maintenance and Stator Lifespan
- Conclusion: Confidently Diagnosing Your Charging System
Understanding Your Vehicle’s Stator: What It Does and Why It Fails
I still remember the first time a stator sent me on a wild goose chase. The bike wouldn’t hold a charge. The battery was new. The lights dimmed at idle then brightened with a blip of the throttle. I chased fuses and grounds. The culprit sat quietly in the engine case. The stator.
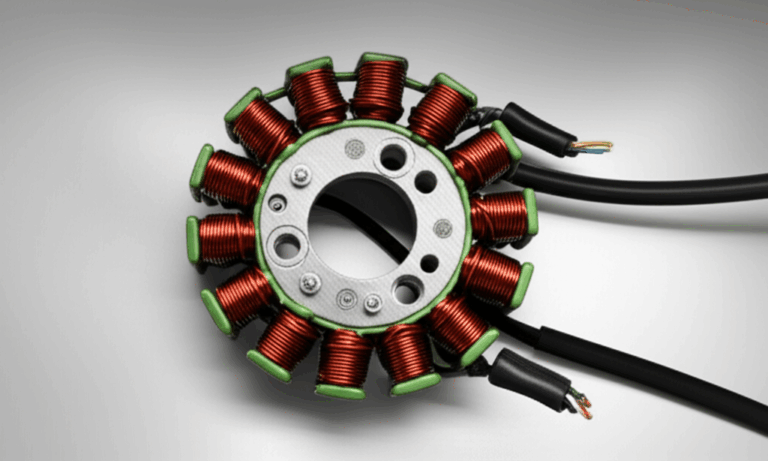
What is a stator? In simple terms, it’s the stationary part of an alternator or magneto. The rotor or flywheel spins around it with magnets. That spinning magnetic field induces AC voltage in the stator windings. The rectifier and voltage regulator then convert and control that AC to charge your battery and run the electrical system.
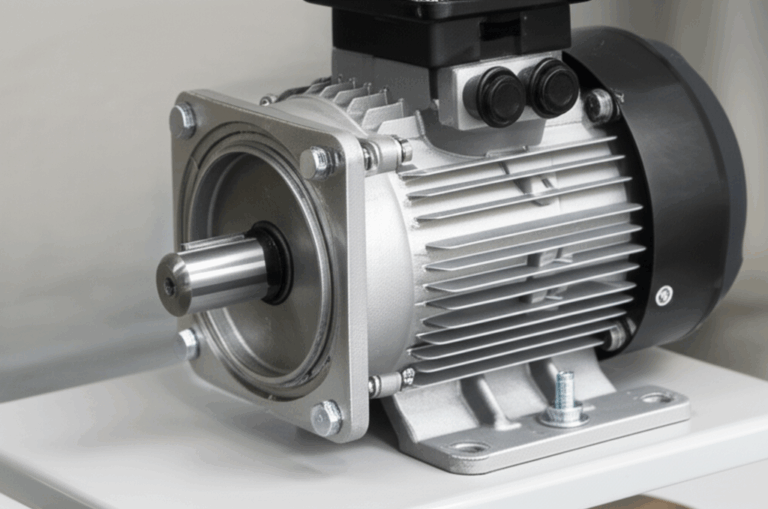
You’ll see stators in motorcycles, ATVs, UTVs, snowmobiles, outboards, generators, and small engines. Cars use alternators that house a stator inside the alternator case. The idea stays the same. Stationary windings plus a spinning magnetic field equals charging.
Stators can be single phase or three phase. Many modern bikes and ATVs use three-phase setups with three similar wires from the engine. Older bikes, small engines, and some generators use single-phase systems with two wires. That detail matters when you test.
Common symptoms of a bad stator:
- Dead battery after a ride or a battery that never seems to charge
- Dim headlights at idle and brighter at RPM then dim again later
- Weak or intermittent spark on ignition systems that rely on a magneto stator
- Battery light or charging warning on the dash
- No charge condition measured at the battery despite a good battery
Why do stators fail? Heat takes the top spot. Oil contamination and age follow close behind. Vibration and bad connectors can finish the job. I’ve seen windings turn dark brown from cooking. I’ve seen broken leads from cracked insulation. I’ve seen corrosion in marine engines that never had a chance.
Construction plays a role too. The quality of the stator core lamination matters because losses increase if the core saturates or overheats. The rotor matters as well since the magnetic circuit is a team sport which is why rotor core lamination quality shows up in real-world reliability. The steel itself matters which is where good electrical steel laminations make a difference in efficiency and heat. If you care about how the whole alternator package performs you’ll eventually care about the quality of motor core laminations.
One more cause deserves the spotlight. A bad regulator/rectifier can cook a good stator. An overcharging system drives heat into the windings. An undercharging or shorted regulator can load the stator too hard. I’ve seen this duo take turns failing. Replace one then watch the other fail weeks later. You want to test both.
Essential Tools for Stator Testing
You don’t need a lab. You do need a few basics:
- Digital multimeter that measures resistance (Ohms), continuity, and AC volts. A backlit display helps in a dim garage. Auto-ranging is nice though not required.
- Vehicle service manual for specific resistance specs, AC output expectations, and wire colors. Stator resistance values vary by model.
- Basic hand tools like sockets and screwdrivers to access connectors and covers.
- Safety glasses and gloves. Protect your eyes and hands. Hot engines and spinning parts don’t forgive.
- Optional: test light for quick checks of certain circuits though it won’t replace a meter for stator work. Alligator clip leads help with hands-free measurements.
Safety First: Before You Begin Stator Testing
I’ve made mistakes so you don’t have to. Start safe.
- Disconnect the battery negative terminal before resistance or continuity tests.
- Let the engine cool so you don’t burn your forearms on a header or cover.
- Work in a well-ventilated area. You’ll run the engine for AC voltage tests.
- Secure the vehicle. Use a stand for bikes and chock wheels for ATVs or generators.
- Keep loose clothing and hair away from moving parts.
- Read the service manual section for your vehicle. Specs matter.
Step-by-Step Stator Testing Procedures
Here’s the exact process I follow for motorcycle stator testing. The logic carries over to ATVs, generators, boats, and even cars with some tweaks.
Step 1: Visual Inspection for Obvious Damage
I like to start with my eyes and nose. A visual inspection can save you time.
- Look for burnt or discolored windings under a cover if you can see them. Dark brown equals cooked insulation. Melted insulation is a smoking gun.
- Smell for a burnt stator smell. It’s distinct like overheated varnish.
- Check connectors for corrosion, loose pins, or melted plastic.
- Follow the stator leads out of the engine. Inspect the wiring harness for rub-throughs, crushed sections, or oil saturation.
- On marine engines look for green corrosion and salt build-up around connectors.
If you find obvious damage you likely found your problem. Still test to confirm.
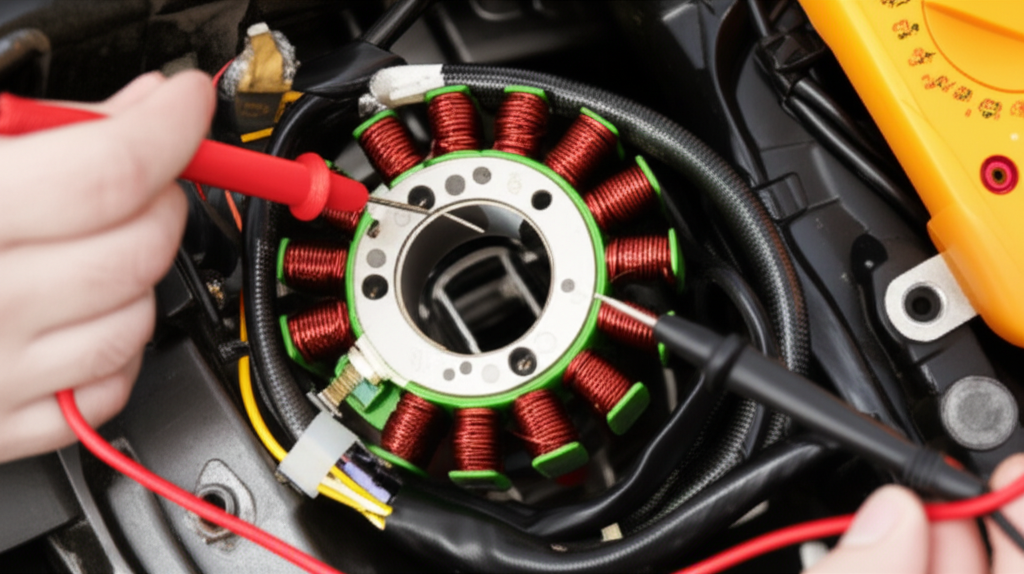
Step 2: Resistance (Continuity) Test for Open or Shorted Windings
Purpose: Verify the integrity of the stator windings. You’re looking for consistent low resistance between phases and no open circuits.
Procedure:
- Three-phase stator: usually three similar color wires like yellow or white. Test between each pair: 1–2, 1–3, 2–3.
- Single-phase stator: usually two wires. Test across them.
Interpreting Results:
- Good stator: Low, consistent resistance between all pairs for three-phase. The numbers should match within a tight margin.
- Open circuit: OL or infinite resistance between any pair means a broken winding.
- Shorted winding: Readings are near zero or significantly below spec. That points to an internal short.
- Don’t forget temperature matters. A hot stator may read a bit different than a cold one.
Extra tips:
- Wiggle the harness gently while watching the meter. If readings jump you may have a broken lead or intermittent connection.
- Keep your meter probes on clean metal. Oxidized pins can give false reads.
- If you see resistance to ground during this step you jump forward to the ground fault test. That’s a red flag.
Step 3: Ground Fault Test (Short to Ground)
Purpose: Make sure the stator windings are not shorting to the engine case.
Procedure:
Interpreting Results:
- Good stator: OL or infinite resistance to ground for all wires. No continuity to ground.
- Bad stator: Any measurable resistance to ground indicates a shorted winding or damaged insulation.
I’ve had bikes that passed the phase-to-phase test then failed here. Heat can crack insulation which lets the coil touch the core or case. That kills charging output and it can fry the regulator too.
Step 4: AC Voltage Output Test (Engine Running)
Purpose: Confirm the stator generates sufficient AC voltage under load. Resistance tests tell you about the windings at rest. This test tells you what happens when the flywheel spins.
Procedure:
Interpreting Results:
- Good stator: Voltage rises smoothly as RPM increases. The readings between phases match closely. Many motorcycle stators produce 20–70 VAC per pair at higher RPM though you must check your manual for the acceptable range.
- Bad stator: Low AC output, no increase with RPM, or big differences between phases. That points to a weak phase or damaged winding.
Two important notes:
- Never measure DC on the stator side. The stator produces AC before the regulator/rectifier.
- Do not short stator wires together to test output. You will damage the stator and the regulator.
I keep a simple stator output chart for my own records. Bike X at idle produces Y VAC. At 4,000 rpm it produces Z VAC. Consistency helps me spot borderline readings or intermittent issues.
Platform-Specific Notes: Motorcycle, ATV, Car, Generator, Marine
The core tests stay the same. The details shift depending on the machine.
Motorcycles and ATVs:
- Atv stator tests and motorcycle stator testing usually involve three yellow or white wires for a three-phase stator. Older models may have single-phase two-wire stators.
- Typical symptoms include dim headlights at idle, dead battery after a ride, or a no charge stator test result after you replace the battery and regulator.
- Dirt bike stator test and snowmobile stator test add vibration and moisture. Check connectors and grounds carefully.
Cars:
- Car alternator stator testing differs because the stator sits inside the alternator. You normally test the alternator assembly by checking DC charging voltage at the battery and by scanning for ripple or performing a bench test.
- If you suspect a failed alternator stator you usually replace the alternator. Most people do not rebuild alternators at home.
Generators and small engines:
- Generator stator testing and small engine stator tests often require identifying separate coils. You may have a charging coil plus ignition coils under the flywheel.
- Some small engines use a magneto that feeds the ignition system. A bad magneto stator can cause no spark or weak spark.
- Follow the wiring diagram. Check resistance specs for each coil. Charging coils tend to have low ohms. Ignition trigger coils and pulser coils have different typical values.
Marine and boats:
- Boat stator tests add corrosion to the mix. Salt and moisture can weaken insulation and corrode connectors.
- Look for oil contamination and heat damage under covers. Marine engines run hard in hot environments which stresses stators.
Single-phase vs three-phase:
- Single-phase stators have two wires. You test across them for both resistance and AC output.
- Three-phase stators have three wires. You test all three pairs: 1–2, 1–3, 2–3. All three pairs should match if the stator is healthy.
Interpreting Your Stator Test Results and Next Steps
This is where you turn numbers into a plan.
If the stator passes all tests:
- The stator likely works. Shift focus to the regulator/rectifier, the battery, and the wiring harness.
- Test the regulator/rectifier. Check DC charging voltage at the battery at idle and at 3,000–4,000 RPM. You should see a steady regulated voltage that stays within spec for your vehicle. Many bikes sit near 13.5–14.5 VDC though you must check your manual.
- Check ground paths and connectors for voltage drop. A poor ground can mimic a charging failure.
- Inspect for intermittent faults that show up with heat or vibration.
If the stator fails any test:
- Replace the stator. Open circuits, shorts between phases, shorts to ground, and low AC output are not repairable in practical terms.
- Consider replacing the regulator/rectifier at the same time if you saw signs of overheat or overcharge. A failing R/R can take a new stator down fast.
- Use the correct gasket or sealant if you remove a cover. Oil leaks from the stator cover are common after a repair if you rush the seal.
Cost and parts:
- Stator replacement cost varies widely. Parts can run from $150 to $500 for many bikes and ATVs. Labor can be significant if the flywheel needs removal.
- OEM parts tend to match specs. Aftermarket stators can save money though quality varies. Compare reviews, warranty, and reputation.
A quick note on flywheel removal:
- Some stators sit behind the flywheel. You will need the correct flywheel puller. Do not pry on the flywheel with a screwdriver. You will damage magnets and the crankshaft.
FAQs and Troubleshooting Tips
What is the difference between a stator and an alternator?
- A stator is the stationary coil assembly. An alternator includes the stator plus the rotor and rectifier plus regulator hardware. Many bikes have a stator and external regulator/rectifier. Cars pack the stator inside the alternator housing.
How do I know if the stator or the regulator/rectifier is bad?
- Do the stator tests first. If resistance and ground tests pass and AC voltage output is solid across all pairs then the regulator/rectifier likely failed.
- Symptoms of rectifier vs stator can look similar. A bad regulator can cause overcharging or undercharging. Batteries boil or stay low. A bad stator usually shows low or no AC output from at least one phase.
Can I test a stator with a test light?
- You can find some shorts or opens with a test light though a digital multimeter gives you real numbers. I use a meter for reliable stator testing.
What are common ohm readings for stators?
- Many motorcycle three-phase stators read around 0.1–1.0 Ω between any two wires. Some read higher. Always check the service manual for acceptable stator resistance. Values vary by model and temperature.
What if my stator resistance is a bit low or a bit high?
- Slight variance can come from meter accuracy and lead resistance. If your readings are far outside spec or mismatched between phases you likely have a problem.
- If resistance looks fine though AC output is low you might have a stator with shorted turns that only shows up under load. The AC output test will catch that.
What about bypassing the regulator/rectifier to test the stator?
- You already bypass the R/R by unplugging the stator for the AC output test. Do not jumper or short wires together to load the stator. Measure AC between pairs only.
How many VAC should I see at idle vs RPM?
- A healthy stator shows lower VAC at idle then rises smoothly with RPM. Many systems will show somewhere between 20–70 VAC per pair by 3,000–5,000 RPM. Check your manual for exact targets. All three pairs should match closely.
Why does my motorcycle still not charge after a stator replacement?
- Check the regulator/rectifier. Check battery condition. Inspect connectors and grounds. Look for a weak battery that drags the system down. A failing R/R can ruin a new stator.
Can a weak battery cause stator failure?
- Indirectly yes. A weak battery stresses the charging system and can keep the regulator working harder than it should. That extra heat and load can shorten stator life.
What about ignition stators and weak spark?
- Some engines use stator coils for ignition. If you have weak spark or intermittent spark test the ignition source or trigger coils according to the manual. The tests are similar though the ohm values differ.
Do stators fail more on certain models?
- Heat and poor airflow drive many failures. I’ve seen early 2000s to mid 2010s big twins cook stators more often due to heat and oil contamination. I’ve seen some sportbikes fry stators because the regulator/rectifier ran hot and failed first which stressed the stator. Older bikes can suffer insulation breakdown due to age.
What is the average lifespan of a stator?
- It depends on the machine and use. I see motorcycle stators run 30,000–60,000 miles in many cases. Some last much longer. Others fail early when heat and a weak regulator beat them up. Generators and small engines depend on hours and load. Many run hundreds to a couple thousand hours before you see issues.
Is there a quick no charge stator test?
- Yes. Unplug the stator and check AC voltage between pairs at idle and at 3,000–5,000 RPM. If you see little to no AC output you likely found the problem.
How do I test stator wires and colors without a diagram?
- Most three-phase stators use three matching colors like three yellows. Test any pair. They should all match. For mixed color systems grab the manual or trace the harness.
Can oil contamination cause stator failure?
- It can if the oil overheats or gets contaminated which damages insulation. Many stators run in oil without issue though heat and contamination do the real harm.
What about intermittent charging that comes and goes?
- Heat and vibration trigger intermittent faults. Try testing AC output when the bike is hot. Wiggle the harness near the stator connector while watching the meter. Look for voltage that drops on one phase.
Preventative Maintenance and Stator Lifespan
I want stators to be boring. Set them up right and they disappear into the background.
Here’s what helps:
- Keep connectors clean and tight. Replace burnt, brittle, or melted plugs. Corrosion adds resistance and heat.
- Make sure the regulator/rectifier has solid grounds and good airflow. Many failures trace back to a cooked R/R.
- Maintain a healthy battery. A weak battery drags the whole charging system down.
- Watch for heat. Relocate or shield the R/R on bikes that roast their electronics.
- Check harness routing for rub points. Vibration can cut insulation and cause shorts to ground.
- Use OEM-quality parts where it counts. A bargain part that runs hot can cost you two parts later.
- Follow oil and cooling system maintenance for engines that bathe the stator in oil. Heat kills insulation.
Real-world lifespans:
- Motorcycles and ATVs often run a stator for 30,000–60,000 miles if the system stays healthy. Some fail sooner in hot climates or heavy traffic. Some last well past 80,000 miles if airflow and regulation stay in check.
- Cars usually get a full alternator lifespan of 80,000–150,000 miles before replacement. The stator is not replaced separately in most cases.
- Generators and small engines see life in hours. I’ve seen 500–2,000+ hours when cooling and load stay reasonable.
Costs and why early diagnosis saves money:
- A stator costs $150–$500 for parts on many bikes and ATVs. Labor can add a lot if you need a flywheel puller and extra disassembly.
- If you misdiagnose and replace a battery or an R/R first you might still end up buying the stator later. Test once and buy once.
- Early detection prevents collateral damage. A shorted stator can fry a regulator. A bad regulator can cook a good stator.
Conclusion: Confidently Diagnosing Your Charging System
Testing a stator doesn’t require magic. It takes a multimeter, a few careful steps, and a clear plan.
Here’s the short version I follow every time:
- Look first. Burn marks, melted connectors, and that burnt varnish smell tell the story.
- Measure resistance between stator wires. Compare all pairs and check the manual.
- Check for shorts to ground. Any continuity to the case is a fail.
- Fire it up and measure AC voltage at idle and at RPM. Watch for smooth consistent increases and matching readings between phases.
- If the stator passes focus on the regulator/rectifier, battery, and wiring.
I’ve used this simple flow to diagnose motorcycle stators, ATV charging systems, small engine magnetos, and generator coils. The numbers don’t lie. With clear measurements you avoid guesswork and you keep your wallet closed.
If you found a bad stator replace it with a quality part. Fix the root cause like a failing regulator or heat soak. Button everything up clean and dry. Then ride, drive, or run your equipment with confidence.
You’ve got this.