How to Test a Snowmobile Stator: A Comprehensive DIY Diagnostic Guide
Table of contents
- Introduction: Understanding Your Snowmobile’s Stator
- Common Symptoms of a Failing Snowmobile Stator
- Electrical Issues
- Engine Performance Problems
- Visible or Olfactory Signs
- Essential Tools for Accurate Stator Testing
- Safety Precautions Before You Begin
- Step-by-Step Guide: Performing Stator Tests
- Locate and Access the Stator Wires
- Stator Resistance Test (Ohms)
- Stator Continuity to Ground Test
- Stator AC Voltage Output Test
- Interpreting Your Stator Test Results
- What to Do If Your Stator Is Bad
- If the Stator Tests Good Yet the Problem Remains
- Preventing Future Stator Failure
- Frequently Asked Questions
- Conclusion: Get Your Snowmobile Back on the Trails
Introduction: Understanding Your Snowmobile’s Stator
I still remember my first long ride that ended with a dead battery and a dark trail. The sled ran fine for an hour. Then the lights dimmed. The engine stumbled. Finally I coasted to a stop with no spark and a battery that looked fine the night before. That evening taught me a lesson I never forgot. When your charging system acts up you test the stator early.
So what is the stator and what does it do on a snowmobile. Think of the stator as the stationary half of a simple generator inside your engine. The flywheel or magneto spins around it with strong magnets. As the engine turns the magnets sweep past the stator’s copper windings and make AC voltage. Your sled uses this power to:
- Charge the battery and keep it from draining quickly.
- Power the lighting system and accessories.
- Feed the ignition system through source coils and trigger or pulsar coils so you get a strong spark.
A healthy stator keeps your sled charging and sparking. A weak or shorted stator gives you dim lights poor performance a battery that never charges and sometimes a no-start condition. I have seen all of the above on Arctic Cat Ski-Doo Polaris and Yamaha sleds. The test process stays about the same across brands. The wire colors and spec values often change. Your service manual is worth its weight in gold here.
Common Symptoms of a Failing Snowmobile Stator
When a stator starts to go it rarely raises its hand and announces the problem. It whispers first. Then it shouts.
Electrical Issues
- Battery not charging or draining quickly after rides.
- Sled lights dim flickering or dead at idle then brighter with revs or vice versa.
- Weak or intermittent spark and sometimes no spark snowmobile at all.
Engine Performance Problems
- Engine misfires or runs rough under load.
- Sled bogs down or lacks power midrange.
- Difficulty starting after a hot soak or a flat no-start.
- Engine dying while riding like someone hit the kill switch.
Visible or Olfactory Signs
- Burnt or discolored wires near the stator or coming from the engine case.
- Smell of burning electrical insulation especially after a hard pull.
- Blackened stator wires or crumbling connectors at the harness.
These symptoms overlap with other issues like a bad regulator/rectifier a weak battery or a failing ignition coil. That is why I test the stator before I buy parts.
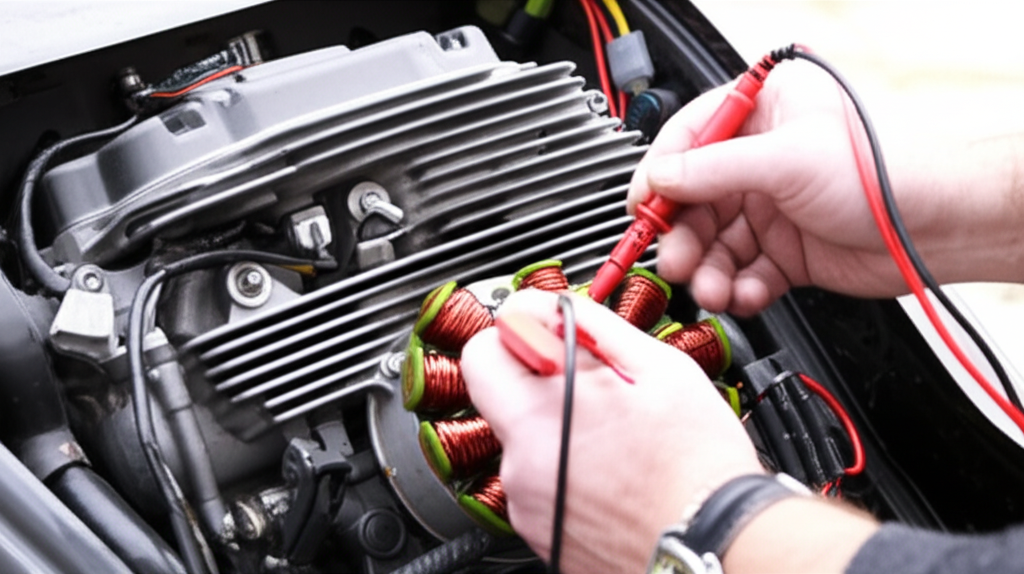
Essential Tools for Accurate Stator Testing
You do not need a lab. You do need a few basics.
- Digital multimeter with Ohms AC/DC voltage and continuity settings. Auto-ranging helps but is not required.
- Your snowmobile’s service manual for wiring colors and exact test values. Model-specific stator resistance values matter.
- Basic hand tools to access panels seats and connectors.
- Wire brush or sandpaper to clean grounds and test points.
- A stator puller or flywheel puller only if you plan to remove parts. Most tests require no removal.
If you want a recommendation I like any mid-range multimeter that reads low ohms accurately and AC voltage up to at least 200 VAC. It does not have to be fancy. It does have to be reliable.
Safety Precautions Before You Begin
I treat electrical testing with respect. So should you.
- Disconnect the battery’s negative terminal before resistance and continuity tests.
- Work in a well-ventilated area if you will run the engine for AC tests.
- Wear safety glasses when you work near a spinning flywheel or test live circuits.
- Keep loose clothing away from moving parts.
- Understand that AC voltage tests use live power. Secure the sled. Chock it or lift the track.
Step-by-Step Guide: Performing Stator Tests
I split stator checks into three pillars. Resistance. Continuity to ground. AC voltage output. If you follow these in order you will not chase your tail.
1) Locate and Access the Stator Wires
- Find the wiring harness that exits the engine case near the flywheel. That bundle includes the stator leads.
- Identify the connector that feeds the main harness and the regulator/rectifier.
- For clean testing unplug the stator from the regulator/rectifier and from the main harness as needed. You want to isolate the stator.
- Identify each coil’s wires. Charging coil. Lighting coil. Source coil. Trigger or pulsar coil. Your manual or wiring diagram shows colors and pinouts for Polaris Ski-Doo Arctic Cat and Yamaha models.
Tip: Take photos before you disconnect anything. It saves you from a late-night guessing game.
2) Stator Resistance Test (Ohms)
Purpose: Check the integrity of coil windings. Open circuits point to broken windings. Very low resistance points to a short.
Multimeter setup: Set to Ohms. Use a low range for charging and lighting coils. Use a higher range for source and trigger coils.
Procedure:
- Charging and lighting coils
- On single-phase stators test between the two coil wires. You may see very low resistance often below 1 ohm like 0.1 to 0.5 Ω.
- On three-phase stators test between all pairs of the three yellow wires. You should see equal resistance across each pair. If one pair reads open or much lower than the others you found the problem.
- Source coil
- Test between the source coil’s leads. Values vary widely by sled often from 10 Ω up to a few hundred ohms.
- Trigger or pulsar coil
- Test across the pulsar’s two wires. Many read 20 to 500 Ω. Again reference the service manual.
Interpretation:
- Open circuit or infinite resistance means a broken winding or a broken connection inside the stator.
- Near zero ohms means an internal short that kills output.
- Values that do not match your service manual usually point to failure. Some manuals provide a range. Stay within it.
Real-world example: I chased a no-spark on a carb Polaris. The source coil tested open. New stator. Instant spark. The sled fired on the second pull.
3) Stator Continuity to Ground Test
Purpose: Detect unwanted shorts from the windings to the engine case ground. Any short here steals energy and wreaks havoc.
Multimeter setup: Set to continuity or a high ohms range like 20 kΩ to 200 kΩ.
Procedure:
- Place one multimeter lead on a clean engine ground. The cylinder head bolt or case boss works.
- Touch the other lead to each stator wire one at a time.
- Watch for a beep or a low resistance reading.
Interpretation:
- You should see no continuity and infinite resistance to ground for most stator leads.
- If you get continuity you likely have a coil-to-ground short that demands a stator replacement.
- Some designs intentionally ground a coil. Your manual will call that out. When in doubt double-check wire colors and the schematic.
4) Stator AC Voltage Output Test
Purpose: Confirm the stator can generate real AC power under engine speed. Resistance tests catch many failures yet not all. A coil can pass a bench ohms test and still fall flat under load.
Multimeter setup: Set to AC volts. Use a range that covers at least 100 VAC.
Safety first:
- Reconnect the battery if needed for starting.
- Disconnect the regulator/rectifier from the stator for this test. You do not want the regulator or the battery to skew readings.
- Secure the sled. Keep hands clear of belts and clutches.
Procedure:
- Start the engine and let it idle.
- For charging or lighting coils place the meter leads across the two stator output wires. On three-phase systems measure each pair of yellow wires. On single-phase measure the two coil leads.
- Note the AC voltage at idle. Then raise RPM to 3000 to 5000. Observe how voltage climbs.
General expectations:
- Charging and lighting coils often make 10 to 30 VAC at idle. They climb to 30 to 70+ VAC at mid to high RPM. Many exceed 100 VAC at high revs depending on design.
- Source coils for ignition can generate much higher AC voltages. Always check your manual.
Interpretation:
- No AC voltage at idle and revs means a dead coil or a broken connection.
- Low AC voltage that does not rise with RPM points to weak magnets a shorted coil or partial failure.
- Normal AC output suggests your regulator/rectifier battery or wiring may be at fault instead.
Anecdote: I saw a Ski-Doo that charged fine at idle then quit charging above 4000 RPM. Resistance tested normal. The AC test showed output collapsing with revs. The stator had a heat-related short that only showed up hot. A fresh stator fixed it.
Interpreting Your Stator Test Results
You ran the three tests. Now what.
- Open circuits
- A coil reads infinite resistance. You find no AC output. That is almost always a failed winding.
- Short circuits
- A coil reads near zero ohms or shows continuity to ground where it should not. That confirms a short inside the stator.
- Weak output
- Resistance looks close to spec yet AC voltage runs low and flat. Suspect partial shorts heat damage or weakening flywheel magnets. Confirm the regulator is disconnected during the test.
- Intermittent problems
- Cold tests pass. Hot tests fail. I repeat the AC voltage test after the engine warms up. I also wiggle the harness near the case and at the connector while watching the meter. Intermittent opens hide there.
Always compare your numbers to the model-specific stator output specifications and coil resistance chart in your service manual. Yamaha values differ from Polaris or Arctic Cat or Ski-Doo. Numbers can vary widely even within a brand.
What to Do If Your Stator Is Bad
You confirmed it. The stator failed. Now you choose a path.
Replacement options:
- OEM stator
- Pros: Known quality and exact fit. Often the safest bet for ignition stability and long life.
- Cons: Costs more than aftermarket.
- Aftermarket stator
- Pros: Cheaper. Often in stock. Many riders use them with good results.
- Cons: Quality varies. I test resistance before I install any aftermarket part.
- Used stator
- Pros: Budget friendly. Helpful for older machines.
- Cons: Unknown history. Test before you install.
- Rewinding
- Pros: Keeps your original core and mounting plate. Some local shops do good work.
- Cons: Not always cheaper. Quality depends on the winder.
Expected cost ranges:
- Aftermarket stator part: roughly $100 to $350.
- OEM stator part: roughly $250 to $600 or more.
- Professional labor: 2 to 4 hours at typical shop rates.
Tools and notes for replacement:
- You often need a flywheel puller that fits your make and model. Do not wedge or pry on the flywheel. You will damage magnets or taper surfaces.
- Mark the stator plate position before removal if timing depends on it. Some sleds use slotted plates for fine timing. Take photos.
- Inspect the flywheel magnets for cracks or loose segments. Loose magnet glue can eat a stator in minutes.
- Route wires exactly as the factory did. Keep them clear of the flywheel. Use grommets and strain reliefs.
- Torque bolts to spec and use proper thread locker where the manual calls for it.
- Replace any torn gaskets or O-rings at the case pass-through to keep moisture out.
I treat the stator swap as a careful project. I clean grounds. I reseat connectors. I test charging and lights after the first ride. That habit saves me comebacks.
If the Stator Tests Good Yet the Problem Remains
Do not stop at the stator if your sled still misbehaves.
- Regulator/rectifier test snowmobile
- If AC output looks strong from the stator yet your battery voltage stays low the regulator likely failed. With the engine running battery voltage should climb to roughly 13.5 to 14.5 VDC on systems with batteries. If it stays at 12.2 you are not charging. If it climbs above 15 you might have an overcharge risk.
- Battery voltage snowmobile
- Load test the battery. A weak battery can mimic a charging failure. I charge it fully then measure resting voltage after a few hours. 12.6 V or higher is healthy for a typical 12 V lead-acid.
- Ignition coil test snowmobile
- Measure primary and secondary coil resistance and check for spark with a known good plug. A bad coil or plug cap can act like a stator issue.
- CDI box testing snowmobile
- CDI boxes are tough to test without specialized tools. Eliminate other things first. Inspect for corroded connectors and poor grounds.
- Kill switch test snowmobile
- A shorted kill circuit will kill spark. Unplug the kill switch at the CDI as a quick test.
- Wiring harness and grounds
- Look for chafed insulation corrosion at connectors and loose ground points. Snow and salt do not play nice.
I follow a simple rule. Verify stator output. Verify regulation and wiring. Verify ignition delivery. Then move to fuel or mechanical issues if spark checks out.
Preventing Future Stator Failure
You got it fixed. Let’s keep it that way.
- Keep connections clean and sealed
- I clean corroded terminals with a small brush and use dielectric grease on weatherpack connectors. Corrosion adds resistance and heat.
- Secure the harness
- Add proper clamps or loom if the harness rubs on the case. Vibration breaks wires and insulation.
- Fix heat problems early
- Overheating fries windings. A clogged cooling duct a blocked exhaust outlet or a slipping belt raises under-hood temps. Heat is the enemy.
- Inspect flywheel magnets
- Broken or loose magnets chew up the stator and cause weird charging behavior. Replace the flywheel if magnets shift.
- Choose quality components
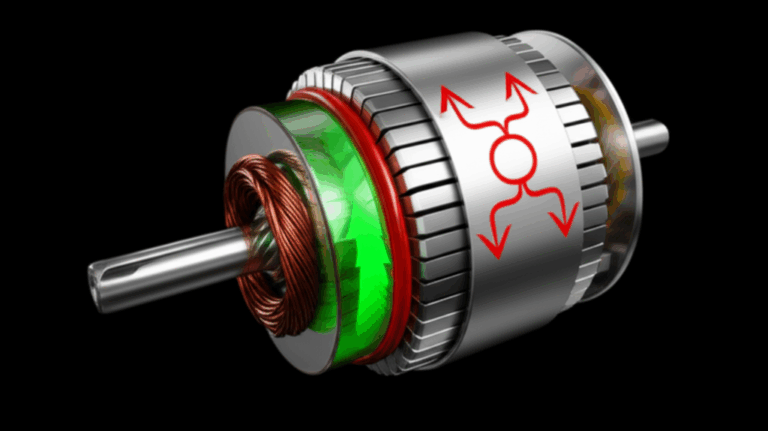
- The materials inside every stator matter. The quality of the stator core lamination affects heat buildup and magnetic efficiency. Good laminations reduce eddy current losses so the windings run cooler. The matching rotor core lamination in the flywheel also plays a role because it shapes how magnetic fields move through the system. Manufacturers that invest in tight tolerances and clean stacking get more reliable output.
- If you like to go deeper the broader family of motor core laminations shows how different cores cut losses and improve performance. Material choice matters too. High-grade electrical steel laminations reduce heat and keep voltage steady across RPM. That translates to longer stator life on the trail.
Regular checks I do each season:
- Quick charging system test snowmobile with a multimeter at the battery terminals.
- Visual scan for burnt spots on wires near the stator.
- Continuity check on suspicious grounds.
- Belt dust cleanup and airflow checks to cut heat.
Small habits pay big dividends in winter.
Frequently Asked Questions
How much does it cost to replace a snowmobile stator
- DIY parts range from about $100 to $600 depending on OEM vs aftermarket. Professional replacement often runs $300 to $1200 or more with labor. Your model and parts availability drive the final number.
Can a bad stator cause my snowmobile not to start
- Yes. If the source coil or trigger coil fails you lose spark. Many no-spark snowmobile cases trace back to a stator failure or a short to ground at the harness.
Is it possible to repair a snowmobile stator
- Sometimes. Rewinding shops can rebuild certain stators if the core and pickup mount remain intact. Quality varies. For common models I often choose a new or OEM replacement for reliability.
How long do snowmobile stators typically last
- I have seen them run for many seasons and over 10,000 miles with no issues. I have also seen early failures after hard use and high heat. They are not a routine replacement item. Regular inspections and a healthy regulator help them live longer.
What is the difference between a stator and a rectifier
- The stator generates AC voltage. The regulator/rectifier converts AC to DC and controls voltage for charging the battery and powering DC circuits. The stator makes the juice. The regulator manages it.
How do I perform a three phase stator test on a snowmobile
- Identify the three stator output wires usually three yellows. With the engine off check resistance between all three pairs. Readings should match. Then disconnect the regulator and with the engine running measure AC voltage between each pair at idle and at 3000 to 5000 RPM. All three pairs should be similar. If one pair reads low you likely have a partial short in that leg.
What multimeter settings do I use for a stator resistance check
- Use Ohms on a low range for charging and lighting coils often below 1 Ω. Use a higher range for source and trigger coils. For continuity to ground use the beeper or a 20 kΩ or 200 kΩ setting. For AC output use V~ on a range that covers at least 100 VAC.
Can a regulator or battery cause symptoms that look like a bad stator
- Absolutely. A failed regulator/rectifier can overcharge or undercharge. A weak battery can pull voltage down and make lights dim. Always isolate the stator for testing and verify battery condition under load.
What are the signs of a short circuit in a stator
- Low resistance between coil leads. Continuity to ground where the manual says there should be none. Hot spots or discoloration near the windings. AC output that lags badly or collapses with RPM.
What causes a stator to fail
- Heat vibration corrosion and poor connections top the list. Sometimes a loose flywheel magnet or damaged wiring harness takes a stator out. Water intrusion and salt accelerate corrosion and insulation breakdown.
A Simple Diagnostic Flow You Can Follow
I like clear paths. Here is the one I use when I suspect stator problems.
1) Verify the symptom
- Battery voltage low after a ride. Lights dim. No spark. Engine dies randomly.
2) Quick checks
- Inspect wiring for damage and loose grounds.
- Load test or replace a weak battery.
3) Isolate the stator
- Disconnect the stator from the regulator and main harness where needed.
4) Measure resistance
- Compare charging, lighting, source, and trigger coil ohms to the manual.
5) Check for shorts to ground
- Confirm no continuity from stator leads to engine ground unless specified.
6) Verify AC output
- Start the engine. Measure AC voltage across coil leads at idle and higher RPM. Compare to spec.
7) Decide next steps
- Bad readings mean stator replacement or repair. Good readings shift your focus to the regulator/rectifier CDI ignition coil kill switch or wiring harness.
This approach saves time and money. It also prevents the parts cannon approach that drains your wallet without fixing the issue.
Real-World Examples From My Bench
- Yamaha with intermittent spark
- Cold it started fine. Hot it died. Resistance tested near spec. A hot AC output test showed the source coil voltage dropping when warmed up. Replaced the stator. Problem solved.
- Polaris battery draining snowmobile
- Battery tested good. Stator AC output looked healthy. Regulator output to the battery stayed at 12.2 V with the engine revved. A new regulator fixed the charging system.
- Ski-Doo engine runs but no lights
- Ignition worked. Lights stayed dark. Lighting coil read open. The lighting section of the stator failed while the ignition section survived. Swapped the stator. Lights returned.
These cases highlight why you test each coil by function. Charging. Lighting. Ignition. They can fail independently.
Tips for Accurate Measurements
- Clean your probes
- When testing very low ohms on charging coils probe resistance matters. Short your meter leads together first and note the baseline. Subtract that from the reading if your meter does not auto-compensate.
- Test connectors not wires
- Back-probe at the connector when possible. That keeps you from poking holes in insulation which invites corrosion.
- Repeat tests hot and cold
- Some defects only show up with heat. If your sled fails after ten minutes ride it on the stand then retest.
- Check the service manual twice
- Wire colors change between years and makes. If the manual says the trigger coil is blue and white trust the book not your memory.
A Word on Statics vs Dynamics
Resistance testing is static. AC output testing is dynamic. Both matter. A coil can pass static tests all day yet fail under load or heat. If a sled behaves fine in the shop but dies on trail I lean on the dynamic test. Real power at real RPM tells the truth.
Common Missteps I See
- Measuring AC with the regulator still connected
- That loads the circuit and hides stator issues or blames the stator unfairly. Disconnect it for the AC test.
- Guessing on wire colors
- One wrong wire and your reading means nothing. Verify with the diagram.
- Replacing the battery first
- A new battery hides the problem for a day then you are back to dim lights. Test the charging system first.
- Skipping the ground test
- Coil-to-ground shorts are common. They cause odd intermittent behavior. Always check it.
Conclusion: Get Your Snowmobile Back on the Trails
I have chased electrical gremlins on sleds in bitter cold with a headlamp and numb fingers. A clear plan beats guesswork every time. When you suspect the stator slow down and test in order. Resistance. Continuity to ground. AC output. Compare everything to your model’s specs. If the stator fails replace it with quality parts and fix any wiring sins you find along the way. If it passes move your attention to the regulator/rectifier battery CDI ignition coil kill switch and grounds.
Do that and you will stop buying parts you do not need. You will get your lights bright and your battery charging. Most important you will get your snowmobile back on the trail where it belongs.
Ride safe. Test smart. Enjoy the snow.