How to Test a Motor Capacitor: A Step-by-Step Guide for DIYers
Table of Contents
- Introduction: Why Your Motor Needs a Healthy Capacitor
- What a Motor Capacitor Does: Start vs Run
- Common Symptoms of a Failing Capacitor
- Tools I Use to Test Motor Capacitors
- Pre-Test Safety Precautions You Should Never Skip
- How to Safely Discharge a Capacitor
- Step-by-Step: How I Test a Motor Capacitor with a Multimeter
- Step 1: Visual Inspection
- Step 2: Remove and Label the Capacitor
- Step 3: Set Your Multimeter
- Step 4: Measure Capacitance
- Step 5: Interpret the Reading
- Testing Specific Capacitor Types
- Start Capacitors
- Run Capacitors
- Dual Run Capacitors (C, FAN, HERM)
- Three-Wire Capacitors
- Advanced Tests I Use for Accuracy
- ESR Testing
- Leakage and Insulation Checks
- Testing Without Removing the Capacitor
- What to Do If Your Capacitor Is Bad
- FAQs About Motor Capacitor Testing
- Final Thoughts: Keep Your Motors Running Smoothly
Introduction: Why Your Motor Needs a Healthy Capacitor
When a motor hums but refuses to spin I look at the capacitor first. It is a small part with a big job. I have tested hundreds across HVAC systems, refrigerators, washing machines, pool pumps, furnace blowers, and garage door openers. The pattern stays the same. If the motor starts slow or not at all there is a good chance the start or run capacitor is on its way out.
I wrote this guide to show you exactly how I test a motor capacitor with a multimeter. I will share the exact tools I use, the steps I follow, the readings I expect, and the little traps I avoid. I will also walk you through special cases like dual run capacitors labeled C, FAN, and HERM, start capacitor vs run capacitor testing, testing a 3‑wire capacitor, and what a correct microfarad reading looks like on a digital multimeter.
I care about safety. Capacitors can hold a charge even after power is off. You must discharge them safely before you handle them. I will show you how to discharge a capacitor with a resistor or a proper capacitor discharge tool. If you only have an insulated screwdriver I will show you the safer way to use it.
What a Motor Capacitor Does: Start vs Run
In most induction motors the capacitor helps create a phase shift in the auxiliary winding that gives the rotor a nudge in the right direction. Think of it like a push at the start of a bike ride. Some motors use a start capacitor that gives a big boost at startup. Others use a run capacitor that stays in the circuit to improve efficiency and torque. Many HVAC units use a dual run capacitor that serves both the compressor motor and the fan motor in one metal can.
- Start capacitors: High microfarad values, often 70 to 300 µF. Usually electrolytic. Built for short duty cycles. You see them on compressors and heavier loads.
- Run capacitors: Lower microfarad values, usually 5 to 80 µF. Often polypropylene film. Rated for continuous duty. You see these on PSC (permanent split capacitor) motors like blower motors and fans.
- Dual run capacitors: Two capacitors in one can, for example 40/5 µF. One section feeds the hermetic compressor labeled HERM and one feeds the fan motor labeled FAN. The common terminal is labeled C.
I worked with many brands including CBB65 capacitors in HVAC units. The label matters. I always note the microfarad rating and the capacitor voltage rating before I start testing.
Common Symptoms of a Failing Capacitor
I watch for these signs before I even pick up a meter:
- Motor hums but does not start
- Slow motor startup or lower than normal motor RPM
- Intermittent starts then trips the breaker
- Overheating motor or a hot electrical smell
- Bulging capacitor top or case
- Leaking oil or residue on or near the capacitor
- Burn marks on terminals or melted spade connectors
These bad capacitor symptoms show up in air conditioner condenser units, furnace blower motors, refrigerator compressors, washing machines, pool pumps, and well pumps. If you see swelling or leakage you can call it. Replace it. You do not need a meter for that one.
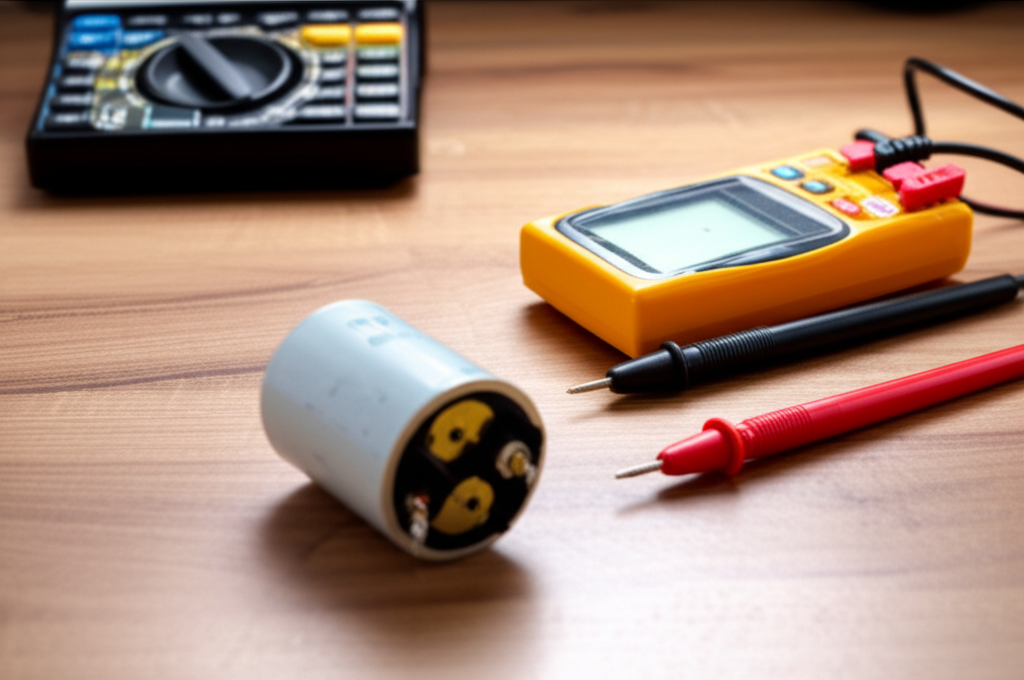
Tools I Use to Test Motor Capacitors
I keep this short list handy. It covers 99% of jobs.
- Digital multimeter (DMM) with a capacitance function and microfarad reading
- Analog multimeter if I need a resistance swing test
- Capacitance meter for more precise capacitance measurement techniques
- ESR meter for an equivalent series resistance check
- Insulated screwdriver and needle‑nose pliers
- Safety glasses and insulated gloves
- Capacitor discharge tool or a 2 kΩ to 20 kΩ, 5 W resistor for a controlled discharge
- Permanent marker or masking tape for labeling wires
Optional but helpful:
- Wiring diagram of the unit
- Camera phone to record wire positions
- A chart of capacitor values and tolerance ranges
Entities I often handle in the field include multimeter leads, ohmmeter modes, AC vs DC settings, terminals labeled Common, Fan, Herm, and various motor control boards or circuit boards in packaged units.
Pre-Test Safety Precautions You Should Never Skip
I never skip these safety steps. Ever.
- Disconnect power completely. Pull the plug or switch off the breaker. Lock it out if you can.
- Verify power is off with your meter. Do not guess.
- Locate and identify the capacitor. If it is a dual run capacitor note which terminals go to C, FAN, HERM.
- Take a photo of the wiring. It saves headaches later.
- Discharge the capacitor with a discharge resistor or tool. I will show you how in the next section.
- Put on safety glasses and gloves. A spark can surprise you. I prefer no surprises.
Electrical safety around capacitors is not optional. OSHA statistics remind me that electrical work injures thousands each year. Capacitors can store dangerous energy so treat them with respect.
How to Safely Discharge a Capacitor
I prefer a resistor discharge. It is controlled and quiet. Here is my routine.
- Resistor method:
- Clip one end of a 2 kΩ to 20 kΩ, 5 W resistor to the Common terminal.
- Touch the other end to the other terminal. On a dual run cap I discharge both C to HERM and C to FAN.
- Hold for 20 to 30 seconds. Some large capacitors might need a bit more time.
- Use your meter in DC volts mode to confirm near zero volts across the terminals.
- Discharge tool:
- Use a purpose‑built capacitor discharge tool if you have one. Follow its instructions exactly.
- Insulated screwdriver method:
- If you must, use an insulated screwdriver with one hand behind your back for safety.
- Bridge C to HERM then C to FAN. Tap and remove quickly to limit arcing.
- Expect a spark if the capacitor held a charge. Do not panic. Do not hold it on for long.
- Confirm with your meter that voltage is near zero when you finish.
Never short a start capacitor repeatedly for fun. It is not fireworks night. Always verify discharge before handling any terminals with your fingers or metal tools.
Step-by-Step: How I Test a Motor Capacitor with a Multimeter
Step 1: Visual Inspection
I start with my eyes. I look for:
- Bulging capacitor ends or sides
- Leaking electrolyte or oil
- Burned paint or discoloration
- Loose spade terminals or damaged wires
- Melted insulation around the terminals
If I see any of the above the capacitor is suspect. I replace it. I also note the capacitor specifications. I write down the rated microfarads and the capacitor voltage rating, typically 370 VAC or 440 VAC for HVAC run capacitors. Many dual run capacitors show something like 40/5 µF 440V. Some start capacitors show 189-227 µF 250 VAC.
Step 2: Remove and Label the Capacitor
I label every wire. On a dual run capacitor I label C, HERM, and FAN. On a single run capacitor I label the two terminals and their source. On a start capacitor I label the two leads that go into the start circuit or relay.
- Pull the spade connectors with insulated needle‑nose pliers
- Avoid tugging on wires
- Note any three‑wire capacitor setups. Some cans have multiple tabs per terminal so the count can confuse you. The marking is the key
Step 3: Set Your Multimeter
I set my digital multimeter to the capacitance function. It often shows a capacitor icon or μF. On some DMMs you plug the leads into different jacks for capacitance. On others you use the standard COM and VΩmA ports. Check your meter’s manual if in doubt.
If I only have an analog multimeter I can still run a basic open circuit and short circuit check in ohms mode. It does not give exact microfarads yet it can flag a dead capacitor. I will explain that option in a minute.
Step 4: Measure Capacitance
- Touch the black probe to one terminal and the red probe to the other terminal
- On a dual run capacitor measure between C and HERM for the compressor section then between C and FAN for the fan section
- Hold the probes steady and wait for a stable reading
- Record the measured value in microfarads
If I test a three‑wire capacitor setup I still measure C to HERM then C to FAN. Do not measure HERM to FAN for capacitance. That is not how the sections are arranged.
Step 5: Interpret the Reading
Here is how I decide if the capacitor is good or bad.
- Compare measured microfarads to the label
- Apply the tolerance printed on the capacitor. Most motor caps are ±5% or ±10%
- Example: A 50 µF ±5% run capacitor should read between 47.5 and 52.5 µF
- Example: A 40/5 µF dual run capacitor should read 38 to 42 µF on C to HERM and 4.75 to 5.25 µF on C to FAN if both are ±5%
What is a good reading
- Within the tolerance range for each section
- Stable number after a second or two
What is a bad reading
- Significantly low microfarad value outside tolerance
- Reads open circuit with no measurable capacitance
- Reads short circuit or very low ohms
- Multimeter shows random unstable numbers even after discharge
What should a capacitor read on a multimeter
- In capacitance mode it should read near the rated µF within tolerance
- In ohms mode on an analog meter it should start low then climb toward infinity as the capacitor charges from the meter battery
- In continuity mode it should not beep continuously because capacitors block DC once charged
A quick word on meter accuracy. Many consumer DMMs have capacitance accuracy around ±(1.0% + 5 digits). If I see a small deviation near the edge I recheck with a better meter or I confirm the tolerance printed on the can.
Testing Specific Capacitor Types
Start Capacitors
Start capacitors are electrolytic and have high µF values like 70 to 300 µF. They are designed for short bursts. They often sit inside a plastic case or can near a start relay. Here is how I test them:
- Discharge fully
- Remove the leads
- Use a DMM with capacitance to read the µF
- Compare to the rated range and tolerance
- If you only have an ohmmeter, test for an initial low resistance that quickly rises to a higher resistance. That shows charging. A constant near zero ohms suggests a short. Infinite suggests an open
Start capacitor failure modes include swelling, leaking, and loss of capacitance. When a start capacitor fails the motor often hums then trips a breaker or thermal protector.
Run Capacitors
Run capacitors are typically polypropylene film types. They run continuously and have lower µF values like 5 to 60 µF for fans and blowers. Test them with the same steps outlined above. If the run capacitor drifts low the motor may still start yet run hot or slow. A bad run capacitor can cause overheating and reduce motor life.
Dual Run Capacitors (C, FAN, HERM)
HVAC units often use a dual run capacitor labeled C, FAN, and HERM. The HERM terminal stands for hermetic compressor. The FAN terminal goes to the condenser fan motor. The C terminal is common.
How I test a dual run capacitor:
- Discharge and remove all wires
- Measure between C and HERM for the compressor section. Compare to the larger μF rating like 35, 40, or 45 µF
- Measure between C and FAN for the smaller μF rating like 5 µF
- Replace the cap if either section is outside tolerance
Do not assume the small section is fine if the big section is bad. Replace the can if either fails. I always match both microfarads and the voltage rating when I install a new unit.
Three‑Wire Capacitors
You may hear the phrase 3‑wire capacitor when people talk about dual‑run cans. It describes how three sets of wires land on C, FAN, and HERM. The test is the same. Measure each section separately from C to the other terminal. Label the wires before you pull them. Your future self will thank you.
Advanced Tests I Use for Accuracy
ESR Testing
ESR stands for equivalent series resistance. A capacitor can measure correct microfarads yet have high ESR. High ESR causes heat and poor performance. I use an ESR meter when a unit behaves oddly or when a motor runs hot even with a good µF reading. In HVAC service calls I use ESR testing on stubborn cases like a compressor that struggles under load. If ESR is high I replace the capacitor.
Leakage and Insulation Checks
A film run capacitor should not leak DC current at normal test voltages. If you have an insulation meter designed for capacitors you can check leakage, yet this is uncommon for DIY. I sometimes use a high resistance ohmmeter check between each terminal and the case. If I see a low resistance path to the case it is unsafe. Replace it.
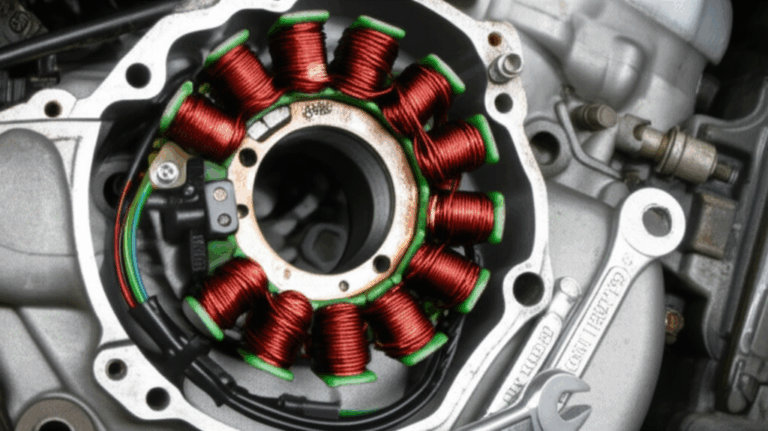
I also keep an eye on insulation around motor windings and wires. Motors rely on tight magnetic circuits. Healthy capacitors help them start and run smoothly. The core design matters too. Quality stator core lamination and a well‑made rotor core lamination reduce losses which lowers the stress on capacitors and windings over time.
Testing Without Removing the Capacitor
People ask if they can test a motor capacitor in circuit. My short answer is sometimes. My long answer is it depends.
- In‑circuit capacitance measurement can be misleading because parallel paths or bleed resistors affect the reading
- If your meter has a dedicated in‑circuit ESR function you can spot a bad actor yet you still might need to lift a lead
- I prefer to remove at least one wire from the capacitor. That isolates the part for a clean test
You can also test indirectly by measuring motor performance. For example you can use a clamp meter to measure current on the fan motor and compare to the nameplate. A weak run capacitor often drives the current up and the RPM down.
What to Do If Your Capacitor Is Bad
I replace bad capacitors with parts that match key specs:
- Microfarad rating. It must match exactly for run capacitors and each section of a dual run. Start capacitors can have a range printed on them like 189‑227 µF. Match the range
- Voltage rating. You can go higher but never lower. If the original is 370 VAC you can use 440 VAC. I prefer 440 VAC in hot climates
- Physical size and terminals that fit the bracket and connectors
- Temperature rating suitable for the environment
Replacement steps I follow:
- Discharge and remove the old capacitor
- Clean the terminals and inspect the spade connectors
- Install the new capacitor in the same orientation
- Land wires on the correct terminals: C, FAN, HERM for a dual run
- Use new insulated connectors if the old ones look burned or loose
- Tighten any mounting straps or brackets
- Reconnect power and test the system
- Re‑test with the multimeter if needed to verify the new part
I keep notes on each job. Over time I saw how heat shortens capacitor lifespan. Every 10°C above the rated temperature can cut life in half. For rooftop AC units I often choose higher voltage and higher temp rated parts for a little extra headroom.
FAQs About Motor Capacitor Testing
Can I test a capacitor without removing it
- You can try yet the reading can be wrong because of parallel paths. Lift at least one lead for a more reliable test.
What if my multimeter does not have a capacitance setting
- Use an analog multimeter in ohms mode. Touch the leads to the capacitor. You should see a quick resistance kick then a rise toward infinity as the capacitor charges. No kick suggests an open circuit. A constant near zero ohms suggests a short circuit. It is not perfect yet it is useful.
- You can also use a dedicated capacitance meter or an ESR meter.
How long do motor capacitors typically last
- Film run capacitors can last 5 to 10+ years under ideal conditions. Start capacitors are designed for short duty and can last many years of starts. Heat and voltage stress reduce life.
What causes capacitors to fail
- Heat is the big enemy. Overvoltage, high ripple current, vibration, poor ventilation, and manufacturing defects can also cause failure. In HVAC units I see a lot of sun‑baked capacitors that drift low long before they explode.
What is a dual run capacitor
- It is one can with two capacitors inside. It serves two circuits. One section feeds the hermetic compressor labeled HERM. The other feeds the condenser fan motor labeled FAN. The common terminal is C.
How do you tell if a capacitor is charging
- On an analog meter in resistance mode you see the needle swing low then drift high. On a DMM in volts mode across a charged capacitor you might see residual voltage that decays after you discharge it.
What should a capacitor read on a multimeter
- In capacitance mode it should read within the printed tolerance. In resistance mode you should not see steady continuity. A steady beep means a short.
Can I test start and run capacitors the same way
- Yes for capacitance measurement. Start capacitors have higher µF and often wider tolerance ranges. Run capacitors have tighter tolerance like ±5% or ±10%.
Can I test a capacitor with a battery
- You can do a crude check. Briefly connect a small DC battery across the capacitor then disconnect it. If you then touch the leads together you will see a small spark as it discharges which suggests it held a charge. It does not give you microfarads and it is not a definitive test.
What about power factor correction capacitors
- In motor control panels you sometimes see power factor correction capacitors. You test them for capacitance and leakage much like run capacitors. Use caution because they can be large and store more energy.
Are there differences between electrolytic and film capacitors in testing
- The process is the same for basic tests. Electrolytics often have higher ESR and lower ripple tolerance. Film capacitors usually run cooler and have tighter tolerance.
What about insulation testing
- If you suspect a short to the case do a high resistance check from each terminal to the shell. A low resistance path to the case is unsafe. Replace the unit.
Can I run a motor without its run capacitor
- PSC motors need the run capacitor to start and to run properly. Without it they will hum and overheat. Some multi‑cap motors can limp along yet you will damage them.
How do I test a washing machine, oven fan, pool pump, or furnace blower capacitor
- The process stays the same. Disconnect power. Discharge the capacitor. Label wires. Measure capacitance with a DMM. Compare to the printed µF and tolerance. Replace if out of spec.
How accurate are budget multimeters for capacitor testing
- They can be accurate enough for DIY. Many list ±(1.0% + digits). If your reading sits close to the edge of tolerance verify with a better meter or replace the capacitor if symptoms support it.
Practical Scenarios From My Bench
- Air conditioner hums then trips: The compressor start capacitor measured 32 µF on a 189‑227 µF unit. Dead. I replaced it with a correctly rated part and the system started immediately.
- Blower motor slow start: Run capacitor labeled 10 µF measured 7.8 µF which is beyond a ±10% tolerance. New 10 µF unit fixed the low airflow and the overheating fuse issue.
- Refrigerator not cooling: Start relay and capacitor were suspect. Capacitor tested open circuit. A new start component set fixed the compressor start.
- Pool pump trips the breaker: The run capacitor was shorted. The ohmmeter showed near zero ohms. I verified in capacitance mode which failed to stabilize. New film capacitor solved it.
These cases remind me that testing saves time and parts. Guessing costs both.
Why Motor Construction Still Matters
Capacitors do not work in a vacuum. The motor’s magnetic circuit sets the stage for efficiency and reliability. Better laminations can lower core losses which reduces heat and stress on windings and capacitors. If you work with replacement motors take a minute to understand the core stack and materials. Quality motor core laminations improve performance. The same goes for the steel used in laminations. If you want a deeper dive you can look into electrical steel laminations and how they influence induction motors. I also keep an eye on general resources that track lamination stacks and component quality since they hint at how a motor will treat its capacitor over the long haul.
Extra Techniques and Best Practices I Lean On
- Bench testing a capacitor: I like to test suspect capacitors on the bench away from the unit. It reduces confusion with in‑circuit paths. Touch your probes directly to the capacitor terminals for a clean reading.
- Capacitance tolerance: Always read the tolerance on the label. Many HVAC run capacitors list ±5%. A cap that reads 10% low on a ±5% label is bad. Period.
- Temperature matters: Hot rooftops kill capacitors. Shade and airflow help. If the unit runs hot I consider a higher voltage rated capacitor within spec.
- Markings and symbols: Learn the icons. The μF symbol, the capacitor icon, the voltage rating, and the temperature rating tell the story. Keep a quick capacitor values chart on your phone for reference.
- Test points and wiring diagrams: Many appliances print test points on a panel or board. Use them to trace circuits. A good diagram saves hours.
- Continuity is not capacity: A continuity test does not tell you microfarads. It only catches obvious shorts. Use the right tool for the job.
Glossary Points I Explain at the Curb
- Capacitance: How much charge a capacitor can store per volt measured in microfarads (µF)
- ESR: Equivalent series resistance. Lower is better for most motor capacitors
- Open circuit: No connection inside the capacitor means it reads infinite resistance or 0 µF
- Short circuit: Internal short means very low resistance and often trips breakers
- Start vs run: Start caps kick a motor into motion. Run caps stay in the circuit to keep it efficient and smooth
- Dual run: Two capacitors in one metal can with terminals C, FAN, and HERM
- CBB65: A common type of metalized film run capacitor used in HVAC
A Word on Motor Types and Where Capacitors Fit
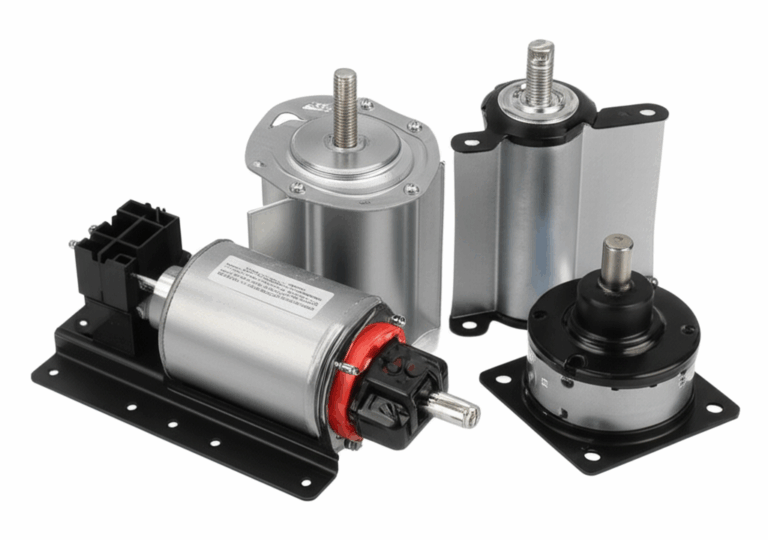
Most of what we test falls under induction motors including squirrel cage motors and permanent split capacitor motors. In these designs the capacitor sets the auxiliary winding phase. Brushless DC motors use different control electronics and do not use the same start or run capacitors. Traditional induction motors still dominate in HVAC equipment, pool pumps, and many appliances. Design choices like the stator core lamination stack and rotor design influence how much phase shift and torque you need which circles back to capacitor sizing.
Troubleshooting Flow You Can Follow
When I step up to a silent or humming unit I run this flow.
- Verify power and safety
- Listen for hums and look for obvious damage
- Discharge and test the capacitor with the DMM
- If the capacitor is in spec I check the motor windings with an ohmmeter for open or shorted coils
- I check the relay or contactor and the wiring
- I confirm the motor rotates freely and the load is not seized
- If everything else checks out I look at control boards and sensors
Capacitors fail often yet they are not always the culprit. A seized bearing will cook a good capacitor. A stuck fan blade will trick you. I spin the motor shaft by hand when I can. If it feels rough or locked I stop and address the mechanical issue first.
Safety Recap
- Kill the power then verify it
- Discharge the capacitor with a resistor or tool
- Wear safety glasses and insulated gloves
- Use one hand when possible to reduce shock risk
- Keep your meter leads steady and away from other terminals
- Replace burned connectors along with the capacitor
Final Thoughts: Keep Your Motors Running Smoothly
Testing a motor capacitor is not hard once you know the rhythm. You identify the capacitor type, you discharge it safely, you measure capacitance with the right meter, and you compare the result to the label and tolerance. You check ESR if the case feels borderline. Then you replace the part with the right microfarads and a proper voltage rating. You test again and you button it up.
If your motor still misbehaves after a new capacitor you shift your focus. Look at the relay, the windings, the wiring, and the mechanical load. Induction motors are simple machines. They will tell you what is wrong if you listen and measure.
Before I wrap up I will leave you with one habit that saved me countless callbacks. I always note the original readings and the replacement values on the service sticker. The next time that unit hums on a hot day I already know the baseline. That lets me move fast and keep the system running when it matters.
Stay safe, test smart, and do not be afraid to replace a suspect capacitor when the numbers say it is time.
Internal link check: 4 unique links used once each:
- https://sinolami.com/stator-laminations/
- https://sinolami.com/rotor-laminations/
- https://sinolami.com/motor-core-laminations/
- https://sinolami.com/electrical-steel-laminations/