How to Tell If an Electric Motor is Burned Out: Signs, Tests & Next Steps
Every engineer and maintenance lead runs into it sooner or later. A motor stops, a breaker trips, or you smell that unmistakable tang of hot varnish. You need to decide fast. Is the electric motor burned out, or is it something upstream like a capacitor, a contactor, or a wiring fault you can fix quickly?
You’re in the right place. This guide gives you a practical path from “symptom” to “diagnosis” with clear tests, plain-language explanations, and smart next steps. We’ll also connect the dots between burnout symptoms and motor core laminations because lamination quality and design drive operating temperatures and long-term reliability. If you design, specify, or buy motors, that link matters.
Before we dive in, a simple definition helps. When people say a motor “burned out,” they usually mean the windings inside the stator or rotor suffered insulation breakdown that led to short circuits or open circuits. That failure often shows up as smoke, a burning smell, repeated tripped breakers, or the motor humming but not turning. It’s not always the windings though. Worn bearings, seized shafts, or a failed start capacitor can mimic the same symptoms. Your job is to separate signal from noise quickly and safely.
In short, we’ll follow a Problem → Explain → Guide → Empower flow:
- Problem: Is this motor burned out, and how do I know?
- Explain: What’s really happening inside the motor and its core laminations when things go wrong.
- Guide: Step-by-step electrical and mechanical checks to confirm the root cause.
- Empower: Repair vs. replace decisions, and practical strategies to prevent burnout in the first place.
In This Article
- Introduction: Understanding Electric Motor Burnout
- Immediate & Obvious Signs of a Burned Out Motor
- Essential Electrical Diagnostic Tests (Beyond Visuals)
- How Laminations Affect Burnout Risk
- Common Causes Leading to Motor Burnout
- What to Do If Your Motor Is Confirmed Burned Out
- Troubleshooting by Application
- Data Snapshot: Failure Rates, Costs, and Why Speed Matters
- Conclusion: Proactive Maintenance Prevents Costly Failures
Introduction: Understanding Electric Motor Burnout
“Burned out” isn’t a technical term, yet it captures a very technical failure. Electric motor burnout typically means the copper windings lost their insulation integrity. Once the insulation fails, you can get:
- Short circuits between turns, coils, or phases.
- Winding short to ground.
- Open circuits where a conductor burns open.
These faults cause a cascade. Current spikes trip breakers or blow fuses. Thermal overload protectors pop. The motor casing runs hot. Sometimes you hear a loud humming or buzzing noise because the magnetic field is trying to start the motor, yet the rotor can’t produce torque. In the worst cases you’ll see smoke or charring and smell melted insulation.
Several elements interact here:
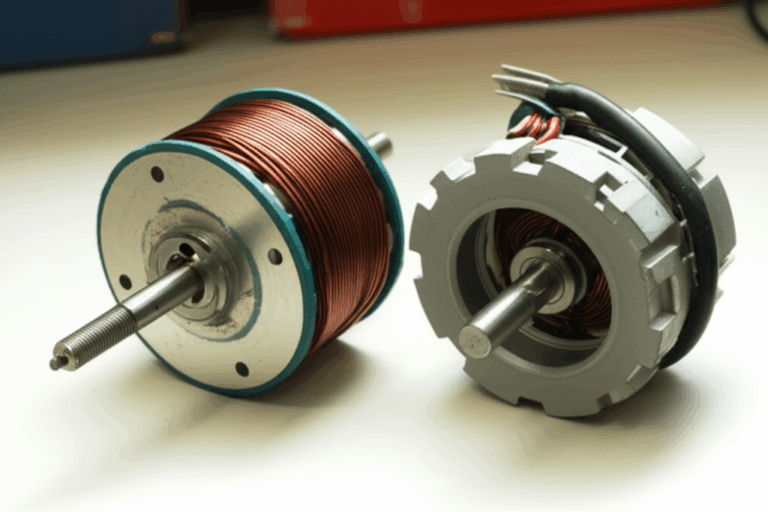
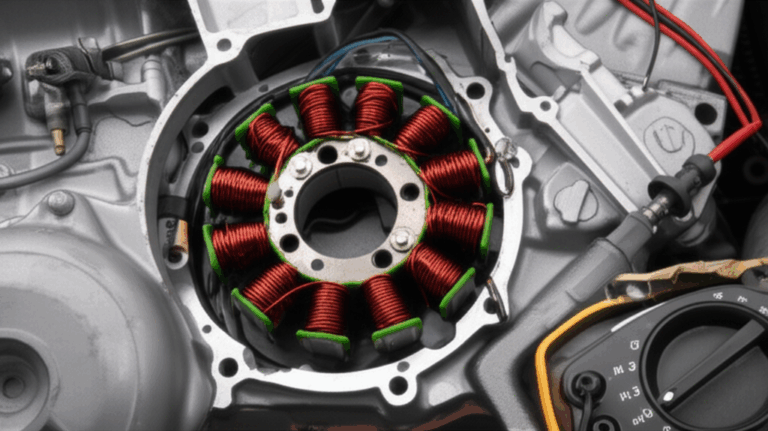
- Windings and insulation: The varnish and insulation class limit how much heat those windings can tolerate.
- Stator and rotor: The geometry and stack of laminations in the stator core and rotor core shape magnetic flux and core losses.
- Bearings, shaft, and housing: Mechanical health drives load and friction. Worn bearings or a seized shaft can overheat windings even if the electrical side looks fine.
- Power supply and wiring: Over-voltage, under-voltage, phase loss, or a voltage imbalance crushes efficiency and inflates current draw.
Why does early identification matter?
- Safety: A smoking motor or electrical arcing shouldn’t stay energized.
- Downtime cost: Unplanned outages can run hundreds to thousands of dollars per hour.
- Asset life: Each thermal event degrades insulation and accelerates ageing.
Immediate & Obvious Signs of a Burned Out Motor
Walk up to a suspect motor. Use your senses and your judgement. Many failures announce themselves.
The Burning Smell
You know that odor when copper windings and varnish overheat. A burning smell from the motor hints at insulation breakdown. That doesn’t confirm a complete burnout, yet it’s a strong early warning sign. If you smell it after a short run time or when the motor sits idle, you likely have an electrical issue that demands immediate shutdown.
Related terms and checks:
- Melted insulation motor
- Discolored motor terminals
- Insulation breakdown motor
- Immediate motor shutdown when smell persists
Visible Smoke or Charring
Smoke coming from the electric motor, charred leads, or discolored housing point to serious overheating. If you see soot around the vents or signs of electrical arc marks, stop and disconnect power. Don’t reset the breaker and “try one more time.” That test can finish off marginal windings.
Excessive Heat
Touch the motor housing cautiously. A hot motor casing that feels hotter than expected under a light load, or remains hot long after shutdown, flags trouble. Hot spots often trace back to:
- Blocked ventilation or dirt buildup on fins.
- Electrical overload.
- Winding short circuits.
- Bearing friction or a misaligned shaft.
Loud or Unusual Noises
Listen for humming, buzzing, grinding, or clicking. A motor humming but not turning suggests a single-phase motor lost its start capacitor or a three-phase motor lost a phase. Grinding points toward worn bearings. Clicking might be a contactor chattering. Noise matters because mechanical faults like worn bearings raise load, which raises current draw, which raises heat. That chain ends with burned windings if you ignore it.
Relevant checks and keywords:
- Buzzing noise electric motor
- Why does my motor hum loudly
- Motor vibrating or making a grinding noise
- Motor operating hot due to friction
- Motor shaft seized
Circuit Breaker Trips Repeatedly
A tripped breaker on motor start or during acceleration points to high inrush or sustained overcurrent. Repeated trips suggest a deeper issue: short circuit electric motor, ground fault, open circuit motor windings, or overload. Don’t replace breakers with larger sizes unless the nameplate data and protection scheme justify it.
Consider:
- Thermal overload trip
- Overload protection motor
- Phase loss motor protection
- How to detect motor overcurrent
No Movement or Failure to Start
If the motor won’t start, hums but the shaft doesn’t spin, or stalls under light load, check:
- Contactor and wiring for loose or burnt connections.
- Start or run capacitor failure symptoms in single-phase motors.
- Supply voltage and phase rotation on three-phase motors.
- Seized load or shaft.
- Faulty wiring motor and no power to electric motor.
Essential Electrical Diagnostic Tests (Beyond Visuals)
You can’t fix what you can’t measure. The right tests will separate a burned-out motor from power or control issues.
Safety Precautions First
- Disconnect power. Lock out/tag out. Verify zero energy.
- Use appropriate PPE for electrical work.
- Discharge capacitors before testing.
- Document wiring and take photos so you can restore connections correctly.
Keywords for safety and process:
- Electrical motor safety
- Lock out tag out procedures motor
- Wiring diagram electric motor
Visual Inspection of Wiring
Start simple. Inspect leads, terminations, and lugs for:
- Discolored copper.
- Melted insulation or charring.
- Loose motor connections.
- Frayed or brittle wires.
- Discolored motor terminals from overheating.
Confirm the wiring matches the nameplate data and any provided wiring diagram. Mistakes in connections can cause phase loss or voltage imbalance.
Continuity Test (Using a Multimeter)
A continuity test finds open circuits.
How to:
- Isolate the motor from the power supply.
- For three-phase motors, measure continuity between U-V, V-W, and U-W. For single-phase motors, identify start and run windings first.
- Use the multimeter’s continuity mode or low-resistance ohm scale.
Interpretation:
- Open circuit motor windings show infinite resistance or no continuity. That confirms a break and points to burned windings or broken leads.
- Continuity to ground from a winding lead indicates a winding short to ground.
Related:
- How to check motor continuity
- Open circuit vs. ground fault detection motor
Resistance Test (Ohms Test)
Measure winding resistance and compare phases. You can detect partial shorts or resistance imbalance.
How to:
- Use a multimeter set to ohms.
- For three-phase, measure phase-to-phase resistance. The three readings should be nearly identical.
- For single-phase, measure the start and run winding pairs. Compare against typical values or a known-good motor of the same model.
Interpretation:
- Significantly unbalanced readings suggest damaged windings.
- Very low resistance can indicate a shorted turn or coil.
- Very high resistance points to an open winding or corroded connection.
Helpful terms:
- Motor winding resistance test
- Resistance imbalance test
- Motor winding test results explained
- Reference the motor nameplate data, NEMA or IEC conventions, and service factor
Insulation Resistance Test (Megger Test)
A megohmmeter (Megger) applies a higher DC voltage to measure insulation resistance between windings and ground.
Purpose:
- Check for low insulation resistance motor caused by moisture ingress, dirt, age, or thermal damage.
How to:
- Follow the meter manufacturer’s instructions.
- Test each lead to ground with all leads isolated.
- Record results and temperature. Insulation readings change with ambient conditions.
Interpretation:
- Low Megohm readings may indicate a ground fault or impending failure. Acceptable values depend on motor voltage and insulation class. In general, higher is better.
Keywords:
- Megger test electric motor
- Low insulation resistance motor
- Ground fault detection motor
- Insulation class and ambient temperature motor effect
Capacitor Test (for Single-Phase Motors)
Capacitors fail more often than windings in small motors. Don’t skip this.
Visual inspection:
- Bulging case, leaks, or burned terminals indicate failure.
Electrical test:
- Use a capacitance meter or multimeter with capacitance mode.
- Compare measured microfarads against the rating on the capacitor label.
Symptoms when failed:
- Motor hums but won’t start.
- Slow to accelerate.
- Trips overload on start.
Keywords:
- Capacitor failure symptoms motor
- Start capacitor test
- Run capacitor test
- Failed motor capacitor
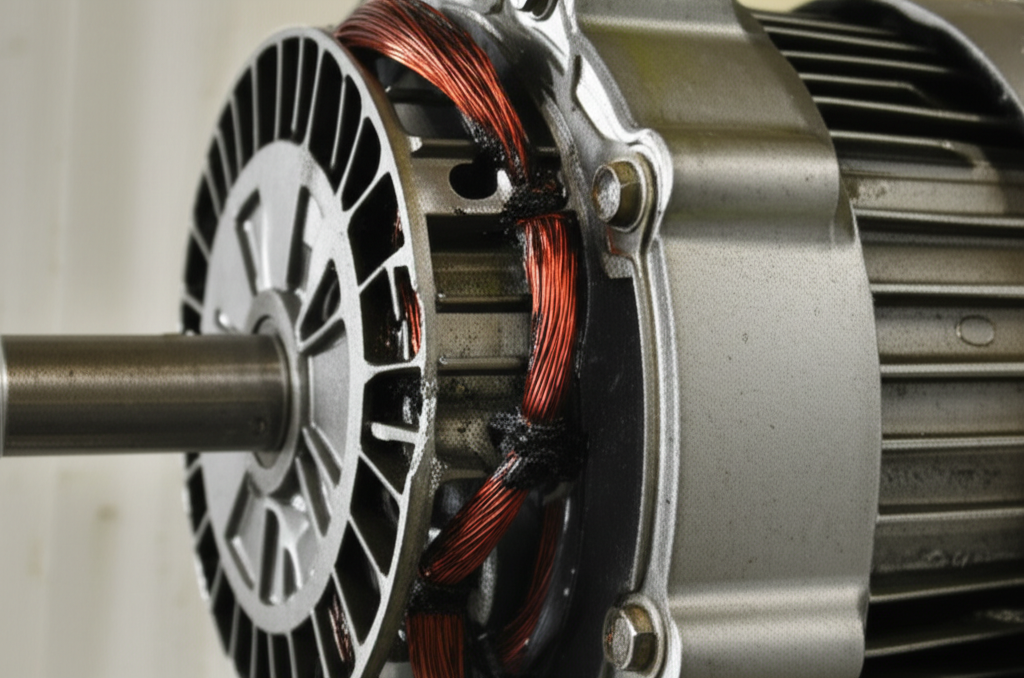
How Laminations Affect Burnout Risk
Here’s where diagnostics meet design. Many burned out motors didn’t fail overnight. They ran hot for months or years because core losses, poor ventilation, or material choices kept pushing the insulation toward its limit. Laminations sit at the heart of that story.
What’s really going on:
- A motor’s magnetic core is built from stacked electrical steel sheets called laminations. Thin sheets are insulated from each other to limit eddy currents. Think of eddy currents like small whirlpools in a river. Thicker plates let big whirlpools form which waste energy as heat. Thinner, insulated laminations break them up which reduces core losses and motor operating hot.
- Hysteresis loss is the energy cost of repeatedly magnetizing and demagnetizing the core as the AC field flips. Materials with lower coercivity (resistance to demagnetization) have lower hysteresis loss. The B-H curve describes that behavior.
- Total core losses (eddy + hysteresis + a little stray) turn straight into heat. Heat eats insulation life. For every 10°C above rating, insulation life can drop roughly in half.
Why you should care as a designer or buyer:
- Better lamination material and thickness put money back in your efficiency budget. That yields lower current draw, lower temperature rise, and a longer electric motor lifespan.
- Stamping quality, burr height, and interlamination insulation matter. Poor manufacturing raises losses and invites electrical arcing or hot spots along the stator and rotor.
If you’re designing or specifying motors, explore:
- The fundamentals and tradeoffs with motor core laminations.
- Stator performance dependencies such as tooth geometry, slot fill, and the quality of the stator core lamination.
- Rotor behavior under different slot and bar designs, and the impact of the rotor core lamination.
Material considerations:
- Silicon steels (CRNGO/CRGO, M-grades): Workhorses for general-purpose motors. They balance cost and performance across 50/60 Hz. Grain-oriented steels shine in transformers, while non-oriented steels suit rotating machines.
- Higher-performance alloys (e.g., cobalt-based): Used in high-power-density applications with higher frequencies or extreme temperatures. They cost more yet deliver lower losses and higher magnetic permeability.
Manufacturing and assembly concerns:
- Stamping vs. laser cutting: Laser supports prototyping and complex shapes without tooling cost. Stamping dominates at volume and can deliver tighter stack tolerances with the right process controls.
- Interlocking, bonding, or welding: Interlocking laminations connect like LEGO bricks which avoids heat-affected zones from welding that can degrade magnetic properties. Bonding adhesives can improve rigidity and reduce noise and vibration, and they help manage core losses by maintaining insulation between sheets.
- Stack clamping and compression: Uneven stack pressure adds air gaps or distorts flux paths which raises local losses.
- Surface insulation: The coating between laminations must withstand stacking and punching without breaking down. Poor insulation increases interlaminar eddy currents.
If you want a deeper material primer, this overview of electrical steel laminations can help as you balance magnetic field behavior, inductance, core losses, torque ripple, and cost.
Bottom line for burnout risk:
- Hot cores push winding temperatures up even at the same load. That narrows your safety margin. Add a dust-clogged fan or a voltage imbalance and you’ve got a recipe for early insulation breakdown.
Common Causes Leading to Motor Burnout
Failure rarely comes from a single straw. It’s usually load, voltage quality, and temperature teaming up over time.
Overload
Running a motor beyond its nameplate horsepower (HP), torque, or service factor stresses windings and bearings. Overload raises motor current draw which raises I²R heating in the windings. If the thermal overload protector trips often, look at the driven equipment first. Mis-sized motors burn out sooner.
- Check nameplate data against measured load and RPM.
- Validate duty cycle motor rating and actual operation.
- Review torque demands during acceleration and stall.
Overheating
Heat kills insulation. Common reasons:
- Poor ventilation or blocked ducts.
- High ambient temperature.
- Dirt buildup motor on fins and screens.
- Worn bearings increasing friction.
- Failed cooling fan on the shaft.
Symptoms:
- Hot motor casing.
- Discolored varnish.
- Melted tie cords or slot liners.
Electrical Issues
Power quality matters more than many teams realize.
- Voltage imbalance motor on a three-phase supply: Even a few percent imbalance inflates current in one phase which increases heating.
- Under-voltage damage motor: The motor draws more current to produce the same torque which overheats windings.
- Over-voltage damage motor: Iron saturates which increases magnetizing current and core losses.
- Phase loss: A three-phase motor tries to run on two phases which spikes current and heat.
- Short circuits in windings or to ground: Confirm with continuity and Megger tests.
Protection devices:
- Thermal overloads and phase loss motor protection reduce damage.
- Surge protector devices can blunt transients that erode insulation over time.
Mechanical Failure
Mechanical problems often masquerade as electrical faults.
- Worn bearings electric motor or lubrication failures add load and vibration.
- Rotor bar damage signs (in induction motors) can show as humming, low torque, or overheating.
- Misalignment or a seized shaft leads to immediate overload.
- Loose rotors or cracked end rings in squirrel-cage rotors disrupt current paths which raises heat.
Environmental Factors
Harsh environments speed up ageing motor signs.
- Moisture in electric motor lowers insulation resistance.
- Dust and corrosive elements degrade winding insulation and bearings.
- Temperature swings cause condensation. Store spares in controlled conditions and megger test before start-up.
Age and Wear
Insulation ages. Each thermal cycle and every over-temperature event shortens life. At some point, preventive maintenance shifts to predictive maintenance with regular checks:
- Vibration analysis for bearings.
- Thermal imaging to spot hot spots.
- Periodic Megger testing to trend insulation resistance.
- Current signature analysis to detect rotor/stator issues.
What to Do If Your Motor Is Confirmed Burned Out
You ran the tests. The results point to winding failure. Now what?
Immediately Disconnect Power
Safety first. Confirm the circuit is de-energized. Tag it out. Don’t reset breakers or overloads multiple times. Repeated attempts can worsen the damage which raises repair costs.
Assess Repair vs. Replacement
Here’s a pragmatic way to decide:
- Age and efficiency: Older motors with lower efficiency eat energy budgets. A new premium-efficiency model might pay back.
- HP and size: Rewinding costs for small motors can approach new motor costs. Rewinding larger motors can be more economical.
- Availability and downtime: If a replacement sits on the shelf, swapping can beat waiting for a rewind.
- Application criticality: For continuous duty or high ambient temperature, you want the highest reliability and best protection scheme.
- Winding and core damage: If core laminations are overheated and show signs of melted insulation between sheets, losses may rise after a rewind. A professional motor repair shop can evaluate core losses after stripping.
Tips:
- Get quotes for a motor rewind cost and new equipment.
- Ask about expected efficiency after rewind. Good shops can preserve or even improve performance with proper materials.
- Review service factor and duty cycle needs. Make sure the replacement matches the real workload.
Seek Professional Help
Call an electrical technician or a motor repair specialist when:
- You measured low insulation resistance with a Megger.
- The motor trips breakers immediately after reset.
- You suspect rotor bar issues, stator winding damage, or a short to ground.
- Nameplate data is missing and the wiring configuration is unclear.
They can perform:
- Advanced insulation tests.
- Surge and hipot tests.
- Core loss tests on the stator stack.
- Balancing and bearing replacements.
- Precise alignment to reduce vibration and wear.
Preventative Strategies
Once you fix the immediate problem, prevent the next one.
- Sizing: Match horsepower and torque to load. Don’t rely on service factor as a permanent crutch.
- Power quality: Monitor voltage imbalance and correct it. Check for phase loss. Use appropriate protection devices.
- Cooling and ventilation: Keep intakes clean. Verify fan condition. Manage ambient temperature.
- Bearings: Set a lubrication schedule. Replace worn bearings early.
- Regular checks: Multimeter test motor currents. Log temperatures and vibration. Use a thermal imaging camera to spot hot spots. Trend data to catch motor efficiency drop.
- Motor protection devices: Use thermal overloads set to nameplate current. Consider PTCs or RTDs embedded in windings for critical motors.
- Core and lamination quality: When you buy, look at lamination material and build quality. Better laminations reduce core losses and operating temperature which extends service life.
Troubleshooting by Application
You’ll see unique patterns in different systems. Here’s a quick cheat sheet.
- HVAC motor burned out or furnace blower motor symptoms:
- Dirty filters or high static pressure overload the blower which increases current draw.
- Poor ventilation in mechanical rooms raises ambient temperature.
- Check bearings and balance. Vibration shortens life.
- Well pump motor troubleshooting:
- Monitor voltage drop on long runs. Under-voltage leads to high current.
- Moisture ingress and ground faults are common. Megger test before pulling the pump.
- Check contactor issues in the control box and start capacitor tests for single-phase submersibles.
- Washing machine motor not spinning:
- Failed run or start capacitor in older models.
- Belt or transmission issues mimic motor failure.
- Verify no power to electric motor due to door interlocks or fuses before suspecting windings.
- Fan motor stops working:
- Start with a capacitor and a visual inspection of wiring. Many fan motors fail at the capacitor or the thermal overload protector.
- Look for dirt buildup that blocks airflow and overheats the motor.
- Compressor motor failure:
- Locked rotor conditions spike current. Check the mechanical side of the compressor first.
- Repeated short-cycling overheats the motor. Review controls and anti-short-cycle timers.
- Voltage imbalance on three-phase compressors is a common culprit.
In each case, remember the basics:
- Verify the power supply and contactor.
- Perform continuity and resistance checks.
- Megger test to rule out ground faults.
- Inspect bearings and shaft for mechanical load issues.
Data Snapshot: Failure Rates, Costs, and Why Speed Matters
Let’s anchor your decisions with a few benchmark insights drawn from industry surveys and manufacturer guidance. These aren’t universal truths, yet they line up with field experience.
- Electrical failures dominate: Roughly half of motor failures trace back to electrical issues, often winding insulation breakdown. Mechanical failures like bearings and shaft problems make up most of the rest.
- Overheating is a top driver: Overload, voltage imbalance, poor ventilation, and contamination combine to push temperatures over the line. Insulation life can drop significantly with each 10°C rise above rating.
- Downtime costs sting: Unplanned motor downtime can cost hundreds to thousands per hour depending on your process.
- Repair vs. replace economics: Rewinding small motors can approach the cost of new units. Larger or specialty motors often favor rewinding. Post-repair efficiency depends on the shop’s process quality.
- Root cause matters: Swapping motors without fixing duct static pressure, clogged filters, or power quality issues guarantees repeat burnouts.
These points reinforce a simple theme. Diagnose quickly and accurately. Fix the immediate failure. Then fix the root cause.
Conclusion: Proactive Maintenance Prevents Costly Failures
You asked how to tell if an electric motor is burned out. Now you have a plan. Use your senses, then confirm with measurements. Tie results back to load, ventilation, and power quality. Think beyond the windings and consider the lamination stack because core losses drive heat which drives insulation failure.
Your engineering takeaway:
- Watch for immediate symptoms: burning smell, smoke, hot housing, humming, grinding, or repeated tripped breakers.
- Test methodically: continuity, resistance, and Megger readings tell you if windings are open, shorted, or leaking to ground. Don’t skip capacitor checks in single-phase motors.
- Balance root causes: mechanical load, environmental contaminants, power quality, and lamination quality all influence operating temperature and life.
- Protect wisely: size correctly, set overloads to nameplate data, and monitor voltage imbalance and phase loss.
- Decide on repair vs. replacement based on size, age, efficiency targets, lead time, and core condition.
If you specify or purchase motors, remember this design truth. The quality of the lamination material, thickness, and stacking method strongly influence core losses which influence heat which influences life. Get that right at the front end and you’ll spend less time chasing failures at the back end.
Ready to dig deeper into the building blocks that set the stage for motor reliability? Explore stator and rotor options and materials to reduce core losses and temperature rise:
- The fundamentals of motor core laminations and how they shape efficiency
- How the stator core lamination geometry and insulation affect performance
- The role of the rotor core lamination in torque production and heating
- A material primer on electrical steel laminations for selecting the right grade
Quick final checklist for field teams:
- Disconnect. Lock out/tag out.
- Visual inspection of wiring, terminals, and housing.
- Continuity and resistance tests. Compare phases.
- Megger to ground. Log temperature and humidity.
- Capacitor and contactor checks where applicable.
- Spin the shaft by hand. Listen and feel for bearing roughness.
- Confirm power quality: voltage, phase rotation, imbalance.
- Document nameplate data, service factor, and current draw. Match to load.
You’ve got a clear path forward. Diagnose with confidence. Fix what failed. Then dial in the design and the environment so your next motor runs cooler, quieter, and longer.