How to Take Out & Replace a Window Motor in Your 2010 Camaro: A Step-by-Step DIY Guide
Table of Contents
- How to Take Out & Replace a Window Motor in Your 2010 Camaro: A Step-by-Step DIY Guide
- Why this guide matters
- What are the signs of a bad window motor?
- What tools and parts do you need?
- How do you stay safe before you start?
- How do you remove the 2010 Camaro door panel without breaking clips?
- How do you access the inner door and protect the moisture barrier?
- How do you detach and secure the window glass?
- How do you disconnect and remove the motor and regulator assembly?
- How do you install the new window motor or motor & regulator?
- How do you test, align, and calibrate the window?
- What if things go wrong after the swap?
- DIY vs. professional: what makes sense for you?
- Time, cost, and part choices at a glance
- Related checks you should do while you work
- FAQs
- References
- Key takeaways
You can fix a slow or dead power window in your 2010 Chevrolet Camaro at home. I’ll show you how to remove the door panel, take out the window motor and regulator, and put in a new part the right way. This guide is worth your time because it keeps you safe, saves you money, and gives you clear steps with simple tools.
I’ve done this repair. I know the pain when the glass won’t move on a hot day. I also know the joy when you hit the switch and the glass slides like new. Let’s get you there.
What are the signs of a bad window motor?
Problem: Your 2010 Camaro window acts up. It moves slow or not at all. You hear a grinding or clicking noise in the door. Sometimes it stops in the middle. Other times it is stuck up or stuck down.
Agitate: You tap the power window switch. Nothing. The driver side window won’t budge. Maybe the passenger side window stops halfway. That’s not safe. Rain can soak your door speaker. The motor can burn out more if you keep trying.
Solution: Check these common signs of a failing power window motor and window regulator:
- Window operates slowly or binds in the tracks
- Grinding, clicking, or whirring from the inner door skin
- Complete failure of window movement
- Intermittent motion when you wiggle the switch
- One-touch auto up or down stops working until you recalibrate
You may have a bad window motor, a worn regulator cable, or an issue with the power window switch. On a 5th Gen Camaro, the motor and window regulator often fail together. Many people replace the power window motor and regulator assembly as one unit.
What tools and parts do you need?
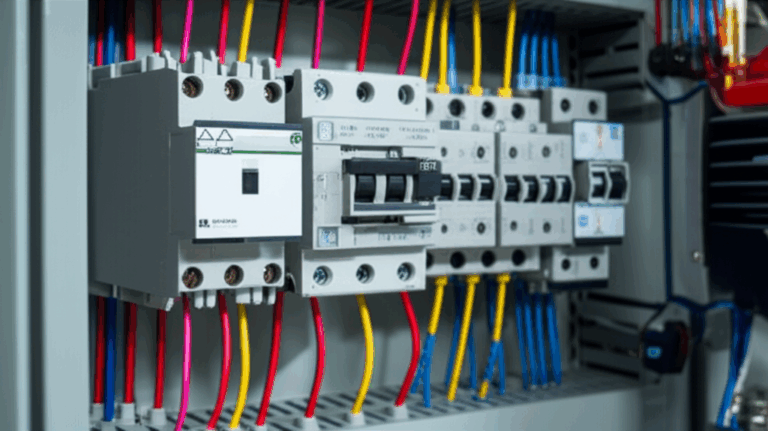
You can do this job with basic hand tools plus a drill and a heavy-duty pop rivet gun. Many 2010 Camaro regulators are riveted to the door frame. You drill the rivets out. Then you secure the new assembly with 1/4 inch aluminum rivets.
Here’s a handy table:
| Category | What you need |
|---|---|
| Essential Parts | New Window Motor (OEM ACDelco or aftermarket Dorman) or Window Motor & Regulator Assembly. Replacement Rivets (1/4 in aluminum). Optional: new clips for door panel. |
| Required Tools | Torx bit set (T15, T20, T30), socket wrench set (10mm, 13mm), Phillips and flathead screwdrivers, plastic trim removal tool, drill with 1/4 in or 6mm bit, heavy-duty pop rivet gun, safety glasses, work gloves, painter’s tape, small container for screws, shop rags, optional multimeter. |
| Helpful Extras | Blue painter’s tape to hold glass up, silicone spray to lube window tracks, zip ties to secure wiring harness, Loctite threadlocker on bolts if needed. |
You will touch many parts inside the door. Door panel, clips, door handle cable, window glass, weatherstripping, speaker, and the wiring harness for the power window motor. Keep a clean space. Use a small tray to hold screws and door trim panel fasteners.
How do you stay safe before you start?
Problem: You can short a wire if you work on live circuits. You can move the glass by accident. You can hurt your hand on the inner door metal. You can also set off a door module error if you do not power down the car.
Agitate: A spark can fry a fuse or the body control module. A moving window can pinch your fingers. Sharp edges can cut you. You don’t want that.
Solution:
- Park your 2010 Chevrolet Camaro on a flat surface. Set the parking brake.
- Wear safety glasses and work gloves.
- Disconnect the negative battery terminal. Do this before you touch the power window switch or motor. This helps protect the BCM, the fuse box, and the door module.
- Gather all tools first so you don’t rush.
If your window is fully up and you need it down to reach the glass bolts, you can reconnect the battery for a moment to move the glass. Then disconnect the battery again right away.
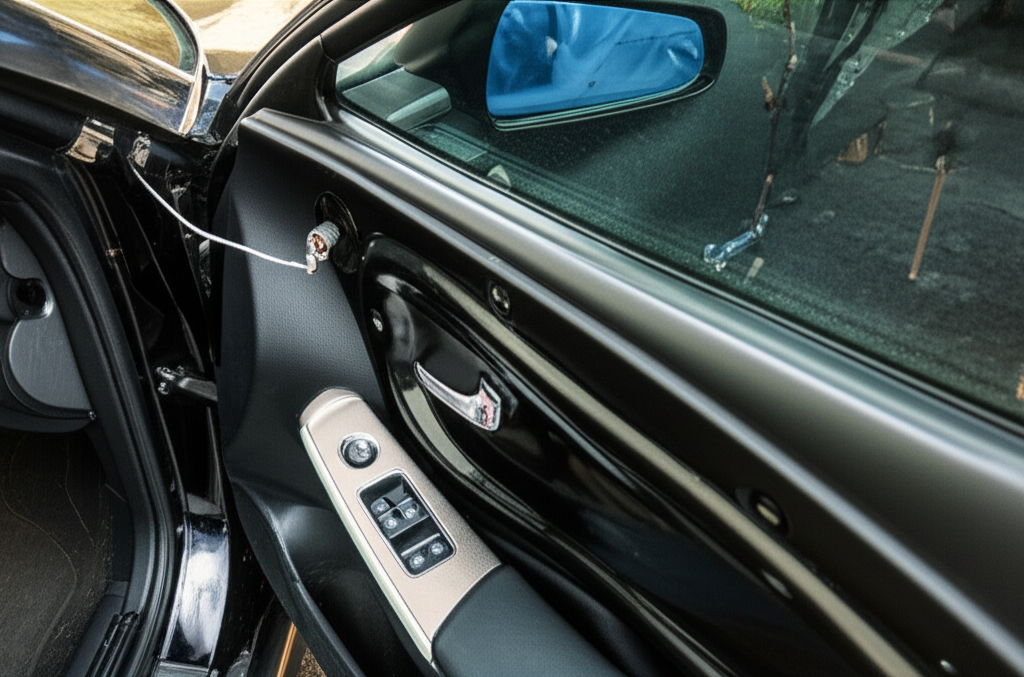
How do you remove the 2010 Camaro door panel without breaking clips?
I start at the armrest and door pull. I look for Torx screws hidden under small trim covers. On many 5th Gen Camaro doors, you will use T15, T20, and T30 Torx bits. You may also see a Phillips screw in the door handle cup or near the speaker area.
- Remove all visible screws in the armrest, door pull, and door handle cup.
- Pry gently around the edge with a plastic trim removal tool. Don’t use a metal screwdriver on paint.
- Pop the door trim panel clips one by one. Take your time.
- Lift the panel up and off the top lip near the window weatherstripping.
- Unclip the door handle cable. It has a small ball end that snaps free.
- Disconnect the electrical connectors for the power window switch, lock switch, and speaker.
Set the panel aside on a soft towel. Keep the clips and bolts together. Note where each screw came from. Some are different lengths.
How do you access the inner door and protect the moisture barrier?
Behind the panel sits a clear or foam moisture barrier with sound deadening material. Peel it back slowly so you keep the adhesive sticky. You can tape it up out of the way with painter’s tape.
- Don’t tear the inner door skin seal if you can avoid it.
- Keep wires and the door latch cable out of your drill path.
- If you see sound-deadening pads, leave them stuck to the metal.
You now see the window regulator, the lift channel, and the window motor assembly. The electrical connector for the motor sits near the motor body. The regulator runs across the door with a cable system.
How do you detach and secure the window glass?
Problem: You must remove the glass bolts to free the regulator. If the glass drops, it can break.
Agitate: A heavy glass can slam down if you slip. It can crack the window glass or damage the window lift channel.
Solution:
- If the glass is fully up, reconnect the battery and key on to drop the glass just enough to see the two bolts that hold the glass to the regulator lift channel. Then disconnect the battery again.
- Loosen and remove the two bolts. On many cars these take a 10mm socket.
- Lift the window glass by hand into the full up position.
- Tape the glass to the top of the door frame with several strips of strong painter’s tape. Run the tape over the top and down the outside. Use more than you think you need.
If you prefer, you can remove the glass. Pull it up and out with the help of a friend. That gives you more room to work inside the door.
How do you disconnect and remove the motor and regulator assembly?
You will see how the 2010 Camaro motor and regulator attach to the door. Many 5th Gen Camaro cars use large rivets at the mounting points. Some use bolts.
- Unplug the electrical connector to the window motor.
- If you see bolts, remove them with your socket set.
- If you see rivets, center punch each rivet head. Drill out the rivet heads with a 1/4 inch or 6mm bit. Wear safety glasses.
- Support the regulator as you remove the last fastener so it does not fall and scratch the door.
Once free, twist and slide the regulator and motor out through the access hole in the inner door frame. Take your time. Don’t kink the wiring harness. Inspect the old unit. Frayed regulator cables and a seized power window lift motor are common.
How do you install the new window motor or motor & regulator?
Problem: You need a part that fits right. You also need to attach it tight and square so the glass moves true.
Agitate: The wrong part can waste your day. A loose mount can make noise. A bad angle can make the window bind.
Solution:
- Compare the new window motor and regulator assembly to the old one. Match the bolt pattern or rivet holes. Check the connector shape and the window motor bolt size, if the motor mounts with bolts to the regulator.
- Guide the new assembly into the door. Line up the holes.
- If you have bolts, thread them in and tighten. If you use rivets, seat the rivets and use a heavy-duty pop rivet gun to secure the assembly. Use 1/4 inch aluminum rivets as many owners do.
- Reconnect the electrical connector to the new motor.
- Make sure the window tracks and window glass channel are clean. Spray a light coat of silicone spray on the window track and weatherstripping.
If you choose motor only, you must remove the motor from the regulator first. You may see Torx bolts. Note the gear mesh. It is often easier and smarter to replace the window motor and regulator assembly together. Many shops recommend it.
How do you test, align, and calibrate the window?
Now you set the glass back on the lift channel and test it.
- Slide the glass down into the door if you removed it. Seat it into the tracks. Align the holes to the regulator.
- Insert the glass retaining bolts and leave them a little loose.
- Reconnect the battery. Reconnect the window switch to its harness. Test the window up and down.
- If it moves crooked or binds, loosen the glass bolts. Nudge the glass to center it in the window lift channel. Tighten again. Test again.
- When smooth and quiet, snug the bolts. Don’t over-torque. If you need exact torque specs for the 2010 Camaro door panel and glass bolts, check a GM Workshop Manual or a Haynes Manual.
Calibrate the one-touch feature:
- Roll the window all the way down. Hold the switch down for 3 to 5 seconds.
- Roll the window all the way up. Hold the switch up for 3 to 5 seconds.
- Test the one-touch auto up/down again.
Disconnect the battery before final reassembly to avoid any surprise moves while you snap in connectors.
What if things go wrong after the swap?
Problem: After you install, the window still does not move. Or it moves with a rattle. Or the one-touch auto up/down does not work. Or the motor makes a grinding noise.
Agitate: You did the work. The window still acts up. That feels bad.
Solution:
- Window not moving: Check the electrical connector at the window motor. Check the fuse for the power window. Check the power window switch. Use a multimeter to do a window motor voltage check.
- Window moves crooked or binds: Check the glass alignment. Make sure the window tracks are clean. Verify all rivets or bolts are tight on the regulator bracket.
- Noisy operation: Tighten all fasteners. Lube the window tracks and weatherstripping with silicone spray. Make sure no wire or zip tie rubs the window lift path.
- One-touch not working: Do the window motor calibration again. Follow the steps above. If it still fails, check your owner’s manual for the door module reset steps.
If the window is stuck completely down and you can’t reach the glass bolts, you can hold the glass and support it while you remove the regulator. Or apply 12V power direct to the motor pigtail to move it just enough to access the bolts. Do this only if you are comfortable with electrical checks. If not, seek a certified mechanic.
DIY vs. professional: what makes sense for you?
Do it yourself if you have the tools, time, and patience. You will save on labor. You will learn your 2010 Camaro inside and out. You can get an OEM ACDelco motor or a solid aftermarket part like Dorman, Cardone, or ACI from AutoZone, O’Reilly Auto Parts, RockAuto, or a Chevrolet dealer.
Hire a pro if you don’t want to drill rivets. Or if the window glass needs major alignment. Or if you see extra wiring issues at the door module. Shops follow labor guides like Alldata and Mitchell. Many charge 1.5 to 2.5 hours for this job plus parts.
Either way, you want a part with good build. A quality power window lift motor uses solid magnetic materials. The motor core and laminations matter. In fact, the durability of the rotor and stator stack can make a motor last longer. If you’re curious about what goes inside, learn about electrical steel laminations, the backbone of motor cores. Better motor core laminations in the rotor and stator can help reduce heat and noise in many electric motors. The same ideas apply when you pick any motorized part. You can also read about rotor core lamination and stator core lamination to understand why quality parts run smoother.
Time, cost, and part choices at a glance
Here is a quick table you can use when you decide between motor only or motor + regulator:
| Category | Detail |
|---|---|
| Common Failure Mode | Motor burnout or worn carbon brushes, slow or dead window. Regulator cable fray or snap, window jamming or falling. Motor & regulator often fail together. |
| Typical DIY Time | 2 to 4 hours if you have tools. First time can take 4 to 6+ hours if you drill rivets for the first time. |
| Professional Shop Time | 1.5 to 2.5 hours labor based on common labor guides. |
| Part Cost (Motor Only) | OEM ACDelco: about $150–$300. Aftermarket Dorman/Cardone/ACI: about $70–$180. Side and supplier affect price. |
| Part Cost (Motor + Regulator) | OEM ACDelco: about $250–$500. Aftermarket Dorman/Cardone: about $120–$300. Often preferred due to co-failure and easier install. |
| Total DIY Cost | About $70–$500+ depending on part choice and tool buys like a rivet gun ($30–$60). |
| Total Professional Cost | About $300–$700+ at common labor rates. Dealer can be higher. |
| Required Rivet Size | 1/4 inch (6.3mm) aluminum rivets for many 5th Gen Camaro doors. Heavy-duty rivet gun needed. |
| Battery Disconnect | Crucial step to prevent shorts, accidental window movement, and module errors. |
| Common Post-Fix Issues | Calibration needed for one-touch, panel rattles from broken clips, glass rattle from poor seating. |
If you need torque specs for 2010 Camaro door panel screws, check the GM service information. Don’t over-tighten plastic fasteners. Replace any door panel clips that look bent or broken.
Related checks you should do while you work
As you go, keep an eye on these items. I’ll phrase each as a short tip you can act on now.
- Test the 2010 Camaro power window fuses and the power window relay if the motor does not get power.
- If your 2010 Camaro window motor is not working, try another power window switch to rule out a bad switch.
- Do a 2010 Camaro window motor wiring diagram review before you probe wires with a multimeter.
- Look up the window motor pigtail and the wiring harness for signs of heat or corrosion.
- If the window is slow, clean and lubricate the window track and window glass channel with silicone spray.
- If the window is stuck down in your 2010 Camaro, support the glass with tape or a suction cup before you loosen anything.
- If your 5th Gen Camaro window motor makes a grinding noise, the regulator cable may be frayed.
- If you hear clicking, the motor brushes may be worn or the gear may be stripped.
- When you remove the door panel, keep an eye on the door handle bezel, armrest, and door handle cable routing.
- Don’t forget the speaker removal in the door if it blocks your path to the inner door cavity.
- If you drill rivets, vacuum the chips so they don’t rattle inside the inner door skin.
- If you use bolts instead of rivets, add a dab of Loctite on threads. Don’t over torque.
- If you need a 2010 Camaro window motor part number, use your VIN at a Chevrolet dealer parts counter or online OEM catalog.
- If you wonder about aftermarket vs OEM window motor warranty, compare ACDelco and Dorman terms before you buy.
- If your door panel rattles after reassembly, you may have a broken door trim panel clip. Replace it.
- If your 2010 Camaro power window problem comes back, check the door module for codes with a scan tool.
- If you cannot get the glass to align, loosen the mount bolts and adjust the regulator slightly. Some play helps seat the glass straight.
- If you want to save time, buy a complete window motor and regulator kit for 2010 Camaro. Many DIYers say it is easier.
- If you shop for parts, compare AutoZone, O’Reilly Auto Parts, RockAuto, and your Chevrolet dealer.
FAQs
Q: How long does this repair take for a DIYer?
A: Plan 2 to 4 hours if you have done door work before. Plan 4 to 6+ hours if this is your first time drilling rivets and aligning glass.
Q: Do I always need to replace the regulator with the motor?
A: Not always. But on many 2010 Camaro cars, the regulator cable and the motor often wear together. A combined motor and regulator assembly saves time and reduces repeat repairs.
Q: What’s the cost difference between OEM and aftermarket?
A: OEM ACDelco motor only runs about $150–$300. Aftermarket brands like Dorman, Cardone, and ACI run about $70–$180 for motor only. A full motor & regulator assembly can run $120–$500 depending on brand.
Q: What if my window is stuck fully down and I can’t access the bolts?
A: Support the glass with tape or a helper. You can power the motor just enough to reach the bolt holes if you have the skill and a multimeter. If not, get help from a pro.
Q: Is window motor calibration needed on all 2010 Camaros?
A: If one-touch auto up/down does not work after the repair, do the calibration. Roll down and hold 3–5 seconds. Roll up and hold 3–5 seconds. Check your owner’s manual for exact steps.
Q: What tools are most used on the 2010 Camaro door?
A: Torx bits (T15, T20, T30), 10mm and 13mm sockets, trim removal tool, drill with 1/4 inch bit, heavy-duty pop rivet gun, Phillips and flathead screwdrivers.
Q: Can I use bolts instead of rivets on the new regulator?
A: Some DIYers do. Use lock nuts and washers if you go that route. Rivets match the factory look and hold well.
Q: Where can I find a good step-by-step video?
A: YouTube has many 2010 Camaro window motor replacement videos. Check the comments for extra tips from owners.
Q: What if I hear a grinding noise after install?
A: Check fasteners. Check gear mesh if you installed motor only. Make sure the glass bolts are snug and the tracks are clean.
Q: How do I find the right window motor part number for driver or passenger side?
A: Use your VIN with a Chevrolet dealer or an online OEM catalog. The sides can be different.
References
- GM Workshop Manual for 2010 Chevrolet Camaro (Service information and torque specs)
- Haynes Manual, Chevrolet Camaro Fifth Generation (Door panel and power window service overview)
- Camaro5.com and LS1Tech owner forums (Common repair threads and DIY tips)
- ACDelco and Dorman product catalogs (Motor and regulator part listings)
- RockAuto, AutoZone, O’Reilly Auto Parts (Retail pricing and availability)
- YouTube DIY videos for 2010 Camaro window motor and regulator replacement (Visual step-by-step demonstrations)
Key takeaways
- Disconnect the negative battery terminal before you start. Safety first.
- Remove the door panel with care. Save clips. Track screws.
- Tape the window glass up after you remove the two glass-to-regulator bolts.
- Drill out the rivets or remove the bolts that hold the window motor and regulator.
- A motor and regulator assembly swap is often easier than motor only.
- Use 1/4 inch aluminum rivets and a heavy-duty rivet gun to mount the new assembly.
- Reconnect the window switch and test movement before final reassembly.
- Align the glass in the tracks. Tighten fasteners. Lubricate the window tracks.
- Calibrate one-touch by holding the switch after full down and after full up.
- If issues remain, check fuses, wiring, the power window switch, and the door module.
Below, I bring the PAS method together one last time:
- Problem: Your 2010 Camaro power window is dead, slow, or noisy.
- Agitate: You can’t air out the car. Rain can soak the door. The motor can burn out more.
- Solution: Use this step-by-step guide to remove the old window motor or regulator and install a new OEM ACDelco or aftermarket Dorman unit. Test. Align. Calibrate. Done.
With a few tools and a calm plan, you can fix your power window like a pro.