How to Safely Remove Your Solera Awning Motor Cover (Step-by-Step Guide)
Table of Contents
- Why I Wrote This Guide
- Why You Might Need to Remove the Motor Cover
- Essential Tools and Safety Precautions
- Tools You’ll Need
- Safety First
- Step-by-Step Guide to Removing the Motor Cover
- Step 1: Secure the Awning and Disconnect Power
- Step 2: Locate the Motor End of the Awning
- Step 3: Identify and Remove Fasteners
- Step 4: Gently Detach the Cover
- Step 5: Carefully Remove and Set Aside
- What to Do After Motor Cover Removal
- Troubleshoot Wiring Issues
- Inspect Gears and Gearbox
- Test or Replace the Motor
- Manual Override Access
- Maintenance While You’re In There
- Reinstallation Tips
- Common Mistakes to Avoid
- Troubleshooting Quick Reference
- Notes on Model Variations (Solera Smart Arm, XL, and Others)
- Frequently Asked Questions
- Conclusion: Taking Control of Your Awning Maintenance
- My Short Checklist You Can Screenshot
Why I Wrote This Guide
The first time I pulled a Solera awning motor cover I assumed it would take five minutes. It did not. One hidden Torx screw kept me guessing while the afternoon sun tried to cook me on the ladder. I learned a better way. I wrote this so you can skip the guesswork and the frustration.
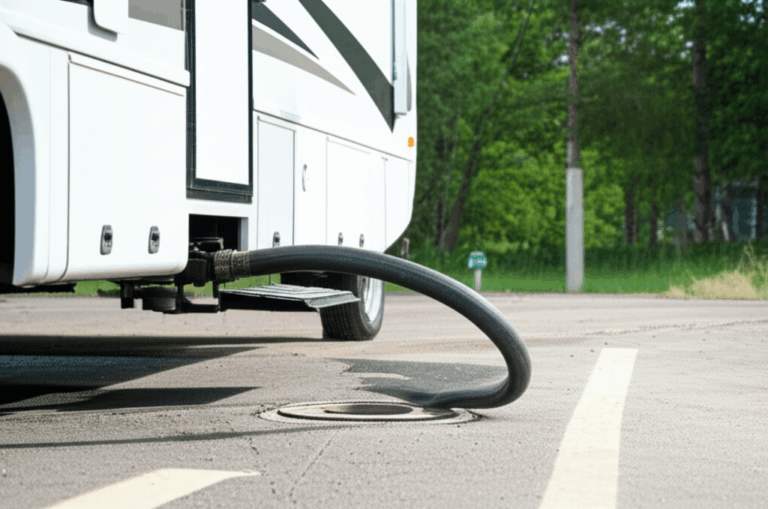
You might be staring at a Solera power awning that won’t extend or retract. Maybe you hear a grinding noise at the motor end. Maybe nothing happens at all. You need to get inside the motor housing. I’ll walk you through how to remove the Solera awning motor cover safely and cleanly. I’ll share what to look for once you’re in there. I’ll also help you avoid the little mistakes that cause cracked covers or lost screws.
I’ll focus on real steps. Clear language. The exact tools I actually use. I’ll mention Solera Smart Arm and XL variations where it matters. If you want a straightforward how-to for Solera awning motor cover removal you’re in the right place.
Why You Might Need to Remove the Motor Cover
In my experience you remove the motor cover for one of a few reasons:
- Troubleshooting a malfunctioning awning:
- Awning extended not retracting.
- Awning retracting not extending.
- No power to the motor or intermittent power.
- Grinding or clicking noises from the motor end.
- Accessing the motor for repair or replacement:
- You plan to replace a worn motor or gearbox.
- You want to test the motor leads directly.
- Inspecting gears or wiring:
- You suspect a stripped gear in the motor assembly.
- You want to check for loose wires or a damaged wiring harness.
- Performing routine maintenance:
- Cleaning the area.
- Lubricating accessible components where appropriate.
- Manual override access:
- You need to retract or extend the awning manually because the motor or control module failed.
If your Solera awning no longer moves or runs weak under load you will likely open the motor cover. The cover is your door to every important check inside the motor end cap. That includes wiring, gear access, and manual override points on many Lippert Components Solera models.
Essential Tools and Safety Precautions
Tools You’ll Need
Bring the basics with a couple of extras. I keep these in a small tote so I can carry them up the ladder easily.
- Phillips head screwdriver
- Flathead screwdriver or a plastic pry tool
- Torx bits or a Torx screwdriver set if your model uses Torx screws
- Needle-nose pliers for clips or stubborn fasteners
- Work gloves
- Sturdy ladder on a flat surface
- Small container or magnetic tray for screws
- Painter’s tape or masking tape to label wires
- Multimeter for voltage checks and continuity tests
- Owner’s manual for your specific Solera model
- Zip ties for tidying wiring on reassembly
- Non-marring trim tool to work seams without gouging the cover
- Penetrating oil for stuck fasteners
- Dielectric grease for connections on reassembly
- Clean rag and a small soft brush for dust and debris
Optional if you expect trouble:
- Heat gun or hair dryer to soften adhesive at trim seams
- A helper to hold the ladder or support the awning arm
- Headlamp because shadows under the RV soffit can hide screws
Safety First
This matters more than anything else you’ll read here. An awning can bite. Electricity can too.
- Disconnect all power to the awning:
- Turn off the RV’s main battery disconnect.
- Switch off or pull the circuit breaker or fuse for the awning circuit.
- If you can unplug a quick disconnect at the awning arm do that as well.
- Verify no power is reaching the motor:
- Use your multimeter at the motor leads.
- Press the control switch while you read. You should see 0 V if you truly killed power.
- Secure the awning:
- Fully retract the awning if possible.
- If it is stuck partially out support it with straps or a 2×4 under an arm.
- Avoid gusty wind while you work.
- Use a stable ladder:
- Put the ladder on solid ground.
- Keep three points of contact with the ladder.
- Ask a helper to steady the ladder while you pry or pull.
- Watch your hands:
- Pinch points hide around the roller tube and arm joints.
- Don’t put fingers behind a cover seam until you confirm all fasteners are out.
- Work slow:
- Don’t force a stuck cover.
- Stop and recheck for hidden screws or clips.
Step-by-Step Guide to Removing the Motor Cover
This is the exact step-by-step process I follow on Solera awnings. It works for Solera Smart Arm and standard Solera power awnings. I’ll point out differences as I go.
Step 1: Secure the Awning and Disconnect Power
- Get the awning retracted if it still moves. If it won’t retract support the roller and arms with straps or a prop. You want to remove any load from the motor end.
- Disconnect power to the awning circuit at the breaker or fuse. Flip the main battery disconnect for good measure.
- Verify absence of power at the motor wires with your multimeter. Check while someone toggles the control switch. You want 0 V while you’re working.
Good news. If you kill power now you won’t accidentally energize the motor while your hand sits near the gears.
Step 2: Locate the Motor End of the Awning
On most Solera awnings the motor sits on the left side as you stand facing the RV. The motor end cap looks a little larger and it often has a more pronounced housing. On Solera Smart Arm versions you’ll see the arm with the control touchpad and LEDs. The motor still typically sits at the left end near the roller tube.
Look for:
- A slightly taller or thicker end cap.
- Wiring coming in behind the cover.
- On some models a small access hole for the manual override.
If you’re unsure check your Solera owner’s manual for a parts diagram. The motor end will be obvious there.
Step 3: Identify and Remove Fasteners
Now the detective work begins. Solera uses a mix of Phillips screws, Torx screws, and tabs. Some screws can hide behind small plastic plugs or stickers.
- Scan the entire cover seam:
- Look at the top seam where the cover meets the roller tube end cap.
- Check the underside with a headlamp. Screws often hide there.
- Inspect the front edge and side faces for screw heads.
- Remove visible screws:
- Use the correct bit size to avoid stripping.
- Press firmly and keep the bit straight.
- Place each screw in your container. Separate sizes if you find different lengths.
- Check for hidden fasteners:
- Gently run a plastic trim tool along the seam and feel for resistance near a clip.
- Pop out round plastic caps to reveal a screw if you see them.
- On Smart Arm models check under the LED strip trim or near the touchpad bezel for a screw that holds the cover.
- Deal with stubborn screws:
- Give a short shot of penetrating oil. Let it sit for a minute.
- Switch to a manual screwdriver for better feel before resorting to a driver.
- If a head starts to strip stop. Seat a fresh bit and try again. A rubber band under the bit can add bite.
Pro tip from my own bruised knuckles. If the cover will not budge there is almost always one more screw you missed on the underside or tucked behind a small cap.
Step 4: Gently Detach the Cover
After you pull the last fastener the cover still might feel glued in place. Weather seals and age make them stick.
- Start at a corner:
- Work a plastic pry tool into the seam.
- Apply gentle pressure. Wiggle. Don’t twist hard.
- Walk the seam:
- Work along the seam in short bites.
- If you feel a solid stop back up and look for another fastener.
- Watch for gaskets or weather seals:
- Some covers include a thin foam gasket that can stick to the housing.
- If the gasket tears don’t panic. You can replace it with thin weather seal or a light bead of compatible sealant on reassembly.
- Avoid metal screwdrivers on finished edges:
- A flathead will pry but it can gouge plastic. I only use one if I protect the surface with a thin plastic card.
If adhesive trim tape holds a small cosmetic strip use a hair dryer to warm it. Adhesive lets go more easily with heat.
Step 5: Carefully Remove and Set Aside
The cover should ease off now. Don’t yank it.
- Pull the cover away a half inch. Peek inside for any wires attached to the cover itself. It is rare on external covers yet possible on models with LEDs or sensors molded into the cover.
- If you see a wire connected use needle-nose pliers to release a clip or back out one more screw that holds the device to the cover. Label the connector with painter’s tape so you plug it back the same way.
- Set the cover on a towel away from your working area. Screws love to hide in grass.
I snap two photos of the exposed motor end before I touch anything else. Pictures save your bacon on reassembly.
What to Do After Motor Cover Removal
Now you can see the motor assembly, gears or gearbox housing, wiring harness, and the end of the roller tube. Here’s how I handle the next steps.
Troubleshoot Wiring Issues
If your Solera awning shows no power or acts intermittent start with wiring.
- Check connectors:
- Look for a main motor connector near the motor assembly. Reseat it.
- Inspect for corrosion or moisture at the contacts. Clean with electrical contact cleaner then apply a tiny dab of dielectric grease.
- Test voltage at the motor leads:
- Reconnect power temporarily for this test.
- Press extend then retract at the control switch while you monitor the motor leads.
- You should see roughly 12 V DC one way for extend and reversed polarity for retract.
- If you see no voltage check the awning control switch and the awning control module upstream. Verify the fuse at the distribution panel.
- Inspect wiring harness routing:
- Look for pinched sections along the arm pivots.
- Replace or re-route anything that chafed through the insulation.
- If voltage looks good but the motor doesn’t move:
- The issue lives inside the motor or gearbox.
- You may also have a stuck brake or worn motor brushes.
Kill power again before you move on.
Inspect Gears and Gearbox
Grinding noise almost always points to gear trouble.
- Check the gearbox housing:
- Some Solera awning motors include a serviceable gearbox attached to the motor.
- If the box looks cracked or the seam shows grease streaks you probably stripped a gear.
- Spin test:
- With power off try rotating the roller tube slightly by hand while you watch the motor shaft. You should feel resistance from the gear train.
- If the motor shaft spins freely while the tube doesn’t move the gear train likely failed.
- Plan the fix:
- You can replace the motor and gearbox as a single assembly on most models.
- If you find a simple retainer clip that popped loose reinstall it and test again.
Test or Replace the Motor
When I suspect the motor I test it directly.
- Direct test with fused leads:
- Disconnect the motor from the RV harness.
- Use a fused 12 V source to power the motor leads directly.
- Reverse polarity to change direction.
- If the motor runs strong both directions the motor likely lives. Look at the control switch or module.
- If the motor stutters or draws heavy current with little motion it is tired.
- Smell and feel:
- A burnt smell equals bad windings or a cooked commutator.
- Excessive heat during a short test equals internal trouble.
- Replacement reality:
- Many owners replace the entire awning motor assembly. It keeps the process simple and reliable.
- In my experience parts prices vary by model. I have paid in the range of a couple hundred dollars for a new Solera motor assembly. Labor costs at a service center can easily add another couple hundred. DIY saves most of that.
Manual Override Access
If you opened the cover because your awning stuck open you need the manual override.
- Check the motor end for a manual override point:
- Many Solera motors provide a nut or hex socket at the motor shaft.
- You can often use a socket and ratchet to retract slowly.
- Two-person job:
- One person cranks at the motor end.
- The other supports the awning arms and watches alignment.
- Go slow:
- Keep fingers clear of the arms and the roller tube.
- Stop if anything binds.
Once you get the awning secure you can continue diagnosis without pressure from the weather.
Maintenance While You’re In There
You opened the cover. Make the most of it.
- Clean dust and debris around the motor housing with a soft brush.
- Inspect the weather seal or foam gasket on the cover. Replace if brittle or torn.
- Lightly lubricate pivot points on the arm if accessible. Use a dry lube that won’t attract dirt. I do not spray the motor or gearbox internals.
- Check fasteners at brackets and support points. Tighten anything loose by hand. Do not overdo it. Plastic strips easily.
Reinstallation Tips
Putting it back together cleanly matters. You want a snug cover that seals well and stays rattle free.
- Dry fit the cover first:
- Align tabs with their slots.
- Make sure wires sit where they belong and won’t pinch.
- Replace or refresh the gasket or weather seal:
- If the old foam looks tired use a thin weather strip of similar thickness.
- A tiny bead of compatible sealant at the top seam can help if your model came sealed from the factory.
- Start all screws by hand:
- Get every screw started before you tighten any one of them.
- This keeps the cover aligned and prevents cross threading.
- Do not overtighten:
- Many screws bite into plastic or thin aluminum.
- Snug is enough. I stop when the cover seats and the gasket compresses slightly.
- Test function before final tightening:
- Reconnect power and run extend then retract.
- Listen for rubbing or new rattles.
- If everything sounds good finish tightening gently.
If your model has cosmetic caps or trim pieces reinstall them last. A gentle press usually snaps them home.
Common Mistakes to Avoid
I have made these. You don’t have to.
- Forgetting to disconnect power:
- Energizing the motor while your hand sits inside the housing can hurt. Kill power every time.
- Forcing the cover:
- If it won’t move you missed a screw or a clip. Find it.
- Using the wrong bit:
- Torx screws strip easily with a Phillips. Grab the right tool.
- Losing screws:
- Use a magnetic tray or a small container. Label different lengths.
- Pinching a wire on reassembly:
- Route wires in the original path. Take a photo before disassembly to guide you.
- Working in wind:
- Even a slight breeze can flex the arms. It distracts you and it can shake the ladder.
- Overtightening screws:
- You can crack the cover or strip plastic. Stop when snug.
Troubleshooting Quick Reference
Below are common symptoms and what I check first. This mirrors the most frequent problems I see on Solera power awnings.
- No movement and no sound:
- Check the awning fuse and circuit breaker.
- Test for 12 V at the motor leads while pressing the control switch.
- Inspect the wiring harness for a loose connector.
- Click from the control switch yet no motor action:
- Verify voltage at the motor.
- If you have voltage the motor may be seized or the brake stuck.
- Motor hums but the awning doesn’t move:
- Gearbox may be stripped.
- The awning can be bound by a sag, a bent arm, or a misaligned roller tube.
- Awning extends but won’t retract or vice versa:
- Check the polarity switching at the control switch or control module.
- Inspect the switch for failure. Replace if necessary.
- Grinding noise at the motor end:
- Gear wear or a broken tooth in the gearbox.
- Open the cover and inspect the gear train.
- Intermittent operation:
- Loose or corroded connectors.
- Frayed wire at a pivot point.
- Weak battery voltage under load. Test battery state and connections.
These are the exact issues that drive most “Solera awning troubleshooting” searches and they all benefit from motor cover removal.
Notes on Model Variations (Solera Smart Arm, XL, and Others)
Solera built several variations. The core steps above still apply yet you’ll see small differences.
- Solera Smart Arm:
- Expect a touchpad module and LED strip on the arm.
- A small screw can hide near that trim. Check there before prying the cover.
- The control module can sit near the motor end so you might see more wiring under the cover.
- Solera XL:
- The cover can run a bit larger with more robust tabs.
- Some XL models use Torx fasteners at the end cap. Bring your Torx set.
- Older Lippert Solera power awnings:
- Phillips screws dominate.
- Plastic tabs grow brittle with age. Pry slowly.
- Carefree and Dometic (related searches but different designs):
- These brands use different end cap shapes and fasteners.
- Don’t assume their videos apply to Solera. Fastener locations differ.
When in doubt lean on your Solera owner’s manual for your exact awning. It shows the motor assembly, the roller tube end cap, and the arm attachment points so you can identify what you’re looking at.
A Quick Peek Inside the Motor (Optional, for the Curious)
You don’t need to know motor anatomy to remove a Solera awning motor cover. If you enjoy understanding what you’re looking at this helps.
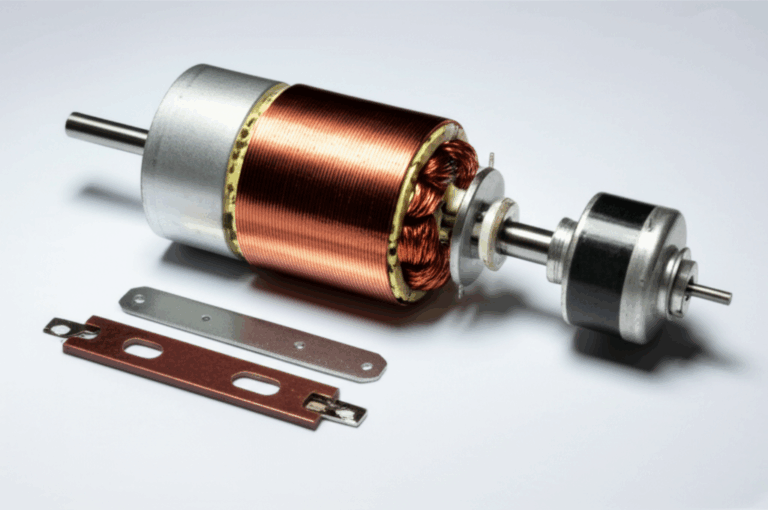
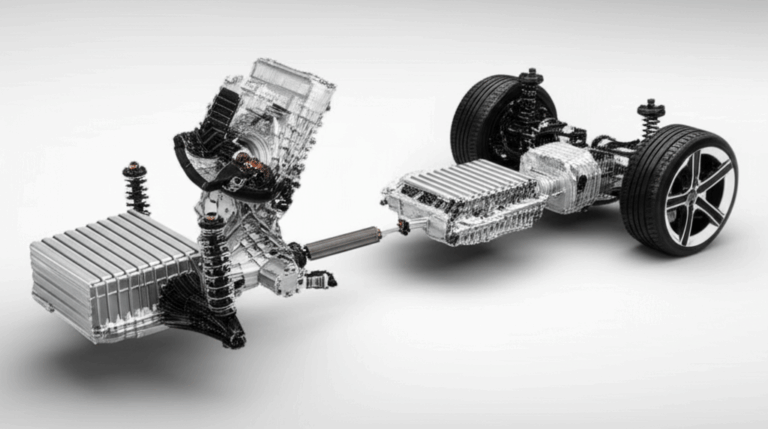
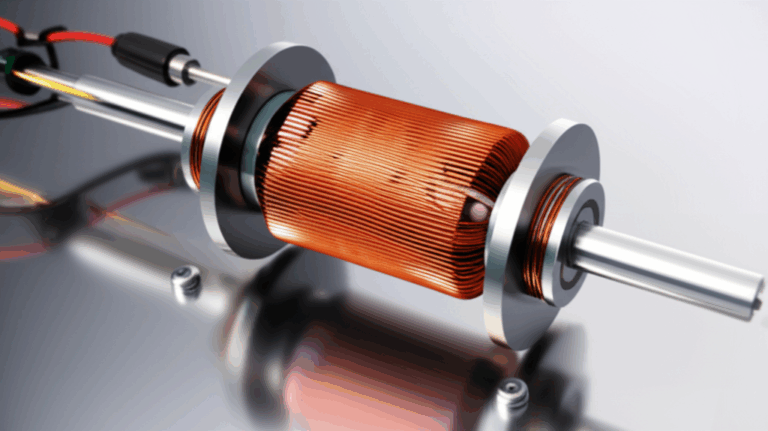
The small 12 V DC motor that powers your awning uses laminated steel in the stator and rotor to reduce losses and heat. Those thin sheets of electrical steel keep the magnetic path efficient which matters under load at the campsite just like it does in industrial motors. If you want a deeper primer these resources explain the parts you’re staring at:
- Learn how thin sheet stacks reduce eddy currents in electrical steel laminations
- See how the stationary part of the motor is built in a stator core lamination
- Understand the moving core that sits on the shaft with a rotor core lamination
- Get the big picture of how these stacks come together in motor core laminations
Again you don’t need to study this to fix your awning. I included it because a little context can make the rest of the repair feel less mysterious.
Frequently Asked Questions
- Which side holds the Solera awning motor?
- Usually the left side as you face the RV. The motor end cap looks slightly larger and you will often see wiring near it.
- Do I need to remove the fabric or roller tube to get the motor cover off?
- No. You only remove the cover to access the motor housing and fasteners.
- Can I do this solo or do I need a helper?
- I can do it solo when the awning is fully retracted. I ask for a helper when the awning is stuck partway out or when wind picks up.
- How long does it take?
- My first time took 45 minutes because a hidden Torx screw fooled me. Now I can remove the cover in 10 to 20 minutes.
- Do I need a torque wrench for reassembly?
- Not for the cover screws. Hand snug works. If your model specifies torque for structural bolts follow the manual.
- Can I spray lubricant into the motor housing?
- I do not. I clean dust and I refresh light grease on accessible gears only if the design allows it. I avoid soak sprays that can foul motor brushes or brakes.
- What if the cover won’t budge after I remove every screw?
- You probably missed a clip or a screw under a cap. Run a trim tool around the seam. If it still sticks warm the seam with a hair dryer to soften any adhesive then try again with gentle wiggles.
Conclusion: Taking Control of Your Awning Maintenance
You can remove a Solera awning motor cover without breaking tabs or losing screws. You only need patience, the right bit, and a steady ladder. Secure the awning. Kill power. Find every fastener before you pry. Take photos before you unplug anything. Work methodically and you’ll get in and out without drama.
This simple job opens the door to the fixes that actually solve your awning problem. You can test for 12 V at the motor. You can spot a loose harness. You can confirm a stripped gear. You can even use the manual override to bring the awning home if the weather turns nasty. Once you do it once you will never fear it again.
My Short Checklist You Can Screenshot
- Kill power at the battery disconnect and the awning circuit breaker
- Retract or support the awning with straps or a prop
- Set the ladder on level ground and ask a helper to spot you
- Identify the motor end on the left as you face the RV
- Photograph the motor end before you touch anything
- Remove visible Phillips or Torx screws then check for hidden caps
- Use a plastic trim tool to break the cover loose
- Watch for wires connected to the cover and label any connectors
- Inspect wiring, gears, and the motor once the cover is off
- Clean, fix, or replace what you found then reassemble gently
- Start all screws by hand and do not overtighten
- Test extend and retract before final tightening
Additional tips I’ve learned the hard way:
- Keep WD-40 away from the awning fabric. Overspray stains.
- Use zip ties to secure any loose wiring after repair so it won’t rub at the arm pivots.
- If you work on an older Solera XL motor cover expect brittle plastic. Warm plastic flexes better than cold plastic.
- Label screw locations if you find different lengths. A strip of painter’s tape on the ladder makes a great map.
If you follow this guide you’ll handle Solera awning motor cover removal with confidence. You’ll also set yourself up for any next step whether that’s a quick wiring fix, a motor replacement, or a routine bit of maintenance that keeps your power awning humming for years.