How to Safely Remove a Squirrel Cage from a Blower Motor (Even When It’s Stuck)
If you’re staring at a stubborn blower wheel that refuses to budge off the motor shaft you’re not alone. Engineers, product designers, and procurement managers run into this during teardown, service, and validation all the time. You want a clear blower motor fan removal guide that works across HVAC, furnace, air handler, automotive HVAC, and even dryer applications. You also need to avoid collateral damage that can bend a wheel, scar a motor shaft, or worse, compromise motor laminations and bearings that control efficiency, noise, and service life.
This article gives you a complete, field-tested process for blower motor squirrel cage removal. You’ll see what causes a squirrel cage to stick, how to remove a stuck blower wheel using the right squirrel cage removal tools, and how to reinstall it without causing imbalance or rattling. We’ll also zoom out and connect the dots to motor core design choices that affect maintenance in the first place. You’ll leave with a clear plan, whether you’re handling a residential HVAC blower fan removal, an AC unit squirrel cage access job, or a complex automotive climate control fan removal behind a dashboard.
We’ll follow the Expert Consultant framework: Problem, Explain, Guide, Empower. You’ll get detailed steps and practical engineering context so you can act with confidence.
In This Article
- Why You Might Need to Remove Your Blower Wheel
- Safety First and How to Prepare the Workspace
- Tools That Make Squirrel Cage Removal Faster and Safer
- Accessing the Blower Assembly in HVAC, Automotive, and Appliances
- Detaching the Squirrel Cage from the Motor Shaft: Step-by-Step
- Troubleshooting Stuck, Rusted, or Broken Wheels
- Inspection, Cleaning, and Reinstallation Best Practices
- Common Issues, Noise Fixes, and When to Replace
- Design and Procurement Considerations: Materials, Manufacturing, and Motor Laminations
- Your Engineering Takeaway and Next Steps
Part 1: Why You Might Need to Remove Your Blower Wheel
You remove a blower wheel for four common reasons.
- Cleaning a dirty squirrel cage that robs airflow and CFM. Dirt builds up on blades which increases static pressure and cuts efficiency.
- Replacing a blower motor or the wheel itself after damage or wear.
- Troubleshooting blower motor noise and vibration like squealing or rattling.
- Accessing components around the housing or control board for broader service.
Engineers also remove them during validation or teardown to assess fan balance, hub integrity, fit-up to the motor shaft, and set screw placement. Procurement teams review blower wheel interchangeability between OEM parts and aftermarket parts to control cost without risking performance or safety.
Two quick truths before we dive in:
- The squirrel cage fan stuck on shaft scenario is very common in humid or older systems due to rust and corrosion.
- Using the proper blower wheel puller and safe prying techniques reduces damage risk dramatically.
Part 2: Safety First and How to Prepare the Workspace
Before any HVAC squirrel cage removal or vehicle HVAC fan removal, lock in your safety process.
- Disconnecting power to blower motor: Pull the circuit breaker for HVAC and air handler systems. Use the disconnect switch at the unit if present. In automotive, disconnect the battery negative terminal. Verify with a multimeter if needed.
- PPE: Wear safety glasses and gloves. A wire brush can fling debris. Penetrating oil can mist.
- Cool-down: Ensure heating and cooling components are cool before touching. Don’t work near heating elements when hot.
- Workspace: Use a stable surface with a work light. Keep a shop vac nearby to clean dust. Label wiring with masking tape so reassembly goes smoothly. Snap pictures of the furnace blower assembly diagram or control board connections if that helps you.
- Protect sensitive parts: Don’t strike the motor shaft bare. Don’t bend the squirrel cage or fan blade tips.
These safety tips for blower motor work sound basic for pros. They save shafts, bearings, and your fingers.
Part 3: Tools That Make Squirrel Cage Removal Faster and Safer
You don’t need a truck full of gear. You do need the right few items. Here’s the list that HVAC technicians and seasoned DIYers rely on.
- Basic hand tools: Flathead and Phillips screwdrivers, socket set or nut drivers, adjustable wrench, and hex keys or Allen wrenches for the set screw. Keep a small hammer and a wood block for tapping a stuck squirrel cage without marring metal.
- Specialized tools:
- Squirrel cage puller tool or fan puller for squirrel cage (wheel puller or jaw puller). It pays for itself if you do this more than once.
- Penetrating oil vs lubricant: Use penetrating oil like PB Blaster or WD-40 to enter threads and between the hub and motor shaft. Save general lubricants or silicone spray for post-cleaning lubrication.
- Wire brush to remove rust and debris from the hub and motor shaft.
- Optional helpers: A vise with soft jaws, pry bar, shop vac, rags, degreaser, and anti-seize compound or white lithium grease for reassembly.
You can remove many wheels without a puller. Using a gear puller on blower wheel hubs is the safest bet for rusted blower wheel removal or a wheel that won’t budge.
Part 4: Accessing the Blower Assembly in HVAC, Automotive, and Appliances
This is where access dictates the job time. The steps to remove the furnace blower or to get squirrel cage off furnace motor differ from prying into a dashboard.
- Furnaces and air handlers:
- Getting access to blower motor: Open the service panel. Identify the blower housing. Many housings slide out after removing a few mounting screws or straps.
- Disconnect wiring: Label motor wires at the control board. Some motors use a capacitor so discharge it properly if you’ll handle it.
- Extract the blower assembly: Slide the housing with the blower motor and squirrel cage out. Clear ductwork or filter rails as needed. Residential HVAC blower fan removal usually takes 10–30 minutes if screws and wiring are straightforward.
- Central AC air handlers:
- AC unit squirrel cage access looks similar to furnaces. Clear condensate lines and ensure panels don’t stress the control board or wiring.
- Removing squirrel cage from central AC follows the same steps with careful handling around the evaporator coil.
- Automotive HVAC:
- Automotive blower motor squirrel cage removal depends on make and model. Many vehicles mount the blower behind the glovebox. Others hide it deep which makes automotive HVAC fan removal a long day. Expect 3–6 hours on some dashboards.
- Dryers and appliances:
- Dryer blower wheel removal usually requires rear or front panel removal. Watch for left-hand threads on some designs when loosening the wheel from the motor.
In all cases, keep track of screws and clips. A magnetic tray saves time.
Part 5: Detaching the Squirrel Cage from the Motor Shaft: Step-by-Step
You’ve got the assembly out. Now let’s detach the wheel without damage. This is the core of removing blower fan from motor or getting fan off electric motor shafts.
Step 1: Find and loosen the set screw
- Identify the squirrel cage set screw location which often lines up with a flat on the motor shaft.
- Use the correct hex key or Allen wrench. Don’t round the head.
- For tight set screw removal or loosening a rusted set screw:
- Apply penetrating oil and give it 10–15 minutes. A few reapplications and light taps on the wrench handle help.
- Heat can help on metal hubs but keep heat away from plastic wheels and wiring. More on heat shortly.
- Removing set screw from blower wheel that’s stripped:
- Use a high-quality extractor bit sized for the recess.
- If the set screw shears, you can often still pull the hub off with a puller then deal with the remnant on the bench.
Step 2: Gentle separation
- Support the motor and wheel so the wheel doesn’t sag.
- Wiggle the wheel while pulling outward. Work around the hub.
- Tap the motor shaft lightly with a hammer and wood block. You’re trying to break the corrosion bond in the hub bore. Don’t mushroom the shaft.
If the fan motor squirrel cage won’t budge you’re ready for a puller.
Step 3: Use a blower wheel puller
- Types of fan pullers include jaw pullers and purpose-made wheel pullers that grab the hub evenly. A fan puller for squirrel cage hubs applies straight, centered force which protects the wheel.
- Position the arms on the hub or the solid center. Don’t grab the thin blades.
- Apply steady pressure. Stop and add penetrating oil as you go. Using a gear puller on blower wheel hubs solves most seized cases without damage.
Step 4: Alternative methods for stubborn blower wheels
Use these with caution.
- Using heat to remove stuck parts: A heat gun on the metal hub expands it slightly which breaks rust. Keep heat short and controlled. Avoid plastic cups and nearby wiring.
- Prying a blower wheel off: If the hub has shoulders you can use a pry bar with a protective cloth. Pry a little on one side then the opposite side which keeps the hub straight. These safe prying techniques prevent bending.
- Using a vise to remove fan: Clamp the shaft in soft jaws lightly. Tap the back of the hub with a punch and small hammer. You can crack hubs if you hit too hard so use patience.
- Tapping a stuck squirrel cage gently while keeping the force in line with the shaft works better than side-loading the assembly.
Step 5: Clean the shaft and hub
- Once free, clean the motor shaft and the wheel hub bore with a wire brush and a rag. Remove rust and debris.
- Check for galling or burrs that suggest shaft damage. If you see scars then dress them with very fine emery cloth.
At this point you’ve mastered how to free a seized blower wheel. The heavy lifting is done.
Part 6: Troubleshooting Stuck, Rusted, or Broken Wheels
Engineers love root cause. Here’s what causes a squirrel cage to stick and what to do about it.
- Corrosion and moisture: Squirrel cage motor shaft corrosion builds in humid equipment rooms, bad condensate management, or marine environments. Anti-seize on reassembly mitigates it.
- Age and heat cycles: Thermal expansion and contraction can cold-weld rust in place on older units.
- Over-torque or misalignment: If the set screw was overtightened or misaligned on the flat you can deform the hub slightly.
- Material mismatch: A steel hub on a steel shaft tends to seize more than a treated or coated interface. Manufacturing choices matter which we’ll cover later.
If the wheel cracked or blades bent during removal you’ll need broken squirrel cage removal procedures. Carefully cut away the wheel if needed to save the motor then order a replacement. When to replace squirrel cage comes down to cracks in the hub, warped blades, visible rubbing marks, or a history of imbalance. The risk to bearings and noise isn’t worth trying to repair a compromised wheel.
Part 7: Inspection, Cleaning, and Reinstallation Best Practices
Now that the wheel is off you’ve got the perfect window for maintenance.
Cleaning and inspection
- Cleaning a dirty squirrel cage or cleaning AC blower fan:
- Use a soft brush and a shop vac. Avoid bending fins.
- A mild degreaser helps. Dry completely before reassembly.
- A dedicated squirrel cage cleaner can save time on heavy debris.
- Best way to clean fan blades: Work from the hub outward. Keep pressure light. Don’t soak the motor.
- Inspect the wheel: Look for cracks, loose hub fit, rubbing scars, and wobble. This covers symptoms of a bad squirrel cage.
- Inspect the motor bearings and shaft. Spin the shaft by hand. Listen for roughness. Check for shaft play. This aligns with preventative maintenance blower motor routines.
- Check wiring, capacitor, and connectors for heat discoloration. Test the motor with a multimeter if you saw erratic behavior earlier. If you’re unsure, a how to test blower motor check with resistance and insulation tests can flag winding issues.
Reinstallation the right way
- Lubricating blower motor shaft or lubricating squirrel cage shaft:
- Apply a thin film of anti-seize or white lithium grease on the clean shaft. Don’t gob it on. You want ease of future removal without sling-off.
- How to reattach squirrel cage:
- Align the set screw with the flat on the shaft. Slide the wheel to the correct axial position. The blades should sit centered in the housing.
- Tighten the set screw to a firm snug without stripping. If you have torque guidance from the OEM follow that. If not, proper torque for squirrel cage set screw is “tight enough not to slip” without deforming the hub or stripping threads.
- Tips for reinstalling blower wheel:
- Manually spin the wheel. It must spin freely with no rubbing. Adjust axial position if needed.
- Reinstall the housing, reconnect wiring to the control board, and close panels. Confirm thermostat calls and run a short test.
- Balancing a squirrel cage fan and the importance of balancing fan:
- Small imbalances create noise and vibration which shorten bearing life. If you see wobble replace the wheel. Field balancing is possible with specialized equipment but isn’t a quick DIY fix.
Do a quick airflow check. Listen for new noises. If you created a new rattle check screws, the set screw, and the housing fit.
Part 8: Common Issues, Noise Fixes, and Frequently Asked Questions
This section addresses the most searched removal challenges and noise complaints with clear answers.
- Blower motor troubleshooting and blower motor troubleshooting for noise:
- Why is my blower fan rattling or how to fix rattling blower fan
- Rattling usually means a loose set screw, debris in the wheel, or a bent blade. Retighten the set screw and clean the wheel. Replace the wheel if bent.
- Squealing can point to motor bearings or a misaligned wheel rubbing the housing.
- Common mistakes removing squirrel cage:
- Overtightening pullers until plastic cracks.
- Hitting the shaft directly with a steel hammer.
- Forgetting to align the set screw to the flat during reassembly.
- Methods for stubborn blower wheels:
- Penetrating oil then steady puller pressure works most of the time.
- Short controlled heat on metal hubs can save the day.
- Fan removal without puller:
- You can use the wiggle and tap method with a wood block on the shaft. It’s slower and riskier on seized hubs. Consider borrowing or renting a puller.
- How to disassemble a blower motor:
- Most service focuses on the wheel and housing. Full motor disassembly is rare in the field and often not recommended unless you’re rebuilding bearings. Replace the motor if windings or bearings fail.
- Blower motor replacement guide:
- Note voltage, horsepower, frame size, rotation, shaft diameter, and length. Verify capacitor value if it’s a PSC motor. Match CFM requirements so airflow and static pressure targets hold.
- How to service blower motor:
- Clean intakes, verify capacitor health, check wiring lugs, ensure the wheel stays centered, and check vibration after reassembly.
- HVAC maintenance tips that prevent seized wheels:
- Keep filters clean. Control humidity and condensate. Use anti-seize on the shaft. Schedule periodic air handler squirrel cage cleaning for dusty environments.
- Heating and cooling fan removal notes:
- Furnaces, air handlers, and ventilation fan squirrel cage assemblies vary in access. Industrial blower motor fan removal may require lockout-tagout and two-person lifts.
Application-specific callouts you might search:
- AC blower motor squirrel cage removal
- Furnace fan cage removal and steps to remove furnace blower
- Home blower motor fan removal
- Residential dryer fan removal
- Automotive HVAC fan removal and automotive climate control fan removal
All follow the same fundamentals with differences in access and fastener types.
Part 9: Design and Procurement Considerations: Materials, Manufacturing, and Motor Laminations
You came for techniques to remove the wheel. Stay for the small decisions that make removal easier, reduce noise, and extend service life. These are the things design engineers and procurement managers can influence.
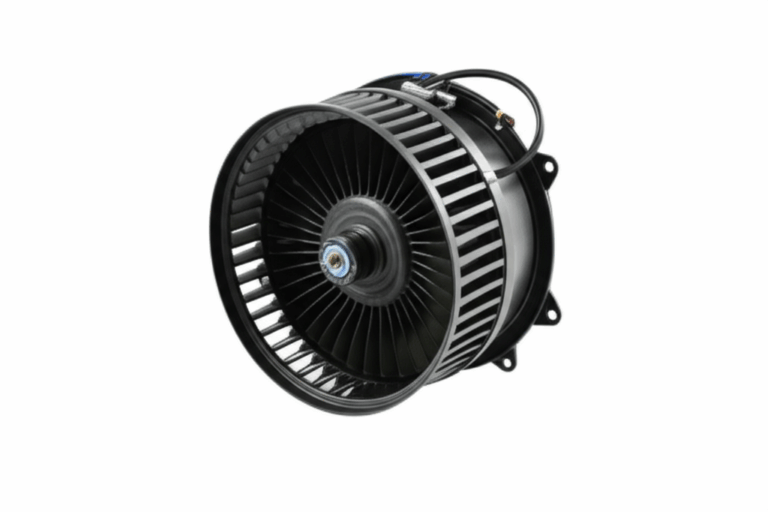
What is a squirrel cage blower and what’s it made of
A squirrel cage blower (also called a blower wheel or fan cage) is a cylindrical array of blades attached to a central hub. As it spins, it moves air radially to create the airflow and CFM your system needs at a given static pressure.
- Squirrel cage fan material:
- Plastic wheels are quiet, light, and inexpensive. They can crack under high puller loads or with heat exposure.
- Metal wheels handle heat better and can accept controlled heat during removal. They add mass and can transmit vibration if unbalanced.
- Hub choices:
- Metal hubs on metal shafts resist wear but seize more. Coated hubs or hubs with anti-corrosion treatments can ease service.
- Manufacturing details:
- Tight hub tolerance and a well-machined flat on the motor shaft give repeatable alignment. Poor tolerances contribute to stuck hubs and noise.
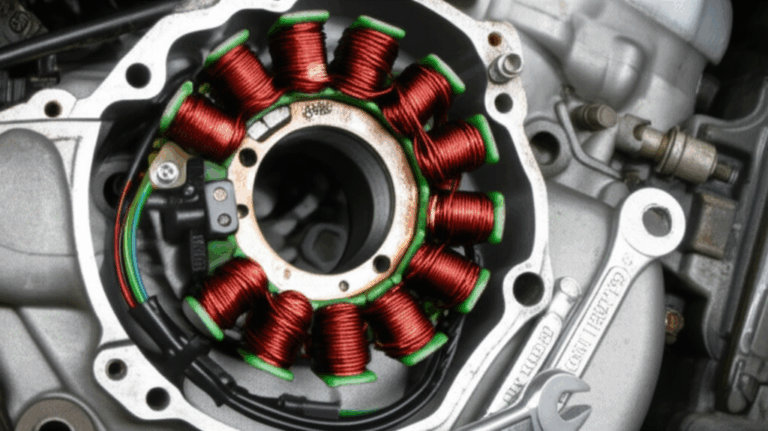
Link to motor lamination design and why it matters here
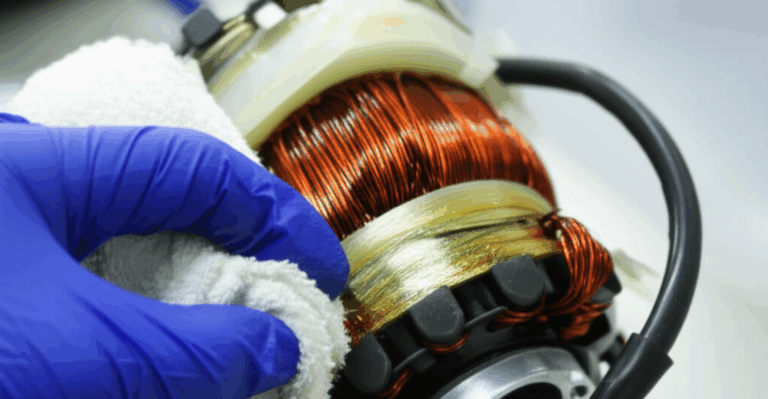
The blower wheel sits on a motor shaft supported by bearings inside a stator and rotor built from stacked electrical steel. Those stacks are the motor core laminations that set magnetic performance, losses, temperature rise, and torque ripple. They also influence vibration and noise that show up as the “hum” engineers battle.
- Better motor core laminations control core loss and temperature which reduces thermal cycling on shafts and hubs. Less cycling means fewer seized hubs over time.
- The stator core lamination and rotor core lamination geometry sets the electromagnetic forces that drive vibration. Lower vibration keeps set screws and hubs tight and reduces rattling.
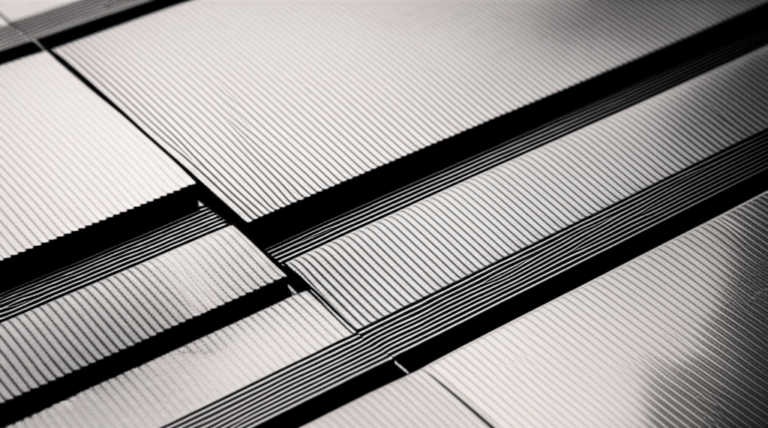
- Material choice and thickness in electrical steel laminations affect eddy currents and hysteresis losses. Lower loss cores run cooler which eases service and extends grease life in bearings.
Think of eddy currents like tiny whirlpools of electricity inside the core. Thinner insulated laminations break up those whirlpools so less heat builds up. Less heat can mean fewer stuck hubs and longer intervals between “how to remove stuck blower wheel” scenarios.
Material and process trade-offs for the motor core and the wheel
- Electrical steels:
- Silicon steel grades (M-grades) balance cost and performance for general-purpose HVAC motors.
- Cobalt alloys offer high saturation flux density and excel in aerospace or very high power density motors. They cost more and can complicate supply.
- Lamination thickness:
- Thinner laminations reduce eddy current loss at higher frequencies. They cost more to stamp and handle.
- Manufacturing:
- Stamping suits high-volume cores with stable geometry.
- Laser cutting offers rapid prototyping and complex shapes with minimal tooling but can affect edge quality and magnetic properties if not controlled.
- Bonding, welding, or interlocking stacks:
- Interlocking laminations snap together like LEGO bricks which avoids welding heat that can harm magnetic properties. Bonded stacks can improve rigidity and acoustic characteristics if your NVH targets are tight.
Tie these to blower behavior:
- A cooler, lower-vibration motor reduces noise complaints and cuts the number of DIY AC repair blower motor calls due to rattles.
- Tight shaft tolerances and a well-ground flat improve the chance that your “how to separate fan from motor” task ends with gentle wiggles not a puller at full tilt.
Fastener and hub design for easier service
- Set screw details:
- Use thread-lockers that hold under vibration yet allow service. Specify torque guidance in service docs so technicians do not crush hubs.
- Provide clear access to the set screw through the wheel if possible. That single choice makes “squirrel cage set screw location” obvious which reduces service time.
- Anti-seize and coatings:
- Calling out a light anti-seize on the motor shaft during assembly helps future techs. It is a tiny cost that pays back.
When your application demands more
- Commercial HVAC squirrel cage systems run longer hours in harsher conditions. Consider metal wheels and treated hubs to resist corrosion.
- Industrial blower motor fan removal may involve large housings and high horsepower motors. Plan for lifting points, service clearances, and hub access from day one.
- Automotive design teams should weigh water ingress and temperature swings near HVAC fresh air intakes. Material choices and seals keep hubs from seizing.
Standards that provide helpful guardrails:
- IEC 60034 series for rotating electrical machines defines performance, testing, and thermal classes.
- ASTM A677 covers nonoriented electrical steel for laminations which sets baseline quality for magnetic sheet.
- IEEE sources like Transactions on Magnetics offer core loss modeling and B-H curve insights that connect to real motor heat and noise.
Part 10: Procurement Notes That Save Time and Money
You don’t want to over-spec a wheel or under-spec a core. Balance matters.
- Cost levers:
- Wheel material and hub finish change assembly time and field service costs.
- Lamination grade and thickness influence energy efficiency and heat. That heat flows into everything including bearings and hubs.
- Supply reliability:
- Verify availability of your selected electrical steel grades. Validate multiple sources if your volume warrants it.
- Quality levers:
- Repeatability in shaft diameter, hub bore, and set screw fit improves serviceability and reduces the rate of “fan motor squirrel cage won’t budge” service calls.
- Documentation:
- Provide a furnace blower assembly diagram or equivalent for installers and techs. Include proper torque for squirrel cage set screw values if you can.
Procurement’s best move might be early technical reviews with the motor and wheel supplier. Share noise and service requirements so they can tune designs before you commit.
Part 11: Quick Application Guides
Below you’ll find focused tips drawn from the step-by-step process that target your use case. These match common queries engineers and technicians bring to the bench.
- Furnace blower wheel replacement and furnace fan cage removal:
- Pull power at the circuit breaker. Remove the blower housing as a unit. Mark wire locations. Loosen the wheel’s set screw. Use a puller if needed. Clean, lube lightly, and reinstall with the wheel centered.
- AC blower motor squirrel cage removal and removing squirrel cage from central AC:
- Manage condensate lines and avoid coil fins. Use a puller for seized hubs to avoid breaking plastic wheels near the evaporator.
- Automotive HVAC fan removal and automotive blower motor squirrel cage:
- Expect tight space. Remove glovebox and trim. Disconnect the battery. Drop the blower assembly then remove the wheel. Replace if cracked.
- Dryer blower wheel removal and residential dryer fan removal:
- Unplug the dryer. Access the blower housing from the front or back. Watch for reverse threads on some units.
Each path echoes the same fundamentals: identify fasteners, disconnect wiring, remove housing, loosen set screw, pull the wheel, clean, inspect, and reassemble.
Part 12: Empowerment—What to Do Next
By now you’ve seen all the core techniques to remove a squirrel cage fan safely. You’ve also seen how motor and hub design choices affect whether you need a puller or just a gentle wiggle. You can use that knowledge during your next design review or RFQ with suppliers.
Here’s a concise checklist you can use in the shop today and at the design table tomorrow.
Hands-on removal checklist
- Kill power at the circuit breaker or battery. Verify with a multimeter.
- Remove panels and get clear AC unit squirrel cage access or furnace access.
- Pull the housing and label wires to the control board and capacitor.
- Find the set screw. Apply penetrating oil. Loosen it with the correct Allen wrench.
- Try gentle wiggle and tap methods. If it resists use a blower wheel puller.
- If seized use controlled heat on metal hubs only. Pry carefully if the hub allows.
- Clean the motor shaft and hub bore. Check for shaft damage and dress burrs.
- Apply a thin film of anti-seize. Reinstall the wheel centered. Align the set screw to the flat and tighten.
- Spin by hand. Listen. Reinstall housing. Test run and check CFM and noise.
Design and procurement checklist
- Specify hub materials and coatings that resist corrosion. Consider anti-seize in assembly SOPs.
- Document set screw access and torque. Add a service note for wheel centering.
- Align motor efficiency targets with the right lamination grade and thickness. Consider the NVH impact of electromagnetic forces on wheel durability.
- Ask suppliers for data on balance, runout, and wheel hub tolerances. These guard against rattle and premature bearing wear.
- For prototyping, consider laser-cut laminations. For production, weigh stamping and interlocking to protect magnetic performance and cost.
Conclusion: Your Clean, Quieter, and More Efficient Blower
You came in searching for techniques to remove squirrel cage wheels and how to remove stuck blower wheels without breaking anything. You now have a step-by-step plan, a complete tool list, methods for stubborn hubs, and proven tips for reinstalling blower wheels so they run true. You also gained insight into how lamination material choice and manufacturing influence heat, vibration, and long-term serviceability.
Your engineering takeaway:
- Disconnect power and use PPE. Label wiring. Don’t rush.
- Penetrating oil plus a proper wheel puller solves most seized hubs without damage.
- Clean the shaft and hub. Use light anti-seize. Align the set screw to the flat.
- Balance and alignment matter. A centered wheel and snug set screw prevent rattling and bearing wear.
- Smarter design decisions upstream on hub coatings, shaft tolerances, and motor laminations make downstream service faster and cheaper.
If you’re scoping a new build or specifying motors and wheels, talk with your suppliers about hub materials, wheel balance, and lamination stacks. Ask how their choices reduce field service pain and improve energy efficiency. Those questions save you hours with a pry bar later.
Ready to go deeper on core technology that underpins motor performance and service life? Explore these technical resources:
- Learn how the quality of your motor core laminations affects loss and heat.
- See how stator core lamination geometry can influence NVH and efficiency.
- Understand how rotor core lamination choices shape torque and ripple.
- Review material options in electrical steel laminations as you balance cost and performance.
Take the process above to the shop floor and you’ll get that blower wheel off without drama. Bring the design and procurement notes to your next review and you’ll prevent the next stuck hub before it happens.
Additional context you might find useful in practice:
- Techniques to remove squirrel cage hubs work across residential HVAC, commercial HVAC squirrel cage systems, ventilation fan squirrel cages, and industrial blower motor fan removal tasks.
- Common issues with blower cages often trace back to debris, hub corrosion, or set screw slip.
- Squirrel cage fan repair attempts on cracked plastic hubs rarely hold. Replacement is the safer path.
- Energy efficiency blower fan upgrades and preventative maintenance blower motor routines pay back through quieter operation and fewer service calls.
- Tighten with care. Over-torque can crack hubs which creates the next failure.
If you’re unsure at any point or the wheel remains stubbornly stuck despite every method above, call a professional squirrel cage removal technician. Some assemblies hide surprises like hidden clips, unique hub keys, or eccentricity you won’t want to discover with a pry bar.
You’ve got this.