How to Rebuild a Starter Motor: A Comprehensive DIY Guide
Table of Contents
- Is Rebuilding Your Starter Motor Right for You? (Rebuild vs. Replace)
- Essential Tools & Parts for a Successful Starter Rebuild
- Step-by-Step Guide: Disassembling & Rebuilding Your Starter Motor
- Step 1: Safe Removal of the Starter Motor from Your Vehicle
- Step 2: Thorough Disassembly & Component Inspection
- Step 3: Cleaning, Repairing, and Prepping Parts
- Step 4: Reassembly with New Rebuild Kit Parts
- Step 5: Bench Testing Your Rebuilt Starter Motor
- Step 6: Reinstallation & Final Operational Test
- Troubleshooting Common Issues After a Starter Rebuild
- Maintaining Your Starter for Extended Life
- Conclusion: DIY Success and Significant Savings
I still remember the first time I faced a car that only clicked when I turned the key. That telltale click sent me down the rabbit hole of starter motor repair. I could have tossed in a new or remanufactured unit. I chose to rebuild the existing starter motor instead. I learned how the solenoid, brushes, armature, and Bendix drive work together. I saved money. I gained confidence. You can too.
I wrote this as a step-by-step, first-hand DIY guide. I’ll show you the tools you need, the rebuild kit parts that matter, and how to test everything with a multimeter. I’ll walk you through common problems like worn brushes, sticky solenoids, and bushings that have too much play. I’ll call out safety precautions that I follow every single time. Along the way I’ll share why certain parts fail and how to prevent it next time.
Is Rebuilding Your Starter Motor Right for You? (Rebuild vs. Replace)
I like rebuilding. It saves money. It teaches you how your car works. It keeps parts out of the landfill. A remanufactured part has its place. So does a brand-new starter. Here’s how I decide.
- The appeal of DIY: I rebuild when I want to save $150 to $600 compared to a shop job. I also do it for the learning experience and the environmental benefit. Extending a component’s life reduces waste.
- Common starter motor failure symptoms:
- Clicking but no crank
- A high-pitched whining noise
- Grinding on engagement
- Slow cranking
- Intermittent starting issues
- When to rebuild: If the brushes are worn. If the solenoid contacts are pitted. If bushings feel loose. If the commutator looks glazed but not destroyed. These are classic wear parts. A starter rebuild kit often includes brushes, brush holder, solenoid plunger and contacts, bushings or bearings, and seals. That’s exactly what fixes most failures.
- When to replace: If the armature shows burnt windings or deep commutator damage. If the housing is cracked. If the field windings are open or shorted. If the Bendix drive or planetary gears are severely worn and parts are hard to find. If you lack time or tools. A remanufactured unit with a warranty makes sense in those cases.
What about cost and time? I spend $20 to $70 on parts for most DIY rebuilds. A new starter often runs $100 to $400 or more. A remanufactured unit usually lands between $70 and $250 with a core charge. I budget 2 to 6 hours for a full remove, rebuild, and reinstall. Shops finish faster since they replace rather than rebuild. You trade time for savings and skills.
One more thing. Make sure the starter is actually the problem. I see dead batteries get blamed all the time. Test the battery voltage under load. Check for a good ground cable connection. Confirm the starter relay clicks. Make sure the neutral safety switch works. The ignition switch can also fail. An alternator that undercharges can mimic starter issues. An alternator vs starter mix-up wastes time and money.
Essential Tools & Parts for a Successful Starter Rebuild
If you have a decent home toolbox you’re halfway there. I add a few electrical tools to seal the deal.
- Basic hand tools:
- Socket set and wrench set
- Screwdriver set
- Pliers
- Wire brush
- Small pry bar
- Specialized tools:
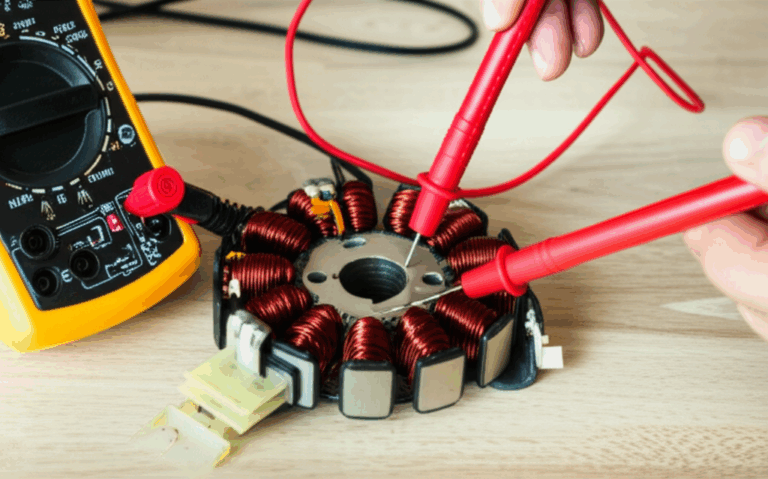
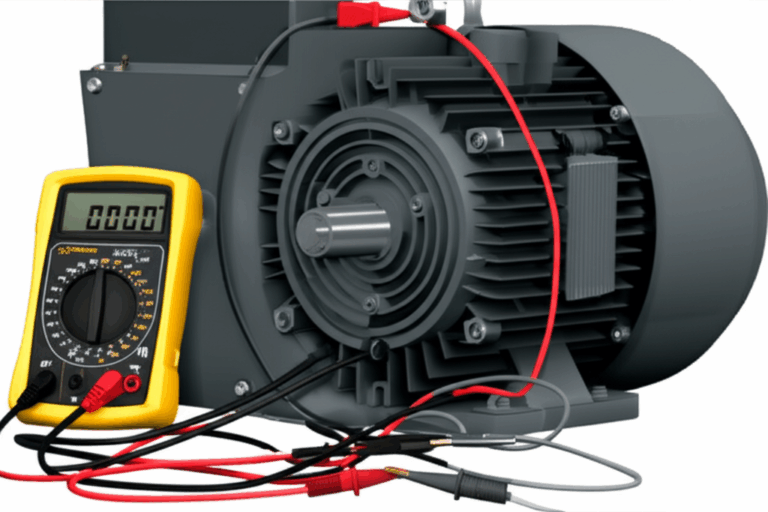
- Multimeter for voltage, resistance, and continuity tests
- Bench vise
- Fine-grit sandpaper (400 to 600)
- Soldering iron and heat shrink tubing for some brush kits
- Safety gear:
- Safety glasses
- Work gloves
- Jack stands and wheel chocks if you lift the vehicle
- Consumables:
- Electrical contact cleaner
- Dielectric grease or high-temperature lubricant where appropriate
- Thread locker for mounting bolts if the manual recommends it
- Key rebuild kit components:
- New brushes and a brush holder assembly
- Solenoid repair kit with plunger and copper contacts
- Bushings or bearings
- Seals and O-rings when applicable
- Optional: Bendix drive or armature if damaged and available
I also pull up a workshop manual. An online repair manual works if you do not have a printed book. It gives me torque specs, wiring diagrams, a starter motor diagram, and the starter relay location. The wiring harness routing and battery cable torque matter. So do the torque specs for the mounting bolts.
Brands and vehicles vary. Ford, Chevy, Honda, Toyota, Chrysler, General Motors platforms, Bosch, Denso, Mitsubishi Electric, and Delco Remy starters each have small differences. Some use permanent magnet fields while others use field windings. Some use planetary gears. The rebuild approach stays the same. The fasteners and brush holder designs vary.
Step-by-Step Guide: Disassembling & Rebuilding Your Starter Motor
Step 1: Safe Removal of the Starter Motor from Your Vehicle
Safety first. Starters draw heavy current. One wrong move makes sparks fly.
- Disconnect the battery. Always remove the negative terminal first. Set it aside so it cannot spring back.
- If you need to lift the car use a jack and jack stands. I never trust a jack alone.
- Locate the starter on the engine block bellhousing area. It sits near the flywheel or flexplate ring gear.
- Take a few photos of the wiring. You will thank yourself later.
- Disconnect the electrical wiring:
- The large battery cable on the solenoid’s main terminal
- The small solenoid signal wire at the spade or ring terminal
- A ground strap if installed
- Unbolt the starter motor. Some use two bolts. Others use three. Support the starter as you remove the last bolt. It has weight. It drops fast if you do not brace it.
Tip: If any fastener fights you soak it in penetrating oil. A little patience goes a long way.
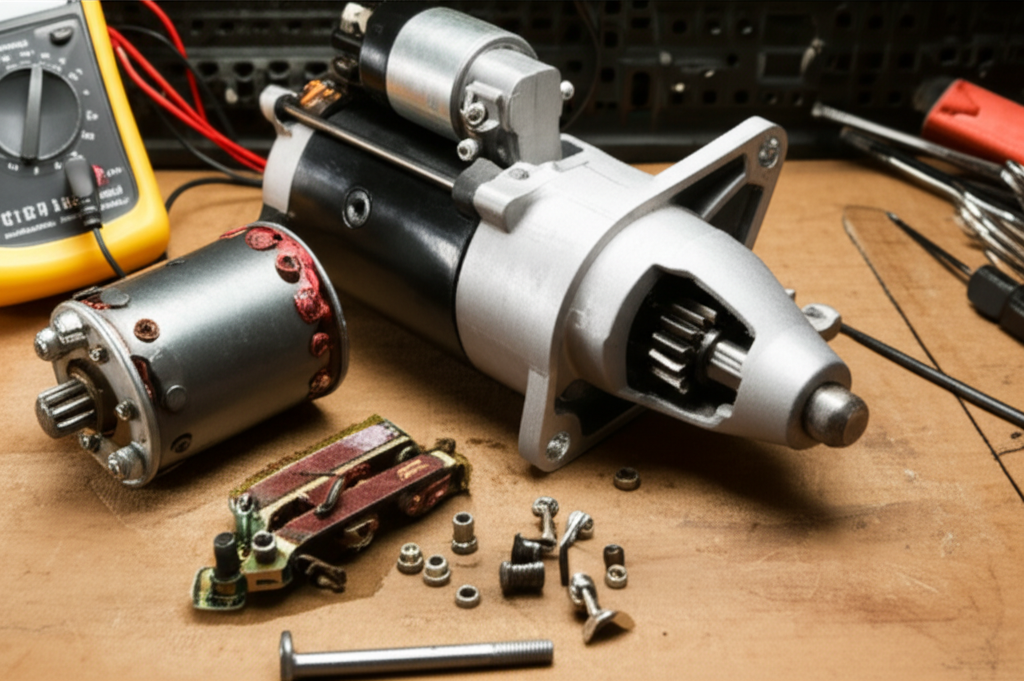
Step 2: Thorough Disassembly & Component Inspection
I set the starter in a bench vise with soft jaws. I do not crush it. I secure it enough to work safely.
- Remove the solenoid. Most solenoids use two screws and a nut for the battery cable. The plunger will slide out once you open it up.
- Remove the long through-bolts. The end frames and housing will separate.
- Pull the armature out. Keep an eye on the washers or spacers on each end.
- Remove the brush holder assembly. Some designs use screws. Others are held by tabs. Take note of the spring positions.
- Take out the Bendix drive if you plan to replace it.
Now I inspect. This is where you win or lose the rebuild.
- Armature: I look for burn marks on the windings and smell for burnt varnish. I check the commutator for deep grooves. I test for shorts and continuity with a multimeter. I set the meter to ohms and check segments for continuity. I check for shorts to the shaft. I like to see no continuity from the commutator to the steel core or shaft.
- Commutator: I look for pitting, uneven wear, and heavy carbon buildup. A light polish usually brings it back. If the mica insulation between the bars sits high I undercut it slightly. That’s an optional step. I only undercut if the brushes ride rough or if the manual calls for it.
- Brushes: I measure the brush length. If they are worn more than fifty percent I replace them. Cracks or chips mean they go in the bin. I check brush springs for good tension.
- Brush holder: I look for corrosion and signs of overheating. I make sure the brushes move freely in the slots.
- Solenoid: I inspect the plunger and the copper contacts. Deep pits and burning cause a voltage drop. That leads to clicking but no crank. A solenoid contact kit fixes most of this.
- Bendix drive: I make sure it slides out and retracts smoothly. The pinion gear should not have chipped teeth. Heavy wear on the root of the teeth means it has been grinding on the ring gear.
- Bushings or bearings: I check for play by rocking the armature shaft in the housing bore. Too much play lets the armature drag. That causes slow cranking and high current draw.
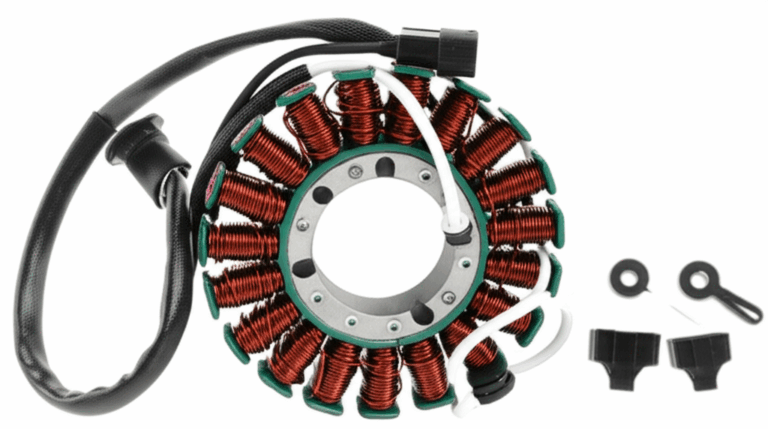
- Field windings: If it is a field coil type I look for burn marks. I test continuity to confirm the circuit is intact. Permanent magnet starters skip this step.
A note on materials. Starter armatures and field cores use laminated steel. Those laminations reduce eddy currents and heat. If you ever get curious about why that matters for efficiency take a look at high level resources on electrical steel laminations. In a typical 12V starter motor the principle remains the same. Laminations improve magnetic performance and reduce losses.
Step 3: Cleaning, Repairing, and Prepping Parts
I keep this step clean and methodical. Dirt kills electrical contacts. Oil on brushes causes arcing.
- I spray electrical contact cleaner on metal parts. I scrub with a wire brush. I avoid soaking the windings.
- I lightly sand the commutator with 400 to 600 grit sandpaper. I rotate the armature and keep it even. I do not go wild. I want a clean copper surface not a flat tire.
- I blow away dust with clean air. I keep my safety glasses on.
- I clean the solenoid cap and plunger. I replace contacts if needed. I do not grease the contact surfaces. Grease here causes problems.
- I install new bushings or bearings. I pre-lube bushings with a dab of high-temperature lubricant. I keep grease away from the commutator area.
- I inspect and clean electrical terminals. Corroded battery cable terminals cause voltage drop. I clean them until they shine.
- I do not remove the varnish from windings. Varnish removal on coils damages insulation. I only remove glaze and carbon from the commutator. That detail matters.
I also check the armature core and laminations for rust and burrs. If you want a deeper dive on how motor cores are stacked and aligned the basics of motor core laminations explain why the stack must stay tight and true. A loose stack can buzz under load. That shows up as noise or heat.
Step 4: Reassembly with New Rebuild Kit Parts
Reassembly runs much smoother if I lay parts out in order. I follow my disassembly photos in reverse.
- I install new brushes into the brush holder. Some kits require soldering. I use heat shrink tubing on soldered joints. I keep insulation neat and away from moving parts.
- I position the brush holder and pre-load the springs. I sometimes use small paper clips or toothpicks to hold brushes retracted. That trick keeps the brushes from snagging the commutator as I slide the armature in.
- I slide the armature into the field windings and housing. I align it with the new bushings or bearings. It should spin freely by hand.
- I swap in a new Bendix drive if needed. I follow the manual for any circlip or retainer orientations.
- I reassemble the end frames and install the through-bolts. I snug them evenly and then torque to spec if the manual lists a value.
- I rebuild the solenoid if my kit includes a plunger and contacts. I reassemble the solenoid housing. I install it on the starter body. I confirm the internal strap or terminal that links the solenoid to the field windings is tight.
- I double check every fastener. I double check every internal electrical connection. Loose hardware creates intermittent starting issues that drive you crazy.
Quick side note for the curious. The rotating armature in a starter behaves like a rotor in other motors. The core is a laminated stack around the shaft. If you have ever wondered how these stacks are built or why the punch pattern matters the basics around rotor core lamination will give you context. It is not required reading for a rebuild. It helps you understand why damage to the armature core often means replacement.
Step 5: Bench Testing Your Rebuilt Starter Motor
I always bench test before reinstalling. It takes two minutes. It can save you an hour of reinstalling a dead unit.
- I secure the starter in a vise or on a stable surface.
- I use heavy gauge jumper cables. This is a high-current test.
- I connect negative to the starter housing.
- I connect positive to the large battery terminal on the solenoid.
- I briefly jump the small solenoid trigger terminal to positive. I use an insulated screwdriver or a jumper wire. I only tap it for a second.
- I watch the pinion. It should extend sharply and the motor should spin with authority. I listen for smooth operation. No grinding. No binding. No wild sparks at the brushes. A small amount of brush arcing is normal on first spin.
Crucial safety warning: Wear safety glasses. Keep the contact brief. The current draw is massive. Cables get hot if you hold it. Sparks are normal. Flames are not.
If the pinion kicks out but the motor does not spin I look at brush contact and armature continuity. If the motor spins but the pinion does not extend I check the solenoid plunger and return spring. That simple test helps you sort solenoid vs motor problems fast.
Step 6: Reinstallation & Final Operational Test
If it passed the bench test I reinstall it.
- I position the starter back on the engine block. I check alignment dowels if equipped.
- I install mounting bolts by hand first. I tighten them evenly. I torque to spec if the manual provides values.
- I reconnect the wiring. The large battery cable goes on the main terminal. The small solenoid signal wire goes on the trigger terminal. I reinstall a ground strap if the vehicle used one. I ensure clean terminals and tight nuts.
- I reconnect the car battery. Positive first. Negative last.
- I start the vehicle. I listen for a strong consistent crank. No grinding. No whine. No lingering engagement after the key springs back.
If it starts cleanly I call it a win. I check for any stored fault codes if the car has a sensitive powertrain control module. Some modern vehicles log low voltage events.
Troubleshooting Common Issues After a Starter Rebuild
Things happen. The good news is you already know the starter inside and out. Here is how I chase the common gremlins.
- Starter clicks but will not crank:
- Check the battery first. Load test it. Do not guess. A weak battery sags under load and the solenoid only clicks.
- Check both battery cables and the ground cable connection to the engine block.
- Check continuity across the solenoid contacts when you energize it. High resistance there points to bad contacts.
- Confirm brushes make solid contact. A stuck brush can kill it.
- Starter cranks slowly:
- Low battery voltage or a dying battery
- Corroded terminals or poor grounds
- Worn bushings that let the armature drag
- Internal resistance from dirty commutator or weak brush springs
- Starter grinds or whines:
- Misaligned mounting or missing shims on some GM setups
- Damaged Bendix or chewed flywheel ring gear teeth
- Incorrect pinion depth
- Starter stays engaged:
- Faulty solenoid that sticks
- Sticky Bendix drive
- Ignition switch or relay that holds the trigger energized
- A short in the wiring harness that backfeeds the solenoid
If you need a wiring sanity check a good starter motor wiring diagram helps. I trace the path from the battery to the ignition switch to the neutral safety switch to the starter relay and finally to the solenoid terminal. A quick continuity test with the key in START often exposes a bad switch. I also check fuses for the starter circuit and look for a starter relay location under the hood or in the cabin fuse box.
Maintaining Your Starter for Extended Life
I treat starters with a light touch. They are powerful. They are tough. They still need a little love.
- Avoid excessive cranking. I keep cranking sessions to ten to fifteen seconds. I let the starter cool before trying again. Overheating a starter motor shortens its life.
- Keep the battery in good shape. An undercharged or failing battery makes starters suffer. It draws excessive current and overheats windings. Test your alternator output. Fix charging issues before they eat the starter.
- Keep cables clean and tight. Battery cable corrosion raises resistance. That means heat and voltage drop. Clean the terminals and use dielectric grease on exposed connectors to slow corrosion.
- Fix engine no-start conditions fast. Flooding, weak ignition, and bad fuel pressure force long cranks. Long cranks cook starters and cables.
- Do basic auto maintenance on schedule. Fresh engine grounds. Clean terminals. Healthy charging system. These small things extend the life of the starter.
A quick note for the technically curious. Starters are DC motors with either permanent magnets or field windings. The cores are laminated to reduce eddy currents. If you like understanding how laminations get stamped and stacked for better magnetic flux you can browse an overview of stator core lamination. Starters do not use stators in the same way as AC motors. The concept of thin stacked laminations still applies across motor types.
Practical Diagnosis Tips I Use Before Rebuilding
I do not tear into the starter until I rule out the basics. Here is my quick triage.
- Voltmeter starter test:
- Battery at rest should read about 12.6 volts for a fully charged battery.
- Voltage drop during cranking should not fall much below 10 volts on most cars.
- Measure drop across the positive cable from battery to starter under load. Anything over about 0.5 volt suggests resistance.
- Measure drop across the ground path from engine block to battery negative under load.
- Continuity test:
- With the battery disconnected I check continuity between the starter housing and the ground cable eyelet.
- I check the solenoid trigger wire for continuity to the ignition switch side with the key off. It should not show a short.
- Neutral safety switch:
- If it only starts in neutral not in park you found your culprit.
- Starter relay:
- Swap with a known good relay if the part number matches. That quick test rules out a sticky relay.
- Fuses for starter:
- Some vehicles use a fusible link or a large fuse for the starter feed. Check it before you blame the motor.
If all that checks out I move to removal and rebuild. If the voltage sag looks severe I fix the battery or alternator first. A bad alternator can lead to a dead battery. That fools you into thinking the starter is bad.
A Real-World Example: Denso-Style Starter on a Toyota
One of my favorite rebuilds was a Denso starter off a Toyota four cylinder. It showed classic bad starter symptoms. It clicked then cranked sometimes. It acted intermittent. I pulled it and opened it on the bench.
- The solenoid contacts were cratered. The plunger face had burn marks.
- The brushes were down to the wear line. Springs felt weak.
- The commutator looked glazed with light grooves. No deep damage.
- Bushings had light play.
I installed a Denso solenoid contact kit with a new plunger, replaced the brushes and brush holder, and fitted new bushings. I polished the commutator with 600 grit and cleaned everything with contact cleaner. Bench test showed crisp engagement and a strong spin. The car fired instantly after reinstallation. That job cost about thirty five dollars in parts and two hours of my time.
I have done similar jobs on Delco Remy units from GM trucks, Bosch starters from older European cars, and a Mitsubishi unit from a small Honda. The pattern repeats. Brushes and solenoid contacts do most of the failing. Armatures fail far less often. When the armature burns or the field winding shorts I replace the whole unit with a remanufactured part.
Advanced Tips: Commutator Work and Brush Seating
You do not need a lathe to get a starter commutator ready. I only resurface by hand unless it is badly out of round.
- Resurfacing the commutator:
- I use 400 to 600 grit emery cloth.
- I support the armature and rotate it while sanding evenly.
- I remove carbon glaze but keep it round.
- Undercutting the commutator:
- I only undercut if the mica is flush or proud of the copper bars.
- I use a dedicated tool or a hacksaw blade with care.
- I keep debris out of the windings.
- Brush seating:
- New brushes seat over the first few starts.
- To speed it up I can use a brush seating stone. I rarely need it on starters.
Be careful not to nick the insulation on the windings. Do not strip varnish from the windings. That varnish is the insulation. Varnish removal belongs nowhere near the windings in a starter motor.
If you ever wonder why undercutting matters think of it like cleaning the grooves on a vinyl record. The brush rides smoother. Electrical contact stays steady. Noise and arcing drop.
Rebuild vs Replace: How I Decide With Real Numbers
Here is how I run the math in my head before I start.
- DIY rebuild parts: $20 to $70 for brushes, solenoid contacts, bushings, seals.
- New unit: $100 to $400 or more based on make and model.
- Remanufactured unit: $70 to $250 plus a core charge that you get back when you return your old starter.
- Shop labor: $100 to $300 or more for removal and installation if you are not doing it yourself.
- Time: 2 to 6 hours for a DIY rebuild start to finish. 1 to 3 hours for a remove and replace.
If the armature and field windings test good I rebuild. If the armature is shorted or the housing is cracked I replace. If the vehicle is a daily driver and I cannot afford downtime I sometimes buy a reman unit and rebuild the old one later as a spare.
Safety Precautions I Never Skip
- I disconnect the negative battery terminal first. I reconnect the positive first during reassembly.
- I use jack stands when I lift a vehicle. I chock the wheels.
- I wear safety glasses for bench work and bench tests.
- I keep rags and a fire extinguisher nearby when I bench test. Sparks are part of the job.
- I use heavy gauge jumper cables for bench tests. Thin cables get hot and fail.
A Quick Note on Motor Construction and Materials
Starter motors are compact, high-torque DC machines. They rely on laminated iron cores for efficiency. Those laminations are thin slices of electrical steel. They fight eddy currents and cut losses. If you enjoy the engineering side there is a simple explainer on stator core lamination. Starters use an armature rather than a stator in the classic AC sense. The principle of lamination still applies. Likewise the rotating core construction has parallels with rotor core lamination. These references are not required to rebuild a starter. They help you appreciate why tight, undamaged laminations matter inside the armature stack.
FAQs I Hear From DIY Friends
- Will a bad alternator ruin a good starter?
- An alternator that undercharges leads to a weak battery. A weak battery forces the starter to draw heavy current for longer. Heat and stress follow. Fix charging problems early.
- Do permanent magnet starters rebuild the same way as field coil types?
- The steps look similar. You still deal with brushes, commutator, solenoid, and bushings. You skip field coil tests. Be gentle. Permanent magnets can chip.
- Can I use grease on the Bendix drive?
- I use a tiny amount of high-temperature grease on the shaft where the drive slides. I keep grease off the pinion teeth and the solenoid plunger face.
- Do I need a torque wrench?
- I like a torque wrench for mounting bolts and solenoid cap screws. Correct torque prevents loosening and distortion.
- Can I rebuild a starter with only basic tools?
- Yes if you add a multimeter. You can rebuild with a socket set, screwdrivers, pliers, a wire brush, contact cleaner, and sandpaper. A bench vise makes life easier.
Conclusion: DIY Success and Significant Savings
I rebuild starters because it works. The job looks intimidating at first. It is just a set of small systems working together. Brushes feed power to the commutator. The armature spins. The Bendix drive engages the ring gear. The solenoid makes and breaks the heavy contact. When you break it down piece by piece the fear fades.
You will save serious money if you rebuild correctly. You will build your confidence. You will reduce waste. Most failures come from brushes, solenoid contacts, and bushings. You can replace those parts with a simple starter rebuild kit. You do not need a fancy shop. You need patience and a methodical approach.
Take your time. Follow the steps. Test with a multimeter. Bench test before you reinstall. Then enjoy that first crisp crank. It feels like you brought the car back to life with your own hands.
Internal link self-check:
- electrical steel laminations: used once
- motor core laminations: used once
- rotor core lamination: used once
- stator core lamination: used once
Total internal links used: 4. All unique.