How to Install Motor Mounts: A Comprehensive DIY Step-by-Step Guide
- Table of Contents
- How to Install Motor Mounts: A Comprehensive DIY Step-by-Step Guide
- Outline
- What Are Motor Mounts and Why Do They Matter?
- Is DIY Motor Mount Replacement Right for You?
- What Tools, Parts, and Safety Gear Do I Need?
- How Do I Prepare the Vehicle Before I Start?
- How Do I Gain Access to the Motor Mounts?
- How Do I Support the Engine and Transmission Safely?
- How Do I Remove Old Motor Mounts?
- How Do I Install New Motor Mounts?
- How Do I Torque, Reassemble, and Test?
- What Problems Might Show Up After Replacement?
- Costs, Time, and Realistic Expectations
- Data and Case Studies You Can Use
- Advanced Note: EVs, Hybrids, and Quiet Power
- Frequently Asked Questions (Optional)
- Summary: Key Things To Remember
- References
Want a smoother ride and less shake at idle? I’ll show you how to install motor mounts the right way. You’ll learn what motor mounts do, how to spot bad ones, what tools you need, and how to swap them at home. I use simple steps. I add safety tips. I show you how to save money and time.
This article is worth reading because it gives you a complete, easy plan. You’ll avoid common mistakes. You’ll know when to tackle the job and when to call a pro. You’ll feel the fix on your first test drive.
Outline
- What are motor mounts and why do they matter?
- Is DIY motor mount replacement right for you?
- What tools, parts, and safety gear do I need?
- How do I prepare the vehicle before I start?
- How do I gain access to the motor mounts?
- How do I support the engine and transmission safely?
- How do I remove old motor mounts?
- How do I install new motor mounts?
- How do I torque, reassemble, and test?
- What problems might show up after replacement?
- Costs, time, and realistic expectations
- Data and case studies you can use
- Advanced note: EVs, hybrids, and quiet power
- Frequently asked questions (optional)
- Summary: key things to remember
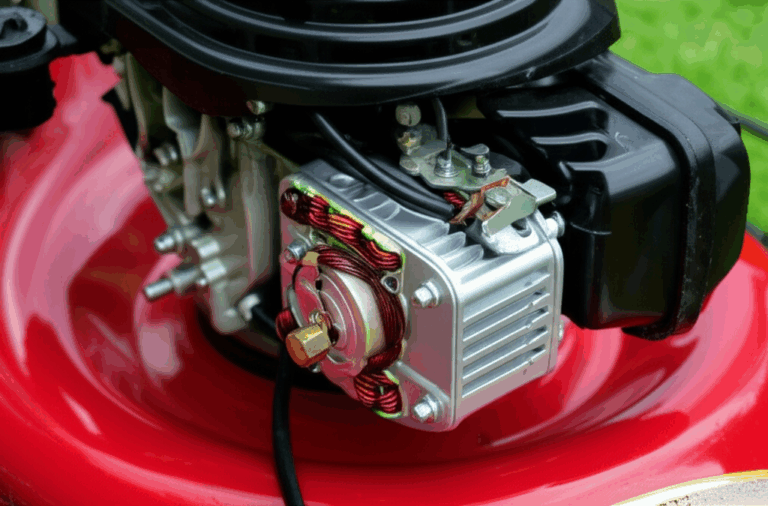
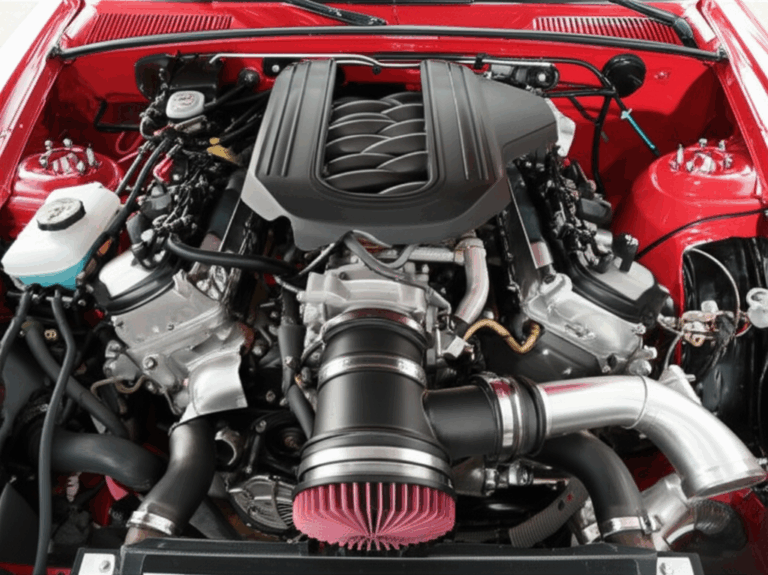
What Are Motor Mounts and Why Do They Matter?
Here’s the problem. The engine is heavy and it vibrates. The job of Motor Mounts and Engine Mounts and Transmission Mounts is simple. They hold the engine and transmission in place. They sit on the Vehicle Frame, Subframe, or Crossmember. They tie into the Engine Block and Transmission Case. Good mounts support the engine and absorb shake. You get a smoother ride and less noise.
Bad mounts cause trouble. You feel Vibration at idle and Rough idling. You may hear a Clunking noise from engine or a Braking clunk or an Accelerating clunk. You may see Excessive engine movement and Engine rocking or Engine sag and Transmission sag. You may feel Drive train vibration and Chassis vibration. You may get Shifting problems due to mounts. You may wonder why the car groans when you start or stop.
Why replace motor mounts? You fix noise. You stop clunks. You protect hoses and wires. You restore smooth power. You stop damage to the Engine cradle and nearby parts. The benefits of new motor mounts include comfort, better power transfer, and less wear on other parts. That’s worth your time.
Is DIY Motor Mount Replacement Right for You?
Let’s use PAS. Problem. Your car shakes and clunks. Agitate. It feels bad every time you stop at a light. The wheel buzzes. The dash rattles. You worry you’ll break something. Solution. Replace the mounts with this Step-by-step motor mount guide. You can do it if you plan well.
Is it hard to install motor mounts? It’s an Intermediate to Advanced job. I won’t sugarcoat it. Some cars are easy. Others are tight with poor access. A Honda Civic or Toyota Camry can be friendly. A Ford F-150 or Chevy Silverado may have big space but heavy parts. A Nissan Altima sits in the middle. The Difficulty of motor mount replacement depends on access and rust.
DIY vs professional motor mount replacement is a fair question. DIY saves money. You learn a lot. You work at your pace. A pro works faster and has all the tools. If you lack a safe way to support the engine you should hire a pro. Your safety always comes first.
What Tools, Parts, and Safety Gear Do I Need?
You need the right tools. You’ll support the engine. You’ll break rusty Bolts and Nuts loose. You’ll set Torque specifications right with a Torque Wrench. Here’s a clean list you can trust.
- Engine Hoist or Engine Support Bar
- Floor Jack and Jack Stands and Ramps
- Wheel Chocks
- Socket Set and Wrenches with deep sockets and Ratchet extensions
- Breaker Bar and Pry Bar
- Impact wrench if you have one
- Penetrating Oil for stubborn, rusty bolts
- Thread Locker (Loctite) and a plan for Loctite motor mount bolts
- Safety Glasses and Gloves
You also need parts. Choose OEM (Original Equipment Manufacturer) or Aftermarket Parts. You can pick Rubber motor mounts, Hydraulic Motor Mounts (also called Fluid filled motor mounts), Solid Mounts, or Polyurethane Mounts. Each type has pros and cons. Polyurethane motor mount benefits include sharp throttle feel and long life. They can add vibration at idle. Hydraulic motor mount installation helps ride comfort. Solid motor mount installation locks the engine down for performance builds.
Brands where DIYers often shop include Anchor Industries, DEA Products, Westar, Febest, and Corteco. Check part numbers by VIN. Match the Motor mount bracket style, Motor mount bolt size, and hardware (Washers, new Bolts, and Nuts) to your car.
Safety matters most. Secure car before working. Use Wheel well access and Under car access only after you set Jack Stands on strong frame points. Wear Safety Glasses. Use Gloves. Keep a clear floor.
How Do I Prepare the Vehicle Before I Start?
I start by reading the Service Manual. It shows Vehicle specific instructions, Torque specifications, Motor mount location, and steps that are unique to your car. I print the torque pages. I keep them on the fender with tape.
Now get the car ready. Park on level ground. Set the brake. Place Wheel Chocks. Disconnect battery at the negative terminal. You don’t want a starter kick while you work. Use your Floor Jack to raise the car. Set Jack Stands on frame points. If you have a Vehicle lift use it. Ramps for car help give more space.
I label parts as I remove them. I bag small screws. I write notes. Labeling bolts and Organizing parts save time later. Take photos as you go. This makes the Post-installation check smoother.
How Do I Gain Access to the Motor Mounts?
You need room to reach the Front motor mount, Rear motor mount, and Side motor mount. Some cars hide the top mount under the air box. Others hide the lower mount behind the Subframe. The steps to Gaining Access to the Motor Mounts can include:
- Remove the air box and intake tube.
- Pull the battery and the battery tray.
- Move the coolant bottle or coolant reservoir.
- Loosen the Radiator hose removal point only if needed.
- Remove or swing the Power Steering Pump if it blocks a mount.
- On some cars you do AC compressor removal to reach a hidden bolt.
- Clear the Engine cradle zone if the service guide tells you to.
I soak all visible bolts with Penetrating oil for rusty bolts. I give it time to work. A little patience now saves a lot of pain later.
How Do I Support the Engine and Transmission Safely?
You must Support the engine for mount change. Do not let it hang on one mount. That can bend brackets and break stuff. I place an Engine Hoist from above or set an Engine Support Bar over the fenders. I clip to lift points and I Lift engine to install mounts very slightly. You only need to take the weight off the mounts.
No hoist? You can use a Floor Jack with a wood block under the Oil pan if the manual allows it. Go slow. Do not crush the pan. A Transmission jack can help hold the trans side. I watch hose and wire tension as I lift. If anything stretches I stop and reroute.
Apply gentle upward pressure. You want the engine to float. This takes the load off the mount so you can pull bolts out with less fight.
How Do I Remove Old Motor Mounts?
Now you start the Mounting bolts removal. I break the bolts loose with a Breaker bar. I use the Socket set for mounts with the right drive size. I try a short socket first. I swap to a deep socket if a stud is long. For stubborn bolts I use an Impact wrench for motor mounts if there is space.
Follow a smart order:
If a mount sticks I use a Pry bar for mounts. I take care not to bend thin brackets. As I pull the mount out I check the sleeves and alignment pins. I look for torn rubber, broken plates, and Fluid leaks from mounts on hydraulic styles.
I also inspect the Mounting Surfaces for Damage or Corrosion. I clean them with a brush. I check for cracks on the Motor mount bracket or on the Subframe.
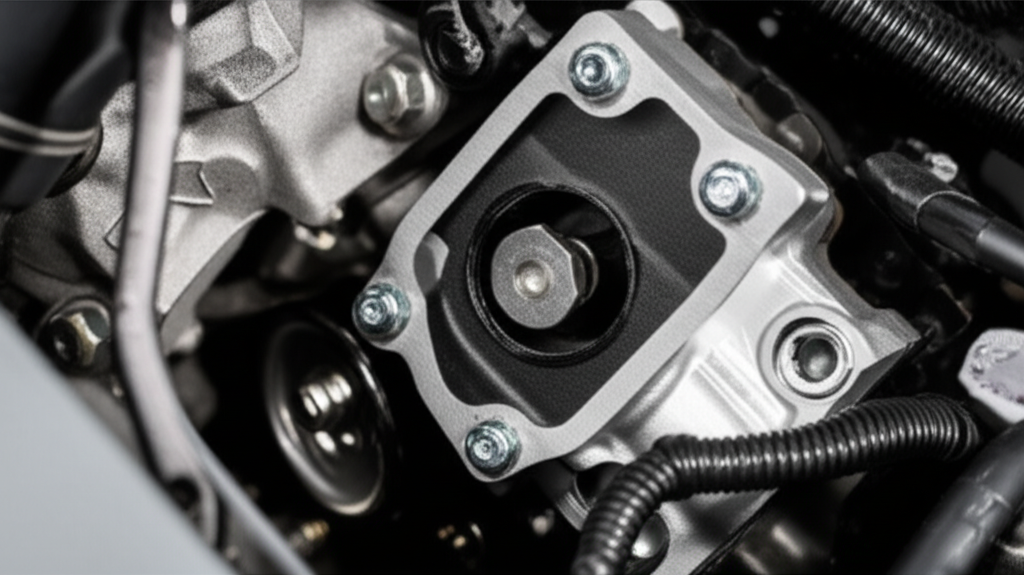
How Do I Install New Motor Mounts?
I test fit the mount first. I confirm the Motor mount bolt size matches. I set the mount in place. I line up the pins. I start all bolts by hand. I do not force any thread. I do not cross thread.
I snug the bolts. I do not tighten them yet. I want wiggle room to align things. If the service guide calls for Thread locker for mounts I use it. If it calls for dry threads I keep them dry. If it says use Loctite motor mount bolts I follow the type and color. Do not add oil or Grease motor mount bolts unless the book says so.
Lower the engine slowly onto the new mount. Watch for clean alignment. This step can take a few lifts. Be patient. When the engine sits on the mount pads and the bolt holes line up you are ready to torque.
How Do I Torque, Reassemble, and Test?
I use a Torque wrench to set bolts to Torque specifications. This matters a lot. Over-tighten and you can crush a bushing. Under-tighten and bolts can back out. Follow the Service Manual values for each bolt and nut.
Reinstall all parts you removed. Put the Air box, Battery tray, and hoses back. Clip wiring in the right places. Reinstall the Power Steering Pump or AC compressor if you pulled them. Double check every fastener. Double-Check All Tightened Bolts for Security.
Reconnect the Battery. Safely lower the car from Jack Stands. Do an Initial Inspection and Test Drive. At idle the shake should drop. Listen for new noises. On the road test light Acceleration and Braking. Try a few stops. If you hear no Clunking Noise and feel less shake you did it right. Finish with a Post-installation check after a short drive. Look for loose parts and any rubbing.
What Problems Might Show Up After Replacement?
Sometimes you still feel Vibration after motor mount replacement. The cause can be improper torque, a Faulty mount, the Wrong mount type, or a Missed mount you did not replace. Some cars need all three or four mounts done together. Replacing all motor mounts can save time if they all have the same age. If you have One bad motor mount you can start with that one first.
If you hear new clunks check for Loose bolts, contact with other parts, or Engine misalignment. If you feel hard shifts it can be the Transmission mount. Difficulty of shifting gears often links to the trans side mount. Use the Troubleshooting Common Issues list in your manual.
If the steering wheel pulls after the job you might have Alignment issues after mounts. A mount job should not change wheel alignment. It can change the way the Subframe sits if it was loosened. Have a pro check alignment if the car drifts.
Costs, Time, and Realistic Expectations
Let’s talk money and time. The Cost to replace motor mounts depends on parts and labor. DIY Saving money on motor mounts can be big. You can cut 60-80% of the total bill. Parts: $30-$200 per mount is common. Shops charge $300-$1000+ per mount with Labor: $100-$400+ per mount. Some cars use special mounts that cost more.
How long will it take? Time to install motor mounts for DIYers runs 2-6+ hours per mount. It goes faster if you have done it before. Pros do 1-4 hours per mount because they have lifts and special tools. Ask yourself, Is it hard to install motor mounts for my model. Look up your car on forums and set a fair window.
How long do motor mounts last? The Typical Lifespan falls in the 50,000 to 100,000+ miles range. Heat, road salt, and hard driving shorten life. Soft rubber rides smooth but wears faster. Performance motor mounts hold strong but can add idle shake. Pick what fits your needs.
Data and Case Studies You Can Use
Here’s a quick table with facts you can use when you plan the job.
| Metric/Category | DIY Motor Mount Installation (Approximate) | Professional Motor Mount Installation (Approximate) | Notes |
|---|---|---|---|
| Cost Savings | 60-80% savings on total cost. Parts: $30-$200 per mount. | Total Cost: $300-$1000+ per mount. Labor: $100-$400+ per mount. | DIY covers parts and maybe tool rental. Savings vary by mount count and access. |
| Time Investment | 2-6+ hours per mount for DIYers | 1-4 hours per mount for experienced mechanics | Time varies by car, accessibility, skill, and rust. |
| Skill Level Required | Intermediate to Advanced | Professional Expertise | Mistakes can cause safety issues and repeat work. |
| Common DIY Challenges | Access issues, rusted/seized bolts, engine support, improper torque, post-install vibration | Fewer issues thanks to tools and experience | A proper Engine support bar or Engine hoist is key. |
| DIY Success Rate | High (80%+) with tools, patience, and following directions | Very high (95%+) | Most failures come from rushing and ignoring torque specs. |
| Typical Lifespan | 50,000 to 100,000+ miles | Same | Depends on mount material and conditions. |
| Safety Risks (DIY) | Moderate to High if safety steps are skipped | Very low | Always use Jack stands, Wheel chocks, and PPE. |
| Tool Investment (DIY) | $100-$500+ | N/A | Tool rental can help reduce cost. |
| Environmental Concerns | Recycle hydraulic mounts if possible | Shops handle waste | Do not toss fluid-filled mounts in general waste. |
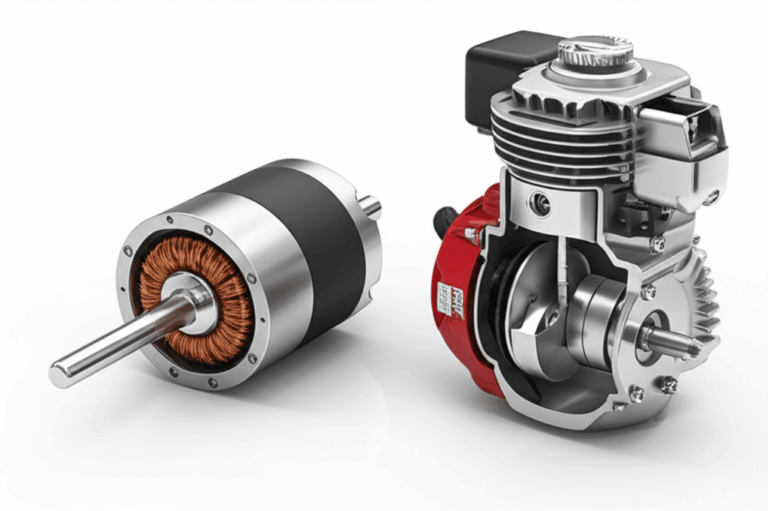
Advanced Note: EVs, Hybrids, and Quiet Power
Many new cars use electric drive parts. Smooth power needs more than good mounts. The motor inside an EV or hybrid uses a steel stack to cut vibration and hum. If you build, repair, or source electric motor parts for fleet tools or shop machines you’ll want to learn how the steel stack works.
- The quality of the motor core laminations shapes noise and heat in an electric motor.
- A well made stator core lamination sets the magnetic field and controls torque ripple.
- A balanced rotor core lamination reduces buzz and improves smooth spin.
- Premium electrical steel laminations help motors run quiet with less loss.
This matters to NVH too. Your engine mounts fight vibration on the outside. The motor’s steel stack fights vibration on the inside. Both work together to keep cabins calm in modern cars and shop equipment.
Frequently Asked Questions (Optional)
- When should I replace engine mounts?
- Replace them when you feel shake at idle, hear clunks on start and stop, or see the engine shift too much. Inspect for cracks, leaks on hydraulic styles, or torn rubber. If one fails others may be close behind.
- Do I need to replace all mounts at once?
- If the car has high miles it’s smart to do all mounts together. If the car is low miles you can do One bad motor mount and watch the others.
- Should I use thread locker on mount bolts?
- Follow the Service Manual. Use Thread locker (Loctite) only when the manual calls for it.
- Can I grease motor mount bolts?
- No unless the manual says so. Use dry threads or thread locker as directed. Grease motor mount bolts can throw off torque values.
Summary: Key Things To Remember
- Bad mounts cause vibration, clunks, and engine movement.
- Plan the work. Read the Service Manual. Know the Torque specifications.
- Use an Engine hoist or Engine support bar. Support the engine before you pull bolts.
- Gather tools: Jack stands, Floor jack, Torque wrench, Socket set, Breaker bar, Pry bar, Penetrating oil, and Thread locker.
- Remove parts for access. Take photos. Label bolts and organize parts.
- Start bolts by hand. Align the engine. Torque to spec.
- Test drive. Listen for noise. Check for persistent vibrations.
- Choose the right mount type: Rubber, Hydraulic, Polyurethane, or Solid.
- DIY saves money when you work safely and follow steps.
References
- Factory Service Manual for your exact year, make, and model
- OEM torque specifications and service bulletins
- Haynes and Chilton repair manuals for general guidance
- Reputable automotive forums for your model (for tips and photos)
- Environmental guidelines for fluid filled mount disposal
Bonus: Complete DIY Checklist You Can Use Today
Use this list to plan, diagnose, and execute. It covers the core steps and terms you’ll see as you work.
- Why replace motor mounts
- How to check motor mounts
- Diagnosing bad engine mounts
- Common motor mount issues
- Symptoms of bad motor mounts
- Broken motor mount
- Engine movement and excessive engine movement
- Clunking noise from engine
- Vibration at idle and rough idling
- Drive train vibration and chassis vibration
- Accelerating clunk and braking clunk
- Shifting problems due to mounts
- How long do motor mounts last
- When to replace engine mounts
- Types of motor mounts: rubber motor mounts, hydraulic motor mounts, fluid filled motor mounts, solid motor mounts, performance motor mounts, polyurethane motor mounts and polyurethane motor mount benefits
- Engine mount replacement and motor mount DIY
- Steps to replace motor mounts and step-by-step motor mount guide
- Tools for motor mount replacement: engine hoist, engine support bar, transmission jack, floor jack, jack stands, torque wrench, socket set, wrenches, breaker bar, pry bar, ratchet extensions, impact wrench for motor mounts
- Safety precautions motor mounts: safety glasses, gloves, wheel chocks, secure car before working
- Penetrating oil for rusty bolts and mounting bolts removal
- Thread locker for mounts and Loctite motor mount bolts
- Motor mount bolt size and torque specifications
- Grease motor mount bolts only if the manual says so
- Front motor mount, rear motor mount, side motor mount
- Motor mount bracket and engine cradle
- Subframe and crossmember
- Engine block and transmission case
- Bolts, nuts, and washers
- Engine hoist and lift engine to install mounts
- Supporting engine for mount change
- Removing old motor mounts and installing new motor mounts
- Lowering and aligning the engine/transmission
- Torquing all bolts to specification
- Vehicle specific instructions and Service Manual
- Vehicle preparation: park on level ground, engage parking brake, disconnect battery, lift and secure vehicle with jack stands on frame points
- Gaining access: component removal for access, power steering pump removal, AC compressor removal, radiator hose removal, wheel well access, under car access, vehicle lift, ramps for car
- Sourcing new motor mounts: OEM motor mounts and aftermarket motor mounts including Anchor motor mounts and brands like Anchor Industries, DEA Products, Westar, Febest, and Corteco
- Honda Civic motor mount replacement and Toyota Camry examples
- Ford F-150 motor mount replacement and Chevy Silverado examples
- Nissan Altima mount layout references
- Post-installation check and test drive after mount change
- Persistent vibrations, clunking or knocking noises, engine misalignment, difficulty shifting gears troubleshooting
- Alignment issues after mounts
- Fluid leaks from mounts
- Saving money on motor mounts
- Cost to replace motor mounts
- Time to install motor mounts
- Is it hard to install motor mounts
- DIY vs professional motor mount
- Preventative maintenance motor mounts
- Engine sag and transmission sag
- Engine hoist and engine support bar use recap
- Organizing parts and labeling bolts
- Motor mount location highlights
- Motor mount bolt size checks
- Penetrating oil use plan
- Post-installation recheck plan
I’ve used this system on my own cars for years. Follow the steps and keep safety first. Your engine will sit solid and your ride will feel new again.