How to Easily Replace a Blower Motor Resistor (DIY Guide)
Table of Contents
- Introduction: Why Your Blower Fan Speeds Are Failing
- What a Blower Motor Resistor Does and Why It Fails
- Is It the Blower Motor Resistor? Diagnosing the Problem
- Common symptoms checklist
- Quick diagnostic tips you can do in minutes
- How to test a blower motor resistor with a multimeter
- Tools and Parts You’ll Need
- Essential tools
- Required parts and compatibility
- OEM vs aftermarket
- Cost, Time, and Difficulty: What to Expect
- Step-by-Step: How I Replace a Blower Motor Resistor
- Step 1: Safety first
- Step 2: Find the blower motor resistor
- Step 3: Remove the old resistor pack
- Step 4: Install the new resistor
- Step 5: Reassemble and test every fan speed
- Troubleshooting After Replacement
- Preventing Future Blower Motor Resistor Issues
- Quick Answers to Common Questions (FAQs)
- Data and Practical Insights at a Glance
- Final Checklist
- Conclusion: Enjoy Your Working HVAC Fan Again
Introduction: Why Your Blower Fan Speeds Are Failing
The first time my fan only worked on high I thought something major had failed. The air blasted like a wind tunnel on setting 4 yet did nothing on 1 through 3. That classic symptom pointed straight to one small part that carries a big load. The blower motor resistor. I swapped it in less than an hour and the heater worked like new. No drama. No fancy tools.
If you’re here because your AC fan speeds don’t work or the heater fan only works on high you’re in the right place. I’ll show you how I diagnose a bad blower motor resistor, which tools I actually use, where to find the resistor, and how to replace it step by step. I’ll also share how I prevent repeat failures because nothing’s worse than replacing the same part twice.
What a Blower Motor Resistor Does and Why It Fails
In most cars with manual fan speed controls the blower motor resistor drops voltage to the blower motor so you get multiple speeds. Lower speeds route current through more resistance which reduces voltage and current. High speed usually bypasses the resistor so the motor gets full voltage. That’s why the fan only working on high is the number one clue.
Modern vehicles sometimes use a fan speed control module instead of a traditional resistor pack. You might hear it called a digital blower motor resistor or a control module. It uses pulse width modulation to control motor speed. The symptoms overlap yet the part looks different and the wiring uses a different style connector. The replacement process feels similar though the module can cost more.
Why do blower motor resistors fail?
- Heat. These parts dissipate a lot of heat by design. Long drives with the fan on high heat them up. Poor airflow around the heat sink cooks them faster.
- Excess current draw. A worn blower motor can draw too much current. That extra load overheats the resistor or the thermal fuse inside the resistor pack.
- Corrosion and moisture. Wet carpets and leaky HVAC cases create green crust on connections. Corrosion raises resistance which makes more heat. You can guess the rest.
- Melted connectors. A loose electrical connector arcs and builds heat. That heat damages the plastic and the terminals. The resistor follows.
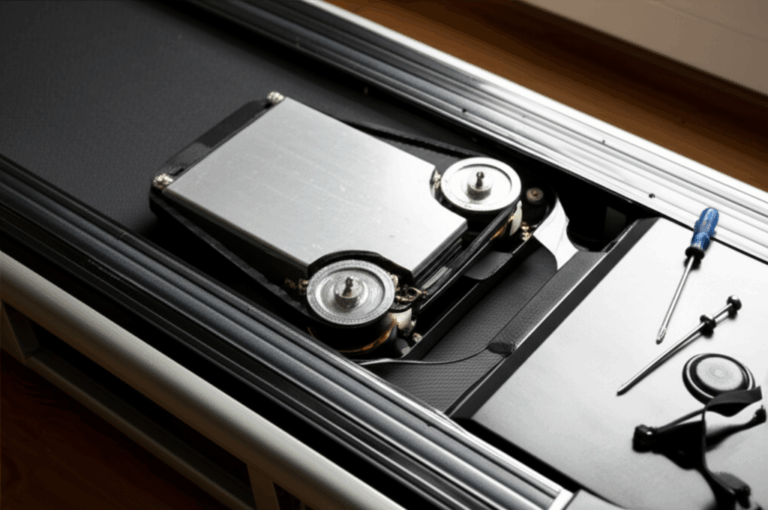
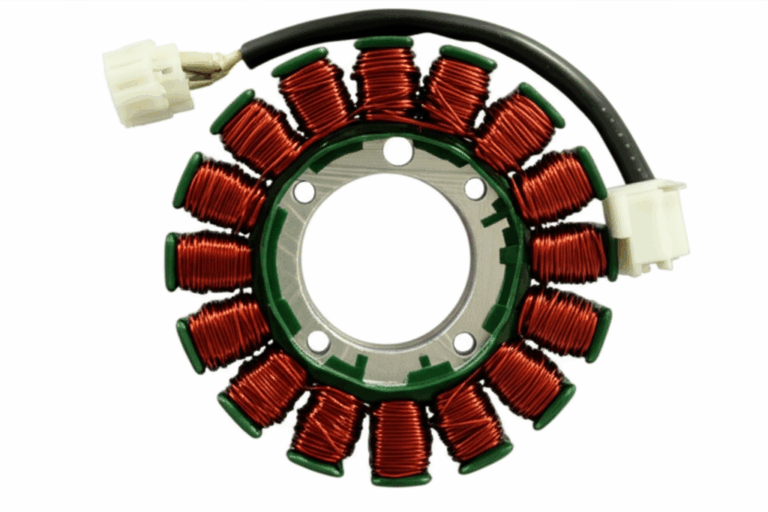
Quick note on the motor itself. The blower motor is a compact electric motor that spins a squirrel-cage fan. Motor efficiency matters because wasted energy turns into heat which shows up as extra current draw. Inside the motor you’ll find a stator and a rotor built with stacked laminations that reduce eddy current losses. If you’re curious about what those thin sheets do and why they’re used in motors you can dive deeper into stator core lamination and rotor core lamination. Those laminations are made from specialized steels that cut losses and manage heat which protects components downstream like your resistor. For a broader look at the materials used in efficient electric machines check out electrical steel laminations.
Is It the Blower Motor Resistor? Diagnosing the Problem
I never throw parts at an electrical problem. I spend five to ten minutes confirming the failure first. It saves time and money and it avoids replacing a good resistor when the blower motor or a fuse is the real issue.
Common symptoms checklist
Run through these quick signs. They match the classic blower motor resistor symptoms I see all the time.
- Fan only works on the highest setting
- Some speeds don’t work like low or medium
- Fan works intermittently when you hit bumps
- No fan operation at all which can happen if the thermal fuse inside the resistor pack blows
- AC fan speeds not working even though the AC light turns on
- Burning smell from the passenger footwell or under the glove box
- Blower motor resistor blowing fuse right after turning on the fan
These point to the resistor or the wiring harness. Complete no-operation can also point to the blower motor or a power feed issue.
Quick diagnostic tips you can do in minutes
- Check the fuse box for the blower fuse. Replace a blown fuse once. If it pops again stop and diagnose because a short or a failing motor may be present.
- Confirm the blower motor itself isn’t seized. Turn the fan on high then lightly tap the blower housing under the passenger side dash. If it roars to life the motor is likely failing.
- Jump the blower motor. Apply 12V and ground to the motor plug with a fused jumper or a power probe. If it spins strong the motor is probably fine.
- Inspect the resistor connector. Look for melted plastic, burnt terminals, or loose pins. If it looks toasted you may need a resistor with harness kit.
- Scan for related Diagnostic Trouble Codes if your car supports HVAC DTCs. You may see codes for the fan control module in newer vehicles.
How to test a blower motor resistor with a multimeter
I use a digital multimeter for two simple tests. Voltage checks and continuity checks.
Voltage test on the blower motor connector:
- Key on. Fan switch set to each speed. Measure voltage at the blower motor connector.
- You should see different voltages for low, medium, and high. No change across speeds points to a failed resistor or a bad speed selector switch.
- If high speed shows battery voltage yet the motor doesn’t run suspect the motor or its ground.
Continuity test on the resistor pack:
- Disconnect the battery. Remove the resistor pack.
- Use the ohmmeter to measure resistance between the terminals that correspond to each speed circuit.
- An open circuit means the resistor element or the thermal fuse inside is blown.
- Some resistors use a thermal fuse you can spot. It looks like a small metal cylinder. If it’s open the pack is done.
Voltage drop test on the connector:
- With the fan on high measure voltage between the connector pin and the corresponding wire a few inches back.
- A large drop points to a bad pin or corroded wire that will heat up and damage the new part.
Tools and Parts You’ll Need
You don’t need anything exotic. I keep a basic kit handy and it covers 90% of cars.
Essential tools
- Screwdriver set with Phillips, flathead, and Torx bits
- Socket wrench set with small extensions
- Multimeter or DMM for electrical tests
- Pliers for clips and connectors
- Work light because you’ll be under the dash
- Safety glasses because falling debris is no fun
- Trim tool for panels in the passenger footwell or kick panel
Required parts and compatibility
- New blower motor resistor or fan speed control module. Match your vehicle’s year, make, and model. Check the part number. Pay attention to trim and engine because HVAC options can differ.
- Resistor with harness pigtail if the connector is burnt. Many brands sell a resistor and wiring harness kit.
- Dielectric grease for terminals. I apply a light film to prevent corrosion.
- Fresh cabin air filter if it’s dirty. It reduces blower strain and extends the life of the new resistor.
OEM vs aftermarket
I’ve used both. OEM parts usually fit perfectly and last a long time. Aftermarket parts can save money and work fine for common models. If your car keeps eating resistors strongly consider an OEM resistor or an upgraded harness. A high-resistance connector kills resistors fast.
Cost, Time, and Difficulty: What to Expect
This is one of the most approachable DIY jobs on a car. On most vehicles I spend 30 to 60 minutes. Tricky cars with buried dashboards can push it to 1.5 hours. The part ranges from $15 to $75 for a resistor pack. Fan control modules cost more. A shop will often quote $100 to $250+ with labor included.
Skill level: easy to moderate
- If you can remove a glove box you can do this job
- If you can test a fuse you can confirm the diagnosis
Step-by-Step: How I Replace a Blower Motor Resistor
Let’s get your hands dirty. I’ll walk you through the exact process I use.
Step 1: Safety first
- Park on level ground. Set the parking brake.
- Turn the ignition off.
- Disconnect the negative terminal on the vehicle battery. I always do this because you’ll unplug an electrical connector in a tight space.
Step 2: Find the blower motor resistor
You’ll usually find it near the blower motor itself. The airflow helps cool the resistor’s heat sink.
Common locations:
- Under the glove box on the passenger side
- In the passenger footwell behind a kick panel
- Under the dash near the blower motor housing
- In the engine bay on some trucks or older cars though that’s less common
Tips for quick access:
- Open the glove box. Many boxes drop down by pressing side tabs. That reveals the blower motor and resistor area.
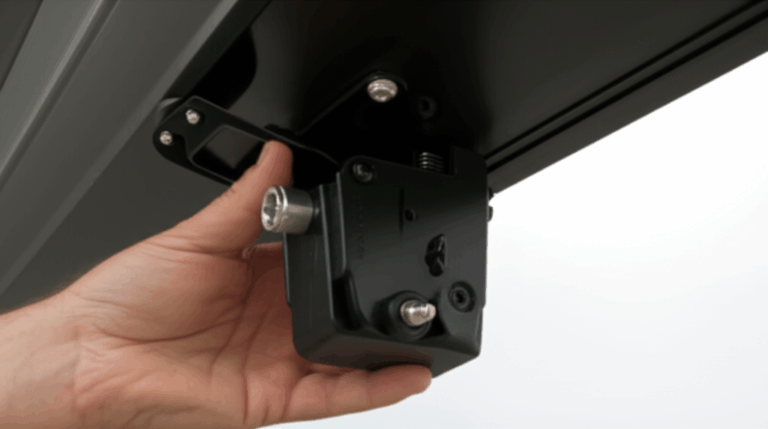
- Look for a small rectangular plate with a harness plug and two to four screws. That’s the resistor pack.
- Use a work light. Shadows hide screws and clips.
Step 3: Remove the old resistor pack
- Remove any trim panels or kick panels. Use a trim tool so you don’t snap clips.
- Disconnect the electrical connector. Press the tab and pull straight out. If the tab feels stubborn use a small flathead to release it without breaking it.
- Inspect the connector for heat damage or melted plastic. A burnt connector needs replacement. You can buy a resistor with harness kit then splice the new pigtail with crimp connectors or solder and heat shrink.
- Remove the screws that hold the resistor in place. Torx screws are common so keep a set handy.
- Pull out the resistor pack. It may feel snug because the heat sink sits inside the air duct.
Step 4: Install the new resistor
- Compare the old part with the new one. Check the mounting holes and the connector shape.
- Slide the new resistor into the duct. Seat it fully so the heat sink sits in the airflow path.
- Install the screws. Snug them down. Do not over-torque because the housing is plastic.
- Reconnect the electrical connector. Push until it clicks. A loose connector will arc and heat up.
- If you replaced the harness apply dielectric grease sparingly to the terminal seals. Route the wires neatly and secure them with zip ties so they don’t rub on sharp edges.
Step 5: Reassemble and test every fan speed
- Reinstall the glove box and any trim you removed.
- Reconnect the vehicle battery.
- Turn the key to ON. Test all fan speeds. Listen for smooth operation. Check that the AC engages if equipped.
- Verify airflow through every vent. If airflow feels weak inspect or replace the cabin air filter. A clogged filter strains the blower motor.
If all speeds work you nailed it. If not don’t worry. The troubleshooting section below will get you the rest of the way.
Troubleshooting After Replacement
I’ve had a few curveballs over the years. Here’s how I sort them out fast.
- Fan still not working at any speed
- Check the blower fuse again. Confirm power at the blower motor with a voltmeter.
- Jump the blower motor directly. If it doesn’t spin the motor is bad.
- Verify the ground connection at the blower. A poor ground will stop the motor cold.
- Only high speed works after replacement
- Suspect the new resistor pack. Test for continuity through the resistor elements.
- Check the heater control panel or the fan speed selector switch. The switch can fail and kill certain speeds.
- New resistor fails quickly or gets very hot
- The blower motor may draw too much current. Listen for motor squeal or grinding. Measure current draw on high. If it’s too high the motor is on its way out.
- Inspect the wiring harness for high resistance. Melted or darkened terminals mean heat damage.
- Replace the cabin air filter. Poor airflow cooks the resistor.
- Intermittent fan speeds
- Wiggle the resistor connector and the harness. If the fan cuts in and out you’ve got a loose pin or a broken wire at the connector crimp.
- Check the blower motor relay if equipped. A sticky relay can cause intermittent operation.
Preventing Future Blower Motor Resistor Issues
I treat the new resistor like a canary in the coal mine. If it failed something else may be stressing the system.
- Replace the cabin air filter on schedule. A clogged filter restricts airflow which raises blower load and resistor temperature.
- Keep the passenger footwell dry. Moisture corrodes electrical connectors and heats things up under load.
- Repair harness damage promptly. A burnt connector will keep cooking resistors until you replace it.
- Listen to your blower motor. If it squeals, chirps, or runs rough it draws more current. Replace the motor before it takes out another resistor.
- Use all fan speeds occasionally. Cycling through speeds can reveal early issues before you need the system on a long trip.
If you want to understand why some motors run cooler and draw less current it often comes back to design and materials. Motors that use high quality motor core laminations waste less energy as heat which helps the entire HVAC system run happier.
Quick Answers to Common Questions (FAQs)
- What are the classic blower motor resistor symptoms?
- Fan only works on high. Some speeds don’t work. Intermittent fan operation. Burning smell from under the glove box.
- Can I replace a blower motor resistor myself?
- Yes. This is a straightforward DIY job for most cars. You’ll need screwdrivers, a socket set, and a bit of patience.
- How long does it take to change a blower motor resistor?
- Plan for 30 minutes to 1.5 hours. Most are on the easy end.
- Where is the blower motor resistor located?
- Usually under the glove box near the blower motor in the passenger footwell. Sometimes behind a kick panel. Rarely in the engine bay.
- How much does a blower motor resistor cost?
- The part often runs $15 to $75. A shop repair typically costs $100 to $250+ depending on labor time and the vehicle.
- Do I need to disconnect the battery?
- I do. It protects you and the vehicle electronics while you unplug the resistor.
- How do I test a blower motor resistor?
- Use a multimeter. Check for voltage changes at the blower motor connector when you change speeds. Remove the resistor and check continuity across its terminals.
- Why does my new blower motor resistor keep failing?
- Excess current draw from a failing blower motor is common. Melted connectors, moisture, and a clogged cabin air filter also cause repeat failures.
- My fan speed selector isn’t working on any speed. Is it the resistor?
- It might be the control switch or a power feed issue. Test for voltage at the blower motor and resistor. Don’t skip the fuse and relay.
- After replacing the blower motor resistor the fan still doesn’t work. Now what?
- Verify power and ground at the blower motor. Jump the motor. If it still doesn’t spin replace the blower motor.
- Do some cars use a module instead of a resistor?
- Yes. Many newer cars use a fan speed control module. The troubleshooting process is similar yet the part and the wiring differ.
- Is an aftermarket resistor OK?
- Often yes. If the harness or connector looks weak go OEM or pick a reputable aftermarket brand with a good warranty.
- Can I repair a thermal fuse inside the resistor?
- I replace the entire pack. You can replace a thermal fuse if you’re handy with solder. Incorrect temperature ratings or poor joints can fail fast.
- Will a clogged cabin air filter burn out my resistor?
- It can. Restricted airflow strains the blower which increases current draw and heat at the resistor.
- Is there a wiring diagram I can use?
- Your owner’s manual won’t include a full diagram. A repair manual for your specific vehicle or a trusted online service will.
Data and Practical Insights at a Glance
Aspect of Blower Motor Resistor Replacement | Data / Statistics / Insights | Source / Context
:– | :– | :–
Average DIY Cost (Parts Only) | $15 – $75 for the resistor itself. Price varies by make, model, and OEM vs aftermarket. | Common pricing ranges from auto parts retailers and marketplaces
Average Professional Repair Cost | $100 – $250+ including parts and labor. Labor is usually 0.5 to 1.5 hours. | Repair estimates from shops and repair cost guides
Typical DIY Time Investment | 30 minutes to 1.5 hours. Most cars are easy to access under the glove box. | DIY guides and mechanic experience
Failure Rate & Common Causes | Resistors fail often due to heat and current draw. Common causes include overheating, worn blower motors, and corrosion. | Automotive engineering principles and common field reports
Symptoms of Failure | Over 90% of failures show as the fan only working on high or certain speeds not working. | Common diagnostic scenarios in manuals and forums
Impact of Cabin Air Filter | A clogged cabin air filter increases blower load which accelerates resistor failure. | HVAC system design basics and technician advice
Frequency of Replacement | Common after 5–7 years or higher mileage. Repeat failures happen if underlying issues aren’t fixed. | Mechanic observations and owner reports
Final Checklist
Use this quick list when you’re ready to wrench.
- Battery negative disconnected
- Trim panels removed and stored safely
- Resistor location identified near blower motor
- Connector inspected for heat damage
- Old resistor removed and compared to new part
- New resistor installed and screws snugged
- Harness connected securely with a positive click
- Panels reinstalled with all clips seated
- Battery reconnected
- All fan speeds tested with AC on and off
- Cabin air filter checked and replaced if dirty
Conclusion: Enjoy Your Working HVAC Fan Again
I’ve replaced a lot of blower motor resistors. The pattern rarely changes. Fan only works on high or low speeds die one by one. I verify the fuse and the blower motor first then I pop the resistor out from under the glove box. New part in. Test every speed. Call it a win.
If your new resistor fails quickly don’t ignore the motor or the harness. A tired blower can pull too much current and a toasted connector can cook the new part. Fix both and your HVAC system will run like it should.
You’ve got this. Take your time. Keep your tools organized. Test as you go. Your reward is simple. Reliable fan speeds and a comfortable cabin in every season.