How to Diagnose & Fix DTC C0267: ABS Pump Motor Circuit Open
Every engineer who has touched a braking system knows the stakes. When the ABS light pops on and a scan tool shows C0267 “pump motor circuit open,” it’s more than an annoying code. It’s a safety-critical warning that the anti-lock system may not kick in when you need it most. If you’re a design engineer validating an ABS pump motor, a product manager weighing supplier options, or a procurement lead comparing costs for rebuilt vs new modules, you need clarity fast. You want root causes, testing steps, and reliable fixes. You also want to understand the engineering behind why these motors fail and how better materials and manufacturing decisions can prevent it.
This guide does both. We’ll show you how to troubleshoot and repair C0267 today. Then we’ll step back and explain the motor and lamination fundamentals that reduce failure risk and improve long-term reliability. By the end, you’ll have a step-by-step plan and the engineering insight to make smarter design and sourcing decisions.
In This Article
- What is DTC C0267 and Why is it Important?
- Common Causes of C0267: Pinpointing the Problem
- Step-by-Step C0267 Diagnostic & Troubleshooting Guide
- How to Fix C0267: Repair Procedures
- Engineering Fundamentals: Why Pump Motors Fail (Laminations, Materials, and Manufacturing)
- Matching Solutions to Applications: OEM, Aftermarket, and Fleet Maintenance
- Costs, TSBs, and Risk Management
- Post-Repair Steps and Verification
- When to Seek Professional Help
- Your Engineering Takeaway
What is DTC C0267 and Why is it Important?
Understanding the C0267 Code
C0267 flags an “ABS pump motor circuit open.” In plain English, the ABS module commanded the hydraulic pump to run and then sensed an open electrical path in the pump motor circuit. It expected current flow. It saw none. Some platforms label it as an ABS module fault while others frame it as a motor control circuit issue. You’ll see this on GM vehicles like Silverado, Tahoe, Sierra, and Yukon. It can also appear on Chevy, GMC, and some Ford platforms. The exact definition varies slightly by manufacturer and model year, so confirm with your service data or a manufacturer-specific scan tool like GM Tech2 or a capable aftermarket ABS diagnostic tool.
Safety Implications of C0267
With C0267 active your ABS likely won’t intervene under hard braking. You may still have normal hydraulic brakes. You may also see the traction control light and stability control light since TCS and ESC piggyback on ABS actuation. The risk goes up on wet roads and gravel. Treat it seriously and avoid aggressive driving until you resolve it.
Common Symptoms of C0267
- ABS light on and traction control light on
- Brake warning light on in some cases
- No ABS pump noise at key-on self-test
- Hard brake pedal under certain conditions
- Intermittent activation followed by a fault after a few seconds
- DTC C0267 stored with or without other ABS or communication codes
Common Causes of C0267: Pinpointing the Problem
You’ll find a handful of usual suspects. Rank them by likelihood before you touch a wrench.
- Faulty ABS pump motor: The motor windings can open up or the brushes can wear out. Sometimes the motor seizes.
- Defective ABS control module (ECU): Internal driver failures or cracked solder joints can mimic an “open circuit” at the pump output.
- Wiring harness issues: Corroded, broken, or chafed wires between the module and the pump motor cause intermittent or permanent opens.
- Blown ABS fuse or faulty relay: A bad relay contact or a blown pump fuse will look like an open circuit to the module.
- Poor ground connection: Rusty or loose grounds starve the pump motor of return path. This often shows up as intermittent C0267.
- Battery voltage or charging issues: Low system voltage can confuse the module or prevent the pump from starting. It’s a less common direct cause yet still worth checking.
Quick data points from field experience across forums and technician reports:
- ABS module internal fault: roughly 50–70% of cases
- Wiring harness or ground issues: roughly 20–30% of cases
- Pump motor failure: roughly 5–15% of cases
- Blown fuse or faulty relay: roughly 5–10% of cases
These aren’t lab-grade statistics, but they align with what many GM and Ford technicians see day to day.
Step-by-Step C0267 Diagnostic & Troubleshooting Guide
This path balances speed with accuracy. You’ll confirm the fault, isolate the circuit, and make a clear repair decision. You need a quality OBD-II scanner with ABS support, a wiring diagram, a multimeter, and basic hand tools. A test light helps. A breakout box or back-probing pins can speed things up.
Initial Checks (Visual & Basic)
- Verify battery health. Check resting battery voltage (12.6 V is healthy) and charging voltage around 14.0 V with engine running. Weak batteries cause headaches.
- Inspect ABS fuses and relays. Find the ABS pump fuse in the underhood fuse box. Pull it and check continuity. Swap the relay with a known good one if available. Look for heat discoloration or melted plastic.
- Perform a quick visual on the ABS module, pump motor, and harness. Corrosion on connector pins, broken wire insulation, and oil-soaked looms all matter. Pay attention to the ground wire and any ground studs on the frame or near the HCU.
Using an OBD-II Scan Tool
- Confirm C0267 is active. Note freeze frame data if available.
- Check for related ABS or communication DTCs. A U-code for CAN communication or a wheel speed sensor fault can muddy the waters but still matters.
- Look at live data. Some ABS modules expose supply voltage, pump command status, or pump driver feedback.
- Run an active test. Command the pump motor on using bidirectional control if your tool supports it. Listen for pump noise. If it doesn’t spin and C0267 logs immediately you just narrowed the field.
Advanced Electrical Testing (Multimeter Required)
Work from the ABS module output toward the pump motor. Confirm power, ground, and motor integrity.
- Voltage test at the pump motor connector
- With key on, command the pump on through the scan tool. Back-probe the pump connector. Check for B+ on the power side and near zero volts on the ground side. If you see battery voltage across the motor leads yet the motor doesn’t run the motor is likely bad or seized.
- Continuity test on the harness
- Disconnect the ABS module and pump motor. Measure continuity end-to-end on the power wire and the ground wire. Wiggle the harness while watching the meter for intermittent opens. Repair any high-resistance or open sections.
- Resistance check of the ABS pump motor
- Measure the motor winding resistance across the two motor pins. Compare to spec if you have it. Many small DC pump motors will show a few ohms. A reading of infinite resistance indicates an open winding.
- Ground circuit integrity
- Do a voltage drop test. Command the pump on and measure the voltage between motor ground and battery negative. You want less than 0.2 V drop under load. Higher drop means a poor ground connection.
Diagnosing the ABS Module Itself
You’ve verified clean battery power, a solid ground, intact wiring, and a healthy motor. Yet C0267 persists and the pump won’t run. The ABS control unit (ECU) likely failed. Many modules use internal high-current drivers and relays to power the pump. Over time vibration and heat crack solder joints or burn contacts. If your advanced scan tool can read module-specific internal fault flags it may confirm a driver fault. If you have access to a known-good module with the same part number you can swap it for a quick A/B test, then code or program as needed.
How to Fix C0267: Repair Procedures
You found the fault. Fix it cleanly, seal it against the elements, and verify the repair under load.
Repairing or Replacing the Wiring Harness
- Cut back to clean copper. Don’t trust green, corroded strands.
- Use high-quality butt splices or solder splices with heat shrink. Seal the repair with adhesive-lined heat shrink or loom and electrical tape.
- Replace broken connectors or damaged terminal pins. De-pin the connector and crimp new terminals using the correct die.
- Reroute chafed harness sections. Add abrasion sleeves where the loom rubs on the body or HCU bracket.
Replacing ABS Fuse or Relay
- Replace blown fuses only after you rule out a short. If a new fuse blows instantly the circuit has a downstream short. Solve that first.
- Replace a suspect relay with a new OEM or quality aftermarket part. Some relays fail intermittently under heat.
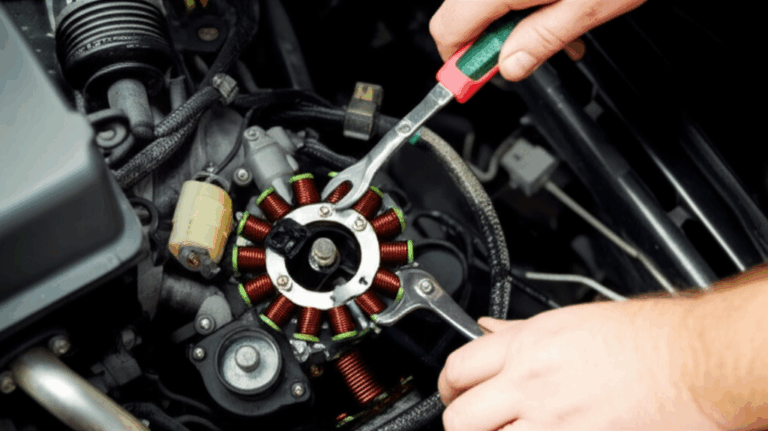
Replacing the ABS Pump Motor
- Many systems integrate the pump motor with the hydraulic control unit. You may need to replace the HCU assembly. Some GM and Ford units allow motor-only replacement.
- Follow torque specs. Keep the sealing surfaces clean. Label brake lines to the HCU and take pictures for routing reference.
- If you replace the HCU you must bleed the brake system and run an ABS automated bleed procedure using a scan tool.
Replacing the ABS Control Module (ECU)
- New vs rebuilt vs used
- New modules cost more and often need programming or coding. Rebuilt modules can be cost effective and are popular for GM trucks with C0267. Used modules can work but carry risk due to unknown history.
- Programming or coding
- Plan for programming with OEM-level tools or J2534 pass-thru if the platform requires it. Some modules need variant coding for options like traction control or stability control.
- Mounting and sealing
- Ensure all seals and gaskets sit correctly. Moisture ingress kills electronics. Torque the module evenly to the HCU body.
Repairing Ground Connections
- Remove the ground bolt. Wire-brush the lug and the body contact area to bare metal.
- Apply dielectric grease sparingly. Reinstall and torque the fastener properly.
- Add a redundant ground strap if the original location sits in a high-corrosion zone.
Engineering Fundamentals: Why Pump Motors Fail (Laminations, Materials, and Manufacturing)
Let’s zoom out. C0267 calls out a circuit fault. That’s an electrical failure mode. Still many underlying motor issues trace back to how the motor was designed and built. If you design ABS units, source pump motors, or set supplier standards, this section is for you.
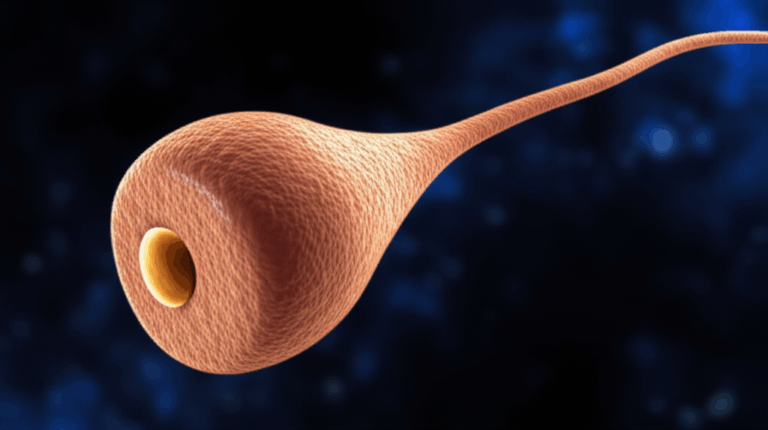
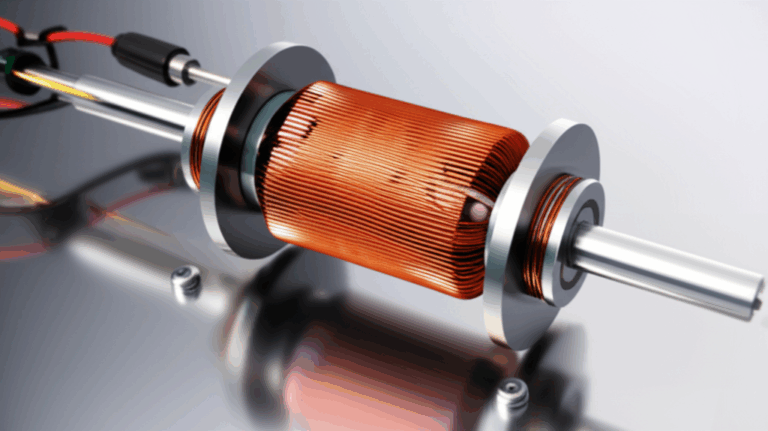
At the heart of the pump is a compact electric motor. Older ABS pumps often use a brushed DC motor with a laminated steel core and copper windings. Some modern platforms move to brushless motors. Either way the magnetic core matters. It defines torque density, heat rise, and efficiency. It also shapes reliability under high duty cycles.
Two core loss mechanisms dominate:
- Eddy currents: Imagine small whirlpools forming in a river when the flow changes. A changing magnetic field induces swirling currents in solid steel. Those currents waste energy as heat. Thinner, insulated laminations break those whirlpools into tiny eddies that do less harm.
- Hysteresis loss: Each magnetization cycle drags the material up and down its B-H curve. The area within that loop is energy lost to internal friction at the atomic level. Materials with lower coercivity reduce this loss.
What helps:
- Thinner laminations reduce eddy currents. At typical ABS pump duty, 0.35 mm or 0.50 mm non-oriented electrical steel is common. Higher frequencies or longer duty may benefit from thinner gauges if cost allows.
- Higher silicon content in non-oriented electrical steel reduces core loss at a given flux density. It also helps resist aging under thermal stress.
- Consistent insulation coatings between laminations interrupt eddy currents. The coating must survive stamping, stacking, and bonding.
Materials to consider
- Non-oriented silicon steels (NOES): Bread-and-butter choice for small motors. Grades covered under standards like ASTM A677 and IEC 60404 deliver predictable magnetic performance. These work well for general-purpose pump motors and hydraulic actuators.
- Cobalt alloys: Better magnetic saturation and lower core loss at high frequency yet very expensive. You see them in aerospace or high power density designs more often than in cost-sensitive ABS pumps.
- Amorphous metals: Extremely low core loss. They shine in high-frequency applications like some power electronics. They are rare in ABS pumps due to cost and manufacturing complexity.
Manufacturing choices that move the needle
- Stamping vs laser cutting
- Stamping shines in high-volume production. It’s fast and repeatable and gives tight tolerances with low per-part cost after you amortize the tool. Die maintenance matters because burr height increases local core loss and raises inter-lam insulation breakdown risk.
- Laser cutting suits prototypes and small runs. It avoids tooling lead time and supports intricate geometries or quick revisions. Heat-affected zones can harden the edge and raise local loss if not controlled.
- Stacking methods
- Interlocking: Tabs lock laminations together mechanically. Think LEGO bricks that hold without adhesives. It simplifies assembly and avoids welding heat that hurts magnetic properties.
- Bonding/varnishing: Adhesive coats each lamination and cures under pressure and heat. The result is a rigid, quiet stack with good damping. You must control cure and clamp pressure to avoid squeeze-out that shorts laminations.
- Welding: Strong and fast for some geometries. It can raise local core loss where heat alters metallurgy. Use sparingly and with process control.
- Quality controls that pay off
- Verify lamination thickness and burr height.
- Measure core loss per IEC 60404 methods for incoming steel.
- Check interlaminar insulation resistance.
- Validate stator and rotor stack runout to reduce mechanical drag and noise.
If you want a concise primer on the building blocks involved, see how general-purpose motor core laminations influence torque density and efficiency. For ABS pump motors that still use a brushed topology with compact armatures, pay attention to rotor core lamination quality and slot geometry because commutation and ripple torque will tie directly to lamination precision. On the stator side, tight slot-to-tooth control improves flux uniformity. You can browse typical stator core lamination approaches to see how different stack-ups handle vibration and thermal growth. If you’re evaluating steel supply and coatings, review the role of electrical steel laminations in balancing cost with loss targets.
Why this matters for C0267
- A motor built with high-loss steel runs hotter for the same output. Heat ages insulation, brushes, and solder joints. That aging raises the chance of an open circuit down the road.
- Poor interlam insulation can promote hot spots and localized shorts. That stresses drivers in the ABS module. A stressed driver fails open and triggers C0267.
- Excess burr height from stamping can nick winding enamel during insertion. You might pass end-of-line tests then fail in the field months later with an open motor circuit.
Matching Solutions to Applications: OEM, Aftermarket, and Fleet Maintenance
One size never fits all. Pick processes and materials for the use case and volume.
- OEM production
- High-volume ABS pump motors lean on progressive-die stamping and interlocked stacks. You need low unit cost and repeatability. Lock down lamination gauge, insulation class, and burr targets in your drawing notes. Audit die wear on a schedule.
- For platforms pushing aggressive duty cycles like full-size pickups that tow heavy loads, consider a small upgrade in steel grade to reduce core losses. You’ll lower steady-state temperature and extend life without a big cost penalty.
- Aftermarket and remanufacturing
- Reman ABS modules often fail due to driver solder cracks. Reinforcing the solder joints and replacing relays inside the module can restore service and prevent C0267 returns. Use high-temp solder and clean flux residues well.
- When remanufacturing pump motors, inspect rotor stack tightness, commutator roundness, and brush spring force. Replace bearings. Validate insulation resistance to ground at rated voltage.
- Prototyping and low-volume custom vehicles
- Laser cut laminations give you flexibility without waiting for tooling. Use this for kitting prototypes or pre-production builds. Validate core loss since edge effects can mislead early tests.
- Consider bonded stacks for better NVH. ABS pump noise matters for cabin impression even if you meet braking targets.
Be honest about limits
- Laser cutting offers precision and speed for prototypes. For high-volume production with simple geometries, progressive stamping reduces cost and variability.
- Cobalt alloys unlock performance for specialty motors. Most ABS pumps do not need them and can hit targets with quality NOES and tight process control.
Costs, TSBs, and Risk Management
Rough parts-only cost ranges for repair
- Rebuilt ABS control module: $150–$400
- New ABS control module: $400–$800 or more
- ABS pump motor or HCU assembly: $200–$1,000+
- Fuses and relays: $5–$25
- Wiring repair materials: $5–$100
Labor time swings based on packaging, corrosion, and access. Trucks like Chevy Silverado or GMC Sierra tend to be easier than some crossovers. Always scan for related DTCs. A C0267 alongside wheel speed sensor faults or communication codes hints at broader electrical issues.
Check for Technical Service Bulletins
- Search OEM TSBs and service information for your specific model year. GM, Chevy, GMC, Ford, and others sometimes publish ABS module update guidance or ground repair bulletins. Some model-specific corrosion paths reappear across forums. A TSB can save hours.
Standards and references
- Electrical steels: IEC 60404 series covers magnetic property measurement. ASTM A677 covers fully processed non-oriented electrical steel for general magnetic applications.
- Programming: SAE J2534 defines pass-thru reprogramming and is relevant when coding or reflashing modules.
- Diagnostics: Follow your OEM repair manual. Use the wiring diagram and connector pinouts. Manufacturer diagnostics always beat guesswork.
Risk trade-offs
- Driving with C0267 isn’t recommended. You may have normal braking without ABS modulation and stability support. If you must drive, keep speeds down and avoid slick conditions.
- Resetting the ABS light without fixing the root cause doesn’t solve the safety risk. Clear codes only after a verified repair.
Post-Repair Steps and Verification
Clearing DTC C0267
Use your scan tool to clear the code. If your repair addressed the root cause the code should stay gone after a key cycle and a short drive. Don’t just pull the battery cable because that wipes helpful data and may trigger unrelated relearns.
Test Drive and Re-check
- Drive at low speed in a safe area. Make a controlled hard stop to command ABS.
- Confirm the ABS light stays off. Watch live data if your tool displays pump command and module voltage.
- Re-scan for pending or history codes. Intermittent wiring issues can hide until vibration returns them.
Bleeding the Brake System (If HCU Was Replaced)
Air in the HCU will cause a soft pedal and delayed ABS actuation. Use a scan tool to run the automated bleed procedure. Follow the sequence in the repair manual. Verify a firm pedal after the final bleed.
When to Seek Professional Help
Recognizing Your Limits
- Electrical diagnosis beyond simple voltage and continuity checks
- Module programming and coding on late-model vehicles
- Severe corrosion that compromises multiple connectors and grounds
- No bidirectional control on your scan tool to run the pump for tests
Benefits of Professional Diagnosis
- Access to OE scan tools like GM Tech2 or fully featured aftermarket platforms
- Experience with platform-specific issues like ground locations on a Tahoe or typical harness pinch points on a Sierra
- The right equipment for voltage drop tests, breakout boxes, and load testing under controlled conditions
Your Engineering Takeaway
- C0267 means the ABS module commanded the pump motor and sensed an open circuit. Treat it as a critical safety fault.
- Start simple. Check battery health, fuses, relays, and grounds. Then move to scan-tool bi-directional tests and multimeter checks for power, ground, and motor resistance.
- Most repairs fall into four buckets: wiring/grounds, fuses/relays, pump motor, or ABS module driver faults. Modules and harness issues top the list for many GM trucks.
- After repair, clear codes, test ABS activation at low speed, and run a proper bleed if you replaced the HCU.
- If you design or source ABS pump motors, invest in lamination quality and process control. Thinner, well-insulated laminations and consistent stacking reduce core loss and heat. That improves reliability and shrinks the chance of open-circuit failures that show up as C0267.
Actionable next steps
- For DIY diagnosis: Gather a wiring diagram, a quality ABS-capable scan tool, and a multimeter. Follow the step-by-step tests above. Document results before replacing parts.
- For engineering and sourcing teams: Align your supplier on lamination gauge, insulation class, stacking method, and burr height limits. Validate magnetic properties per IEC 60404 and steel per ASTM A677. Request process capability data and set incoming inspection plans for lamination insulation resistance and stack runout.
- For procurement managers: When comparing OEM, reman, and aftermarket options, weigh module programming requirements, warranty terms, and known platform issues. Ask suppliers about their lamination sourcing, stacking processes, and end-of-line motor load testing. Better core design and manufacturing lead to fewer warranty returns.
If you need a deeper dive on how lamination choices affect compact motor performance, review standard practices for motor core laminations. For pump motors that rely on armature design, study rotor core lamination parameters like slot shape and skew. On the stationary side, stator core lamination geometry drives flux distribution and NVH. For a materials overview, explore the role of electrical steel laminations in balancing loss, cost, and reliability.
Frequently asked quick checks and pro tips
- ABS pump not running during active test? Confirm you have B+ at the pump connector while commanding ON. No voltage points to a relay, fuse, or module driver.
- Intermittent C0267 after a car wash or a rainstorm? Suspect moisture in connectors or a compromised ground. Clean and seal.
- ABS light with other codes like wheel speed sensors? Fix those first because the module may inhibit pump commands if it sees invalid sensor data.
- Can a wheel speed sensor cause C0267? Not directly. It can trigger ABS faults and inhibit pump activation which confuses diagnostics. Resolve sensor issues then re-test.
- Should you reflash the ABS module? Only if the OEM publishing body lists a software fix relevant to your symptoms. A reflash doesn’t repair open circuits or burned drivers.
You’ve got a clear path now. Fix the immediate fault and get the vehicle safe. Then take the longer view if you design or source ABS systems. Better laminations and tighter manufacturing translate to fewer hot motors, fewer cracked drivers, and fewer C0267 callbacks.
Internal link check: 4 unique links used, each only once.