How to Connect a Motor to a Power Screw
Short summary: In this simple guide, I show you how to connect a motor to a power screw so you get smooth, strong, and precise linear motion. You learn what parts you need, how to pick them, and how to put it all together without trouble. Read this if you want a clear path from plan to a working linear actuator.
Table of Contents
- Introduction: Why this guide matters
- What is a power screw and why connect it to a motor
- What parts do you need for a clean build
- How do you choose the right motor and screw
- Which coupling should you use
- How do you set up supports and bearings
- Step-by-step: Connect the motor to the power screw
- How do you test and tune the system
- How do you cut backlash and vibration
- Safety and care for long life
- Troubleshooting common problems
- Should you upgrade parts for better results
- References
- Summary of key points
Introduction: Why this guide matters
Let’s be honest. You want your machine to move straight and true. You want smooth motion. You want enough force. You want it safe. Yet the tiny link between the motor and the power screw can make or break the whole build. That small link is the heart of your linear motion control.
Here is the problem. Many builds fail at the joint. Misalignment hurts bearings. Backlash kills precision. A poor coupling slips. Heat rises. The motor cries. That’s a mess.
I’ve been there. So I wrote this to solve it for you. I show you the parts. I show you how to pick them. I show you how to connect them. I show you how to test them. Then I show you how to keep them in shape. You get a clear, step-by-step path you can trust.
What is a power screw and why connect it to a motor
A power screw turns spin into push. Turn the screw and the nut moves in a line. That is linear motion. You’ll see three main types: the lead screw, the ball screw, and the acme screw. A trapezoidal screw is like an acme screw too. Each type has its own efficiency and friction. A ball screw is very efficient. A lead screw can be self-locking. An acme screw is tough and simple.
Why connect it to a motor? A motor gives you fast spin and repeat motion. That spin becomes thrust force in the screw. A motor plus a power screw becomes a linear actuator. You can move parts in a 3D printer, a CNC machine, a robot, a screw jack, or a custom linear actuator build. You can use a direct drive power screw system. Or you can use a gear reduction motor lead screw with a planetary gearbox lead screw or a worm gear lead screw drive. You can also use a belt drive lead screw mechanism or even a chain drive if you need it.
What parts do you need for a clean build
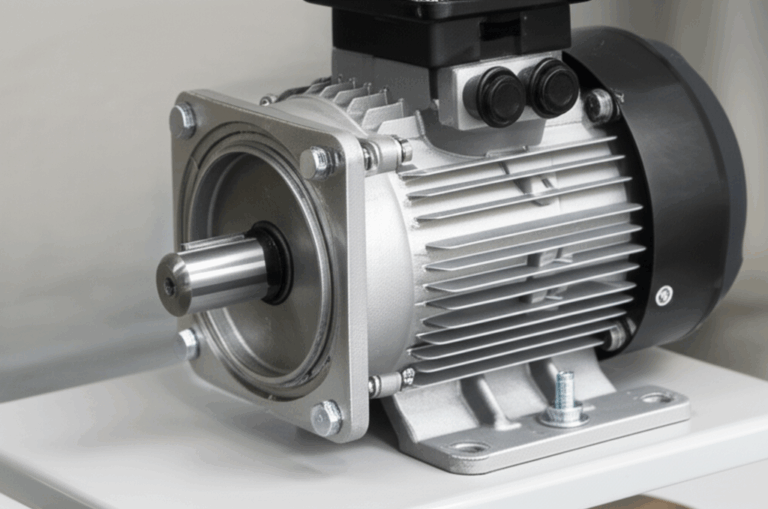
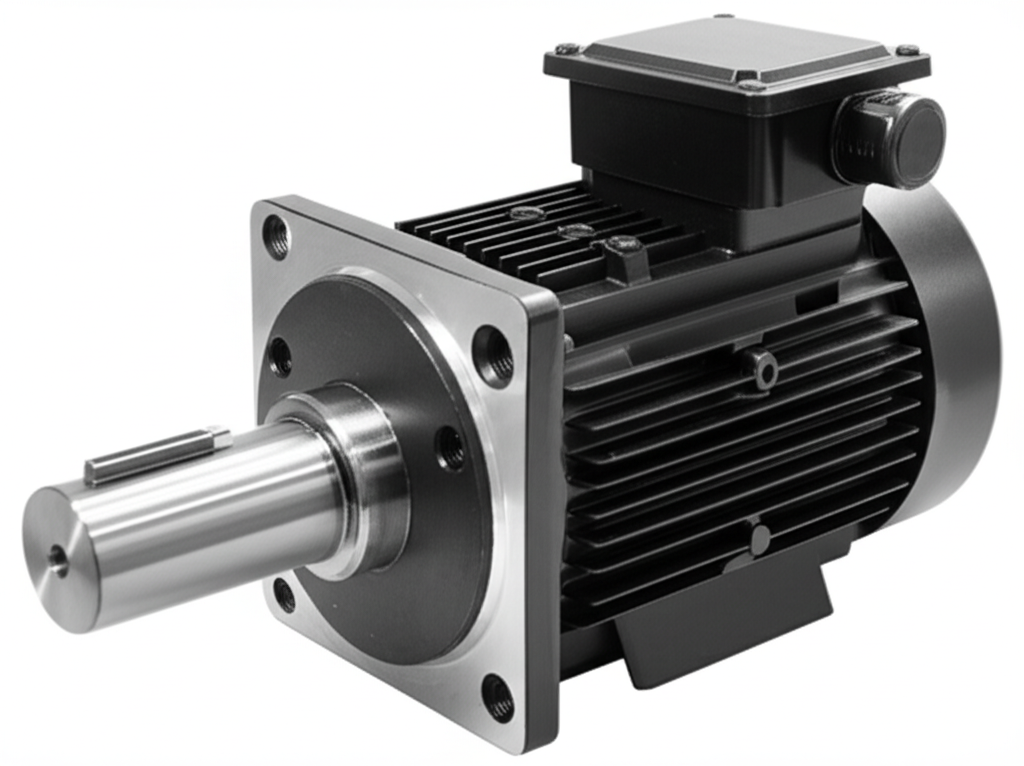
You need a motor. You can use a stepper motor, a servo motor, a DC motor, or an AC motor. A brushless motor works well too. Pick the right NEMA size to fit your frame. You also need the power screw. That can be a lead screw, a ball screw, or an acme screw. Pick the pitch and lead that match your speed and force needs.
You need a coupling. You can use a rigid coupling motor connection for zero play. You can use a flexible coupling power screw to handle misalignment. Common types are jaw, Oldham, bellows, beam, and disc. A spider coupling power screw uses a soft insert. A bellows coupling motor gives low backlash and handles some misalignment. A beam coupling lead screw gives flex with low cost. You can also use a universal joint motor to screw if you must handle big angles. You may need a rigid clamp coupling or a set screw coupling power screw. Some shafts use a keyway motor shaft lead screw. Some use a D-shaft motor lead screw. A motor shaft adapter lead screw can help when bores do not match.
You also need support. Use lead screw support bearings, a lead screw bearing block, and end supports. Use thrust bearings for axial load. Use radial bearings to hold side load. You need a motor mounting bracket lead screw and maybe a flange mount motor to screw. You need a linear guide rail and a linear slide motor connection so the load does not push the screw sideways. Grab tools too: wrench, Allen key, screwdriver, calipers, a multimeter, and safety goggles. A dab of Loctite helps.
Components and terms you will see
Here is a quick map of parts and terms that show up in a motor to lead screw coupling build:
| Term or Part | What it does |
|---|---|
| Stepper motor lead screw connection | Connects a stepper to a screw for precise steps |
| Ball screw motor mounting | Holds a ball screw to the frame and motor |
| Linear actuator DIY motor | A home-built push device with a motor and screw |
| Connecting servo motor to ball screw | Adds fast response with feedback |
| Acme screw drive motor | A robust and simple drive with higher friction |
| Coupling for motor and lead screw | Transfers torque from shaft to screw |
| Rigid coupling motor connection | Zero backlash connection for tight control |
| Flexible coupling power screw | Allows small misalignment and protects bearings |
| Universal joint motor to screw | Handles big angle misalignment when needed |
| Direct drive power screw system | Motor shaft connects to screw with no gear or belt |
| Gear reduction motor lead screw | Adds torque with a gearbox |
| Belt drive lead screw mechanism | Moves screw via a belt and pulleys |
| Flange mount motor to screw | Uses a flange to mount and align |
| Shaft coupling types for lead screw | Jaw, Oldham, bellows, beam, disc, rigid |
| Motor shaft adapter lead screw | Matches bore sizes or D-shaft to round |
| Anti-backlash nut lead screw | Reduces play and improves precision |
| Lead screw bearing block | Supports the screw ends |
| Choosing motor for linear motion | Sizing for thrust and speed |
| Calculating torque for lead screw | Turns load and friction into motor torque |
| Stepper motor driver lead screw | Powers and controls a stepper |
| Controller for motor and power screw | CNC or PLC sets speed and position |
| Precision linear motion system | Tight control with low error |
| Reducing backlash in lead screw | Methods to cut play |
| Motor alignment lead screw | Aligns shafts to prevent binding |
| Vibration reduction power screw | Tuning and mounts to cut noise |
| Lubrication for lead screw nut | Grease or oil to reduce wear |
| Mechanical coupling solutions | Picking the right coupling style |
| CNC lead screw motor connection | Common in routers and mills |
| 3D printer lead screw upgrade | Replaces rods with smoother screws |
| Robotics linear motion guide | Helps a robot move in a line |
| Industrial power screw systems | Heavy duty machines |
| Motor selection for thrust applications | Force heavy loads |
| Power screw efficiency factors | Friction, lead, nut type |
| Screw jack motorization | Turn a jack into a motorized lift |
| Lead screw pitch and motor speed | Sets linear speed per rev |
| Power transmission mechanisms | Coupling, belt, chain, gears |
| Encoder feedback lead screw motor | Adds position feedback |
| Planetary gearbox lead screw | High torque with small size |
| Worm gear lead screw drive | Good for holding load |
| Linear slide motor connection | Smooth travel on guides |
| Safety considerations power screw | Keep hands and eyes safe |
| Troubleshooting lead screw motor | Fix common faults |
| DIY CNC router lead screw | Affordable and strong |
| Motor mounting bracket lead screw | Holds the motor in place |
| Backlash compensation methods | Software and hardware fixes |
| Optimizing linear motion | Tune speed, force, and accuracy |
| High precision lead screw systems | Tight tolerances |
| Miniature linear actuators motor | Small builds |
| Lead screw material selection | Steel, stainless, or alloy |
| Motor cooling for linear systems | Heat sinks and airflow |
| Thrust bearing lead screw | Handles axial load |
| Screw shaft machining motor | End machining for bearings and couplings |
| Coupling hub types | Clamp, split, keyed, set screw |
| Motor sizing for linear force | Match torque to thrust |
| Power screw design guide | Rules of thumb and steps |
| Securing lead screw to motor | Proper tightening and Loctite |
| Lead screw end machining | Steps and flats for better grip |
| Flexible shaft coupling benefits | Protect bearings and reduce shock |
| Oldham coupling lead screw | Handles misalignment with low backlash |
| Jaw coupling motor connection | Easy install with elastomer spider |
| Spider coupling power screw | The elastomer in the jaw coupling |
| Bellows coupling motor | High precision with flex |
| Beam coupling lead screw | Single or multi-beam design |
| Rigid clamp coupling | Strong, one-piece grip |
| Set screw coupling power screw | Simple and low cost |
| Keyway motor shaft lead screw | Uses a key to stop slip |
| D-shaft motor lead screw | Flat on shaft for set screw grip |
| Motor to threaded rod connection | Basic setup for DIY builds |
| Power screw applications | Many machines and tools |
| Linear motion control | Motion planning and control loops |
| Motor current for lead screw | Driver current tuning |
| Voltage requirements motor drive | Pick power supply voltage |
| Limit switches linear actuator | Stop motion at the ends |
| Home switch lead screw system | Find zero point |
| Motor enclosure for power screw | Keeps dust out |
| Lead screw maintenance tips | Clean, lube, and check for wear |
| Selecting motor RPM for screw | Sets the top speed |
| Impact of friction lead screw | Needs more torque and makes heat |
| Lead screw wear prevention | Lube and clean often |
| Motor torque conversion to force | Torque to thrust math |
| Power screw assembly tips | Square it, tighten right, test slow |
| DIY linear stage motor | Small stage for labs |
| Power screw materials | Steel, aluminum bronze, Delrin nuts |
| Threaded shaft motor connection | Clamping onto a threaded rod |
| Linear motion system components | Motor, screw, guides, controller |
| Motor performance lead screw | Force, speed, and duty |
| Backlash nut installation | Set preload right |
| Lead screw nut types | Standard, anti-backlash, bronze, Delrin |
| Coupling installation guide | Align, slide, tighten, verify |
| Motor vibration dampening | Rubber mounts and balance |
| Shaft runout and alignment | Check with dial indicator |
| Thrust load motor lead screw | Axial load on bearings |
| Radial load motor lead screw | Side load to avoid on the screw |
| Motor mounting techniques | Rigid plates and slotted holes |
| Power screw design considerations | Load, speed, life, cost |
| Proper motor to screw linkage | The heart of the build |
| Optimizing linear speed and force | Match pitch, torque, and RPM |
How do you choose the right motor and screw
Start with the load. How much force do you need. That is thrust force. Work from the weight of the load and friction. Think about the impact of friction lead screw and the total thrust load motor lead screw will see. Then pick a lead or pitch. Lead screw pitch and motor speed control how fast the nut moves. A big lead moves faster at the same RPM. A small lead gives more force for the same torque.
Then size the motor. Motor sizing for linear force means you convert the needed thrust to torque. That is motor torque conversion to force. Add a safety factor. Consider power screw efficiency factors. A ball screw may be 90 to 95% efficient. A lead screw may be 20 to 60% efficient. Low efficiency can be good if you want self-locking. High efficiency needs less torque. Now check selecting motor RPM for screw. Make sure the motor and driver can hit that speed. Check motor current for lead screw and voltage requirements motor drive. That helps you pick a motor driver and a power supply. For tight control use encoder feedback lead screw motor with a servo or a closed loop stepper.
If you build a CNC, 3D printer, or robot you need precision. That means low backlash. A ball screw shines here. If you build a lift or a screw jack motorization you may want self-locking. An acme screw drive motor can help. For a robotics linear motion guide a miniature linear actuators motor may be the right pick.
Which coupling should you use
Couplings move torque from the motor shaft to the screw shaft. They also control backlash, alignment, and vibration. You can pick a rigid coupling motor connection if you can align the shafts very well. Rigid clamp coupling gives zero play. It also gives no mercy if you are off a bit. Bearings will complain.
Flexible coupling power screw types help. A jaw coupling motor connection with a spider coupling power screw insert is a common choice. It handles small misalignment and dampens shock. An Oldham coupling lead screw adds more misalignment capacity with low backlash. A bellows coupling motor gives high precision with some flex. A beam coupling lead screw is simple and forgiving. A disc coupling can give high torque with low backlash.
Think about shaft ends. If you have a keyway motor shaft lead screw you can use a keyed coupling hub types. If you have a D-shaft motor lead screw a set screw coupling power screw will grip the flat. You can also use a motor shaft adapter lead screw if sizes do not match. This is all part of good mechanical coupling solutions.
Quick coupling comparison
| Coupling type | Misalignment | Backlash | Notes |
|---|---|---|---|
| Rigid | Very low | Zero | Needs perfect motor alignment lead screw |
| Jaw with spider | Low | Low | Easy install and good damping |
| Oldham | Medium | Low | Great for parallel misalignment |
| Bellows | Low | Very low | High precision and cost |
| Beam | Low | Low | Simple and light |
| Disc | Low | Very low | High torque, precise |
How do you set up supports and bearings
A screw needs proper support. Use a fixed end with thrust bearings to take axial load. Use a free or supported end with a radial bearing. This can be fixed-free, fixed-supported, or fixed-fixed. Use a lead screw bearing block and a thrust bearing lead screw set. Pick bearing types that match the load. Thrust, radial, ball, roller, or linear bearings may all show up in your build.
Mount the motor on a solid motor mounting bracket lead screw. Use a flange mount motor to screw if your frame allows it. The goal is square and straight. Add a linear guide rail on both sides of the moving stage. Use a linear slide motor connection so the load rides on the guides, not the screw. That cuts radial load motor lead screw and lowers wear.
Check shaft runout and alignment. Use calipers for spacing. Use a dial indicator if you have one. The straighter you get it the happier your bearings. The quieter your system. The longer your maintenance gap.
Step-by-step: Connect the motor to the power screw
Problem: Your parts sit on the bench. You’re not sure what to do first. You fear binding and slip.
Agitate: If you rush this step you risk damage. Misalignment will wear bearings. Backlash will ruin cuts. The motor may overheat.
Solution: Follow this simple path.
1) Gather tools and parts
- Wrench, Allen key, screwdriver
- Calipers, multimeter, safety goggles
- Motor, power screw, coupling, bearing blocks, mounting bracket, limit switches linear actuator, home switch lead screw system
- Grease for lubrication for lead screw nut and Loctite for screws
2) Prep parts
- Inspect threads and bores
- Clean shafts and coupling bores
- Check lead screw end machining and screw shaft machining motor features: steps, flats, keyway
3) Mount supports
- Install the bearing blocks and end supports
- Square them to the frame
4) Mount the motor
- Bolt the motor to the motor mounting bracket lead screw
- Leave bolts a bit loose for rough alignment
5) Install the coupling
- Slide coupling hubs onto the motor shaft and the screw shaft
- Set the gap per the coupling installation guide
- Align the shafts by eye first then improve it
6) Secure the connection
- Tighten clamp or set screws in steps
- Use a key if you have a keyway
- Use Loctite on set screws if the maker says it is ok
7) Check motion by hand
- Turn the motor shaft or the screw slowly
- Feel for smoothness
- If it binds stop and realign
8) Power test at low speed
- Use the stepper motor driver lead screw or a servo driver
- Test jog speed and direction
- Set the controller for motor and power screw in your CNC or PLC
9) Add stops and home
- Set limit switches linear actuator at both ends
- Add a home switch lead screw system for repeat zero
10) Lube and protect
- Add light grease on a lead screw nut
- Use the right oil for a ball screw
- Consider a motor enclosure for power screw if dust or chips fly
How do you test and tune the system
Start slow. Run a short move at low RPM. Listen. Watch. If you see wobble you may have shaft runout and alignment issues. If you hear a click the coupling may slip. If the motor stalls your motor sizing for linear force may be off or friction is too high.
Tune the controller. Set current on the motor driver. Check motor current for lead screw. Then raise speed. Set acceleration. Check selecting motor RPM for screw so you do not hit whip on a long screw. Add encoder feedback lead screw motor if you need closed loop. That helps if the motor skips steps. Balance the load to cut motor vibration dampening needs. Use rubber mounts if needed for vibration reduction power screw.
How do you cut backlash and vibration
Backlash is play. It hurts precision. You can use an anti-backlash nut lead screw to cut it. You can preload a ball screw for near zero backlash. You can try backlash compensation methods in software too. That is part of optimizing linear motion and high precision lead screw systems.
Vibration comes from misalignment and imbalance. Check alignment. Use the right flexible shaft coupling benefits to protect bearings and cut shock. Add dampening mounts. Keep the screw straight. Keep the nut and guides aligned. A smooth system is a quiet system.
Safety and care for long life
Safety first. Wear safety goggles. Keep hands clear of pinch points. Disconnect power before you work on the system. Use proper tool usage. A wrench or an Allen key that fits helps. A stripped screw head hurts.
Care keeps your system alive. Follow lead screw maintenance tips. Clean dust. Wipe the screw. Add the right lubrication for lead screw nut. Use oil on ball screws. Use grease on acme nuts or Delrin. Watch heat. Use motor cooling for linear systems if the motor runs hot. Check bolts. Check bearings. You get long life if you do simple maintenance.
Troubleshooting common problems
- Binding or stiffness
- Misalignment is common. Loosen mounts and realign.
- Over-tightening can crush bearings. Back off and retorque.
- Insufficient lubrication causes drag. Add the right lube.
- Excessive noise
- Vibration can point to misalignment or bad coupling choice.
- Worn components need a swap. Check the nut and bearings.
- Poor motor mounting techniques can add resonance. Stiffen the bracket.
- Loss of precision
- Backlash hurts accuracy. Install an anti-backlash nut or preload a ball screw.
- Loose connections will slip. Tighten clamp and set screws.
- Stepper skip means driver current or voltage needs a tune. Check voltage requirements motor drive and motor current for lead screw.
- Overheating motor
- Excessive load raises current. Downshift the lead or add a gearbox.
- Binding raises heat. Fix alignment and lube.
- Inadequate driver current settings waste power. Tune the motor driver.
Should you upgrade parts for better results
You can upgrade to a ball screw for higher efficiency and low backlash. You can upgrade to a zero-backlash coupling. You can add a planetary gearbox lead screw for more torque. You can add an encoder for closed loop control. You can add a better controller for motor and power screw like a CNC controller or a PLC. You can add better linear guide rail to reduce side load. You can choose better power screw materials and lead screw material selection to match your environment.
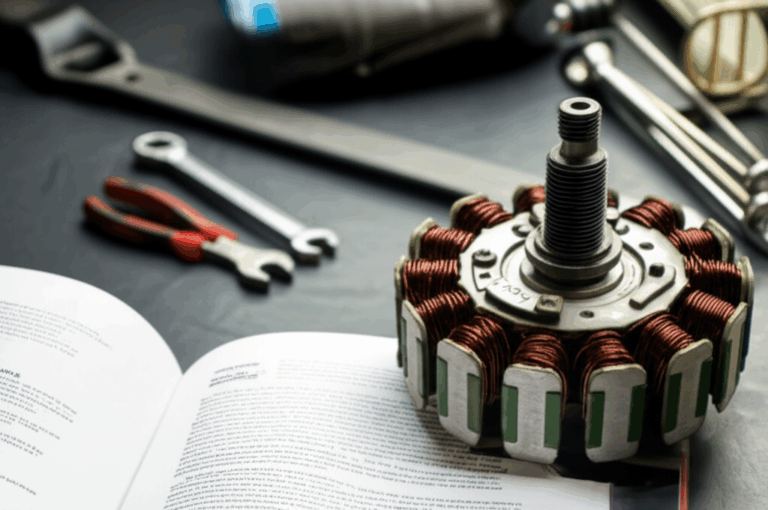
Here is one more tip. The core of the motor matters too. Quality laminations cut losses. They improve torque and efficiency. If you want stable torque and cooler runs look for high grade motor core laminations. The match between the stator core lamination and the rotor core lamination sets your base torque. Better electrical steel laminations reduce heat and noise. They help your motor performance lead screw stay strong under load.
Simple efficiency table
| Screw type | Typical efficiency | Notes |
|---|---|---|
| Ball screw | 90% to 95% | Low friction and high precision |
| Lead screw (Acme/Trapezoidal) | 20% to 60% | Higher friction and can be self-locking |
| Square thread | 35% to 70% | Strong and used in heavy loads |
FAQs
- What controller do I need
- A CNC controller or a PLC can run your motor. You set steps per mm for a stepper. You set counts per unit for a servo with an encoder.
- Can I use a belt instead of a coupling
- Yes. A belt drive lead screw mechanism can work. It can also reduce shock. It adds parts and can add backlash if not tight.
- Which lube should I use on my screw
- For lead screws use a light grease on bronze or Delrin nuts. For ball screws use oil or the maker’s grease. Follow the maker’s guide.
- How do I size my motor
- Start with load force. Convert to torque with the lead and efficiency. Add speed and a safety factor. That is calculating torque for lead screw and motor selection for thrust applications.
- Do I need limit switches
- Yes. Limit switches linear actuator stop the motion at the ends. Add a home switch lead screw system to set zero.
References
- Coupling makers: Lovejoy, R+W, and SKF
- Linear motion makers: Thomson, Hiwin, NSK, Nook Industries
- Motor makers and notes: Oriental Motor, NEMA motor standards
- Condition standards: ISO 10816 for vibration
- Engineering topics: Machine Design handbooks and general mechanical engineering guides
Summary of key points
- Match load, speed, and efficiency to pick the motor and the screw
- Align shafts well and pick the right coupling type
- Support the screw with the right thrust and radial bearings
- Lube the screw and keep it clean
- Use limit switches and a home switch for safe control
- Test slow then tune speed, acceleration, and current
- Cut backlash with anti-backlash nuts or preloaded ball screws
- Fix vibration with alignment, damping, and better mounts
- Protect your motor with quality laminations and good cooling
- Keep up with maintenance so your system stays strong and precise