How to Clean a Stator: A Comprehensive Guide for Optimal Performance
Table of contents
- Introduction: Why I Clean Stators and Why You Should Too
- What a Stator Does and How Dirt Knocks It Off Its Game
- Why Cleaning Your Stator Is Crucial for Equipment Health
- Essential Tools and Materials I Keep on Hand
- Step-by-Step: How I Clean a Stator Safely and Effectively
- Step 1: Prioritize Safety and Disconnection
- Step 2: Initial Dry Cleaning – Removing Loose Debris
- Step 3: Targeted Wet Cleaning – Oil, Grease, and Sticky Residue
- Step 4: Drying the Stator Completely
- Step 5: Post-Cleaning Inspection and Electrical Testing
- Tips That Prevent Future Stator Contamination
- When I Hand It to a Professional
- Common Questions I Hear About Stator Cleaning
- Final Thoughts and A Quick Checklist
Introduction: Why I Clean Stators and Why You Should Too
I started cleaning stators out of necessity. A motorcycle would misbehave on hot days. An alternator would drop voltage under load. A factory fan would run fine cold then trip a breaker after an hour. Each time I opened the thing up I found the same culprits. Dust baked on the windings. Oily film from a leaky seal. Carbon residue clinging to the slots. After a careful clean the equipment ran cooler and steadier. In many cases the “failure” vanished.
A stator sits at the heart of your electric motor, generator, or alternator. It carries windings that create or react to magnetic fields. When contamination coats those windings it traps heat. It can also create unintended conductive paths that invite shorts. That is why a dirty stator often leads to reduced performance, overheating, and premature failure.
In this guide I will walk you through how I clean a stator step by step. I will show you my tools, my safety routine, my dry and wet cleaning methods, and how I test my work. I will also share the habits that keep stators clean longer. You will see where DIY ends and when to call a pro. If you follow along you will avoid common mistakes and you will give your machine its best shot at a long service life.
What a Stator Does and How Dirt Knocks It Off Its Game
You can picture the stator as the stationary half of the electromagnetic dance. The rotor spins inside it. The stator’s slots hold the windings. Those windings sit on a laminated iron core that focuses magnetic flux. The lamination stack matters. It limits eddy currents and keeps losses low. In practice the quality of the stator core lamination affects how efficiently heat moves out and how strongly the magnetic field forms.
Now think about what happens when dust, oil, or carbon packs into those slots. You get a thermal blanket right where you do not want it. You also get conductive films in the worst possible places. Contaminants interfere with cooling, electrical insulation, and the magnetic circuit. I have seen a thin layer of oily dust raise operating temperatures enough to push insulation over its comfort zone. Industry rules of thumb say even a few millimeters of buildup can add 10–15°C. Each 10°C increase can cut insulation life about in half. Dirt also steals efficiency. It is not unusual to see a 2–5% uptick in energy consumption when motors run dirty. That is money and heat wasted for no good reason.
Why Cleaning Your Stator Is Crucial for Equipment Health
Here is what I have learned the hard way.
- Prevent overheating. Dust and grease act like insulation. Heat piles up in the windings and varnish cooks. Hot spots turn a minor cleanup into a major rewind.
- Restore efficiency. Clean windings shed heat better and carry current evenly. The magnetic circuit does its job with less waste.
- Extend lifespan. A clean stator resists insulation breakdown and corrosion. Bearings and other parts also live longer when the motor runs cooler.
- Avoid costly repairs. Preventative cleaning costs little compared to stator rewinds, rotor replacements, or full motor swaps. I would rather spend an hour with a brush than a week waiting on parts.
- Keep failures at bay. A surprising share of electric motor failures trace back to stator winding issues. Moisture and conductive dust make that worse. Cleanliness helps you dodge a big part of that risk.
- Common contaminants to watch for:
- Dust and dirt
- Oil and grease
- Carbon dust from brushes or the environment
- Metallic particles
- Moisture and chemical films
Essential Tools and Materials I Keep on Hand
I do not like surprises in the middle of a cleanup. Here is the kit that earns its keep on my bench.
- Safety gear
- Safety glasses or a face shield
- Chemical-resistant gloves
- Dust mask or respirator with appropriate cartridges
- Cleaning agents
- Compressed air regulated at low pressure and kept dry
- Non-conductive, residue-free electrical contact cleaner
- Electric motor safe degreaser for heavy oil and grease
- Isopropyl alcohol for final wipes and small spots
- Cleaning tools
- Soft-bristle non-metallic brushes like nylon or acid brushes
- Lint-free cloths or microfiber towels
- Shop vacuum with a brush attachment
- Cotton swabs and pipe cleaners for tight slots and corners
- Inspection and testing tools
- Bright flashlight or headlamp
- Multimeter for continuity and resistance checks
- Optional megohmmeter for insulation resistance testing where it matters
I avoid metal brushes on windings. They can nick varnish and create more trouble than they fix. I also check the labels on cleaners. I want non-conductive, fast evaporating, residue-free products designed for electrical parts.
Step-by-Step: How I Clean a Stator Safely and Effectively
Step 1: Prioritize Safety and Disconnection
I start every job with power fully isolated. I lock and tag the source when I can. I confirm zero energy with a meter. Then I wait for the machine to cool to room temperature. I set up in a well-ventilated area. I lay out pads or a clean bench mat. I snap photos during disassembly. Those photos save time on reassembly and they keep wiring errors at bay.
When the stator sits inside a motor housing I note gasket locations and shims. I mark orientation with a paint pen. If I am dealing with a unit that lives near fuel or solvents I treat vapors and ignition sources with real caution.
Step 2: Initial Dry Cleaning – Removing Loose Debris
Dry methods come first. They remove most of the junk and they do it safely.
- Vacuuming the housing and windings
- I use a soft brush tip and a light touch. I do not want to tug at wires or snag insulation.
- I let the vacuum do the work while I guide it around slots, end turns, and vents.
- Compressed air with care
- I regulate the air to a gentle level and I make sure it is dry. Moist air creates more problems.
- I hold the nozzle at a distance. I use short bursts and I blow debris out of the stator not into it.
- I never spin a bearing with air. That trick ruins bearings fast.
- Brushing stubborn dry dust
- A nylon brush loosens caked dust without scuffing varnish.
- I brush then vacuum the loosened debris. I do not want to blow it deeper inside slots.
This dry pass alone often drops a surprising amount of contamination. If the stator only carried dry dust this might be enough. Oily deposits call for the next step.
Step 3: Targeted Wet Cleaning – Oil, Grease, and Sticky Residue
I treat liquids like surgery. Targeted. Minimal. No soaking unless the part and varnish are rated for it.
- Apply the right cleaner where needed
- I start with a residue-free electrical contact cleaner. I spray only the dirty spots and I allow it to drip off to a safe catch pan.
- If I see thick oil or grease I step up to a motor safe degreaser. I follow the label to the letter. I test a small area first in case the varnish reacts.
- Agitate gently and wipe
- I use nylon brushes, cotton swabs, and pipe cleaners to get into the crevices between coils and around slot liners.
- I wipe dissolved gunk with lint-free cloths. I keep turning to a clean face so I do not smear residue back over the windings.
- Repeat if needed
- Heavy contamination sometimes takes two or three passes. I would rather repeat light applications than flood the windings.
Special cases I see often:
- Motorcycle stators bathe in oil if a seal fails. I remove the stator. I degrease the windings carefully. I always address the leak before reassembly or the mess returns fast.
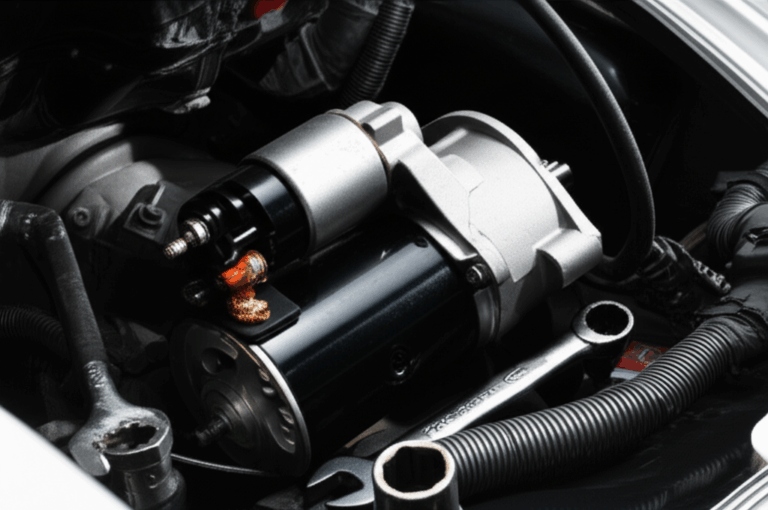
- Alternator stators collect carbon dust and road grime. Contact cleaner works well. A careful brush along with vacuuming clears the slots.
- Industrial motors in dusty plants build a mix of abrasive dust and oil mist. I take my time here. I avoid driving sludge deeper into the insulation system.
I keep solvents off rubber components unless I know the elastomer can handle it. I never scrape the varnish off windings. That varnish is there for insulation and for mechanical security.
Step 4: Drying the Stator Completely
Drying matters more than any other step. Residual moisture or solvent inside the windings can lead to instant failure when you re-energize.
- Air dry with patience
- I set the stator in a warm, dry, dust free area. I let time do its work.
- Assist with moving air not high heat
- A fan helps. A hair dryer on a cool low setting helps too. I avoid heat guns or high heat. Those can blister varnish and trap solvents inside.
- Verify zero moisture
- I look for solvent smell. I feel for cool spots that hint at evaporation. If in doubt I wait longer.
- For critical or large industrial units
- A professional bake-out under controlled temperature and ventilation does the job right. If I do not have the equipment I send it out. Better safe than sorry.
Step 5: Post-Cleaning Inspection and Electrical Testing
Clean does not mean ready. I build confidence with a bright light and a meter set.
- Visual inspection
- I look for leftover grime, discolored windings, cracked varnish, burnt spots, and any sign of chafing at slot edges or where tie cords sit.
- I check for loose lacing or wedges. I confirm that slot liners look intact.
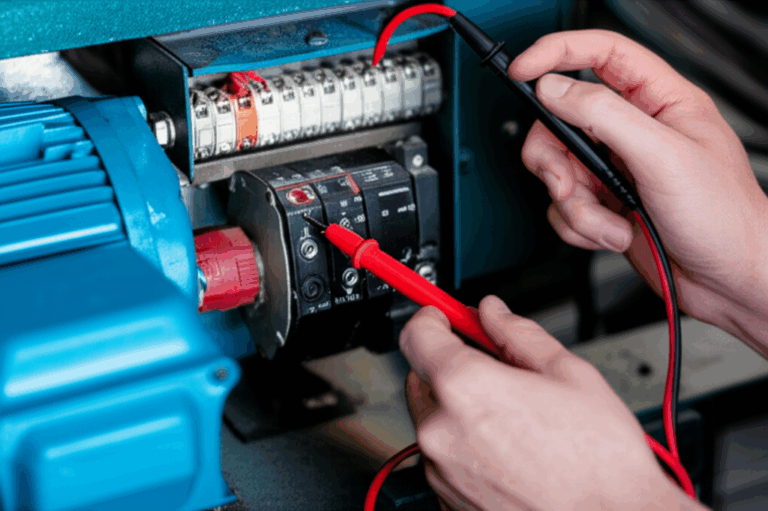
- Continuity check with a multimeter
- I verify that each winding or phase shows continuity where it should and open where it should not.
- Resistance checks
- On a three-phase stator I measure resistance phase to phase. The values should be close to each other. Exact numbers depend on the model and gauge.
- Insulation resistance test with a megohmmeter
- If the application is critical I connect a megger and test insulation to ground per the manufacturer’s rating. I follow OEM voltage recommendations. I record the reading and watch for any drop during the test interval.
If anything looks off I stop. A small defect now can become a big failure later. No rush beats replacing a motor you just cleaned.
Tips That Prevent Future Stator Contamination
I like to spend my time using machines not fixing them. These habits pay for themselves.
- Regular preventative maintenance
- I set inspection intervals based on environment and duty cycle. Light dust may call for a quick vacuum every few months. Harsh service calls for more.
- Improve filtration and ventilation
- I add or replace intake filters. I keep vents clear. I make sure fans move air like they should.
- Control the environment
- I reduce dust sources near air intakes. I shield equipment from chemical mists and moisture wherever I can.
- Proper lubrication practices
- I do not over-grease bearings. Excess grease finds its way into windings. I fix seals that weep oil.
- Consider protective coatings
- In harsh environments a re-varnish or approved protective coating on windings can help. I choose products designed for electrical insulation and I follow cure instructions.
One more note. Construction quality matters. Good lamination stacks carry flux efficiently and shed heat evenly. When I talk about cores I look at the entire system from materials to stack pressure. If you want to learn more about the parts themselves you can dive into motor core laminations and how they shape performance.
When I Hand It to a Professional
I enjoy DIY. I still draw lines.
- Visible winding damage or burnt insulation
- Deep corrosion or swollen, brittle varnish
- Insulation resistance that will not recover after thorough drying
- Persistent performance issues after a proper clean and test
- High-value or critical industrial machines where downtime costs a fortune
- Cleaning methods like CO2 blasting or controlled bake-out that require specialized equipment
A pro also helps when you need a stator reconditioned with new varnish. They can rewind coils if needed and they can test with equipment I do not keep in my garage.
If you suspect physical issues beyond surface contamination take a look at the magnetic partners too. The rotor faces the stator across a tiny air gap so defects there can throw debris or rub. If you are curious about construction details you can read about rotor core lamination and how the rotor’s stack plays with the stator’s magnetic field.
Common Questions I Hear About Stator Cleaning
I hear the same questions a lot. Here are the quick answers I share from experience.
- How often should I clean a stator?
- It depends on the environment. In clean indoor service I inspect quarterly and clean as needed. In dusty, oily, or humid areas I check more often. I let temperature trends guide me. Rising temps hint at buildup.
- Can I wash a stator with water?
- I avoid water unless the design and varnish rating say it is safe. Even then I prefer electrical solvents that evaporate cleanly. Drying after water washing takes time and usually calls for a controlled bake.
- Is compressed air enough?
- For light, dry dust it often is. I combine it with vacuuming and brushing. Oil and sticky grime need solvent.
- Will solvents damage my windings?
- The wrong solvent can. I choose electrical contact cleaners and motor safe degreasers. I test a small spot first. If the varnish softens I stop.
- What about pressure washers or steam?
- I do not use them on assembled motors. You can trap water deep in windings and you can force contaminants past insulation barriers.
- Do I need a megger every time?
- Not for every small DIY job. I do use one any time the stakes are high or the machine’s history is unknown. It is the best way to confirm insulation health after cleaning and drying.
- Can cleaning fix low output from my alternator?
- Sometimes. If contamination causes heat soak or conductive tracking you can regain output after cleaning. If diodes or regulators fail the fix will need parts not cleaning.
- What if the stator has rust on the core?
- Light surface rust on the core outside the slot can be cleaned gently. I do not sand or grind near windings. I avoid removing protective coatings on the laminations.
A Few Build Notes That Help You See the Whole Picture
A stator is more than copper and varnish. The laminated steel core forms the magnetic backbone. Those laminations are thin sheets of electrical steel stacked and bonded to reduce eddy currents. Better steel and better stacking reduce losses and heat. If you want to understand how material choices shape performance you can skim an overview of electrical steel laminations. It is not required for cleaning. It does help you appreciate why clean, cool cores matter.
The stator does not work alone either. It sits with its partner rotor inside a controlled air gap. Dirt that sheds from upstream filters or that oil pump leak does not respect boundaries. Clean the surroundings when you clean the stator. You will keep the gap clean and the field strong.
A Real-World Walkthrough: Three Situations I See Often
Stories stick. These three stick with me.
- The dusty shop fan
- A plant fan motor ran hot and tripped on overload by lunchtime. The windings wore a furry coat of dust about 3 mm thick. I vacuumed, brushed, and blew the slots clear. I measured temperature again and saw a drop that matched the kind of improvement industry guidelines predict. The overload stopped tripping. We added a filter sock on the intake and set a monthly vacuum routine.
- The oily motorcycle stator
- The bike charged fine at idle then faded at speed. The stator lived inside a cover with a leaking crank seal. The windings looked like they had been dipped in molasses with carbon grit mixed in. I pulled the stator, degreased it with electrical safe cleaner, and dried it for a full day with a fan. I replaced the seal and checked insulation resistance. The bike’s charging system woke right up.
- The alternator with carbon dust
- A car alternator showed low voltage under load. The stator slots held black carbon dust from brush wear. I disassembled the unit, used contact cleaner and a nylon brush to clear the dust, and checked the rectifier and regulator. After reassembly the voltage held steady. The fix cost pennies not a replacement alternator.
These jobs look simple. They rely on patience and on careful drying. Rushing the dry step invites a comeback.
Detailed Testing Notes You Can Use
Testing saves guesswork. Here is my routine in a little more detail.
- Continuity and open circuit checks
- I confirm each coil or phase makes an electrical loop. If a winding reads open I stop. Cleaning does not fix a broken wire.
- Winding resistance
- I expect close matching resistance between stator phases. A large mismatch hints at partial shorts or connection issues.
- Ground insulation
- With a megohmmeter I test insulation to the core or frame. I follow OEM test voltage guidance. I take notes for trend tracking over time. A healthy reading that climbs over the first minute suggests drying completes the job. A sagging reading hints at trouble still inside.
When in doubt I compare to manufacturer specs. If I cannot find those I compare to an identical healthy unit.
Cleaning Methods I Avoid and Why
I have tried things that did not pan out. You can skip the mistakes.
- Wire wheels and metal brushes
- They cut varnish and they shed metal. Both are bad near windings.
- High-pressure air or steam
- These drive contamination into places you cannot reach. They can also damage slot liners and wedges.
- Household degreasers not rated for electrical service
- Many leave conductive residue or attack varnish. I keep them away from windings.
- Heat guns for drying
- High heat blisters varnish and bakes contaminants into pores. It can also lock solvents inside.
Parts Around the Stator Worth a Quick Look
Every time I clean a stator I check nearby parts so I do not miss the root cause of contamination.
- Bearings and seals
- I inspect for play, noise, or oil leakage. A failed seal can undo your cleaning fast.
- Vents, fans, and shrouds
- I clean them and confirm airflow. If air cannot get in and out the stator will run hot no matter how clean it is.
- Electrical connections
- I check for loose lugs and burnt connectors. Heat here can migrate into the windings.
- Core and laminations
- I scan for rust at mounting points and for any delamination signs. The core needs to stay tight and clean to shed heat well.
For readers who like to understand the building blocks I will leave one more reference about how engineers stack and punch the core for different motors. You can peek at the variety under core lamination stacks to see how design choices evolve for torque, speed, and efficiency.
A Simple Preventative Maintenance Plan You Can Steal
I like plans that fit on a sticky note.
- Monthly
- Quick external vacuum around vents and shrouds
- Check for unusual noise, vibration, or heat
- Quarterly
- Open the covers where practical. Vacuum and brush dry dust. Inspect seals and gaskets.
- Log temperatures under normal load for trend tracking
- Semiannual
- Full dry clean and targeted wet clean if needed
- Inspect wiring, lacing, wedges, slot liners
- Resistance and continuity check
- Annual
- Insulation resistance test on critical units
- Review and refresh protective coatings if the environment is harsh
Adjust the cadence based on how dirty your environment is and how critical the equipment is.
Final Thoughts and A Quick Checklist
Cleaning a stator does not require magic. It takes respect for electricity, patient drying, and the right tools. Dirt insulates heat and invites failure. A clean stator runs cooler and lasts longer. I have seen maintenance programs cut unplanned motor downtime dramatically just by sticking to simple cleaning and inspection habits. That is the kind of win I like.
Here is the quick checklist I keep nearby:
- Kill and lock out power. Confirm zero energy.
- Let it cool. Set up a clean ventilated workspace. Take photos.
- Vacuum gently. Brush and blow out dry debris with low-pressure dry air.
- Use contact cleaner and motor safe degreaser only where needed. Agitate with soft brushes.
- Wipe with lint-free cloths. Repeat lightly if needed. Avoid soaking.
- Dry completely with time and moving air. Skip high heat.
- Inspect visually. Check continuity, resistance balance, and insulation resistance if required.
- Fix root causes like leaks and poor filtration. Reassemble and test under load.
With practice you will move through those steps quickly and with confidence. Your motors, alternators, and generators will pay you back with smooth performance and a longer service life.
Internal links used in this article:
- stator core lamination: https://sinolami.com/stator-laminations/
- motor core laminations: https://sinolami.com/motor-core-laminations/
- rotor core lamination: https://sinolami.com/rotor-laminations/
- electrical steel laminations: https://sinolami.com/electrical-steel-laminations/