How to Check Motor Mounts: Your Guide to Diagnosing Engine Mount Issues
Table of contents
- Why I Care About Motor Mounts (and Why You Should Too)
- Understanding Motor Mounts: Function and Types
- What motor and transmission mounts actually do
- Why they matter for vibration and engine stability
- Common types: rubber, hydraulic, vacuum-controlled, electronic, polyurethane, solid
- Red Flags: Common Symptoms of Bad Motor Mounts
- Step-by-Step Visual Inspection
- Safety first
- How to locate each mount (FWD, RWD, AWD)
- What to look for: cracks, leaks, sagging, separation, rust, bolts
- Advanced Testing Methods
- Rocking test (engine off)
- Pry bar test (engine off)
- In-gear test (engine on, extreme caution)
- Acceleration, braking, and turning tests
- Road test notes
- Ruling Out Lookalikes: When It’s Not the Mounts
- Next Steps After You Find a Bad Mount
- Professional diagnosis
- Replacement options: OEM vs aftermarket vs performance
- Costs and timing
- Risks of driving with failed mounts
- Preventative Maintenance That Extends Mount Life
- Special Cases and Real-World Examples
- FAQs: Quick Answers
- Quick DIY Checklist: Motor Mount Inspection
- A Note for EV Curious Readers
Why I care about motor mounts (and why you should too)
I still remember a Honda Civic that came into my driveway with a steering wheel that buzzed at idle and a loud thud every time the owner shifted from Reverse to Drive. He swore it was the transmission. I watched the engine as a helper feathered the throttle in gear with the brake held. The engine jumped an inch and a half. The front hydraulic engine mount had leaked out its fluid and collapsed. We changed that mount and the torque strut (the dog bone). The vibration went away and the clunk vanished. That job taught me a simple lesson. When you diagnose engine vibration or clunking, check the motor mounts first.
You might be here because your vehicle shakes when stopping or you feel a clunk when shifting. Maybe you hear a banging over bumps. Or you just want to learn how to check motor mounts before you buy a used car. I’ll walk you through the exact steps I use. I’ll share what the symptoms mean, what to look for, and how to test safely. I’ll also show you when to call a pro and how to avoid common pitfalls like over-torqued motor mounts or misdiagnosing a misfire as a bad mount.
Understanding motor mounts: function and types
What motor and transmission mounts actually do
Motor mounts and the transmission mount secure the engine and transmission to the chassis or subframe. They do two big jobs.
- They hold the engine and transmission in alignment so the drivetrain runs true.
- They isolate vibration so your hands, feet, and cabin don’t feel every combustion event.
In most vehicles you’ll see three to four mounts:
- A front motor mount or a torque strut mount (often called a dog bone mount or engine roll restrictor).
- A rear motor mount that controls fore/aft movement.
- A side motor mount (left or right) that supports weight.
- A transmission mount that supports the transmission and controls roll.
Why they matter for vibration and engine stability
Good mounts reduce vibration at idle and during acceleration. They keep the engine from rocking excessively under torque so you don’t get a clunking noise during shifting or harsh driveline lash. They protect the exhaust system flex pipe, the cooling system hoses, the belts, and even the power steering pump and AC compressor brackets from stress. When mounts fail you feel it. Vibration, noise, shaking, and thumps make the vehicle feel tired and rough. Worse, excessive engine movement can pull on wiring and hoses which leads to leaks and failures you didn’t ask for.
Common types: rubber, hydraulic, vacuum-controlled, electronic, polyurethane, solid
Not all motor mounts are created equal. Here is what I’ve seen across cars, trucks, and SUVs.
- Rubber or passive mounts: Simple rubber bushings bonded to metal. Cheap and reliable but they wear, crack, and dry rot over time.
- Fluid-filled hydraulic mounts: These have fluid chambers to improve damping at idle. When they leak dark oily fluid you’ve found your smoking gun. Many Honda Civic and older GM models use these.
- Vacuum-controlled mounts: Some mounts change stiffness with engine vacuum to control vibration at certain RPM. When vacuum lines crack or valves fail you get odd vibration at specific speeds.
- Electronically controlled or adaptive mounts: Used on some modern vehicles. They can change stiffness using internal valves or electronic control. If the connector breaks or the system fails you may get an “active motor mount” code and a rough idle.
- Polyurethane performance mounts: Stiffer and more durable. They reduce engine movement which helps throttle response yet they transmit more vibration into the cabin. Great for track or high torque builds but not for comfort.
- Solid mounts: No give. They fix movement and introduce lots of NVH. I only recommend them for race cars where comfort doesn’t matter.
Red flags: common symptoms of bad motor mounts
Here are the symptoms that make me check mounts right away.
- Excessive engine vibration at idle or at a specific RPM. The steering wheel or accelerator pedal vibrates more than usual. The cabin hums.
- Clunking or banging noises during acceleration, braking, or shifting. A thud when you start the engine also counts.
- Visible engine movement when you rev in Park or shift from Reverse to Drive. The engine sways or jerks in the engine bay.
- Rough shifting or a clunky transmission feel. Especially in vehicles with a worn transmission mount.
- Vehicle shakes when stopping. You feel it through the brake pedal or the seat.
- Loud thud when starting the engine or shutting it off.
- Engine rattles after shutdown on some cars with weak mounts. The residual movement can knock parts.
- Engine noise over bumps or a knock that changes with load. Think subframe mount play or an exhaust pipe contacting the crossmember due to excessive engine roll.
- Visible damage to the mounts. Cracked rubber, torn bushings, separation of rubber from the metal bracket, or a hydraulic mount leak.
- Engine sitting lower on one side. A collapsed or sagging mount can make the engine look crooked.
- Jerking during acceleration and fore/aft lurches on throttle tip-in. That’s a classic torque control issue.
Step-by-step visual inspection
Safety first
I never start a motor mount check without a few basics.
- Park on level ground. Set the parking brake.
- Use wheel chocks on the rear wheels if you’re working at the front, and vice versa.
- If you need to raise the car use a proper jack and always support the vehicle with jack stands at the correct lift points. Never get under a vehicle supported only by a jack.
- Wear eye protection and gloves.
- Keep loose clothing away from belts and fans.
- Let the engine cool if you need to reach around the exhaust manifold or the radiator hoses.
Tools I use most often
- Bright flashlight or headlamp
- Pry bar
- Floor jack and jack stands
- Wrenches, sockets, ratchet
- Torque wrench for reassembly checks
- Mirror on a stick
- Paint marker or chalk to mark reference points
How to locate each mount (FWD, RWD, AWD)
- Front wheel drive motor mount check: Most FWD cars have a right side mount that supports weight, a rear mount under the engine or on the subframe, a front torque strut that limits roll, and a transmission mount on the left. Look near the radiator support and the firewall side of the subframe.
- Rear wheel drive motor mount check: You’ll usually find two engine mounts on the left and right sides of the block attached to the frame or crossmember, plus a transmission mount at the rear supporting the tailshaft and crossmember.
- All wheel drive motor mount inspection: Similar to the above yet AWD packaging can be tighter. Expect shields and more brackets. The transmission mount may be harder to see.
- Torque strut mount inspection (dog bone mount check): These often run from the engine to a bracket on the radiator support or subframe to control fore/aft roll. They fail often because they handle torque reactions.
What to look for: visual cues that matter
- Cracks, tears, or dry rot in rubber. Check both sides of every bushing. Use the mirror if you can’t see up top.
- Separation of rubber from metal brackets. If you can slide a thin pick between the rubber and the shell the bond may be broken.
- Hydraulic motor mount leak. Look for dark oily stains on the mount, subframe, or splash shield below. Fluid-filled motor mount failure is common on many sedans.
- Collapsed or sagging mounts. Compare the gap between the mount halves. A sagging mount may let the engine sit noticeably lower on one side.
- Excessive rust or corrosion on metal components. Pay attention to the crossmember and subframe where the mounts bolt in. Rust can let bolts loosen or holes elongate.
- Snapped motor mount bolt or loose hardware. A sheared bolt can cause a scary clunk.
- Engine support bracket check. Inspect the brackets on the engine block and transmission case for cracks or stress marks.
- Stress cracks and heat damage. Heat bakes rubber, especially near the exhaust. Dry, shiny rubber with surface cracking is a red flag.
- Oil contamination motor mount. Oil or power steering fluid swells and softens rubber which accelerates failure. If you see wet mounts fix the leak first.
- Alignment issues motor mounts. If the engine looks shifted in the bay or the axles look off center you may have a broken or misinstalled mount.
- Vacuum motor mount problems. If your mount ties into a vacuum line check the hose for cracks and the valve for leaks.
- Active or electronic motor mount function. Check for broken connectors or damaged wiring where equipped.
Advanced testing methods
The rocking test (engine off)
- With the engine off open the hood.
- Grab a safe part of the engine or the intake manifold. Rock the engine forward and backward. Do not yank. You’re feeling for excessive play, knocking, or a clunk.
- A little movement is normal because rubber flexes. A sharp clunk or visible gap means trouble.
The pry bar test (engine off, with caution)
- Slide a pry bar between the engine bracket and the subframe or between the mount halves where appropriate. Do not pry on soft aluminum or thin castings.
- Apply gentle pressure and watch the rubber. You’re looking for separated layers, large gaps, or rubber tearing where it bonds to metal.
- If the mount lifts away from its bracket or you see daylight where there shouldn’t be any it’s worn.
The in-gear test (engine on, extreme caution)
This one is a two-person job for safety. I never do it alone.
- Park on level ground. Engage the parking brake. Chock the wheels front and rear.
- Open the hood and stand to the side of the engine bay, not in front of the vehicle.
- Have a helper sit in the driver’s seat with the brake pedal pressed firmly.
- With the engine idling put the transmission in Drive and apply light throttle for a second then let off. Watch the engine movement. Repeat in Reverse.
- What to look for: excessive engine movement while in gear. A front mount that lets the engine lift dramatically in Drive usually points to a failed rear or torque strut mount. Big lift in Reverse points to the opposite mount.
- Listen for clunks or bangs as load shifts. That is the sound of a mount bottoming or hardware shifting.
- Keep the throttle light. You do not need much to see mount movement.
Acceleration, braking, and turning tests
I like to feel how the vehicle reacts to common load changes.
- Acceleration motor mount test: From a stop accelerate smoothly then lift off. A lurch or thud on tip-in or tip-out points to worn mounts.
- Braking motor mount test: Gently brake to a stop from 20 mph. If the vehicle shakes when stopping or you feel a knock right at the end you may have a loose mount or a transmission mount issue.
- Turning motor mount test: Make a low speed turn into a driveway with mild throttle. If you hear a clunk as the engine rolls you may have a failed side mount or torque strut.
The road test: what I pay attention to
- Engine vibration at idle. Watch the steering wheel and mirrors. If the shifter buzzes in Drive but calms in Neutral that can be a mount or an idle issue. Compare.
- Engine clunk when shifting between Drive and Reverse. That lash can be a mount or a driveline joint.
- Engine noise over bumps. If the exhaust hits the crossmember because the engine sits too low you’ll hear a metallic tap.
- Chassis vibration diagnosis. If you feel a steady vibration that follows engine RPM more than vehicle speed it often ties to mounts or engine balance. If it follows road speed look at tires or axles.
Ruling out lookalikes: when it’s not the mounts
I’ve chased vibrations that turned out to be anything but mounts. Here’s how I avoid false calls.
- Misfire vs mounts. A misfiring engine shakes at idle and smooths out at speed. Check for codes and listen to the exhaust note. If it stumbles you likely have ignition or fuel issues.
- Exhaust system contact. A broken hanger can let the exhaust contact the subframe or heat shield under load. Grab the exhaust when it’s cool and shake it. Look for shiny rub spots.
- Accessory noise. A failing alternator bearing or AC compressor clutch can buzz. Use a mechanic’s stethoscope or a long screwdriver to listen carefully. Watch the belts.
- Drivetrain vibration diagnosis. A bad CV joint or driveshaft causes vibration with speed and under load. If it vibrates in Neutral while coasting it’s probably not the engine mounts.
- Suspension knocks. Bad sway bar links or control arm bushings knock over bumps. Mount noise usually shows up with engine load changes not just bumps.
- Subframe bolts loose. Loose subframe hardware can mimic a failed mount. Torque checks matter.
Next steps after you find a bad mount
Professional diagnosis
You can catch obvious failures with a flashlight and a few simple tests. In my experience DIYers nail the diagnosis when the symptoms are clear about six or seven times out of ten. Pros with a lift, mirrors everywhere, and NVH analyzers get it right far more often. If your symptoms are subtle or you have active/vacuum-controlled mounts I recommend a mechanic confirm the issue before you spend money on parts.
Replacement options: OEM vs aftermarket vs performance
- OEM motor mounts comparison. Original mounts match the vehicle’s NVH tuning. They’re my default on daily drivers.
- Aftermarket motor mounts quality varies a lot. I’ve installed great ones and I’ve seen cheap ones fail fast. Check reviews and avoid no-name rubber that smells like solvent and feels too soft.
- Heavy duty motor mounts benefits. They handle torque better and last longer yet they may add vibration.
- Polyurethane motor mount pros and cons. Pro: sharper throttle response and less engine movement. Con: more vibration through the chassis and cabin.
- Solid motor mount effects. They eliminate engine movement and they transmit maximum NVH. Track use only.
Costs and timing
Most vehicles fall in the range of $200 to $600 per mount for parts and labor. Some mounts are buried under brackets which raises labor. Some require lowering the subframe or supporting the engine from above with a support bar. If someone quotes you far more they may be right for your make and model so ask for a breakdown.
Risks of driving with failed mounts
You can limp a short distance with a tired mount if you drive gently. I don’t recommend doing that for long. Here is what I’ve seen when people keep driving.
- Accelerated wear on CV joints, exhaust flex pipes, and shifter cables due to excessive engine movement.
- Strain on the cooling system hoses and power steering hoses which can cause leaks.
- Stress cracks on brackets and even the radiator fan contacting parts when the engine droops.
- Increased risk of engine or transmission damage during a panic stop or hard acceleration.
- Reduced vehicle control because the drivetrain can lurch on and off throttle.
Motor mount replacement guide: common pitfalls to avoid
I’ll keep this high level because exact steps vary by vehicle.
- Support the engine before you unbolt a mount. Use a jack with a wood block under the oil pan lip or use an engine support bar across the strut towers. Don’t crush the oil pan.
- Loosen the mount-to-bracket bolts and the bracket-to-engine bolts as needed to relieve bind. Do not pry hard on cast aluminum ears.
- Align the new mount before final torque. Some mounts have alignment dowels or slotted holes. A misaligned mount can cause vibration even if it’s new.
- Torque to spec with a torque wrench. Over-torqued motor mounts can crush the rubber and under-torqued motor mounts can work loose and clunk. Both shorten lifespan.
- Recheck torque after a few heat cycles if the service manual calls for it.
Preventative maintenance that extends mount life
- Regular visual checks. I peek at mounts during every oil change. It takes two minutes.
- Address fluid leaks promptly. Oil and power steering fluid chew through rubber. Stop the leak and you save the mounts.
- Avoid aggressive launches and harsh shifting. Hard driving loads mounts heavily. Fun once in a while is fine just don’t do drag starts every commute.
- Watch heat shields. Keep heat off the mounts where possible. Missing shields cook rubber.
- Inspect after accidents or curb strikes. A sudden impact can crack a mount or the engine support bracket.
- Keep hardware torqued. If you’ve had subframe work or a clutch job ask the shop to verify mount and crossmember bolt torque.
Special cases and real-world examples
- Honda Civic motor mount issues. I see fluid-filled upper mounts leak and collapse around the 80,000 to 120,000 mile mark. Idle vibration and a thunk on shifts are common.
- Ford Focus motor mount common problems. Focus and Fiesta models with firm transmission behavior can stress mounts. Watch the passenger side mount and the transmission mount for bushing wear.
- Older GM vehicles. Many use softer rubber mounts that degrade and separate with age.
- Diesel motor mount symptoms vs gasoline motor mount symptoms. Diesels make more low RPM torque and can expose weak mounts with a heavy shake at idle and a pronounced lurch on throttle tip-in. Gas engines often show more vibration at specific RPMs.
- Front motor mount check vs rear motor mount inspection. A heavy clunk under braking often points at the rear mount in FWD cars while a clunk on acceleration points toward the front torque strut.
- All wheel drive motor mount inspection. AWD packaging makes access tight. I use mirrors and take my time because small cracks hide behind brackets.
FAQs: quick answers
How long do motor mounts typically last?
In my experience they last about 5 to 7 years or 50,000 to 100,000 miles depending on heat, driving style, and fluid leaks. I’ve seen mounts fail sooner on performance cars and last longer on gentle highway commuters.
Can I replace motor mounts myself?
Yes if you have tools, patience, and a safe way to support the engine. Some mounts are straightforward. Others require lowering the subframe or removing brackets. If you’re unsure use a professional motor mount diagnosis before you dive in.
What’s the difference between engine and transmission mounts?
Engine mounts support the engine and manage torque reactions. The transmission mount supports the transmission and stabilizes the tail end of the drivetrain. Transmission mount symptoms often show up as harsh or clunky shifting and a thud when you go from Reverse to Drive.
Is it expensive to replace motor mounts?
It varies. Expect $200 to $600 per mount for parts and labor on most cars. Some vehicles cost more if access is tight or if you replace multiple mounts at once which I often do on high mileage cars to restore balance.
Is it safe to drive with bad motor mounts?
Short trips at low load might be okay yet I don’t recommend it. Failed mounts can damage the exhaust system, cooling system hoses, and other parts which turns a small bill into a big one.
What do motor mounts do?
They secure the engine and transmission to the chassis, limit excessive engine movement, and isolate vibration so your cabin stays quiet and smooth.
What causes motor mounts to fail?
Age and mileage, aggressive driving, oil or coolant contamination, heat damage, and accidents. Vacuum or electronic control issues can also make mounts act wrong even if the rubber looks okay.
How often do motor mounts go bad?
I see mount issues on about one in ten vibration complaints. They’re common enough that I check them early in any NVH diagnosis.
Quick DIY checklist: motor mount inspection
Use this motor mount inspection checklist to stay organized.
- Look for cracked motor mount rubber, torn bushings, or dry rot.
- Check for separated motor mount signs where rubber has pulled from metal.
- Inspect for hydraulic motor mount leak or any dark fluid near the mount.
- Compare engine height side to side. Watch for engine dropping symptoms or sagging.
- Check torque strut mount and dog bone bushings for play.
- Verify the transmission mount condition if shifts feel harsh or clunky.
- Inspect crossmember and subframe for rust, damage, or loose bolts.
- Look for oil contamination on the mounts. Fix leaks first.
- Perform rocking engine by hand and prying motor mount tests with care.
- Do a controlled in-gear test with a helper and full safety precautions.
- Road test. Note vibration at idle, clunks during acceleration or braking, and engine noise over bumps.
- If unsure get a professional motor mount diagnosis before buying parts.
A note for EV curious readers
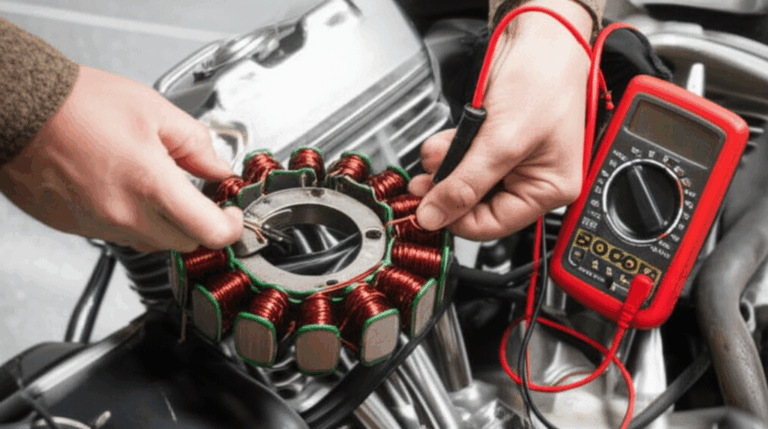
If you work around hybrids or EVs the driveline mounts still matter because electric motors make instant torque which can stress mounts. The electric motor itself uses stators and rotors built from thin electrical steel laminations which is a different topic than mounts. If you want a quick primer these resources are helpful:
- How a stator core lamination supports electric motor performance
- What a rotor core lamination does in a motor
- The role of electrical steel laminations in controlling losses and heat
Engine noise explanation: connecting symptoms to causes
I often translate the sounds and shakes into likely culprits.
- Loud thud when starting engine or when shifting: Think separation in a front or rear mount or a loose transmission mount.
- Constant vibration at idle that gets better at 1,200 RPM: Collapsed hydraulic mount or vacuum-controlled mount stuck in the wrong mode.
- Engine sways in the engine bay when revved in Park: Worn torque strut or dog bone bushing.
- Pedal vibration source and steering wheel vibration causes: Failed isolators feed vibration into the chassis which shows up most in the steering wheel and accelerator pedal on FWD cars.
- Chassis vibration diagnosis at highway speed with no change in Neutral: Likely wheel or axle related not mounts.
- Engine clunk when shifting and a knock when lifting off throttle: Excessive engine movement that loads and unloads the drivetrain.
Common motor mount failures and materials
I see a few failure modes again and again.
- Rubber motor mount degradation from age and heat. The rubber hardens, cracks, then splits.
- Fluid-filled mount failure from internal bladder leaks. The mount looks wet and the idle feels rough.
- Vacuum-controlled motor mount issues from cracked hoses which change stiffness at the wrong time.
- Electronic motor mount function faults from broken connectors or internal valve failures.
- Motor mount bushing wear in torque struts and dog bones. These bushings tear under repeated torque reversals.
- Under-torqued or over-torqued bolts that let mounts shift or crush the rubber.
- Alignment issues that preload a new mount which shortens its life.
What I look for in mounts when replacing
- Correct design for engine and transmission weight and layout.
- Quality rubber or polyurethane that doesn’t feel gummy or too shiny.
- Proper bracket geometry and hardware grade.
- Brand reputation and warranty support.
- Fitment notes for model years because small changes matter.
Mechanic tips for tricky diagnoses
- Use paint marks on the mount and bracket. After a road test a slipped mark shows movement.
- Photograph each mount before and after. Your eyes miss small changes. Photos don’t.
- Compare cold vs hot behavior. Some mounts get softer with heat which makes hot idle vibration worse.
- Check the subframe alignment pins after any major front end work. A shifted subframe can fake mount symptoms.
- If your vehicle uses an engine roll restrictor inspect the bushings with a pry bar while someone rocks the engine. Tiny tears can hide under load.
Case study: a rough Focus that only shook at stoplights
A Ford Focus showed up with a rock steady idle in Neutral and a big shake in Drive at stoplights. No codes. No misfire. The steering wheel buzzed and the shifter chattered. The right side engine mount looked clean yet the top had dropped about a quarter inch compared to factory photos. The rear mount bushing had a hairline tear. We replaced the right side hydraulic mount and the rear mount. The shake disappeared. The transmission shifted smoother because the powertrain stayed in alignment.
Another case: a truck with a brake knock
A half-ton truck clunked only at the last five feet of a stop. That felt like a rear engine mount or transmission mount loading up. On the lift we found the transmission mount bushing had separated from its shell. The driveshaft lash showed up as a knock at the very end of braking. New mount and proper torque cured it.
Final thoughts
If your engine vibrates at idle or you hear a clunk when shifting do not jump straight to a transmission rebuild. Check the motor mounts. A careful visual inspection with a flashlight finds most failures. A controlled in-gear test reveals the rest. When in doubt get a professional diagnosis. Replace mounts in pairs when practical. Fix leaks that attack rubber. Then enjoy a quieter cabin, a smoother shifter, and a powertrain that feels planted again.
Before you wrench on anything remember this. Safety first. Jack stands, wheel chocks, and a helper when you need one. Your hands and your car will thank you.