How to Change Motor Mounts: Your Step-by-Step DIY Guide
Table of contents
- What motor mounts do and why they matter
- Signs your motor mounts need replacing
- Common symptoms of bad motor mounts
- How to visually inspect your motor mounts
- Is changing motor mounts a DIY job
- Tools and materials you’ll need
- Essential tools
- Replacement parts
- Step-by-step: how to replace your motor mounts
- Step 1: Safety first and prep
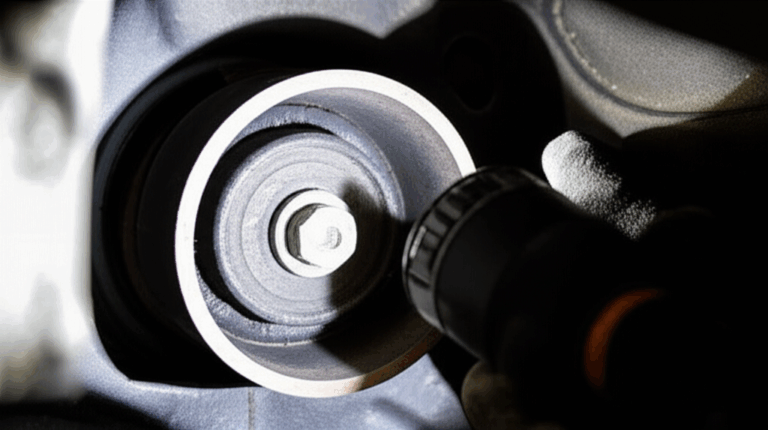
- Step 2: Identify and access the worn mount
- Step 3: Support the engine or transmission
- Step 4: Remove the old motor mount
- Step 5: Install the new motor mount
- Step 6: Torque bolts and reassemble
- Step 7: Post-installation checks and test drive
- Common mistakes to avoid
- Motor mount replacement cost: DIY vs professional
- DIY costs
- Professional costs
- When to call a professional mechanic
- FAQs about motor mounts
- Conclusion: enjoy a smoother ride
What Are Motor Mounts and Why Are They Important?
When I explain motor mounts to friends, I grab a rubber bushing from my toolbox and shake it. That little chunk of rubber tells most of the story. Motor mounts sit between your engine and your chassis. They support the engine and transmission. They isolate vibration. They keep the drivetrain aligned under load. They also absorb the twisting force that happens when you hit the gas.
Good mounts keep vibrations out of the cabin. They protect the exhaust system and the crossmember. They reduce stress on the subframe and drivetrain. Worn mounts do the opposite. You’ll feel rough idling and engine vibration at idle. You might hear clunking noise when shifting or when you accelerate. The engine can rock back and forth which stresses the transmission and the chassis. Ignore bad mounts and you risk secondary damage to wiring, hoses, CV axles, and even the exhaust.
I’ve replaced rubber mounts, hydraulic motor mounts, and polyurethane motor mounts. Each type has trade-offs. Rubber mounts are standard and comfortable. Fluid-filled mounts feel smooth but they can leak. Poly mounts resist movement and last longer under hard use but they transfer more vibration into the cabin.
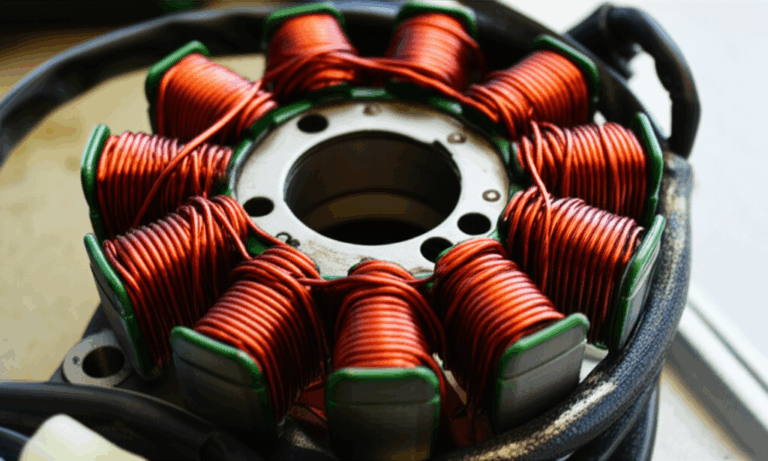
Quick note on terminology so you don’t chase the wrong rabbit. Motor mounts are not the same as electric motor internals. If you were searching for electric motor parts like stators and rotors you’ll want resources on motor cores. For that topic, these guides help:
- Learn how a stator core lamination affects motor efficiency.
- See how a rotor core lamination is built for torque.
- Dive into the role of motor core laminations in reducing losses.
Back to mounts. Your goal here is simple. Support the engine safely. Swap the worn mount. Torque everything to spec. Confirm the fix with a test drive.
Signs Your Motor Mounts Need Replacing
Over the years I’ve seen the same symptoms across brands like Honda, Toyota, Ford, and GM. The pattern rarely lies.
Common Symptoms of Bad Motor Mounts
- Excessive engine vibration. You feel it at idle through the steering wheel and the dashboard. It can show up as a rough idle or a buzz in the seat.
- Clunking or banging noises. You hear a thud during shifting. You might hear a knock on acceleration or when you go over bumps.
- Engine movement or rocking. Open the hood. Have someone shift between Park and Drive with the brake on. Watch for the engine to leap or rock back and forth.
- Jerking during acceleration or braking. The drivetrain loads and unloads which causes a jerk.
- Abnormal engine noise. A grinding noise or squeaking can show up when the rubber deteriorates and metal touches metal.
- Visible cracks. Look at the rubber. Cracks, torn rubber, collapsed mounts, or fluid leaking from a hydraulic mount point to failure.
- Excessive engine movement that hits the firewall or crossmember under load. You might see witness marks where components made contact.
You can also see drivetrain vibrations on the road. Acceleration shudder. Vibration when you shift. The whole car can shake when accelerating if a mount has broken.
How to Visually Inspect Your Motor Mounts
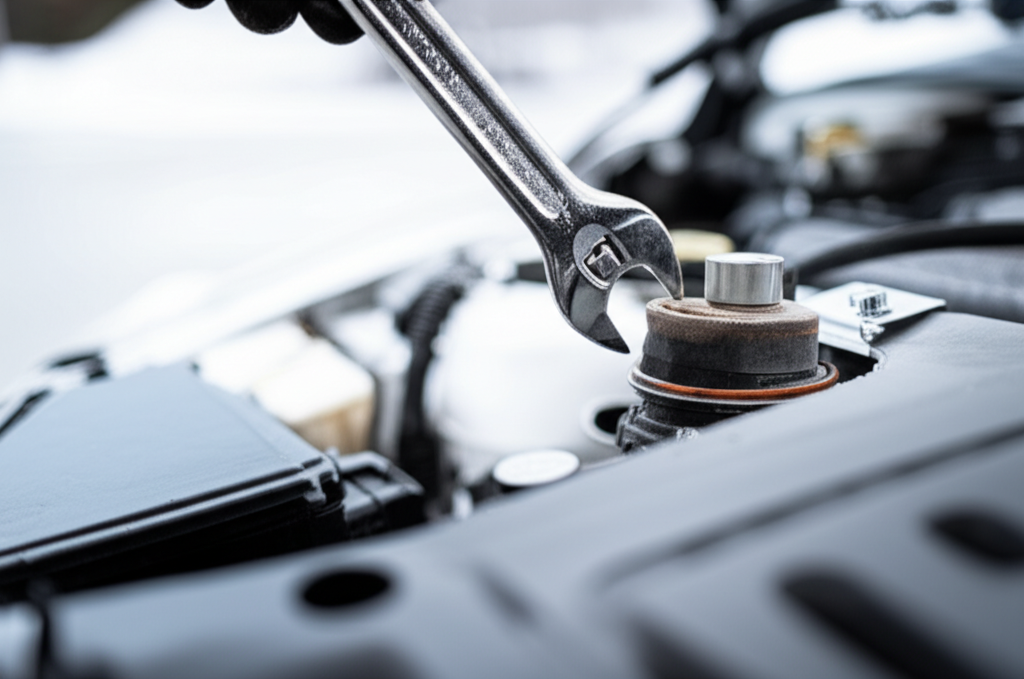
I start with a bright light and a small pry bar. I look at each mount from the engine side and the frame side. I check the mount bracket for damage. I look for rubber deterioration and fluid leaks on hydraulic mounts. I search for witness marks on the subframe and the exhaust system. I use the pry bar gently to check for excessive play while the engine is supported.
If I suspect a specific mount like a front motor mount or a rear motor mount, I watch that mount as the engine torques. On transverse engines the passenger side motor mount often carries a lot of load. Transmission mounts can fail too which creates strange drivetrain vibrations. Don’t forget side motor mounts on longitudinal layouts.
Is Changing Motor Mounts a DIY Job? (Difficulty Assessment)
Can you change motor mounts in your driveway? Often yes. Is it always simple? Not always. Here’s how I decide.
- Skill level. If you’ve done brake jobs, suspension work, or a starter replacement you can likely handle a motor mount. If you’ve only changed oil, you can still do it with patience and a clear plan.
- Tools. You need a good socket set, a breaker bar, a torque wrench, a floor jack, and jack stands. An engine support bar makes some jobs much easier. Without proper support you shouldn’t start.
- Vehicle design. Some vehicles require subframe removal or exhaust removal to access a rear mount. AWD layouts and tight engine bays can add hours. On others you can do a front or side mount in under an hour.
- Time. First timers should plan 2 to 8 hours. Shops bill 1 to 4 hours per mount. Rusted bolts or seized hardware can double your time.
- Safety. You must support the engine correctly. Jack the vehicle and support it with jack stands. Use wheel chocks. Wear safety glasses and gloves.
When do I call a professional mechanic? If a mount hides behind a crossmember that needs to come down. If the subframe must be dropped and the alignment will need resetting. If bolts are seized and you don’t own an impact wrench or a solid breaker bar. If you lack confidence or time. No shame in that call.
Tools and Materials You’ll Need
I keep a standard kit for engine mount work. It saves time and headaches.
Essential Tools
- Floor jack and jack stands. Use rated stands on level ground. Never get under a car supported only by a jack.
- Wheel chocks. Chock the wheels that stay on the ground.
- Socket wrench set with extensions. Metric and SAE as needed. Deep sockets help. A wobble extension can save a knuckle.
- Breaker bar. Stubborn bolts don’t care about your feelings. They respect leverage.
- Torque wrench. You must hit the torque specs for motor mounts. Too loose and the mount shifts. Too tight and you risk stripped threads.
- Pry bar. Helpful for small alignment tweaks during install.
- Engine support bar or an engine support fixture. I prefer an overhead support bar that sits on the strut towers. A floor jack with a wood block under the oil pan can work on many cars but I use it with care.
- Penetrating oil. Spray rusted motor mount bolts and nuts early and let them soak.
- Impact wrench. Useful on rusted fasteners. Not required. It saves time.
- Safety glasses and mechanic gloves. Eyes and hands matter.
- Thread locker and anti-seize. Blue thread locker for bolts that need vibration resistance. Anti-seize on studs or areas prone to corrosion if the service manual calls for it.
Replacement Parts
- New motor mounts. Choose OEM parts when you want original ride comfort and fit. Aftermarket parts can cost less. Some are excellent. Some aren’t. Read reviews and check warranty terms.
- Polyurethane performance motor mounts if you want stiffer response. They improve throttle feel. They add vibration at idle.
- Hardware if required. Some mounts include new bolts, nuts, and washers. If yours do not, inspect your old hardware and replace if corroded or stretched.
A note on OEM vs aftermarket motor mounts. OEM often uses specific rubber or hydraulic fluid density. It matches the vehicle’s NVH tuning. Aftermarket offers options like solid motor mounts or polyurethane. Solid mounts hold power but they can be harsh. Hydraulic mounts give a smooth, luxury feel at idle but they can leak. Choose based on your goals.
Step-by-Step Guide: How to Replace Your Motor Mounts
I’ll walk you through a generic process that covers most vehicles. Always check your service manual for the exact torque values and any vehicle specific repair guide notes.
Step 1: Safety First and Vehicle Preparation
- Park on level ground. Set the parking brake.
- Chock the wheels.
- Pop the hood. Disconnect the negative battery terminal if you’ll work near electrical connectors or the starter.
- Lift the vehicle if access from below helps. Position jack stands under approved points. Keep the floor jack ready.
I lay out tools in the order I’ll use them. I spray penetrating oil on the mount bolts to give it time to work.
Step 2: Identify and Access the Worn Mount
- Locate the specific motor mount. On transverse engines you’ll often find a top mount near the passenger side, a lower front torque mount, and a rear mount near the firewall. Longitudinal layouts usually place mounts on each side of the engine block and a transmission mount at the rear.
- Remove obstructing components. This might be the air intake tube, a battery and tray, an engine cover, or a splash shield. On some cars the exhaust or driveshaft needs to come out for a rear motor mount. I’ve had jobs where the crossmember blocked the last bolt. Plan your path.
- Take photos as you go. They help during reassembly.
Tip: Label bolts and washers. Keep engine side hardware separate from frame side hardware. It saves guesswork.
Step 3: Support the Engine/Transmission
- Use an engine support bar across the strut towers if you have one. Hook into a strong lift point on the engine. Apply light tension.
- If you use a floor jack, place a wide wood block on the jack pad. Position it under a sturdy part of the engine like the oil pan rail or the transmission case rib. Avoid crushing the oil pan. Raise the jack until it just takes weight. You don’t want to lift the engine significantly. You only want to relieve load on the mount.
- Watch for clearance issues while supporting. A small lift can tighten a bolt. A small drop can free it.
Rule of thumb: only as much support as needed to take the strain off the bolts. Too much and you fight alignment. Too little and bolts bind.
Step 4: Remove the Old Motor Mount
- Loosen the mount bolts in a controlled order. Usually I crack the frame side first. Then the engine side. I leave one bolt threaded a few turns until I’m ready to pull the mount.
- Use a breaker bar or an impact wrench for stubborn bolts. Penetrating oil helps. A little heat can help on rusted nuts if the area allows it. Wear safety glasses.
- Remove the remaining bolts and maneuver the mount out. Some mounts slide out easily. Others need a bit of pry bar persuasion. Move slow. Don’t pinch fingers. Watch nearby hoses and wiring.
- Inspect the engine mount bracket and the mounting surfaces. Clean rust and debris. Check for cracks in the bracket.
If a bolt feels like it’s seizing, stop and reassess. I’ve walked bolts out a quarter turn at a time to save threads. Patience beats a broken stud.
Step 5: Install the New Motor Mount
- Compare the new mount to the old one. Match bolt hole positions and bracket shape. Confirm it’s the correct part number for your vehicle.
- Position the new mount in place. Start all bolts by hand. Don’t cross-thread. Hand-tighten to snug. You want wiggle room for alignment.
- Align the engine and frame sides. A small pry bar helps. You can carefully raise or lower the engine a hair to line up holes.
I like to start with the harder-to-reach bolt by hand first. That one sets the tone for alignment. Then I work around the mount.
Step 6: Torque Bolts and Reassemble
- Torque the bolts to the manufacturer’s specification. This step matters. Under torqued bolts can back out which leads to excessive engine movement. Over torqued bolts can stretch or strip which weakens the joint.
- Slowly lower the engine off the support. Watch the mount settle. Recheck bolt alignment and torque if needed.
- Reinstall any components you removed. Intake ducting. Battery tray. Exhaust pipe. Driveshaft. Crossmember. Splash shields.
- Reconnect the negative battery cable.
You’ll find torque specs in your service manual. They vary by mount location and bolt size. Some fasteners call for thread locker. Some call for replacement stretch bolts. Follow the book.
Step 7: Post-Installation Checks and Test Drive
- Double-check every bolt and nut. Tug on the mount with a pry bar to confirm it’s seated and tight.
- Start the engine. Let it idle. Listen for new noises. Watch for abnormal engine movement.
- Shift through gears with your foot on the brake. Feel for driveline clunks.
- Take a short test drive. Start gentle. Then add a few stronger accelerations. Listen for squeaks or grinding. Feel for vibration. If the steering wheel buzzes more than before, recheck your work.
If you replaced a transmission mount along with engine mounts, the improvement can feel dramatic. The cabin gets quieter. Jerking during gear changes fades. Acceleration shudder drops.
Common Mistakes to Avoid During Motor Mount Replacement
I’ve made every mistake at least once. You don’t need to repeat them.
- Not using jack stands. A hydraulic jack can lose pressure. Jack stands don’t. Use stands and wheel chocks. Stay safe.
- Improper engine support. Don’t crush an oil pan. Don’t lift the engine too high. Support the engine at strong lift points.
- Not torquing bolts to spec. Guessing with a regular ratchet can leave you loose or over-tight. Use a torque wrench.
- Installing the wrong mount. Some mounts look similar. The durometer and bracket offsets differ. Match part numbers and side-specific labels.
- Ignoring other worn components. If the engine mount bracket cracks or a subframe bushing is blown, fix it now. Worn components can shorten the life of new mounts.
- Skipping penetrating oil and rushing stubborn bolts. That’s how you snap a stud. Soak. Work the fastener back and forth in small steps.
- Forgetting to reconnect grounds or intake components. A forgotten ground strap can cause all kinds of weird electrical problems.
Motor Mount Replacement Cost: DIY vs Professional
I keep a running mental math for customers and friends. The numbers below reflect what I see most often.
DIY Costs
- Parts per mount: $50 to $200 for standard rubber or hydraulic. Performance polyurethane mounts can run $150 to $500.
- Total parts for a 3-mount job: $150 to $600 in most cases.
- Tools: If you already have a floor jack, jack stands, and a socket set you may only need to rent an engine support bar. Many parts stores rent tools with deposits.
- Time: 2 to 8 hours for a first timer. Simple top mounts can take an hour. Hidden rear mounts can take much longer.
DIY savings can hit 50 to 75 percent of the total cost. Your time and patience are the trade.
Professional Costs
- Parts plus labor per mount: $150 to $400 on average. Luxury vehicles and complex AWD layouts can exceed that range.
- Labor time per mount: 1 to 4 hours depending on access. Shop rates usually run $80 to $150 per hour.
- Total for a 3-mount job: $450 to $1200 is common. More on vehicles that need subframe removal.
Pros bring experience and specialized equipment. They carry liability. They warranty their work.
When to Call a Professional Mechanic
I don’t hesitate to recommend a shop when:
- The rear mount requires subframe removal. That job can involve exhaust removal, driveshaft removal, and crossmember interference. It’s doable at home. It’s much easier on a lift with a transmission jack.
- The bolts are seized or corroded. You need heat, an impact, a breaker bar, and a gentle touch. Broken studs escalate fast.
- You don’t have an engine support bar. A floor jack can work but some jobs are risky without overhead support.
- You lack time or confidence. A rushed job can end badly. A careful pro can knock it out and save your weekend.
Frequently Asked Questions (FAQs) About Motor Mounts
How long do motor mounts last?
- I generally see 5 to 7 years or 50,000 to 100,000 miles. Heat, oil exposure, and heavy driving shorten lifespan. Hydraulic mounts tend to fail sooner if the fluid leaks.
Can I drive with a bad motor mount?
- You can drive short term if it’s only worn. I avoid it if a mount has broken. Excessive engine movement can damage the exhaust, the radiator hoses, the axle joints, and the transmission. It can become a safety issue.
Do I need to replace all motor mounts at once?
- Not always. I replace what’s failed. If the other mounts show cracks or collapse, I do them together. On high mileage vehicles I often recommend doing the set to restore alignment and ride comfort.
What’s the difference between engine and transmission mounts?
- Engine mounts support the engine block on the subframe or chassis. Transmission mounts support the transmission or transaxle at the rear of the drivetrain. Both control drivetrain vibrations and alignment.
What tools do I need for motor mount replacement?
- Floor jack, jack stands, wheel chocks, socket set with extensions, torque wrench, breaker bar, pry bar, safety glasses, gloves, penetrating oil. An engine support bar or an engine support fixture makes support easier.
How long does it take to change motor mounts?
- Shops book 1 to 4 hours per mount. DIY ranges from 2 to 8 hours depending on access, rust, and skill.
Should I use thread locker on motor mount bolts?
- Follow your service manual. Some bolts call for blue thread locker. Others do not. I also use anti-seize in areas prone to corrosion if the manual allows it.
Are polyurethane motor mounts worth it?
- They reduce engine movement which helps throttle response and shifting feel. They add vibration at idle and in the cabin. I use them on performance builds. I stick with rubber or hydraulic for comfort.
Why do motor mounts fail?
- Heat cycles, oil leaks that soften rubber, age, and constant stress. Aggressive driving and off-road use accelerate wear. High mileage vehicles naturally see rubber deterioration.
What do motor mounts actually do?
- They secure the engine and transmission to the vehicle. They isolate vibration. They control engine torque movement under load. They protect the chassis and connected systems.
How do I check motor mounts without tearing things apart?
- Watch the engine with the hood open while someone shifts with the brake pressed. Look for excessive engine movement. Inspect the mounts with a light. Pry gently to feel play. Listen for clunks during shifts and acceleration.
Do I need an engine support bar?
- It’s not mandatory on every vehicle. It makes the job safer and smoother. A floor jack with a wood block can work. I prefer the support bar when I can use it.
What about torque specs for motor mounts?
- The correct torque values depend on your vehicle. Check your service manual or a reputable database. Torque matters for safety and longevity.
Where should I buy motor mounts?
- I buy from local auto parts stores for quick pickups or reputable online auto parts stores for wider selection. I compare OEM parts and aftermarket parts. I check warranty terms before I click buy.
Conclusion: Enjoy a Smoother Ride
Replacing motor mounts feels like swapping out the shoes on your drivetrain. Worn mounts sag and split which shakes the cabin and stresses everything around them. New mounts tame vibration. They protect the exhaust, the crossmember, and the subframe. You get a smoother idle and cleaner shifts. You also prevent secondary damage that costs real money.
If you take one thing from my experience, let it be this. Support the engine correctly. Use jack stands. Work patiently. Hand start every bolt. Torque to spec. Then test drive and listen.
You can do this in your driveway with a basic tool kit and a careful plan. You’ll save 50 to 75 percent over shop prices. You’ll also learn a ton about your vehicle which pays dividends on your next DIY.
Before you grab the socket set, here’s a quick summary to keep in your back pocket:
- Confirm the diagnosis with a visual inspection and a simple engine rock test.
- Gather a floor jack, jack stands, wheel chocks, a torque wrench, a breaker bar, a pry bar, and penetrating oil. Rent an engine support bar if you can.
- Support the engine just enough to relieve weight. Don’t crush the oil pan.
- Remove the old mount. Install the new one. Start bolts by hand. Align carefully.
- Torque to the manufacturer’s specification. Reassemble. Test drive.
Still on the fence. If your vehicle needs subframe removal or the bolts fight you, call a pro. That’s not defeat. It’s smart.
Either way, fix bad mounts sooner than later. Your engine, your transmission, and your chassis will thank you.
Notes for the curious and the meticulous
- For performance setups, consider soft vs stiff motor mounts trade-offs. Stiff mounts control engine movement which helps launches and shifts. Soft mounts win on ride comfort and reducing cabin noise.
- Keep an eye on preventative maintenance. Check mounts during oil changes. A quick pry bar check and a look for leaks can spot early failure.
- After installation, do a post-installation test drive loop. Idle in gear. Light acceleration. Moderate acceleration. A few shifts. Then recheck torque after a few heat cycles if your manual recommends it.
Glossary touchpoints I lean on during this job
- Engine, transmission, drivetrain, and chassis alignment all interact. One loose bolt can amplify vibrations through the steering wheel and the dashboard.
- Tools like a torque wrench, an impact wrench, a breaker bar, and a solid ratchet with the right socket set sizes make the job smoother.
- Consumables like penetrating oil, thread locker, and anti-seize compound can be the difference between a one-hour job and an all-day fight.
- Safety gear matters. Safety glasses and gloves save the day more often than you think.
Ready to start. Print these steps or keep them open on your phone. Take your time. Work clean. Enjoy the payoff when that first smooth idle returns.