How Do I Know If My Motor Is Blown? Definitive Signs, Root Causes, and the Lamination Decisions That Prevent Failure
If you landed here after searching “how do I know if my motor is blown,” you’re probably dealing with something urgent. Maybe a vehicle sputtered, a line stopped, or a test bench tripped. You want a straight answer. You want to know what failed, why it failed, and what to do next.
Here’s the twist. People mean two different things when they say “blown motor.” In automotive circles, it often means a catastrophic internal combustion engine failure. In electric machines, engineers use it informally to describe a motor that has failed beyond easy repair. In both cases, heat and stress did the damage. The causes differ. The way you diagnose the problem and prevent it next time differs too.
This guide does two things. First, it gives you a clear checklist to triage a suspected “blown” engine or electric motor. Second, it shows you how core design and motor laminations drive reliability, efficiency, and temperature rise. If you design motors or source laminated cores, this second part matters just as much as the first. It’s the difference between a failure-prone product and a robust one.
In short, we’ll go from problem to physics to practical choices you can act on.
In This Article
- The Alarming Truth: What “Blown Motor” Means for Engines vs Electric Machines
- What’s Really Going On Inside Laminated Cores (and Why Heat Wins)
- Immediate and Obvious Failure Signs
- Critical but Subtle Symptoms You Should Not Ignore
- Professional Diagnostic Steps: ICE vs Electric Motor
- Material Considerations for Motor Core Laminations
- Manufacturing and Assembly Processes That Affect Reliability
- Matching the Right Lamination Solution to Your Application
- What Happens After a Blown Motor: Repair, Rebuild, Replace, or Salvage
- Your Engineering Takeaway and Next Steps
The Alarming Truth: What a “Blown Motor” Really Means
Let’s set definitions first. It avoids crossed wires later.
- Internal combustion engine (ICE)
When mechanics say “blown engine,” they mean catastrophic internal damage. Think broken pistons, bent connecting rods, seized crankshaft bearings, or a hole in the block. It often follows severe overheating or oil starvation. The engine might not turn at all. You might have heard a loud bang. You might see white, blue, or black smoke. This is total loss territory.
- Electric motor
Engineers use “blown motor” loosely when the machine suffered an unrecoverable event. Winding insulation failed. The rotor locked. The drive trips immediately due to fault current. The core overheated and lost temper. You might salvage parts. In many cases, you rebuild or replace.
In both worlds, heat kills. It cooks lubricant. It breaks down insulation. It warps parts. Sometimes you get a sudden bang. Sometimes it creeps up over months. Either way, temperature rise and hot spots tell the story.
Which brings us to motor laminations. Laminations don’t just shape the field. They set the baseline for core losses and heat. Better material and a better stack keep temperatures down. That margin helps you avoid the slow march toward failure.
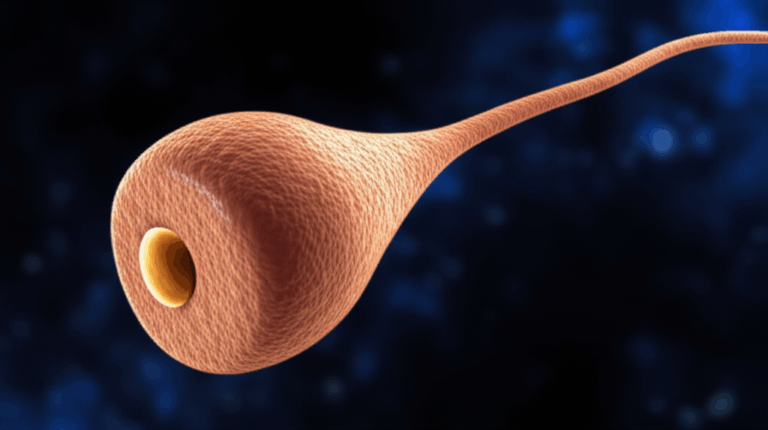
What’s Really Going On Inside Laminated Cores (and Why Heat Wins)
You can’t fix what you don’t understand. So let’s talk fundamentals in simple terms.
- Magnetic flux and the core
The stator and rotor guide magnetic flux like rails guide a train. High permeability materials let flux pass with less “reluctance,” which is the magnetic analog of resistance. Think of permeability like a sponge soaking up water. A better sponge pulls more in with less effort.
- Hysteresis loss
Every time you flip magnetization in the core, the material fights back a bit. That energy turns into heat. Harder materials with higher coercivity resist flipping more. They burn more energy per cycle. Softer magnetic steels lower these losses.
- Eddy current loss
Changing magnetic fields induce currents in the steel. Those circulating eddies generate heat inside the core. Imagine tiny whirlpools in a river stealing energy from the flow. Thinner, insulated laminations break big whirlpools into tiny ones. Smaller eddies mean less heat.
- Why lamination thickness matters
Eddy current loss scales roughly with the square of lamination thickness at a given frequency. Cut thickness in half and eddy loss drops sharply. You pay for thinner steel and more pieces to handle. You get a cooler core and higher efficiency.
- Why coating and stacking matter
Laminations need an insulating coating to stop interlaminar shorts. Burrs, welds, or pressure points can short laminations together. Shorted spots bypass insulation and let eddy currents grow. That creates hot streaks and localized overheating.
- Why this matters to failure
High core loss means heat. Heat ages winding insulation. Heat pushes bearings and grease toward their limits. Heat shrinks your safety margin. Over time, a motor that runs hot is a motor that fails early.
If motor reliability is the destination, well-chosen motor core laminations are the road. They set your temperature rise. They set how close you run to the cliff. You still need sound windings, bearings, and cooling. Yet the core sets the tone.
Immediate and Obvious Failure Signs
You want quick triage. Here’s what “blown” looks like in the field. First for engines. Then for electric motors.
Internal Combustion Engines (the classic “blown engine”)
- The engine seized up
You hit the starter and nothing turns. Maybe you heard a heavy clunk right before it died.
- Loud bang or explosion from the engine bay
A piston broke. A connecting rod punched a hole in the block or oil pan. You might see oil everywhere.
- Thick smoke
- White smoke points to coolant burning. Think cracked block or blown head gasket.
- Blue smoke means oil is burning. That suggests failed piston rings or valve seals.
- Black smoke means a rich fuel mixture. Severe misfires can cause it and hint at deeper internal damage.
- Catastrophic fluid loss
Oil or coolant pours onto the ground. The low oil pressure light glowed moments before. The temperature gauge spiked.
- Rod knock that gets louder with RPM
A deep metallic knock that speeds with engine speed often means bearing or connecting rod distress. When it gets severe, it can end with a thrown rod.
These symptoms map to familiar diagnostics: compression test, leak-down, borescope, oil analysis for metal shavings, and DTC scans. We’ll get to that in a moment.
Use case keywords you might be searching for
- signs of a blown engine
- overheating engine signs
- engine hydrolock
- cracked engine block
- blown head gasket symptoms
- engine seized up
- engine won’t turn over
- white smoke from exhaust
- blue smoke from exhaust
- black smoke from exhaust
- coolant in oil or oil in coolant
- metal shavings in oil
- low oil pressure light
- high engine temperature gauge
Electric Motors and Drives (how “blown motor” shows up in plants and products)
- The drive trips immediately
Instant overcurrent or ground fault trips on power-up. The machine won’t start. Protection saw something ugly and shut it down.
- The motor locked up
The rotor won’t turn or stalls under load. You can’t spin it by hand after you de-energize it. Bearings might have failed or debris jammed the air gap.
- Smoke or a burning smell
Windings overheated. The varnish baked. You might see charred slot liners or darkened tooth tips. That’s insulation breakdown and local hot spots.
- Severe vibration and noise
A sudden increase often signals bearing damage or rotor issues. You might hear grinding or a cyclic rub noise that hints at rotor-to-stator contact.
- Melted lead insulation or deformed coil overhangs
This points to serious thermal events. You’ll often find carbonized residue and brittle conductors.
- Discolored laminations
Blueing or straw colors on the core surface suggest heat beyond normal operation. Shorted laminations or a hot tooth can leave a clear signature.
Use case keywords for electric motor failure
- abnormal engine sounds vs abnormal motor sounds
- burning smell from engine vs burning smell from motor
- engine vibration excessive maps to motor vibration excessive
- engine stalls repeatedly maps to motor trips repeatedly or stalls
Note for teams with both ICE and electric systems
If you’re in e-mobility or hybrid powertrains, both sets of symptoms might apply. You could see an engine misfire and a motor overtemperature derate in the same event. Diagnose each system on its own merits. Don’t let one mask the other.
Critical but Subtle Symptoms You Should Not Ignore
Not every failure arrives with fireworks. The quiet ones can cost more because they hide while they damage equipment.
Internal Combustion Engines
- Persistent check engine light that flashes under load
A flashing check engine light often signals a severe misfire. Cylinders drop out. You feel a heavy loss of power. Codes like P0301 or P0302 point to specific cylinders.
- Rough idling and repeated stalls
You might have valvetrain damage or low compression. The engine might still run. It will not run well.
- Coolant level dropping fast with no obvious leak
Combustion gases can push into the cooling system. Watch for a sweet smell from the exhaust. Watch for steam from the engine bay.
- Oil level dropping fast or fuel smell in the oil
Diluted oil loses film strength. Bearings pay the price. That’s a short path to catastrophic failure.
- Engine management system faults
Oxygen sensor and catalytic converter damage follows misfires. You’ll see oxygen sensor faults and catalyst efficiency codes as collateral.
This lines up with common searches
- engine misfire diagnosis
- cylinder misfire codes
- oxygen sensor fault
- catalytic converter damage
- engine warning lights meaning
- limp mode engine
- vehicle won’t accelerate
- engine stalls repeatedly
Electric Motors
- Subtle overloads and rising thermal cycles
The motor starts fine. It runs hot. It trips after 20 minutes. It cools and restarts. This pattern points to insufficient thermal margin or high core loss. Frequent overload shortens insulation life.
- Current imbalance or excessive harmonics
Unbalanced phases or drive harmonics increase copper and iron losses. Watch the current signature on a power analyzer. Look for distortion that heats the core.
- Bearing temperatures creeping up
That small increase in bearing temperature can point to lubrication breakdown or shaft currents. Either way, it ends with seized bearings and a locked rotor if you ignore it.
- Audible change in tone
You know the normal hum. A new buzz or “singing” at specific frequencies can hint at lamination resonance, loose stacks, or PWM ripple effects.
- Mild but persistent insulation resistance decline
Megger results that decrease over time tell you moisture or contamination is finding a path. Electrochemical effects nibble at insulation. Failures follow.
These subtle signs connect back to your core. If the laminations run hot, everything else runs closer to the edge. Thinner gauges and better coatings reduce eddy losses and heat. That extra margin often keeps these subtle issues from snowballing.
Professional Diagnostic Steps: ICE vs Electric Motor
You can do quick checks in the field. For definitive answers, use structured tests.
For Internal Combustion Engines
- Visual inspection
Look for external damage, leaks, milky oil, or coolant contamination.
- Compression test
Low or zero compression in one or more cylinders points to internal damage. Broken pistons. Bent valves. Blown head gasket.
- Leak-down test
This tells you where you’re losing compression. Air hissing through the intake suggests valves. Through the exhaust points to exhaust valves. Through the oil filler points to rings or a cracked piston.
- Borescope inspection
Pull a spark plug and look inside. Scored cylinders, broken lands, or coolant in the chamber tell the truth.
- Oil analysis
Metal shavings on the drain plug or in the oil reveal bearing or piston damage. A lab test can quantify wear metals. Coolant in oil confirms a sealing failure.
- Scan for codes
Read the ECU for DTCs. Severe misfires, oxygen sensor faults, or catalyst damage paint the picture. You might see P0301, P0302, and related misfire codes.
This set matches familiar workflows in shops and aligns with industry practices. It uses standard tools and procedures. No magic needed.
For Electric Motors
Follow recognized best practices. EASA AR100 and IEEE standards such as IEEE Std 43 for insulation resistance are good anchors.
- Visual and thermal inspection
Look for discoloration on stator teeth, melted slot liners, or loose wedges. Use a thermal camera during a controlled run if safe. Hot teeth can indicate shorted laminations.
- Insulation resistance (IR) and polarization index (PI)
Use a megohmmeter per IEEE Std 43. Trend results. Low IR or a poor PI signals contamination or insulation damage.
- Winding resistance and balance
Phase-to-phase resistance should match closely. Misbalance can indicate shorted turns or connection issues.
- Surge testing
Surge tests detect turn-to-turn insulation weaknesses in the stator. Use with care and proper limits to avoid overstressing an already weak winding.
- Current signature analysis and power quality
A power analyzer reveals current imbalance, THD, and harmonic content that heats the core. VFD-driven motors may show specific harmonic fingerprints.
- Vibration analysis
Use accelerometers to identify bearing faults, rotor bar issues, or mechanical looseness. Match peaks to bearing fault frequencies. Watch for higher 2× line frequency components in induction motors.
- Core loss testing
Methods like ring testing or ELCID can identify interlaminar shorts and localized hot spots without full disassembly in some cases. If you see abnormal losses, suspect burrs, coating damage, or a compromised stack.
- Borescope of stator slots and coil heads
Inspect slot liners, coil lacing, and end-turn spacing. Look for rub marks and carbonization.
- Drive and control checks
Confirm VFD parameters match motor nameplate values. Check carrier frequency, dv/dt filters, and cable lengths. High dv/dt and reflections can stress insulation. This matters at higher switching speeds.
Tie these tests back to the physical components. Examine the stator core lamination condition and tooth tips. Inspect the rotor core lamination stack for looseness or heat signatures. If you find interlaminar shorts or excessive burrs, expect higher iron loss and temperature rise.
Standards to keep in your back pocket
- IEEE Std 43 for insulation resistance testing on rotating machinery
- IEEE Std 112 for motor efficiency testing methods
- IEC 60404 series for magnetic properties measurement of electrical steels
- UL 1446 for electrical insulation systems
Material Considerations for Motor Core Laminations
Now we shift from diagnosis to design and procurement. You prevent core-related failures with the right materials and thickness. You also reduce temperature rise and boost efficiency.
Consider the following levers.
- Grade selection
Nonoriented electrical steel (NOES) for motors comes in grades with different loss and permeability characteristics. Higher silicon content typically lowers core loss and increases resistivity. That helps at higher frequencies. You’ll see M-grades used for general purpose. High-performance motors push toward specialized grades with lower watt-per-kilogram losses. If you build for EV traction, robotic actuation, or aerospace, you’ll often need thinner gauges and premium grades.
- Thickness vs frequency
Eddy current losses scale with thickness squared. At 50/60 Hz you might use 0.35 mm or 0.50 mm. At higher electrical frequencies, you move to 0.35 mm down to 0.20 mm and thinner. BLDC and PM motors with high electrical frequency especially benefit from thinner laminations.
- Coating insulation class
The interlaminar coating provides electrical isolation between sheets. Choose a coating that matches your stamping, bonding, and stacking process. It must survive your bonding cure temperatures and resist chemical attack from coolants or varnishes. Coating quality directly affects stacking factor and eddy current control.
- Core loss and permeability data
Use supplier curves measured per IEC 60404 at your operating flux density and frequency. Don’t compare loss at 1.5 T and 50 Hz if your machine runs 1.2 T and 400 Hz. Ask for loss versus frequency and B over your real operating window. A small change in flux density can swing losses a lot.
- Temperature rise margin
High iron loss increases heat. Heat lowers insulation life and bearing life. Use your thermal model to translate core loss savings into temperature margin. That margin protects real machines on real duty cycles.
- Specialty alloys
Cobalt-iron alloys offer superior saturation flux density and low losses at high frequency. They cost more. They shine in aerospace, turbo machinery, and high power density machines. Use them when the system-level benefits outweigh the premium.
If you want a quick refresher on the landscape of material choices, see electrical steel laminations and how grades and coatings affect performance. For many general-purpose designs, silicon steels hit the sweet spot for cost and performance. You can dive deeper on silicon steel laminations when you evaluate gauge and grade trade-offs.
Manufacturing and Assembly Processes That Affect Reliability
You picked the right material. You can still lose the game during manufacturing. The way you cut, stack, and join laminations influences iron loss, noise, and lifetime.
- Stamping vs laser cutting vs EDM
- Stamping is king for high volume. It delivers low piece cost and high repeatability. You must control burr height and die wear. Excess burrs raise iron loss and can short laminations.
- Laser cutting works well for prototypes and low volume with complex geometries. Watch the heat-affected zone. It can increase loss if you push too hard.
- EDM and waterjet are niche methods for delicate or thick sections. They avoid HAZ. They trade speed and cost.
- Interlocking, bonding, welding, and riveting
- Interlocking acts like LEGO bricks that snap together to form rigid stacks without welding. It avoids heat input that can damage coatings near welds.
- Bonding with adhesives delivers strong stacks and excellent damping. It reduces magnetostriction noise. Select adhesives that cure below the coating’s damage threshold.
- Welding offers strong joints but adds local heat. It can degrade insulation around the weld. Use minimally and with appropriate controls.
- Riveting and through-bolts are simple and effective. They may add flux disturbance near holes. Design around it.
- Stacking factor and compression
Stacking factor measures the fraction of the stack that is actual steel vs coating and air. It affects slot fill and performance. Control stack compression to keep lamination flatness and ensure consistent magnetic properties across the stack.
- Burr control and deburring
Burrs cut insulation. They create interlaminar shorts. They raise loss. Control die conditions. Inspect burr height. Deburr where needed. Your loss budget depends on it.
- Dimensional tolerances and alignment
Slot width variation impacts fill and thermal hot spots. Tooth tip geometry drives local flux density. Keep tolerances tight to reduce risk of tooth saturation and localized heating.
- Surface treatment and cleanliness
Oil, dust, or residue can reduce bond quality or introduce partial shorts. Cleanliness standards help. Monitor with simple wipe tests and periodic lab checks.
Good manufacturing turns the promise of your lamination material into a cool, quiet core. Treat the lamination stack as a precision component, not a commodity sheet pile.
Matching the Right Lamination Solution to Your Application
The best choice depends on frequency, flux density, duty cycle, and volume. Here’s a quick guide to set direction before you go deep.
- General-purpose industrial motors at 50/60 Hz
Use NOES silicon steels in standard gauges like 0.35–0.50 mm. Stamping is the default at volume. Interlocking or bonding works well for stack integrity. Aim for low noise and long life.
- BLDC and high-speed PM motors
Electrical frequency gets high as poles increase. Move toward thinner gauges, often 0.20–0.27 mm. Premium grades reduce loss. Control coating quality and bonding for good damping and slot wedge retention. Evaluate skew and tooth tip geometry to manage cogging torque and noise. For design references and stack options, explore bldc stator core choices early in the design.
- EV traction and e-axles
Duty cycles and temperatures run high. You need low loss at elevated frequencies and robust stacking. Vacuum pressure impregnation and bonded stacks help with NVH and thermal performance. Coordinate with the inverter team on switching strategies, dv/dt filters, and cable lengths to protect insulation.
- Aerospace and turbo machinery
Consider cobalt-iron alloys for high saturation flux and efficiency at speed. Costs rise. Weight and performance gains may justify the move.
- Transformers and static machines
Grain-oriented steels dominate cores with unidirectional flux. That’s a separate domain. The lamination principles overlap, yet the materials and geometries differ.
Not sure which bucket you fall in? Map your electrical frequency, flux density, and duty cycle first. Then talk to your lamination partner about gauge, coating, and stack assembly that hit your targets with margin.
What Happens After a Blown Motor? Repair, Rebuild, Replace, or Salvage
You diagnosed the issue. Now you need to act. The options differ for engines and electric motors. The decision always hangs on cost, lead time, and risk.
Internal Combustion Engines
- Engine replacement
You can install used, remanufactured, or new engines. Used engines cost less and carry uncertainty. Remanufactured units cost more and often include a warranty. New engines are rare outside high value vehicles due to cost.
- Engine rebuild
A rebuild tears the engine down and replaces worn or broken internals. The block must be sound. Machining adds cost. You can extend life if you perform a quality rebuild.
- Cost implications
Typical market ranges suggest used engines installed can run several thousand dollars. Remanufactured units and new long blocks cost more. Costs vary widely by vehicle and region. Check multiple quotes and factor in vehicle value.
- When to salvage
If repair cost exceeds a large fraction of the vehicle value, walk away. Many owners consider 50–75 percent of market value a practical cutoff. Insurance often uses similar logic.
Electric Motors
- Rewind and repair
If the core remains sound and mechanicals can be restored, a rewind can return the motor to service. Follow EASA best practices. Verify slot liners, wedges, and varnish quality. Test the core for interlaminar shorts before you rewind.
- Core replacement or re-stack
If you find shorted laminations or excessive core loss, you can re-stack the core with fresh laminations. This is more involved. It makes sense for high-value machines or when you also want to upgrade material and thickness.
- Replace with new
In commodity sizes, a replacement motor is often the fastest path. In specialized designs, lead times and qualification drive you toward repair.
- Total cost of ownership
Don’t chase the lowest repair bid blindly. Consider efficiency differences, heat rise, and expected life. A better core or tighter stack may pay for itself in uptime and energy savings.
If you need to evaluate your core options as part of a repair or redesign, review the role of motor core laminations in temperature rise and loss. Confirm your stack construction with your supplier. Align the lamination spec with your real duty cycle.
Don’t Ignore the Warning Signs: Act Quickly
Most catastrophic failures don’t start catastrophic. They whisper. They show up as a small knock, a minor temperature rise, a trip that only happens near peak load. That’s your early warning. Act on it.
- If it’s an engine
Stop driving when you see the oil pressure light or a high temperature warning. Continued operation makes a rebuild less likely and replacement more likely.
- If it’s an electric motor
Shut down and diagnose when you see trip patterns, smell insulation, or notice rising bearing temps. Target the root cause fast. That might be a cooling fault, a drive parameter issue, or a core problem.
Safety first in both cases. Don’t run suspect equipment. You protect people and also protect your budget when you avoid a cascading failure.
The Explainer: How Lamination Choices Prevent “Blown Motor” Outcomes
Let’s connect the dots from physics to purchasing decisions. You can reduce core losses and heat with better lamination choices. You can make the motor more tolerant to tough duty cycles.
Here’s the short version of how to think about it.
- Pick the right grade for your operating point
Loss curves vs frequency and flux density matter more than nameplate slogans. Push your supplier for curves that match your machine. Then simulate loss and temperature rise.
- Select thickness for your electrical frequency
High electrical frequency calls for thinner laminations. This hits eddy currents where they live. If cost limits how thin you go, model the trade with temperature rise and life in mind.
- Choose coating and bonding with your process in mind
Coating integrity prevents interlaminar shorts. Bonding improves damping and noise. Make sure curing temperatures don’t degrade the coating.
- Lock in manufacturing controls early
Work with your stack supplier on burr control, die maintenance, dimensional tolerances, and cleanliness. The stack is not a place for surprises.
- Inspect and test cores
Ask for sample stacks. Measure loss under representative conditions. Inspect tooth tips and slot geometry. Use torque on stack compressing fasteners consistently. Quality here shows up as quieter, cooler machines.
When you want to translate these concepts into real parts, talk through the details of stator core lamination tooth geometry, slot liner space, and skew. Pair that with rotor slot and bar designs crafted around your thermal and torque ripple constraints. If your design’s rotor architecture is still open, align it with your rotor core lamination stacking and joining method so you can scale production cleanly.
Your Options Explained: A Balanced Guide
Let’s compare the main approaches without hype.
- Material decisions
- Silicon steels
Pros: Proven, cost effective, wide grade range. Good for 50/60 Hz and moderate frequency designs. Cons: Higher losses than specialty alloys at very high frequency. Use coatings optimized for your bonding or interlocking.
- Premium low-loss NOES
Pros: Lower watts-per-kilogram across a wide frequency band. Helps reduce temperature rise. Cons: Higher material cost. Tighter handling requirements.
- Cobalt-iron alloys
Pros: High saturation flux density and low losses at high frequency. Excellent for high power density. Cons: Expensive and harder to source at times.
- Amorphous and nanocrystalline (niche for motors)
These excel in transformers. They see limited motor use due to brittleness and processing limits. Watch this space for specialty applications.
- Cutting and shaping
- Stamping
Best for volume. Control burrs. Use premium dies and maintenance plans. Great for repeatability and cost at scale.
- Laser cutting
Best for prototypes and low volume complex shapes. Control HAZ with parameters. Expect higher per-piece cost.
- EDM or waterjet
Niche for ultra-precision or HAZ-sensitive applications. Slow and costly per piece.
- Stacking and joining
- Interlocking
Fast and robust without heat input. Great for many stator stacks.
- Bonding
Excellent mechanical integrity and noise damping. Demands process control on adhesive and cure.
- Welding
Use sparingly and with insulation protection. Good for certain rotor stacks.
- Riveting and through-bolts
Simple and reliable. Mind the magnetic disturbance near fasteners.
- Quality gates
- Burr height limit and inspection
- Coating adhesion and thickness checks
- Dimensional audits on slots and tooth tips
- Loss testing at representative points
- Stack compression torque standards
This is not a this-vs-that battle. It’s a toolkit. Pick what fits your performance, budget, and volume.
Which Application Is This For? Match Design Choices to Reality
You can speed decisions by anchoring to your real use case.
- Low voltage industrial AC motors at 50/60 Hz
Choose standard NOES silicon steel grades with 0.35–0.50 mm thickness. Interlocked stacks. VPI windings. Focus on durability and serviceability.
- High-frequency BLDC drives
Use thinner laminations. Aim 0.20–0.27 mm with low-loss grades. Bond stacks for noise and stiffness. Coordinate with drive switching strategies to limit iron loss and acoustic noise. For geometry and integration details, review bldc stator core options early to avoid last-minute compromises.
- EV traction motors
Push for lower loss material and robust bonding. Control skew and tooth tip design to handle NVH. Validate loss at your exact frequency and flux. Plan for the worst-case thermal load.
- Aerospace, turbo, and high-speed spindles
Evaluate cobalt-iron. Model the system-level benefits. If weight and size fall significantly, the material premium can pay back in performance.
- Harsh environments
Consider coatings and bonding that handle chemicals and moisture. Add protective measures for bearing currents such as insulated bearings or shaft grounding. Verify IR and PI over environmental cycling.
You don’t have to guess. Ask for data at your frequency and flux. Run a quick loss-to-temperature rise translation with your cooling assumptions. Decide with real numbers.
Your Engineering Takeaway and Next Steps
If you remember only one thing, remember this: heat is the silent killer. In engines and in electric motors. The right lamination material and thickness cut iron loss. Lower iron loss cuts heat. Lower heat extends life, protects insulation, and keeps bearings happy.
Key points you can act on today
- Define “blown motor” in your context
For an ICE, look for seizure, smoke, and catastrophic fluid loss. For electric motors, look for trips, smells, discoloration, and vibration.
- Diagnose with discipline
Engines: compression, leak-down, borescope, oil analysis, and DTCs. Electric motors: IR/PI per IEEE 43, surge, current signature, vibration, and core loss checks.
- Pick lamination materials by operating point
Match grade and thickness to your frequency and flux. Use IEC 60404 loss data at your real operating conditions.
- Control manufacturing variables
Burr height, coating integrity, and stack joining methods drive loss and noise. They also drive lifetime.
- Think total cost of ownership
Lower loss and cooler operation reduce failures. They also save energy every hour the motor runs.
A safe, practical call to action
- If you’re troubleshooting a vehicle engine and see white or blue smoke, a flashing check engine light, or the oil pressure light, stop driving and have the car towed. A seized engine rarely gets better on the road.
- If you’re troubleshooting an electric motor and see repeat trips, smell insulation, or hear new noise, shut down and test. Use IR and surge tests. If you suspect core issues, test for localized loss before you rewind.
- If you’re designing or sourcing cores, bring your frequency, flux density, duty cycle, and volume targets to your lamination supplier. Ask for loss curves and coating options. Review stack assembly methods that fit your noise and durability goals. When you need a refresher on the building blocks, skim motor core laminations and material pages such as electrical steel laminations and silicon steel laminations. Then talk specifics on stator core lamination geometry and rotor core lamination stack assembly.
Final thought
Engineering decisions prevent “blown” outcomes. You can’t control every shock or misuse event. You can control core loss, temperature rise, and margin. That’s how you build motors that run cooler, last longer, and keep your programs on schedule.