How Do DC Motors Work? A Practical Guide to Core Laminations, Efficiency, and Design Trade‑offs
Every engineer who specifies a DC motor faces the same balancing act. You want high torque and precise speed control from a compact package. You also want low losses, manageable heat, and a reliable bill of materials that won’t blow up your budget. The quiet hero inside that equation is the lamination stack. Lamination thickness, material grade, and how you assemble the core define a DC motor’s efficiency, noise, and life. If you’ve wondered how a DC motor really works and how core laminations push performance, you’re in the right place.
We’ll start with the physics so the “why” makes sense. Then we’ll walk through material options, manufacturing routes, and the honest trade‑offs you’ll face. You’ll leave with a checklist you can use on your next drawing or supplier RFQ.
In This Article
- The Problem You’re Solving: Efficient, controllable rotation without excess heat
- What Is a DC Motor? Core components and forces
- Step by Step: How current creates torque and continuous rotation
- Why Laminations Matter: Eddy currents, hysteresis, and back EMF
- Materials and Manufacturing: Electrical steels, cobalt alloys, stamping vs. laser, and stack assembly
- Best Fit by Application: Matching material and process to use case
- Performance Factors That Drive Choices: Torque‑speed, efficiency, and direction control
- Procurement and Quality: Specs, tests, and standards that prevent surprises
- Your Engineering Takeaway: Actionable next steps
The Problem You’re Solving: Efficient, Controllable Rotation Without Excess Heat
At its core, the question “How do DC motors work?” is really two questions for a design team:
- How does electrical energy turn into mechanical energy reliably?
- What design choices control heat, torque, speed, and cost?
Your electrical design cares about voltage, current, and how back EMF stabilizes speed. Your mechanical design cares about torque, bearings, shaft loads, and the speed‑torque curve. Your manufacturing and procurement teams care about material availability, die life, tolerances, and long‑term supply.
All those threads tie back to the motor’s electromagnetic heart: the stator and rotor core built from thin electrical‑steel laminations. You reduce eddy currents with thin laminations. You dial in hysteresis loss with the right alloy and heat treatment. You control torque ripple and acoustic noise with slot geometry and skew. Get those elements right and the rest of the design gets easier.
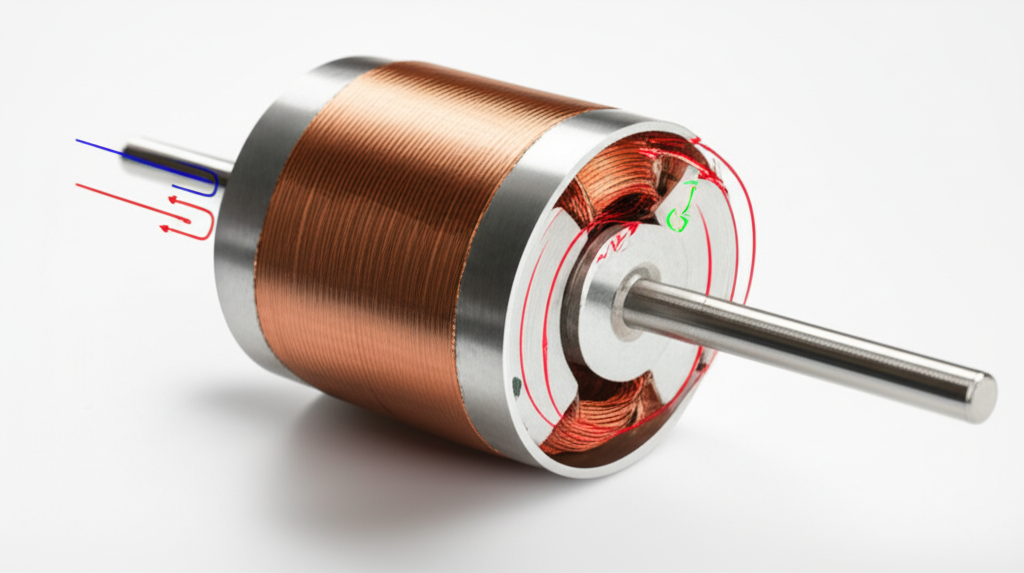
What Is a DC Motor? Core Components and Forces
A DC motor converts electrical energy from direct current into rotational mechanical energy. Classic brushed DC motors use brushes and a commutator to switch current in the armature winding. Brushless DC (BLDC) motors use electronic commutation to achieve the same directional torque without brushes.
Key parts and what they do:
- Stator: The stationary part that provides a magnetic field through permanent magnets or field windings.
- Rotor or Armature: The rotating part with coils (armature windings) that carry current and experience force.
- Commutator and Brushes (brushed DC): The commutator is a split‑ring device on the rotor. Carbon brushes ride on it to feed DC to the rotating coils and to switch the current direction at the right time.
- Shaft and Bearings: Transfer torque and support rotation.
- Power Supply: A DC source such as a battery or converter.
The physics in one breath: a current‑carrying conductor inside a magnetic field feels a force. That’s the Lorentz force. Aim the conductor so that force creates a torque on the rotor, and you get rotation. Fleming’s Left‑Hand Rule gives the force direction given current and magnetic field directions. Faraday’s Law explains the induced voltage you see as the coil moves and the magnetic flux through it changes. Lenz’s Law tells you that induced voltage opposes the change that created it, which sets up back EMF that regulates speed.
Step by Step: How Current Creates Torque and Continuous Rotation
Let’s connect dots with a simple brushed DC motor, since that’s the classic “how it works” model.
1) Power on
- You apply DC voltage. Current flows from the supply through brushes into commutator segments and into armature windings.
2) Electromagnets form
- Those armature coils become electromagnets. They sit in the stator’s magnetic field set by permanent magnets or field windings.
3) Force on each coil side
- Opposite sides of a coil carry current in opposite directions. Each side sits in the stator’s magnetic field, so each side feels a Lorentz force in opposite directions. Those two forces form a couple. That couple produces torque on the rotor.
4) Commutation keeps the torque unidirectional
- As the rotor spins and a coil passes through the position where torque would drop to zero, the brushes switch contact to the next commutator segment. That reverses the current in that coil relative to the field. The result stays the same: the torque keeps pushing in the same rotational direction. This is the commutation process that gives you smooth, continuous rotation.
5) Back EMF rises with speed
- As the rotor speeds up, a voltage is induced in the armature that opposes the supply. That’s back EMF. It reduces net current as speed rises. Current falls, so torque falls. You land on a speed that balances the load torque. That’s why the no‑load speed sits high and the stall torque sits high, with a nearly linear speed‑torque curve for a given DC motor.
6) Speed control and direction
- Change the input voltage to change current and speed. Reverse polarity to reverse direction. Add series resistance or use PWM for fine speed control. In BLDC motors, electronic controllers change phase current timing to achieve the same effects.
That’s the motion story. Now let’s dig into where the heat comes from and why laminations matter.
Why Laminations Matter: Eddy Currents, Hysteresis, and Back EMF
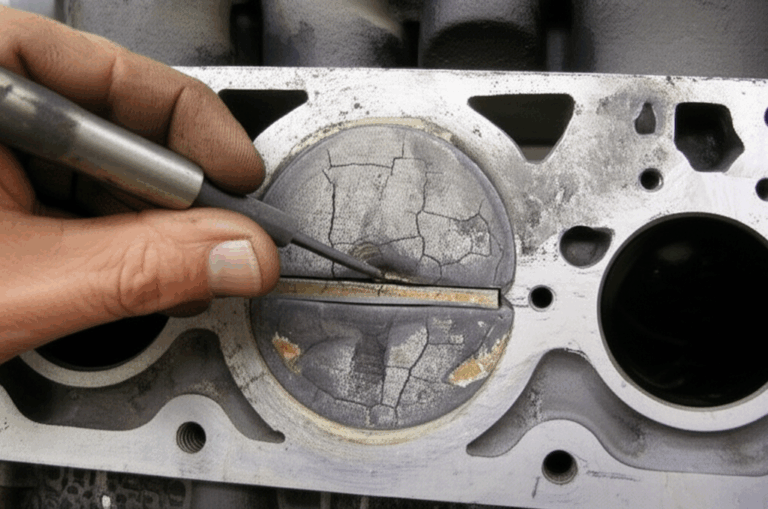
If you made a motor core from a solid steel block, it would run hot. Painfully hot. Why? The magnetic field in the core changes with time as coils energize and as slots pass under stator teeth. Changing flux induces circulating currents within the metal. Those are eddy currents. Eddy currents waste power as heat.
Here’s an analogy. Picture a wide river with a strong current. Drop a big boulder and you get large whirlpools. Break the boulder into many thin, insulated slabs stacked together and you interrupt those whirlpools. In a motor core, thin, insulated laminations do exactly that. They chop big current loops into tiny loops that don’t go far. Less loop area means less eddy current loss.
Two main core loss components matter:
- Eddy current loss: Caused by changing magnetic fields driving currents in the core. It scales strongly with lamination thickness, frequency, and flux density.
- Hysteresis loss: Energy lost as the magnetic domains in the material flip each cycle. It depends on the alloy, its microstructure, coercivity (how hard it is to demagnetize), and flux swing.
You also see mechanical loss from bearing friction and windage. Copper loss comes from I²R heating in the windings. But core loss is the piece lamination design can tame.
Eddy currents love thickness. Thin laminations starve them. Hysteresis loves high coercivity. Alloys and heat treatments with low coercivity push hysteresis down. That’s why electrical steels with silicon, and sometimes additions like aluminum, exist. They tune magnetic permeability and core loss for rotating machinery.
Back EMF doesn’t count as a loss. It’s your friend. It sets an operating point that keeps current in check as speed rises. But if core losses climb, the whole balance shifts. Temperature rises. Efficiency drops. Magnets in a PM motor see more heat, which can lead to irreversible demagnetization if you push too far. Good laminations help the whole system run in a safe, efficient space.
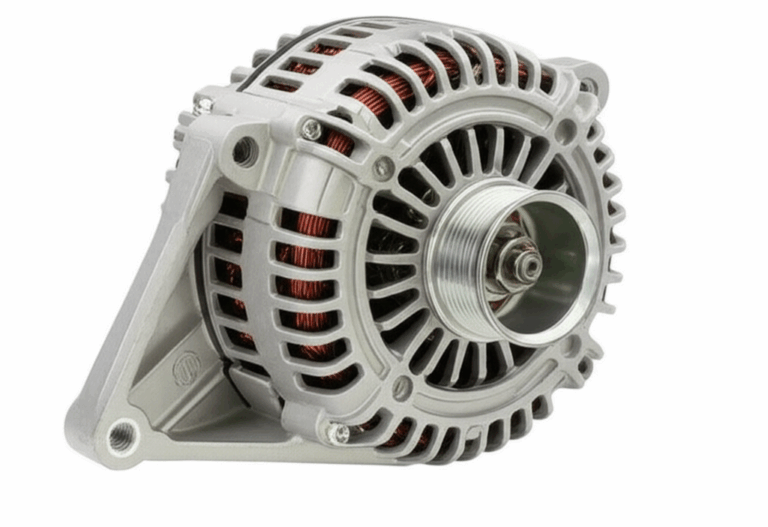
Materials and Manufacturing: Electrical Steels, Cobalt Alloys, Stamping vs. Laser, and Stack Assembly
Let’s switch hats and act as your guide. You’re choosing material and a manufacturing route for motor core laminations. We’ll split the landscape into material considerations then manufacturing and assembly processes. This is the heart of design and sourcing.
Material Considerations
1) Non‑oriented silicon electrical steels (NOES, CRNGO)
- What they are: Low‑carbon iron with silicon added to improve resistivity and reduce losses. “Non‑oriented” means the magnetic properties are similar in all directions in the sheet plane, which suits rotating machines.
- Why they’re popular: Great balance of cost, performance, and availability. You’ll see grades grouped as M‑grades or by specific loss targets. Standards such as ASTM A677 and IEC 60404 series define properties and test methods.
- Typical use: General‑purpose motors, BLDC stators, robotics, industrial machinery, fans and pumps. Common lamination thicknesses range from around 0.50 mm down to 0.20 mm for higher frequency or lower loss needs.
- Pros: Low cost, good magnetic permeability, decent saturation flux density, broad supplier base.
- Cons: Not the lowest loss possible at high frequency. Core losses rise with frequency and flux density. Very thin gauges can be harder to stamp cleanly.
2) Grain‑oriented electrical steels (GOES, CRGO)
- What they are: Steels processed to align grains so magnetic properties are superior along the rolling direction.
- Why not for motors: Great for transformers where the flux stays aligned in one direction. Rotating machines swing flux through different directions in the sheet plane, so GOES loses much of its advantage and can perform worse than NOES due to anisotropy.
- Use where it shines: Transformers, inductors, and static applications with directional flux. That’s why you see it in EI and UI cores.
- Takeaway: Use GOES for transformer lamination cores, not for standard rotating DC motor rotors or stators.
3) Cobalt‑iron alloys
- What they are: High‑performance soft magnetic alloys such as 49–50% Co with Fe and a bit of V in some grades. Known for high saturation flux density and good strength at temperature.
- Why they shine: High saturation allows higher air‑gap flux or smaller cores for a given torque. That can increase power density, which is gold in aerospace and high‑speed machines.
- Pros: High saturation flux density, good at elevated temperatures, strong mechanical properties.
- Cons: High cost. Forming and heat treatment require tight control. Core losses can be higher than premium electrical steels at some frequencies if you don’t choose the gauge correctly.
4) Nickel‑iron soft magnetic alloys
- What they are: Alloys with high nickel content (think “permalloy”) with very high permeability and very low coercivity.
- Use cases: Sensors, magnetic shielding, and specialized low‑loss cores where saturation flux density limits aren’t a deal‑breaker. For mainstream motor rotors or stators they’re less common due to lower saturation and cost.
5) Amorphous and nanocrystalline ribbon
- What they are: Rapidly solidified metals with no long‑range crystalline structure or with nanometer‑scale grains. Extremely low hysteresis and eddy current loss in the ribbon direction.
- Use cases: High‑frequency magnetic components. Motors running at very high electrical frequencies can benefit, yet mechanical handling and stack assembly become challenging. Cost and form factor often steer teams back toward thin‑gauge NOES in many motors.
6) Soft magnetic composites (SMC)
- What they are: Iron powder with an insulating binder pressed into 3D shapes. Each particle is insulated to break up eddy currents in all three dimensions.
- Use cases: 3D flux paths, axial flux motors, or designs where geometric freedom beats lamination constraints. They trade some permeability and saturation versus laminated steels. Great for certain BLDC topologies, not a general replacement.
A practical rule of thumb
- For most brushed DC motors and many BLDC motors, start with a thin‑gauge non‑oriented silicon steel. Evaluate core loss at your operating flux density and electrical frequency. If you need higher power density or better high‑temperature behavior, explore cobalt‑iron with your supplier early since cost and processing change your economics.
Relevant deep‑dive resource: a primer on electrical steel laminations can help you compare NOES vs. GOES and coating options.
Manufacturing and Assembly Processes
Picking the right process means matching volume, precision, edge quality, and magnetic performance.
1) Stamping (progressive die)
- What it is: High‑speed presses stamp laminations from coil stock. Progressive dies create slots, holes, and external profiles in sequence.
- Best for: High‑volume production with stable designs. Excellent cost per part once tooling is amortized.
- Pros: Speed, repeatability, tight dimensional control, and low burr if maintained. You can stamp thin gauges efficiently.
- Cons: Tooling cost and lead time. Design changes after tooling lock can get expensive.
2) Laser cutting
- What it is: A laser cuts profiles directly from sheet or strip.
- Best for: Prototypes, low volume, and complex geometries without tooling.
- Pros: Fast iteration. No tooling. Fine features possible.
- Cons: Heat‑affected zones can degrade magnetic properties and raise core loss. Edge recast can increase burr or insulation damage. You mitigate with process control, post‑processing, or by undersizing and finishing.
3) Wire EDM
- What it is: A wire erodes the profile through the material with electrical discharges.
- Best for: Prototypes and precision parts that demand minimal mechanical stress and tight tolerances.
- Pros: Excellent dimensional accuracy. No mechanical shear. Minimal burr.
- Cons: Slow and costly for volume. Some surface layer changes can occur and need evaluation.
4) Waterjet
- Rare in electrical steel because water and abrasive can damage insulation coatings and leave rough edges. Use only with supplier guidance.
5) Insulation coatings
- Each lamination needs an insulating layer to interrupt eddy currents between sheets. Coatings range from inorganic phosphate films to organic varnishes. Standards such as ASTM A976 classify coating types and test adhesion and interlaminar resistance.
- The right coating balances punchability, stack bonding needs, and thermal stability. It also affects interlaminar friction during stacking and the final noise signature.
6) Stack assembly methods
- Interlocking: Tabs formed in stamping lock laminations like LEGO bricks. No adhesive required. Great for speed. Very low impact on magnetic properties when designed well.
- Bonding: Varnish or adhesive bonds laminations into a solid core. Good vibration damping and noise control. Clean edges. Requires controlled curing.
- Welding: Fast structural attachment for stacks and end rings. Be careful near the active magnetic path since welds can short laminations locally and increase eddy losses. Use sparingly or away from flux paths.
- Riveting or banding: Mechanical fastening that avoids heat. Can add assembly time and affect balance in high‑speed rotors.
7) Stator vs. rotor specifics
- Stators carry slots for windings. Tooth and slot geometry affect magnetic flux density distribution, torque ripple, and acoustic noise. Skewing stator or rotor slots reduces cogging torque.
- Rotors demand tight control of concentricity, bore size, skew angle, and balance. Surface finish and burr control matter for mechanical integrity and low acoustic noise.
You’ll find a broad overview of design considerations in motor core laminations. For component‑specific detail, the differences between a stator core lamination and a rotor core lamination matter, especially when you’re chasing low noise and consistent torque.
Best Fit by Application: Matching Material and Process to Use Case
Let’s walk through common scenarios and what usually fits best.
1) Brushed DC motors for power tools and appliances
- Needs: High torque at low voltage, rugged operation, cost control, decent efficiency.
- Typical choices: Non‑oriented silicon steel around mid‑range thickness for manufacturability and cost. Progressive die stamping with interlocking or bonding. Skewed rotor laminations to reduce torque ripple if acoustics matter.
- Watch‑outs: Keep burrs low to protect winding insulation. Verify core loss and temperature rise at duty cycle peaks.
2) BLDC motors for robotics and drones
- Needs: High efficiency, light weight, precise control, lower mechanical noise, often high electrical frequency.
- Typical choices: Thinner‑gauge NOES or premium low‑loss grades to cut eddy losses at higher electrical frequency. Bonded stator stacks to reduce buzz and to hold tight geometry. For concentrated windings and tooth‑tip flux, control tooth saturation carefully.
- Consider: For the stator, see the nuances of a BLDC stator core because slot fill, tooth geometry, and lamination thickness drive both torque and thermal behavior.
- Watch‑outs: Laser cutting can raise losses. Validate with core loss tests or pick stamped prototypes early if your frequency sits high.
3) Industrial automation and conveyors
- Needs: Long life, consistent torque, good efficiency under continuous duty, easy sourcing globally.
- Typical choices: NOES M‑grades matched to the electrical frequency and flux density of your drive. Stamped stacks with bonding for mechanical quietness in office or lab environments.
- Watch‑outs: Specify test conditions for core loss, not just “grade.” Your actual operating B and frequency matter.
4) EV traction and high‑power density machines
- Needs: Very high torque per volume, tight thermal limits, wide speed range, and aggressive acoustic targets.
- Typical choices: High‑end NOES at thin gauge or cobalt‑iron in some stages. Multi‑segment stators, hairpin windings, skew strategies. Heavy modeling and testing.
- Watch‑outs: Costs rise quickly with exotic alloys. Validate added value with system‑level efficiency maps and duty cycles.
5) Transformers and inductors
- Different animal: Use grain‑oriented steels and lamination shapes like EI and UI for directional flux paths and low core loss at mains frequencies. You can explore transformer lamination core standards and shapes when you’re not spinning rotors.
Honest trade‑off example: Laser cutting shines for prototypes and complex low‑volume work. It flexes with design change. It may raise core loss. If you need a crisp read on motor efficiency, move to stamped laminations early since you will stamp in production.
Performance Factors That Drive Choices: Torque‑Speed, Efficiency, and Direction Control
Let’s tie the electromagnetic basics to practical design outcomes.
- Torque production in electric motors
- Torque is proportional to magnetic flux times current and the number of active conductors under load. Higher flux increases torque. Higher current increases torque. You shape flux with lamination material, tooth geometry, and air‑gap length.
- Speed‑torque curve of a DC motor
- For brushed DC motors the curve is roughly linear from no‑load speed down to stall torque. Back EMF rises with speed and reduces current. As load increases, speed drops. In practice friction and armature reaction nudge the straight line, yet the mental model holds for quick checks.
- Efficiency drivers
- Copper loss: I²R in windings.
- Core loss: Eddy currents and hysteresis in the stator and rotor. Lamination thickness, coating, and alloy tune this.
- Mechanical loss: Bearings and windage.
- Stray load loss: Harmonics and leakage.
- You reduce core loss by choosing thin gauges and low‑loss alloys, and by keeping local flux density where the material behaves efficiently. Slot and tooth choices matter. Coatings and bonding help keep losses predictable by maintaining interlaminar resistance.
- Back EMF in DC motors
- Back EMF is the induced voltage that opposes supply. It’s proportional to speed and flux. It stabilizes current and sets your operating point with a given load.
- Speed control and direction reversal
- Vary voltage or use PWM for speed. Reversing supply polarity flips direction in a brushed DC motor. BLDC controllers reverse phase order to reverse rotation while managing timing with sensors or sensorless estimation.
- DC vs. AC motor backdrop
- AC induction motors use rotating magnetic fields and slip to create torque. DC motors create torque through commutation that keeps force unidirectional. The physics overlaps through electromagnetism and Lorentz forces, yet the implementation differs.
Procurement and Quality: Specs, Tests, and Standards That Prevent Surprises
If you specify laminations and want first‑pass yield, give suppliers the information they need and ask for the data that matters. Here’s a practical checklist you can copy into your RFQ or drawing notes.
Engineering and material details
- Material type and grade: Non‑oriented silicon steel grade with acceptable equivalents. If you target a cobalt or nickel alloy, state the chemistry and heat treatment requirements.
- Lamination thickness: Specify nominal and tolerance. Thinner gauges reduce eddy currents and raise handling demands.
- Insulation coating: Type or class per ASTM A976 or equivalent. Specify minimum interlaminar resistance and thermal rating.
- Magnetic test conditions: Specify flux density and frequency for core loss measurement per IEC 60404 methods. Include maximum allowable loss at those conditions.
- B‑H curve expectations: If relevant, state target permeability and coercivity ranges at operating flux levels. Coercivity is the resistance to demagnetization.
- Stator and rotor geometry: Slot dimensions, tooth tip radii, stack height, skew angle if any, and critical concentricity.
- Rotor dynamics: Balance grade, maximum safe RPM, and bore tolerances.
Manufacturing and inspection
- Process: Stamping vs. laser vs. EDM. State if prototypes can be laser cut but production must be stamped.
- Burr and edge quality: Maximum burr height and edge taper. State chamfers or deburr requirements to protect windings.
- Stack integrity: Bonded vs. interlocked vs. welded. If welded, specify weld location outside active flux paths.
- Flatness and parallelism: Specify for lamination stacks, not just single laminations.
- Dimensional inspection plan: CMM on key features, sampling rate, and PPAP level if automotive.
- Traceability and certificates: Mill certs for coil stock, coating certs, and core loss test reports. Consider both stator and rotor stacks.
Packaging and logistics
- Corrosion protection and handling: Dry packs or VCI, separators to avoid fretting of coatings, and stack alignment to avoid warpage.
- Regional standards: If your product follows IEC or NEMA standards, note frame size conventions or mounting interfaces so lamination stack features align downstream.
Internal alignment
- Involve the electrical and mechanical teams early so the lamination spec aligns with expected flux density, temperature rise, and slot fill factor. Over‑specifying a premium grade when your drive runs at low electrical frequency wastes money. Under‑specifying at high speed invites heat and noise you’ll fight later.
If you’re looking for a quick primer on the building blocks of stacks and shapes, you can scan the home page for core lamination stacks. It will help you visualize the breadth of options before you lock your own.
Tying Back to “How DC Motors Work”: Components, Forces, and Laminations
Let’s map the foundational DC motor concepts to lamination decisions so you can see the whole picture.
- DC motor components and LSI concepts in play
- Stator and rotor interaction sets the magnetic circuit. Magnetic flux flows through stator teeth, across the air gap, into rotor teeth, and back. Magnetic field lines prefer low reluctance paths, so high‑permeability materials steer flux efficiently.
- Armature winding operation determines mmf (magnetomotive force), which drives flux. Current produces magnetic field according to Ampere’s Law.
- Commutation keeps torque unidirectional in brushed motors, while BLDC controllers handle switching electronically. Either way the coil’s current reverses at the right time.
- Lorentz force on conductors in a magnetic field produces torque. Fleming’s Left‑Hand Rule shows the force direction. The right‑hand rule helps with current and field direction.
- Back EMF regulates current and stabilizes speed. Lenz’s Law captures the sign convention.
- Energy conversion: electrical to mechanical through electromagnetic interaction. Losses subtract along the way: core loss, copper loss, mechanical loss.
- How laminations influence each factor
- Magnetic field strength and torque: Better permeability and higher saturation flux density let you push more flux for a given current or reduce size for the same torque.
- Efficiency: Thinner, well‑insulated laminations cut eddy currents. Alloys with low coercivity cut hysteresis. Together they lower core loss.
- Speed capability: Lower losses at higher electrical frequency keep temperatures down so you can run faster safely.
- Noise and torque ripple: Slotting, skew, and bonding damp vibration and reduce cogging in PM DC motors and BLDCs.
- Practical DC motor examples where laminate decisions shift outcomes
- Robotics DC motor control benefits from thin‑gauge NOES for precise positioning under PWM drives.
- Electric vehicle motor technology leverages advanced BLDC or PMSM variants with premium lamination stacks for high efficiency.
- Power tool motors often stick with robust NOES and stamped interlocks. They trade a bit of efficiency for proven durability and cost.
Common Questions and Straight Answers
- Does lamination thickness always need to be as thin as possible?
- No. Thinner gauges cut eddy losses at higher frequency. They cost more and can be harder to stamp. Match thickness to your electrical frequency and flux density.
- Should I use grain‑oriented steel for my motor because it has low loss?
- Not for rotating fields. GOES shines in transformers where flux stays in one direction. Rotating machines see changing directions so NOES wins most of the time.
- Are cobalt‑iron laminations worth it?
- If you need high saturation flux density and power density, yes. If your motor runs at modest flux and frequency, premium NOES likely delivers better cost per watt saved.
- Is welding bad for stacks?
- Welding near active flux paths can short laminations and increase loss. Place welds carefully or use bonding and interlocks where possible.
- How do BLDC stator laminations differ?
- BLDC stators often use concentrated windings and specific tooth geometries to manage flux density and reduce eddy losses from high PWM ripple. Slot shapes and bridge thickness matter to avoid local saturation hot spots.
Your Engineering Takeaway: Actionable Next Steps
Here’s the short list you can act on today.
- Define your magnetic operating point
- Estimate electrical frequency and flux density in teeth and back iron. Those two numbers drive lamination grade and thickness.
- Select material with intent
- Start with non‑oriented silicon electrical steel. Move to thinner gauges or premium grades as frequency and loss targets demand. Consider cobalt‑iron only when power density or temperature demands drive the choice.
- Control losses by design
- Use thin, well‑coated laminations. Keep burrs low. Choose bonding or interlocking to maintain interlaminar insulation through the stack.
- Match process to volume
- Laser or EDM for prototypes. Progressive die stamping for production. If you prototype by laser, validate core loss impact early, then switch to stamped samples before finalizing efficiency claims.
- Specify and verify
- Put magnetic test conditions on the drawing per IEC 60404 methods. Ask for core loss reports at your B and frequency. Require coating class, burr limits, flatness, skew angle, and stack height tolerances.
- Think stator and rotor as a system
- Stator slot geometry, rotor skew, and air‑gap all shape torque ripple and noise. Integrate these choices with lamination spec to avoid redesign loops later.
- Keep BLDC nuances in mind
- For high‑frequency BLDC, consider thinner NOES gauges, careful tooth design, and bonded stacks. Avoid local saturation that raises loss and distorts the back EMF shape.
- Partner with your lamination supplier
- Share your duty cycle, thermal limits, and acoustic targets. Ask for alternatives with pros and cons. A supplier who can speak to both stator core lamination and rotor core lamination trade‑offs will help you reach your torque and efficiency goals faster.
If you need a quick orientation before a design review, skim an overview of motor core laminations and refresh on the electrical steel options with this short read on electrical steel laminations. Bring those insights to your next internal discussion. You’ll set clearer requirements and cut iteration time.
Final note on sources and standards
- For magnetic testing and terminology, IEC 60404 series and ASTM standards such as ASTM A677 and ASTM A976 provide the foundation. Manufacturer data sheets and peer‑reviewed IEEE papers offer application‑specific loss curves and process notes. Use them to validate your specific operating point rather than relying on generic grade labels.
When you understand how DC motors convert current to motion, the lamination conversation becomes easier. You’re no longer choosing “a steel.” You’re shaping flux, losses, and noise with purpose. That’s how you design a DC motor that works the way you want on day one and keeps working years down the road.