DIY Guide: How to Install a Starter Motor in Your Car (Step-by-Step)
Table of Contents
- Introduction: How I Knew My Starter Was Failing
- Safety First: The Rules I Never Break
- Tools and Materials I Use for Starter Replacement
- Quick Diagnosis: Confirm the Starter Is the Culprit
- Removing the Old Starter Motor
- A. Gaining Access
- B. Disconnecting Electrical Connections
- C. Unbolting and Removing the Starter
- Installing the New Starter Motor
- A. Prep and Fitment Check
- B. Position and Mount
- C. Reconnect Electrical Connections
- D. Reinstall Obstructing Components
- Post-Installation Checks and First Start
- Troubleshooting After Replacement
- When I Hand It to a Pro
- Cost, Time, and Part Quality: What to Expect
- A Quick Look Inside a Starter: Why Quality Matters
- Final Tips: Keep Your Starting System Healthy
- FAQ: Common Questions I Get
Introduction: How I Knew My Starter Was Failing
The first time I replaced a starter motor I was standing in a grocery store parking lot with a cart full of melting frozen food. My car would not crank. No matter how hard I turned the key I got one solid click. Then nothing. The battery checked out. The lights looked bright. I heard that familiar click from the solenoid yet the engine did not turn. I had seen the same symptoms on other cars I worked on. I knew I had a failing starter motor.
Since then I’ve replaced starters on Hondas, Toyotas, Fords, and Chevys. Some were easy. Some felt like I needed yoga training and three elbows. In this guide I’ll show you the exact process I follow. You’ll see what tools I use, how I remove the old starter, how I install the new one, and how I test everything. I’ll call out the common pitfalls and the little tricks that save time and knuckles.
If your car clicks but won’t crank, grinds when starting, starts intermittently, or smokes near the starter you’re in the right place. You can absolutely replace a starter motor yourself with basic tools, patience, and a clear step-by-step plan.
Safety First: The Rules I Never Break
This job sits near the top of the DIY list for safety. You work around high current wiring and you may work under the vehicle. I follow these rules every time.
- Disconnect the battery before any work. Negative terminal first. No exceptions.
- Park on level ground. Transmission in Park or Neutral. Parking brake set. I also use wheel chocks.
- Lift the vehicle only at proper lifting points. Use a floor jack to raise it. Set jack stands under the frame or factory pinch welds before you crawl under. Jack stands are mandatory.
- Wear gloves and safety glasses. You’ll brush against sharp heat shields, rust, and road grit.
- Keep a fire extinguisher nearby if you have one. Starters can spark if mishandled during testing.
- Use a work light instead of a lighter or match. Sounds silly until you see how much vapor collects near exhaust components.
These rules keep you safe. They also prevent accidental short circuits that can damage wiring, melt a battery cable, or fry the new starter.
Tools and Materials I Use for Starter Replacement
Over time I’ve built a go-to kit for this job. You might already own most of it.
- Essential hand tools
- Socket wrench set with deep and shallow sockets
- Extensions and a universal joint for tight angles
- Wrench set
- Torque wrench
- Breaker bar for stubborn bolts
- Wire brush for cleaning grounds and terminals
- Electrical and diagnostics
- Multimeter
- Work light or headlamp
- Consumables and extras
- Penetrating oil
- Anti-seize compound for mounting bolts
- Dielectric grease for electrical connections
- Shop rags and a small wire brush
- Cable ties to tidy up wiring
- Lifting and safety
- Floor jack
- Jack stands
- Wheel chocks
- Nice-to-have
- Vehicle-specific repair manual or a reputable online guide
- OBD-II scanner to check for stored codes related to starting or charging systems
Parts you’ll need:
- New starter motor. You can go OEM, aftermarket, or remanufactured. I’ll share notes on each later.
- New heat shield if the old one is missing or damaged on vehicles that use them.
- Starter shims for vehicles that require them. Many don’t. Some GM vehicles do.
- Replacement mounting bolts only if the old ones are damaged.
Quick Diagnosis: Confirm the Starter Is the Culprit
Before I remove anything I confirm the diagnosis. Replacing the starter won’t fix a weak battery or a bad ground.
Here’s the quick path I follow:
- Battery test. Check voltage at the battery posts with the car off. A healthy battery sits around 12.6 V. If you read under 12.2 V charge or replace the battery before you blame the starter.
- Load check. If you have a battery tester use it. If not watch the dome light while a helper turns the key. If the light goes totally dim the battery may be weak or your connections are corroded.
- Inspect cables and grounds. Clean both battery posts. Check that the ground cable from the battery to the chassis and engine block is tight and corrosion free. The starter grounds through the engine block. A poor ground mimics a bad starter.
- Listen. A single loud click often points to a solenoid issue. Repeated rapid clicks usually mean low voltage from a weak battery or a bad connection. Grinding points to incorrect shimming or damage to the flywheel or flexplate ring gear.
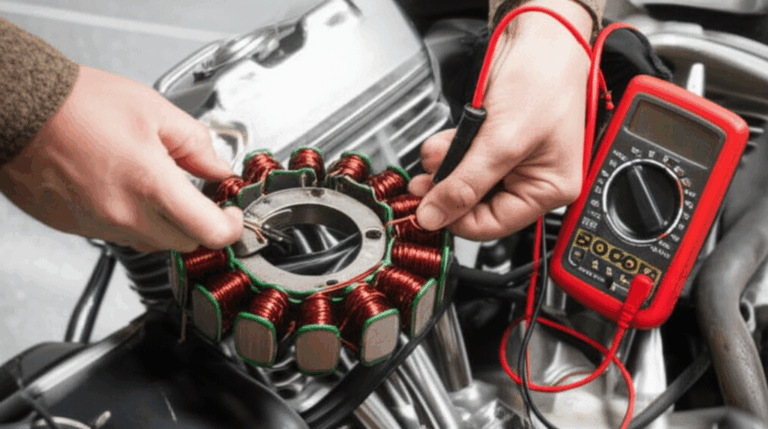
- Voltage drop test on the starter circuit. Set the multimeter to DC volts. Check between the battery positive post and the starter main post while cranking. More than about 0.5 V drop on the positive side suggests resistance in the cable or connections. Do the same from the battery negative post to the starter case to test the ground side. More than about 0.3–0.5 V suggests a bad ground or corroded contact.
- Check fuses and the starter relay. Look at the fuse box layout in your manual. Swap the starter relay with an identical one if available to rule out a bad relay.
- Neutral safety switch and clutch switch. Try starting in Neutral instead of Park. Press the clutch fully on manuals. If it cranks in Neutral only you may have a switch issue not a bad starter.
If the battery and grounds are good, the relay and fuses pass, and the voltage drop test looks clean I move forward with starter replacement.
Removing the Old Starter Motor
A. Gaining Access
First I locate the starter motor. On many front-wheel-drive cars it sits at the front or rear of the engine near the transmission bell housing. On some trucks it lives on the passenger side low and forward. A few cars hide the starter under the intake manifold. If your model tucks it up high you may not need to jack the car. If it sits low I get the car in the air safely with a jack and jack stands.
I remove anything in the way. That can include:
- Heat shields
- A small exhaust section or downpipe on tight layouts
- Intake tubing or a battery tray
- Splash shields under the engine
I photograph the layout before I start. One quick shot can save you from guessing where a heat shield bolt goes later.
B. Disconnecting Electrical Connections
With the battery negative disconnected I move to the starter. I find two connections most of the time:
- The main battery cable on a stud with a nut. It’s the large gauge wire.
- The solenoid control wire on a push-on spade or small ring terminal.
I label them or take a clear photo. Then I remove the nut from the main post and slide the cable off. I pull the solenoid wire next. A little dielectric grease later will help keep these clean and dry.
Pro tip: If the nut fights you let penetrating oil work for a few minutes. I hold the stud steady if needed to avoid twisting it in the solenoid housing.
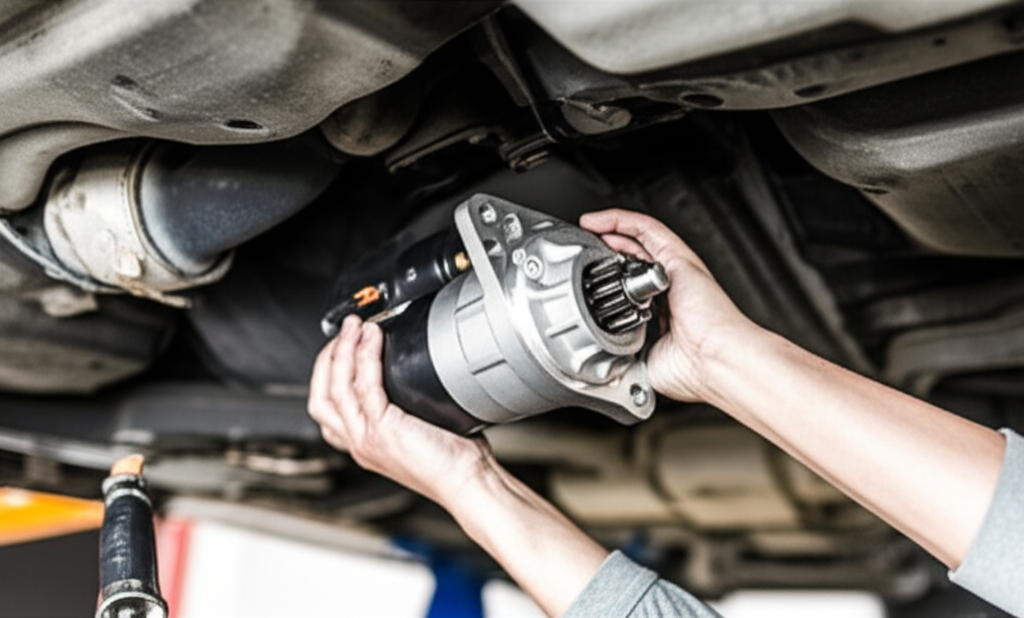
C. Unbolting and Removing the Starter
Most starters hold on with two or three mounting bolts that go into the engine block or transmission bell housing. I spray penetrating oil on each. Then I break them loose with a breaker bar or a long-handled ratchet.
I keep my free hand under the starter as I remove the last bolt. Starters are denser than they look. You don’t want it dropping on your face. I wiggle it past wiring and shields. A quarter turn here and there usually frees it.
Before I set it down I check the flywheel or flexplate ring gear with a light. Look for chipped or missing teeth. If you see heavy damage you’ll want a pro opinion because the transmission may need to come out for ring gear service.
Installing the New Starter Motor
A. Prep and Fitment Check
I open the box and compare the new starter with the old one. I check:
- Clocking and shape of the housing
- Position and thread size of the electrical studs
- The nose length and diameter
- The pinion gear count and diameter
- Mounting bolt hole size and spacing
Everything should match. I clean the engine block mounting surface with a rag and a wire brush. Good contact here improves grounding.
I apply a tiny dab of anti-seize to the threads of the mounting bolts. You don’t need much. Never put anti-seize on electrical studs or the mating face.
If your vehicle calls for a shim I lay it out now. GM designs sometimes need shims to set proper gear mesh. I’ll cover shimming in the troubleshooting section as well.
B. Position and Mount
I guide the new starter into place and seat it against the engine block or bell housing. I hand-thread all mounting bolts. Hand-threading avoids cross-threading which can ruin your day and your block. Once the bolts seat I torque them to your vehicle’s spec. Many starters land in the 25–35 ft-lb range. Some run higher. Always check a repair manual for your exact spec. This step matters. Too loose and the starter can move under load. Too tight and you can strip threads or crack the housing.
C. Reconnect Electrical Connections
I connect the smaller solenoid control wire first. Then I place the main battery cable on the large stud and tighten the nut snugly. I don’t over-torque it. I add a little dielectric grease to the connections to slow corrosion. If the starter came with a protective boot I make sure it fully covers the main stud.
I route the wires away from the exhaust and moving parts. I use cable ties where needed so nothing rubs through or vibrates loose.
D. Reinstall Obstructing Components
Everything that came off goes back on now. Heat shields, small exhaust pieces, intake tubes, splash shields, and the battery tray. I double-check that nothing pinches the new starter wires.
Post-Installation Checks and First Start
Before I lower the car and reconnect the battery I run a quick checklist.
- Are the mounting bolts torqued
- Are both electrical connections secure and protected
- Is the wiring routed cleanly away from heat and sharp edges
- Are all shields and components reinstalled
Now I reconnect the battery. Positive cable first. Negative cable last. I get in the car and turn the key or push the start button. A healthy starter spins strong with a steady quick whir. The engine should fire normally without grinding. I listen for odd noises. I glance at the dash for any warning lights. If all looks and sounds normal I take a short test drive and restart the car a few times to confirm consistent operation.
Troubleshooting After Replacement
Sometimes a new starter doesn’t solve the problem. Sometimes a brand-new unit makes a noise that turns your stomach. Here’s how I sort issues fast.
- No crank at all after install
- Check battery charge. A new starter won’t save a weak battery.
- Confirm both battery clamps are clean and tight. Don’t forget the ground strap to the engine block.
- Verify the solenoid control wire is on the correct terminal.
- Check the starter fuse and relay again.
- Inspect the neutral safety switch or clutch switch.
- Clicking but no crank
- Low battery voltage under load.
- Loose or corroded main battery cable at the starter or battery.
- Faulty new solenoid. It happens more than you expect with reman units.
- Grinding noise when cranking
- Incorrect shimming on models that require shims. Start with the shim thickness recommended by your parts supplier or manual. Grinding often means the pinion sits too tight against the flywheel teeth. Adding a thin shim can increase clearance.
- Damaged flywheel or flexplate ring gear. Rotate the engine by hand and inspect more teeth.
- Wrong starter for your application. Even small differences in nose length or gear diameter will cause noise.
- Car cranks slowly and then stops
- Check for voltage drop on both positive and ground sides during cranking.
- Inspect the ground cable from the battery to the block and any engine-to-chassis ground straps.
- Check the alternator and charging system. A weak alternator leaves the battery undercharged which stresses a new starter.
- Intermittent no crank
- Heat soak in starters near exhaust components. Verify the heat shield is installed. Some vehicles need a replacement or additional shielding.
- Loose wiring at the ignition switch or starter relay.
- Damaged wiring harness near the bell housing or exhaust.
If I suspect the starter itself I bench test it. I secure the starter in a vise or on the ground. I connect jumper cables from a known good battery. Negative to the starter case. Positive to the large stud. Then I use a small jumper to feed the solenoid terminal from the positive. The pinion should kick out and the motor should spin smoothly. I keep this test short. Starters aren’t meant to run free for long.
When I Hand It to a Pro
I do most starter jobs in my driveway. I still hand some to a professional mechanic.
- The starter sits under the intake manifold or behind major accessories like the power steering pump or AC compressor.
- The exhaust must come off and the bolts look like they grew up in a salt mine.
- The bell housing threads feel compromised.
- The flywheel ring gear looks damaged.
- I can’t chase down an electrical gremlin after solid testing.
There’s no shame in calling in help. You’ll protect your car and your sanity.
Cost, Time, and Part Quality: What to Expect
Here’s what I see in real life.
- DIY time: 2 to 6 hours. Some trucks take one hour. Some transversely mounted V6 engines eat a Saturday.
- DIY savings: You usually save 50% to 80% compared to shop prices because you avoid $150 to $600+ in labor.
- Pro cost: $300 to $1,000+ depending on the vehicle and parts quality. Many land around $450 to $700.
- New part lifespan: A good starter often lasts 5 to 10 years or 100,000 to 150,000 miles. Remanufactured units vary with rebuild quality.
- Return rates and misdiagnosis: Starters get returned more than many mechanical parts. I see misdiagnosis and weak batteries behind many “bad” replacements.
OEM vs Aftermarket vs Remanufactured
- OEM starters cost more but usually match fitment and durability. I lean this way on tough-to-access vehicles. I don’t want to do the job twice.
- Aftermarket new starters range widely. Reputable brands do fine in my experience. Stick with known names.
- Remanufactured starters can be excellent if the rebuilder uses quality components and tests thoroughly. They can also be inconsistent. Check the warranty. Inspect the unit. If the price looks too good it probably is.
A Quick Look Inside a Starter: Why Quality Matters
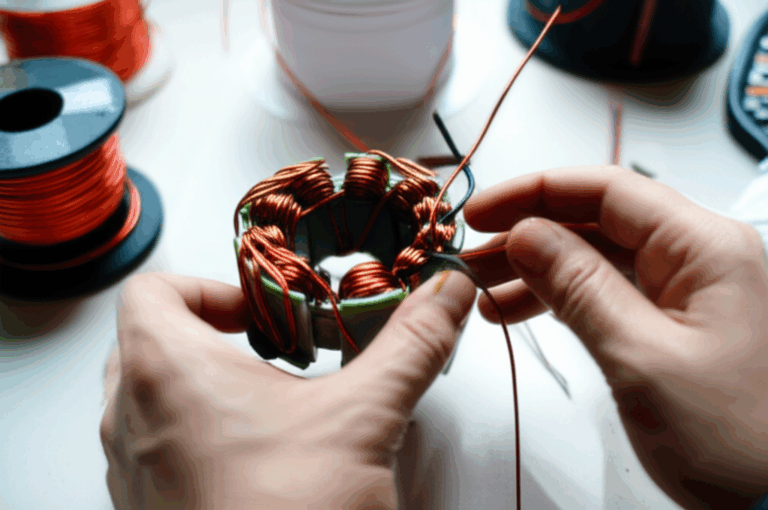
I’ve opened a few failed starters out of curiosity. Inside you’ll find a compact motor and a solenoid. The motor’s armature spins inside field windings or permanent magnets. You’ll see a commutator and brushes on brush-type designs. The solenoid pushes the pinion gear (also called the Bendix drive) into the flywheel ring gear then supplies power to the motor.
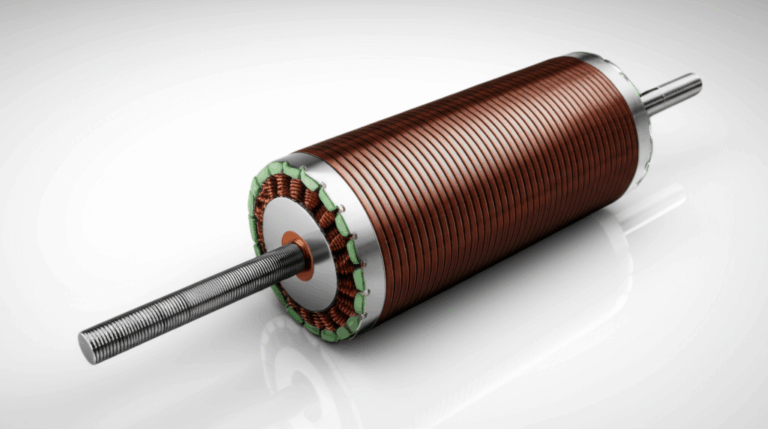
Two parts in particular have a huge impact on heat and efficiency: the stator and rotor cores. Good manufacturers use precise electrical steel laminations to reduce eddy currents and heat buildup. The thin stacked plates create the magnetic path without letting wasteful currents run wild. That translates to a cooler and more efficient starter under heavy load.
The motor section uses tightly stacked motor core laminations in both the stator and rotor. That stack quality affects torque, current draw, and noise. You can dig deeper into how a stator core lamination works and how a rotor core lamination completes the magnetic circuit. I won’t turn this into a motor design lecture. I will say this. Quality inside the motor shows up outside as fewer hot starts, less grinding, and a longer lifespan.
This is one reason I avoid the cheapest no-name starter on a car that’s hard to service. The difference hides inside the motor but you’ll feel it every winter morning.
Final Tips: Keep Your Starting System Healthy
I treat the starter as one part of a starting and charging system. If one part struggles the others feel it.
- Keep battery terminals clean and tight. A little dielectric grease after cleaning helps slow corrosion.
- Check the battery’s health twice a year. Cold weather finds weak cells fast.
- Inspect ground straps from battery to body and body to engine block. Replace frayed or corroded straps.
- Listen for new noises during starting. Grinding or a sudden slow crank deserves attention now not later.
- Don’t ignore warning lights. A charging system light might point to alternator issues that will stress the starter.
Step-by-Step Summary: The Quick Reference I Keep Handy
- Confirm the starter is the issue with battery tests, voltage drop checks, and relay inspection.
- Disconnect battery negative first.
- Raise the car safely and secure it with jack stands if needed.
- Remove shields or components for access.
- Label and disconnect the solenoid wire and main power cable.
- Remove starter mounting bolts and pull the starter.
- Clean the mounting surface. Check ring gear teeth.
- Compare old and new starters. Apply anti-seize to mounting bolt threads.
- Install the starter. Hand-thread bolts. Torque to spec.
- Reconnect wiring. Apply dielectric grease. Route wires safely.
- Reinstall shields and parts you removed.
- Reconnect battery positive first then negative.
- Start the car. Check for noise or warning lights.
FAQ: Common Questions I Get
Q: My car clicks but doesn’t start. How do I know it’s the starter
A: Check battery voltage first. Then run a voltage drop test on the starter circuit. If the battery is healthy and the drop is low yet the starter only clicks you probably have a bad solenoid or motor.
Q: Do I have to use jack stands if I’m only removing a splash shield
A: Yes. A floor jack can lose pressure. You need jack stands any time you work under a raised vehicle.
Q: Do I need to shim my new starter
A: Many cars don’t need shims. Some GM setups do. If you hear grinding on a GM product start with a thin shim between the starter and the mounting pad. Add or remove shims until the noise disappears and the gear mesh looks right. Always follow vehicle-specific guidance.
Q: Can I reuse the old bolts
A: Often yes if the threads are clean and the heads are not rounded. Replace damaged bolts. Torque them to spec.
Q: The starter spins on the bench test but the car still won’t start. What now
A: Revisit your wiring and grounds. Check fuses and the relay. Verify the ignition switch or neutral safety switch. Confirm the battery holds voltage under load.
Q: The new starter grinds on start-up. Will it wear in
A: Don’t hope for wear-in. Grinding means poor gear mesh or damage. Check shimming and inspect the ring gear before you ruin both parts.
Q: After I replaced the starter the engine cranks slowly
A: Check voltage drop on both sides of the circuit. Clean battery posts. Inspect the ground cable to the engine. Confirm your battery passes a load test.
Q: Should I choose OEM, aftermarket, or remanufactured
A: If access is awful I prefer OEM or a top-tier brand. On easy applications a quality reman or reputable aftermarket unit can be a smart buy. Focus on warranty and brand reputation.
If your starter motor failed you’re not alone. I’ve pushed carts full of groceries and dealt with sunbaked driveways to get cars going again. Follow the steps. Take your time. Respect the wiring and the torque specs. You’ll save real money and you’ll gain the kind of confidence you only get after you hear that engine fire up because you did it right.