Deep Clean Your Squirrel Cage Fan: A DIY Guide for Optimal HVAC Performance and Energy Savings
Table of Contents
- Introduction: Why I Clean My Squirrel Cage Fan and Why You Should Too
- Safety First: How I Prep the Work Area and Power Down
- Tools and Materials: What I Actually Use and Why
- Step-by-Step: How I Clean a Squirrel Cage Fan
- Step 1: Access the Blower Fan Assembly
- Step 2: Disconnect and Remove the Blower Assembly
- Step 3: Detach the Squirrel Cage Wheel from the Motor
- Step 4: Deep Clean the Blower Wheel and Housing
- Step 5: Drying Matters More Than You Think
- Reassembly and Testing: Put It Back Together and Verify Results
- Maintenance Schedule and Smart Habits: Keep It Clean and Efficient
- Troubleshooting and When to Call a Pro
- Common Mistakes I See and How to Avoid Them
- A Quick Note on Motors and Why You Never Want Them Wet
- Conclusion: Clean Fan, Better Air, Lower Bills
Introduction: Why I Clean My Squirrel Cage Fan and Why You Should Too
The first time I pulled a blower assembly out of a furnace I winced. The blades on the squirrel cage fan were packed with dust and greasy grime. No wonder the home had weak airflow and rising energy bills. I cleaned it, reassembled everything, and the difference hit me right away. Airflow jumped. The rattling noise vanished. The system sounded like it could finally breathe.
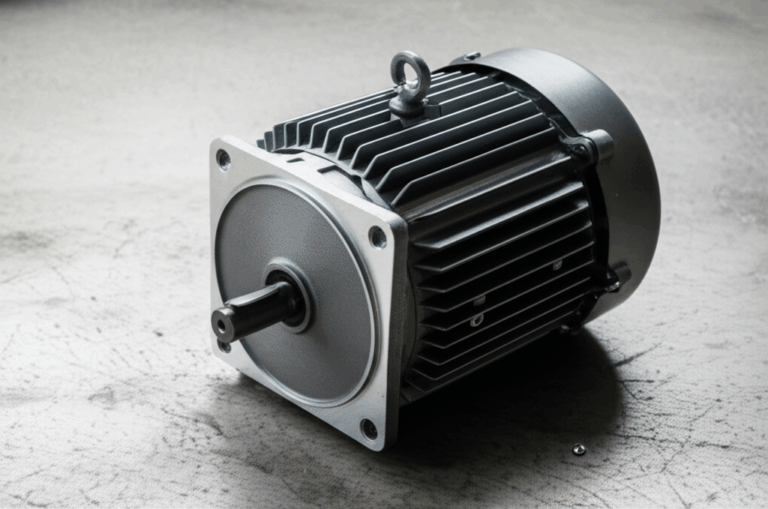
Here’s the thing. A squirrel cage fan works at the heart of your HVAC system. It’s the centrifugal blower wheel inside your furnace or air handler that pulls air through the return and pushes it across the heat exchanger or evaporator coil and out to your rooms. When that wheel is dirty you lose airflow and you lose efficiency. The motor works harder and you pay for it every month.
What made me a believer wasn’t a sales pitch. It was results I could feel. Industry data shows dirty fans and coils can reduce HVAC efficiency by 5–20% and a dirty blower alone can push energy use up to roughly 15%. I’ve seen airflow drop 20–30% in homes with heavy dust buildup on blower blades. Clean it and you often quiet the system and improve indoor air quality. You also ease the strain on the blower motor which can help extend system lifespan.
If you’re dealing with weak airflow, strange noises, poor cooling or heating, or higher energy bills your blower fan may be the culprit. This guide walks you through what I actually do. I’ll cover safety, tools, a step-by-step process, and how to put it all back together without drama.
Safety First: How I Prep the Work Area and Power Down
I never start until I make the system safe.
- Turn the thermostat to Off. If it’s calling for heat or cooling the blower could start while you’re working which you don’t want.
- Cut power at the breaker for the furnace or air handler. I always flip the service switch near the unit as well. No power means safer hands and a calmer mind.
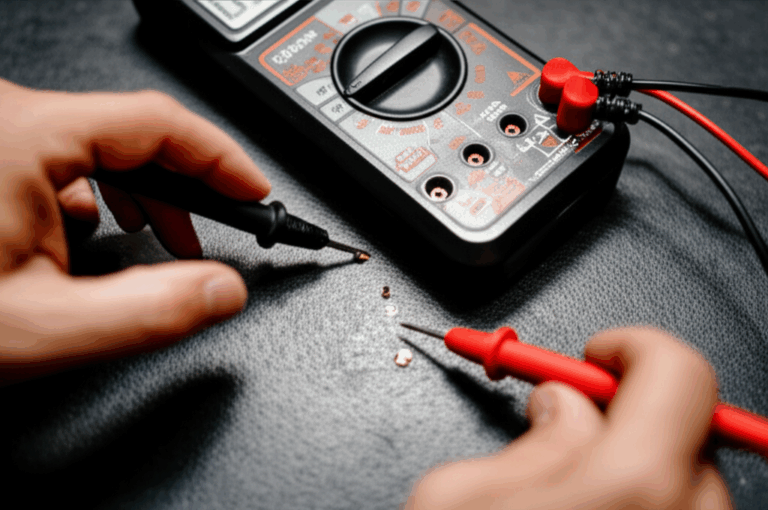
- Confirm power is off. I use a non-contact voltage tester at the control board area before I touch anything. A multimeter works too if you know how to use it safely.
Personal protective equipment matters. I wear safety glasses, gloves, and a dust mask or respirator. The dust in blower housings isn’t just dust. It can carry allergens and sometimes mildew or mold spores. Keep your lungs happy.
A few more safety notes I follow every time:
- Capacitors can hold a charge after you cut power. If I see a run capacitor near the blower motor I give it time to discharge before disconnecting wires. I also avoid shorting it with a screwdriver which is unsafe.
- If anything about the wiring scares you call an HVAC technician. There’s no shame in handing off electrical work if you’re not comfortable.
- If you have a gas furnace make sure your carbon monoxide detector works and keep your return air and supply vents unblocked after you reassemble the system.
Tools and Materials: What I Actually Use and Why
I’ve tried fancy gadgets and I always return to basics that work.
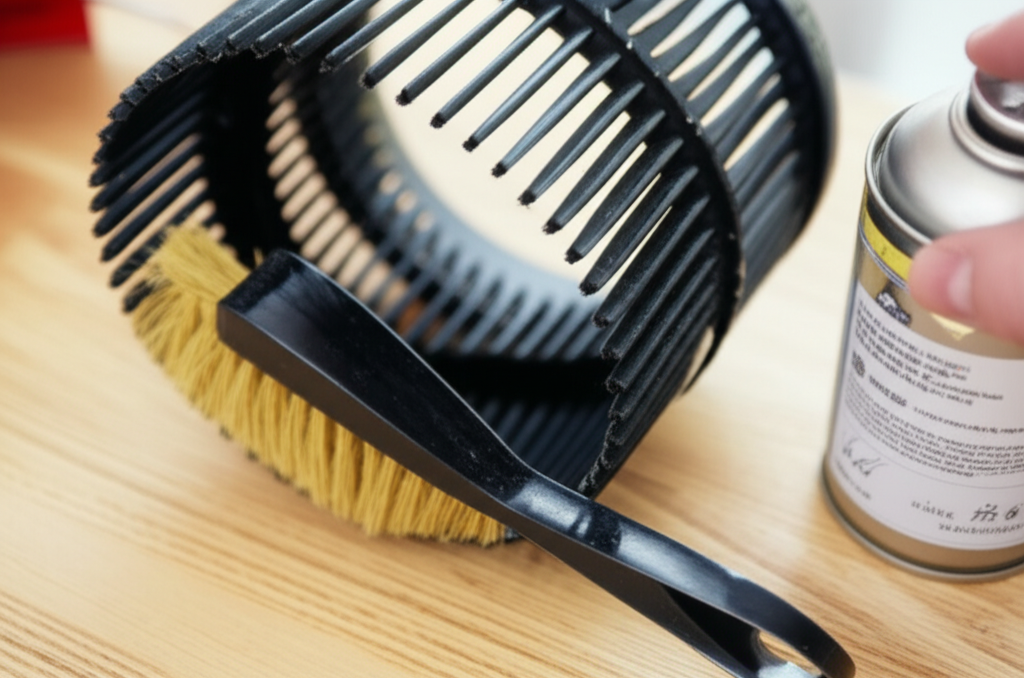
Cleaning tools:
- Shop vacuum with hose and brush nozzle. A must. It pulls out heavy dust without blasting debris into the motor.
- Soft-bristle brush and a small stiff-bristle brush or old toothbrush. Soft for general cleaning, stiffer for stubborn grime.
- Microfiber rags and a drop cloth to protect floors and keep parts clean.
- Compressed air can help in tight corners if you keep it away from the motor windings.
Cleaning solutions:
- Degreaser like Simple Green or a strong dish soap solution in a spray bottle. It cuts grime on blades and housing.
- Clean water for rinsing the blower wheel only when it’s fully removed from the motor and housing.
Other essentials:
- Screwdriver or nut driver set and a small wrench. Every unit seems to use different screws.
- Flashlight or headlamp. You’ll want to see into the housing and around the motor mount.
- Camera or your phone. I take photos of every wire and bracket before I disconnect anything. Those photos save time on reassembly.
- A marker or painter’s tape. I label connectors and note which bolts came from which holes.
- Optional multimeter for testing voltage or current draw after cleaning if you know what you’re doing.
Step-by-Step: How I Clean a Squirrel Cage Fan
You’ll find squirrel cage blowers in furnaces, air handlers, some bathroom fans, range hoods, and even in dryers. I’ll focus on residential HVAC first since that’s where most folks start. I’ll add notes for bathroom and kitchen exhaust fans and dryers in a moment.
Step 1: Access the Blower Fan Assembly
- Locate the unit. For a furnace it’s usually in a basement, utility room, or closet. For an air handler it may sit in the attic or a garage.
- Remove the access panels. I place screws in a magnetic tray or a labeled cup so nothing goes missing.
- Find the blower assembly. It looks like a metal drum or a rectangular housing with a round wheel inside. You’ll also see the blower motor mounted to the side or inside with a bracket.
- Take a quick look. If the blades show a ridge of dust and lint or if you see greasy grime you’ve got airflow restriction. If you spot mold growth consider wearing a better respirator and keep moisture away from the motor. If the blower wheel looks bent or rusted plan on extra time and care during cleaning.
Pro tip from my own shop routine. Photograph the wiring and motor mount now while everything’s still together. You’ll thank yourself later when it’s time to reassemble.
Step 2: Disconnect and Remove the Blower Assembly
- Cut power again if you’re paranoid like me. I prefer redundancy with electricity.
- Document every wire. I photograph the motor leads, the capacitor connections, and any quick-disconnect plugs. I label them with tape if the colors aren’t clear.
- Disconnect the wires. If a capacitor is present give it time to discharge. I never short a capacitor to discharge it. If you’re not certain about capacitor safety stop here and call a pro.
- Remove the mounting screws or bolts that hold the blower assembly to the cabinet. Some units have rails and the assembly slides out. Others need a gentle tilt and pull.
- Slide the entire blower assembly out. Go slow. Watch for wires or tape that still connect to the cabinet. I set the assembly on a drop cloth so I can work comfortably.
Step 3: Detach the Squirrel Cage Wheel from the Motor
You can clean in place but for a deep clean I remove the wheel.
- Find the hub and the set screw on the fan shaft. It often uses an Allen key. Spray a tiny bit of penetrating oil if it looks stuck.
- Loosen the set screw. Don’t strip it. Use the right size key and keep pressure straight.
- Gently tap the hub with a rubber mallet if it feels frozen. I support the wheel so I don’t bend a blade. Patience beats force here.
- Slide the wheel off the motor shaft. I note the orientation so I can reassemble with the same offset. If your wheel has a flat that lines up with the motor shaft keep that mental picture close.
If the wheel refuses to budge leave it connected and do a careful cleaning with minimal moisture. You can still get 80–90% of the benefit with a methodical dry clean and light degreasing on the accessible surfaces.
Step 4: Deep Clean the Blower Wheel and Housing
Here’s my routine that works across dirty furnace blowers, central air handler blowers, and commercial-style squirrel cage fans.
Initial dry cleaning:
- Vacuum loose dust and lint from the blades and the housing. The shop vac does heavy lifting. I hold the hose close to each blade and work around the circumference.
- Use a soft brush to lift caked dust then vacuum again. Don’t bend the thin metal blades since they affect balance.
Degreasing and scrubbing:
- Spray a degreaser or dish soap solution on the blower wheel. Keep spray off the motor and bearings. I use just enough to wet the grime and I let it sit a minute so it can break the bond.
- Scrub each blade with a stiff toothbrush. It’s tedious and it’s worth it. Dirt on centrifugal blades equals drag which equals airflow loss.
- Clean the housing interior. The scroll housing can hold dust ridges that recirculate debris back to the wheel.
Rinsing when safe:
- I only rinse when the blower wheel is completely detached from the motor and electrical parts. A quick rinse under a gentle stream of water works. I avoid high-pressure sprays that can bend blades or drive water into the hub.
- Shake out water then hand dry with towels. I finish with air drying for several hours.
Compressed air (optional):
- I sometimes use compressed air to clear tight spots in the housing. I blow debris away from the motor and I catch it with the shop vac nozzle nearby.
What about mold or mildew:
- If I see dark or musty buildup I wear a better respirator and I dispose of used rags outside. I never soak the motor. I also check the air filter and duct conditions since mold points to moisture problems upstream.
What about grease:
- Kitchen exhaust squirrel cage fans often carry sticky grease. A strong degreaser helps. I repeat light applications instead of one heavy soak which is safer for the metal and easier to rinse.
A note on “cleaning without water”:
- You can do a very effective dry clean with a shop vac, soft brushes, and a barely damp cloth. It takes longer yet avoids the risk of moisture near bearings or motor windings.
Proper disposal:
- I don’t pour oily or greasy wash water down a storm drain. I wipe excess onto rags and dispose of them per local rules. The remaining soapy water goes down a sink since it’s essentially dishwater after you strain out debris.
Step 5: Drying Matters More Than You Think
I learned the hard way that rushing this step causes headaches. Water trapped in the hub or near the set screw can sling out during a spin which makes a mess and can re-rust the shaft.
- Towel dry first. Get the big drops off.
- Air dry for several hours or overnight. I place the wheel somewhere warm and dry with good airflow.
- If you used water make sure the hub and set screw hole are bone dry. I’ve used a hair dryer on low to speed up the hub area. I keep heat gentle so I don’t warp anything.
Reassembly and Testing: Put It Back Together and Verify Results
Reattach the wheel:
- Slide the blower wheel onto the motor shaft. Align the flat on the shaft with the set screw if there is one. Center the wheel so it doesn’t scrape the housing.
- Tighten the set screw firmly. Manufacturers sometimes publish torque values for set screws and motor mount bolts. If you don’t have them snug it firmly with the correct tool without stripping it.
Reinstall the blower assembly:
- Slide the assembly back into its rails or mounting location. Watch for wiring harnesses and make sure nothing gets pinched.
- Secure the mounting screws or bolts. Even pressure across mounts helps prevent vibration.
Reconnect wiring:
- Use your photos and labels. Reconnect the motor to its capacitor and control board exactly as before. Double-check ground connections.
- Tidy excess wire with clips or ties so nothing rubs the wheel.
Close the unit and test:
- Replace all access panels. This matters because panels affect airflow and static pressure and you want a real-world test.
- Restore power at the breaker and service switch. Turn the thermostat to Fan On first to test the blower without heat or cool.
- Listen and feel. You want smooth airflow and no scraping. A gentle whoosh is fine. A rattle or cyclical hum means something is off. If you hear rubbing cut power and recenter the wheel.
Optional performance checks I like:
- With a clamp meter you can compare blower motor amp draw before and after cleaning. Lower amps at the same speed often means reduced static pressure and improved airflow.
- Hold a tissue at a supply vent. You’ll often see stronger pull and steadier flow after a deep clean.
- Check return filters. Replace them immediately after cleaning to keep the blower wheel clean longer.
Maintenance Schedule and Smart Habits: Keep It Clean and Efficient
How often should you clean the blower:
- I aim for once a year in average homes and twice a year if there are pets, heavy dust, or allergy concerns. HVAC pros will tell you the same thing. Annual or bi-annual service keeps buildup from getting out of hand.
Air filters are your best defense:
- Replace filters on schedule. Cheap filters clog fast and premium filters can restrict airflow if they’re oversized for your system. I look for the manufacturer’s recommended MERV rating then I stick to it.
- A clogged filter forces the blower to work harder which raises energy use and shortens motor life.
Preventative tips:
- Seal return duct leaks. Dust gets sucked in from attics and basements and lands on your blower wheel. Sealing ducts keeps the whole system cleaner and boosts efficiency.
- Keep supply and return vents unblocked. Proper airflow reduces static pressure and limits the dust that settles in the blower housing.
- Inspect the evaporator coil during blower cleaning. If the coil is dirty your system struggles to cool and your blower drags lint through the wheel again. Clean coils and a clean blower go hand in hand.
Lubrication and bearings:
- Many modern blower motors use sealed bearings which don’t need lubrication. If your motor has oil ports use a few drops of the specified HVAC motor oil and not general-purpose oil. Never over-oil bearings since excess oil can attract dust and migrate into windings.
- If you feel roughness when you spin the blower by hand or if you hear squealing that doesn’t go away after cleaning the bearings may be failing. Replace the motor or call a pro.
Checking balance after cleaning:
- Spin the wheel by hand and watch the outer rim. If it wobbles you may have bent a blade or the wheel is off center. A small wobble can become a big vibration at speed.
- If the wheel stays smooth yet you still have vibration check the set screw and motor mount bolts again.
Troubleshooting and When to Call a Pro
Dirty fan causing AC not cooling:
- A clogged blower wheel cuts airflow across the evaporator coil which reduces heat transfer. You’ll feel lukewarm air and long runtimes. Cleaning the wheel often helps. If cooling is still weak check the coil and filter.
Dirty fan causing furnace issues:
- Low airflow across the heat exchanger can cause limit switches to trip. The furnace starts then shuts down. A clean blower restores airflow and reduces nuisance shutdowns.
Rattling or squealing noise:
- Rattling points to a loose set screw, debris in the housing, or a misaligned wheel. Squealing often points to bad bearings or a belt on older belt-drive blowers. Cleaning can quiet dust-related imbalances. Bearings require replacement.
Blower won’t spin after cleaning:
- Check wiring connections and the run capacitor. A weak or failed capacitor prevents the motor from starting. If you’re not comfortable testing with a multimeter call a technician.
Motor overheating:
- If the motor runs hot after cleaning the wheel might be rubbing or the static pressure in the system is still too high due to duct restrictions or a clogged filter. Fix the mechanical issues first then call a pro if overheating continues.
When to call a professional HVAC technician:
- You see complex wiring or a variable-speed ECM motor and you’re not sure how to disconnect it.
- You suspect mold contamination inside ductwork or the air handler.
- You want a full system tune-up which includes coil cleaning, blower balancing, and airflow measurements.
- You prefer someone else to handle capacitor testing and electrical diagnostics.
Costs to compare:
- Professional blower fan cleaning often falls around $150 to $500 and it’s sometimes part of a larger HVAC tune-up. If you’re not set up with tools or you’re pressed for time that can be money well spent.
Common Mistakes I See and How to Avoid Them
- Forgetting to shut off power. I always flip the breaker and the service switch then verify with a tester.
- Getting the blower motor wet. Water ruins windings and bearings. I keep liquids away from the motor and I only rinse the wheel when it’s fully removed.
- Rushing drying time. Moisture left in the hub invites rust and imbalance. I let the wheel dry for hours or overnight.
- Mixing up wires or bolts. Photos and labels save you from this headache.
- Over-spraying degreaser. Use minimal cleaner and wipe quickly so residue doesn’t corrode anything.
- Bending blades during scrubbing. I go slow and use soft brushes unless I hit sticky spots.
- Ignoring the air filter. A dirty filter will undo your hard work in a matter of weeks.
- Skipping the housing. Debris in the scroll housing migrates right back to the wheel.
A Quick Note on Motors and Why You Never Want Them Wet
If you’ve ever wondered what’s inside the blower motor you’re not alone. The motor has a stator and a rotor with stacked steel laminations designed to guide magnetic flux while minimizing electrical losses. Those laminations are precisely engineered and insulated which is one reason moisture is such a problem. Water invites corrosion and electrical tracking which shortens motor life.
For the curious:
- If you want to understand how the stationary side of a motor is built take a peek at a resource on stator core lamination.
- The spinning section uses a matching stack called the rotor core lamination.
- Both are examples of electrical steel laminations that control losses and heat.
- Many motors use integrated stacks and precision motor core laminations which are sensitive to contaminants and moisture.
You don’t need to be a motor engineer to clean a blower wheel well. It helps to know why we treat the motor like a no-splash zone and why we avoid high-pressure water anywhere near it.
Variations: Bathroom Fans, Range Hoods, and Dryers
Squirrel cage fans show up in more places than furnaces. I tweak my approach a little.
Bathroom exhaust fans with squirrel cage wheels:
- Dust and lint build up faster thanks to humidity. I vacuum first then use a light degreaser on the wheel. I let it dry fully before reinstalling. While I’m there I clean the fan housing and grille.
Range hood squirrel cage fans:
- Expect sticky grease. I pull the wheel out if at all possible. I apply degreaser in light rounds and rinse the wheel in a sink with hot water. I keep the motor dry and I finish with a long air dry. Grease may hide under the hub so be patient.
Dryer squirrel cage fans:
- Lint city. I unplug the dryer and pull the panel to access the fan. I vacuum lint thoroughly and check the vent path to the outside. Lint is flammable so I clean everything carefully. I rarely use water here which keeps things simple and safe.
All three cases benefit from the same rules. Power off. Minimal liquid near motors. Dry completely. Reassemble and test.
Why This Work Pays Off: Results I See Again and Again
After a thorough blower wheel cleaning I expect a few wins:
- Better airflow at supply vents. It’s noticeable to the hand and sometimes even to the ear.
- Lower blower motor amp draw at the same fan speed. Less resistance saves energy.
- Quieter operation. Dirt doesn’t distribute evenly so it throws the wheel off balance and causes vibration. Cleaning rebalances the wheel and quiets rattling.
- More stable heating and cooling. With improved airflow your coil or heat exchanger can do its job.
You can’t promise a specific number for every home yet the trend is consistent. A clean blower cuts energy waste and often reduces wear on the motor. Over the life of a system that matters.
Quick Tips That Make the Job Easier
- Use a painter’s marker to draw a thin line on the motor shaft where the set screw sits. Reinstall to the same depth which helps keep the wheel centered.
- Keep a small parts tray for screws and set screws. Those set screws love to roll under cabinets.
- If the set screw keeps loosening add a tiny drop of medium thread locker. Don’t drown it and don’t use the permanent stuff.
- If you find rust on the wheel treat it lightly with a rust remover or a Scotch-Brite pad then wipe with a damp rag. Go gentle so you don’t thin the metal.
- Replace a wheel if it’s badly bent or cracked. Balancing a damaged wheel becomes a game you won’t win.
Signs It’s Time to Clean Right Now
- Weak airflow from multiple supply vents even after you change the filter.
- Blower noise that sounds like rattling coins or a steady hum that wasn’t there before.
- Higher energy bills without a change in weather or usage.
- Visible dust ridges on the blower blades or gray sludge on the housing.
- A furnace that short cycles or an AC that runs long and struggles to cool.
FAQs I Get From Homeowners
Can I clean the blower without removing it:
- Yes you can. Use a shop vac, brushes, and a lightly damp cloth. You’ll improve performance even without rinsing. It takes more patience yet avoids dealing with the set screw.
Should I lubricate the motor:
- Only if your motor has oil ports and the manufacturer calls for it. Most modern residential blower motors are permanently lubricated and sealed.
How often should I do this:
- Annually for most homes. Twice a year if you have pets, heavy dust, or allergies.
Compressed air or vacuum:
- Vacuum first to capture debris. Compressed air can help in corners if you keep it away from the motor and bearings.
What brush works best:
- Soft bristles for general dust. A firm toothbrush for stubborn grime on the blade edges. Metal brushes are too aggressive for most blower wheels.
Will this fix a blower that won’t start:
- Cleaning helps with airflow and noise. If the motor won’t start check the capacitor, wiring, and motor health or call a pro.
Bringing It All Together: My Cleaning Checklist
I like a simple checklist that fits on a sticky note:
- Power off at thermostat and breaker. Verify no voltage.
- Remove panels. Photograph wiring and mounts.
- Disconnect and slide out the blower assembly.
- Loosen set screw and remove the wheel or plan an in-place clean.
- Vacuum blades and housing. Brush and vacuum again.
- Apply degreaser sparingly. Scrub each blade. Wipe housing.
- Rinse wheel only if detached. Keep motor dry.
- Towel dry then air dry for hours or overnight.
- Reinstall wheel. Align set screw on the flat. Center the wheel.
- Slide assembly back. Tighten mounts. Reconnect wiring.
- Replace panels. Restore power. Test on Fan On then heat or cool.
- Listen for vibration and check airflow at vents.
- Replace the air filter.
Conclusion: Clean Fan, Better Air, Lower Bills
I clean squirrel cage blower wheels because it works. It boosts airflow, cuts noise, and can trim energy use in a way you can feel. The process takes patience and care and it’s absolutely doable as a DIY project if you respect electricity and keep liquids away from the motor. I’ve seen systems breathe easier right after a good cleaning and I’ve seen homeowners breathe easier once the dust and grime stop recirculating through their homes.
Start with safety. Go step by step. Take photos as you go. Dry everything completely. Reassemble with care and test calmly. You’ll learn a lot about your HVAC system and you’ll likely save money this season and the next. That’s a win in my book.
Final thought. Keep your air filter fresh and put a reminder on your calendar for an annual or semi-annual cleaning. Prevent the mess before it starts and your blower wheel will stay clean longer. Your furnace or air handler will thank you with quieter operation and steadier comfort. You’ll see it and you’ll feel it.