Can-Am X3 Stator Upgrade Guide: Boost Your Power and Reliability
Table of Contents
- Introduction: Why I Upgraded the Stator on My Can-Am X3
- Understanding the Can-Am X3 Charging System
- How the Stock Stator Works
- Key Components: Stator, Flywheel, VRR, Battery
- Where Things Go Wrong
- Benefits of a High-Output Stator on the Maverick X3
- How I Chose the Best Can-Am X3 Stator Upgrade
- OEM vs Aftermarket
- Specs That Matter
- Heat Resistance and Build Quality
- Compatibility and Use Case
- Should You Upgrade the Voltage Regulator Rectifier Too
- Installation Overview: How I Installed My X3 Stator
- Tools and Materials
- Safety Prep
- Step-by-Step Process
- Common Challenges and Troubleshooting Tips
- Diagnostics: How I Tested the X3 Stator and Charging System
- Basic Stator Tests
- Voltage Regulator Checks
- Real-World Load Testing
- Post-Upgrade Maintenance and Best Practices
- Monitoring Voltage Output
- Battery Health and Selection
- Accessory Wiring That Prevents Problems
- Cost and Value: What I Paid and Why It Was Worth It
- FAQs About Can-Am X3 Stator Upgrades
- Quick Answers to Popular X3 Charging Questions
- Conclusion: Power Your Adventures With Confidence
Introduction: Why I Upgraded the Stator on My Can-Am X3
The night I knew my Can-Am Maverick X3 needed a stator upgrade started out perfect. Cool air. Empty trails. I flicked on the LED light bar and cranked the SSV Works sound system. Twenty minutes later the lights dimmed when I worked the winch and the dash voltmeter dropped into the low 12s. The engine stumbled when I hit a rocky climb. I limped back to the trailer with a weak battery and a strong suspicion.
If you run a winch, big LED lights, a sound system, heated seats, GPS, and radios you ask a lot of the X3 charging system. I learned that the stock setup can be fine for a stock machine. It struggles once you pile on accessory power draw. I chased the usual suspects first. I checked grounds. I inspected the voltage regulator rectifier. I tested the battery. The stator told the real story.
In this guide I’ll explain how the Can-Am X3 charging system works, what typically fails, why a high-output stator helps, how to choose the right kit, and how the installation went for me. I’ll share the exact stator test procedure I used, the parts list I relied on, and the mistakes I made so you can avoid them. If you’re battling Can-Am X3 charging issues or planning upgrades that demand more current this walkthrough will save you headaches.
Understanding the Can-Am X3 Charging System
How the Stock Stator Works
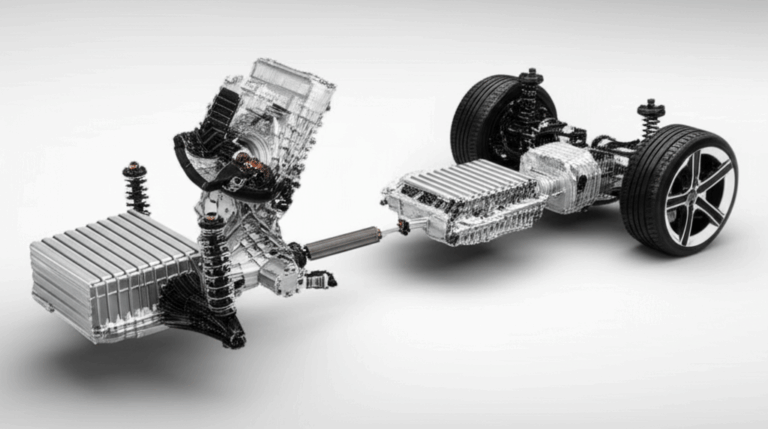
The X3 uses a three-phase AC stator mounted behind the engine side cover. Magnets in the flywheel sweep past the stator coils to generate AC voltage. The voltage regulator rectifier (often called the VRR) converts that AC to DC and regulates the voltage that charges the battery and feeds the electrical system.
At higher RPM the stock stator typically outputs around 300 to 350 watts which equals roughly 25 to 29 amps. Output at idle sits much lower. I’ve seen 10 to 15 amps depending on engine speed and accessory load. That gap between idle and cruising output matters when you crawl, winch, or stop to chat with the lights and fans running.
Key Components: Stator, Flywheel, VRR, Battery
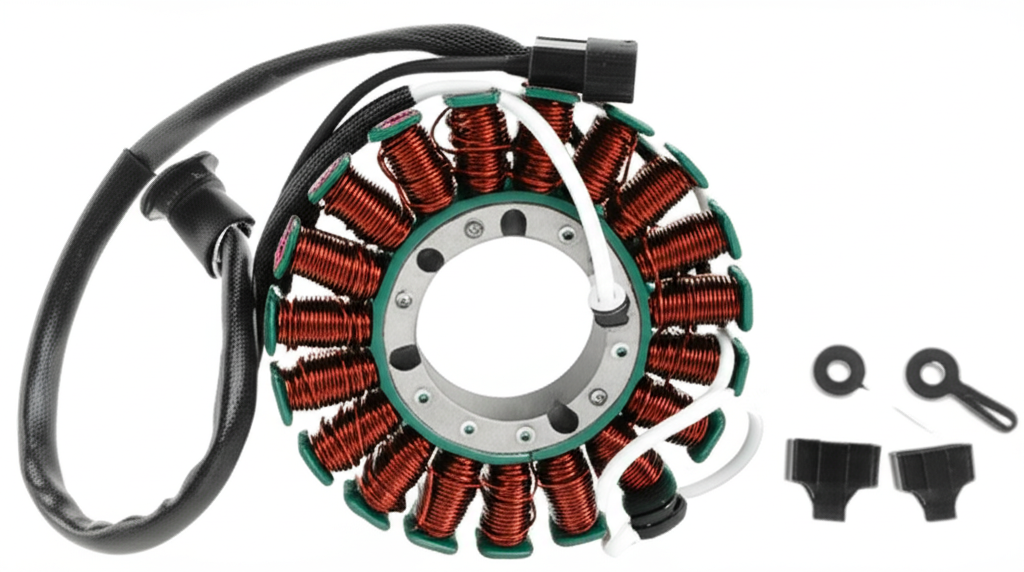
- Stator: Copper windings on laminated steel cores that create three-phase AC. If the windings short or the insulation degrades you lose output or you get chaotic voltage.
- Flywheel: Houses the magnets that excite the stator coils. Magnet damage or delamination can chew up coils.
- Voltage Regulator Rectifier: Converts and regulates power. A failing VRR can mimic stator failure or cook a healthy battery.
- Battery: Your buffer and backup. AGM or lithium-ion works with the X3 if you match the charging profile and accessories.
These parts form the heart of the Maverick X3 charging system. When any one piece goes out of spec the whole system suffers.
Where Things Go Wrong
I’ve seen three big failure patterns:
- Heat and overload: Long climbs at high RPM bake the stator. Add a heavy electrical load and you raise temperatures even more. Oil helps cool the unit yet heat still wins over time.
- Aging insulation and vibration: Coils can short between phases or to ground. You’ll find blackened windings or that burnt varnish smell.
- VRR or flywheel issues: A weak voltage regulator pushes erratic voltage. Magnet movement on the flywheel can scrape or shatter. Either problem can take a stator with it.
Common symptoms include:
- Battery drain between rides or while idling with accessories
- Dimming lights and flickering displays
- “Check Engine” lights related to low voltage
- Accessories that cut out when you hit the throttle
- Engine stalling or misfires due to low voltage to the ECU and fuel pumps
If any of that sounds familiar you’re not alone. MaverickForums and X3 owner groups are full of similar stories.
Benefits of a High-Output Stator on the Maverick X3
When I upgraded the stator to a high-output unit the difference showed up fast:
- Stronger charging at trail speeds: Voltage stays steady with the light bar and radios on. Even at idle I saw better recovery after winch pulls.
- More accessory headroom: I can run a 50 inch LED light bar, an amplified sound system, a pair of heated seats, communications, and a GPS without watching the voltmeter like a hawk.
- Less stress on the battery: The battery stays charged so starts get easier and the battery lasts longer.
- More reliability: Fewer voltage dips mean less risk of ECU glitches or fuel pump hiccups on rough terrain.
- Peace of mind: When you’re deep in the woods or ripping dunes you want to focus on the line not on whether your battery voltage will nosedive.
Aftermarket high-output stators for the X3 commonly claim 350 to 500+ watts which is roughly 29 to 42+ amps. Alternator conversion kits exist as well. Those can top 100 amps if you need extreme output for racing or massive SSV audio builds. I rarely need that on trails. A stout stator has covered me even with high draw accessories.
How I Chose the Best Can-Am X3 Stator Upgrade
OEM vs Aftermarket
I compared a fresh OEM stator to several aftermarket options. OEM works if you want stock behavior and stock output. I needed more capacity for winching and lighting. I looked at high-output stators from Rick’s Motorsport Electrics, SuperATV, and QuadBoss. Rick’s gets a lot of love in X3 stator upgrade reviews. SuperATV offers full charging system kits that include a VRR. QuadBoss lists compatibility clearly and prices competitively.
Key takeaway from my research. Pick a brand that publishes real numbers, that has clear compatibility by year and trim like Turbo or Turbo RR, and that backs the product with a decent warranty.
Specs That Matter
- Output rating: Look for 350 to 500+ watts or a stated amperage at a given RPM. If a kit doesn’t publish specs I skip it.
- Wire quality and insulation: High temp magnet wire with robust varnish resists heat and oil. It also lasts longer if you ride hard in hot climates.
- Epoxy potting and strain relief: Good potting supports the coils. It keeps vibration from breaking the windings at the lead exits.
- Gasket and hardware quality: Clean gasket fit and proper screws with threadlocker matter more than they seem because loose fasteners kill stators.
- Compatibility: Match your exact year and model including X3 Turbo and Turbo RR. Check the stator part number and connector style. The wrong plug or diameter equals a bad day.
Heat Resistance and Build Quality
The best stators use precise laminations and high grade electrical steel that reduce core losses and heat. If you want to understand why some stators run cooler and last longer take a minute to learn what sits under the copper windings. The core is a stack of thin steel plates that focus the magnetic field.
I dug into lamination quality when I picked mine. Here are a few resources that helped me understand the difference:
- The role of the stator core lamination in magnetic efficiency and heat control
- How overall motor core laminations influence losses under load
- Why the grade of electrical steel laminations matters for performance
- What a quality rotor core lamination stack means in rotating machines like alternator conversions
Better laminations show up as less heat, steadier voltage, and longer life. I still ride with the same mindset. Heat is the enemy of everything electrical on a UTV.
Compatibility and Use Case
I didn’t just list what I run today. I also counted the accessories I plan to add next season. That includes more auxiliary lighting and a higher CFM cooling fan. I wanted headroom for a street legal kit and future radios. If you plan to add a second battery or an intercooler pump go bigger on output now. You save labor and money later.
Should You Upgrade the Voltage Regulator Rectifier Too
Short answer. Usually yes. A fresh stator feeding a tired voltage regulator is like a new heart feeding weak arteries. It kind of works, not for long. I upgraded the VRR with the stator. My X3 now holds 14.2 to 14.5 volts at cruise with lights and a modest audio load. If you replace the stator because of a VRR failure that cooked it you must change both. Otherwise you risk repeating the cycle.
Installation Overview: How I Installed My X3 Stator
I’ll give you the big steps and the lessons that saved me time. Always reference your service manual for torque specifications and model-specific procedures. That manual pays for itself the first time you avoid a stripped bolt.
Tools and Materials
- Basic mechanics tools: metric socket set, Torx bits, Allen keys, screwdrivers
- Flywheel puller for the Maverick X3
- New stator and voltage regulator rectifier if you upgrade both
- Side cover gasket and a dab of sealant for specific corners
- Engine oil and a new filter
- Dielectric grease for connectors
- Loctite threadlocker per service manual
- Multimeter with ohmmeter for stator resistance checks
- Shop towels and a clean drain pan
Safety Prep
Disconnect the negative battery cable first. Let the engine cool completely. Drain the oil to avoid a mess when you pop the right engine side cover. Work on a clean surface so you keep dirt out of the engine.
Step-by-Step Process
1) Remove the necessary plastics and guards for access. I took photos during tear down so reassembly would go faster.
2) Disconnect the stator harness at the main connector near the VRR. Label connectors if you feel unsure. I add a bit of dielectric grease during reassembly to prevent corrosion without drowning the pins.
3) Drain the oil. Pull the right engine side cover. Expect some gasket resistance. Work carefully so you don’t gouge the mating surface.
4) Remove the flywheel. Use the correct puller. Do not pry on the coils. Check the flywheel magnets for cracks or delamination. If you see damage replace the flywheel. Check for metal dust or stator magnet contact. That points to deeper issues.
5) Unbolt the old stator. Look for signs of stator coil burnt spots or melting. If you see a stator oil leak pattern around the grommet clean the channel thoroughly so the new grommet seals well.
6) Install the new stator. Torque the hardware to spec. Route the harness as the manual shows. Keep it clear of the flywheel and rotating parts. This is a common place people pinch wires during reassembly.
7) Clean the gasket surfaces. Install the new gasket. Some corners call for a small dab of sealant. Follow the service manual.
8) Reinstall the side cover. Torque in a crisscross pattern. Reinstall the flywheel if the model requires it at this stage. Follow torque specs and use Loctite where the manual specifies.
9) Reconnect the stator harness and the VRR if upgraded. Double check that every connector snaps home.
10) Refill oil and install a new filter. Reconnect the battery. Start the engine. Check for leaks. Watch voltage at idle and at 3,000 RPM. Confirm a clean rise to the mid 14s under light load.
Common Challenges and Troubleshooting Tips
- Stator wiring harness routing: If you route over rather than under a tab it can rub through. I zip tied the harness at factory points to keep it safe.
- Gasket damage: If the cover hangs up stop and check alignment. Do not force it. I’ve seen small tears that cause a slow drip that looks like a main seal leak.
- VRR location heat soak: The X3 puts the VRR where it gets blasted by engine heat. Some riders add a small heat shield or move airflow around it. I left mine stock and I check it often.
- Magnet rub marks: If the flywheel scraped the stator I check for play in the crank or a misaligned side cover. If that shows up after an upgrade I stop and find the root cause.
Diagnostics: How I Tested the X3 Stator and Charging System
You don’t need a lab bench to test the stator. A decent multimeter and a methodical approach solve half the mystery.
Basic Stator Tests
- Resistance check across the three stator phases: With the engine off and the stator unplugged measure resistance between each pair of the three yellow wires. You should see equal low ohms on each pair. A reading that is way off points to stator winding damage.
- Ground check: Measure from any stator lead to engine ground. You should see open circuit or very high resistance. Any measurable continuity to ground often means a short.
- AC output test: With the stator unplugged and the engine running measure AC voltage between each pair of the three stator wires at idle and at 3,000 RPM. The three pairs should read similar voltage. Low or uneven output says the stator is weak.
These quick tests catch most stator failures fast. They also confirm or rule out a bad stator before you throw parts at the problem.
Voltage Regulator Checks
After confirming the stator I checked the VRR:
- DC charging voltage at the battery: With the engine running you should see roughly 13.8 to 14.6 volts depending on load and RPM. If voltage climbs above 15 you risk cooking the battery. If it stays down near 12.5 with a good stator the VRR likely has failed.
- Heat and connector inspection: Melted plugs or browned plastic means high resistance or a weak connection. Clean or replace as needed. Add a touch of dielectric grease. Do not pack it full.
- Avoid a voltage regulator bypass: People sometimes bypass the VRR to “test” a circuit. I don’t recommend this on the X3. You can spike the ECU or fry accessories.
Real-World Load Testing
Bench tests are good. Real riding tells the full story. I measured:
- Charging voltage at idle with all accessories off vs on
- Voltage after a light winch pull
- Voltage at steady 3,000 RPM with the light bar and sound system on
Stock systems often show charging voltage low when you creep or winch. A high-output setup recovers faster. That is what I saw after the upgrade.
Post-Upgrade Maintenance and Best Practices
Monitoring Voltage Output
I mounted a small voltmeter where I can see it at a glance. It cost less than a tank of fuel. That little gauge tells me more than any dashboard icon.
Best practices that helped me:
- Check voltage before every ride
- Watch voltage drop when you flip big loads like light bars
- Scan for codes if the dash throws a warning after heavy electrical use
Battery Health and Selection
I ran an AGM battery for years because it handles vibration well and it charges predictably. Lithium-ion batteries weigh less and deliver strong cranking current, yet they need a compatible charging profile. If you go lithium make sure your VRR and battery management match. A high-output stator helps keep a second battery charged if you run a dual-battery setup for winch or audio.
A few battery notes for the X3:
- Best battery for Can-Am X3 with upgrades depends on use. AGM for cold and rough. Lithium for weight savings and high draw builds if supported.
- Replace a tired battery before you blame the stator. A bad battery can mimic poor charging and it can mask an underlying VRR problem.
Accessory Wiring That Prevents Problems
- Wire gauge: Size wires for the load. The Can-Am X3 charging system wire gauge matters once you add big accessories. Undersized wire creates voltage drop and heat.
- Fusing: Use a fuse box with proper fuses for each circuit. Label it. You will thank yourself on the trail at night.
- Relays and distribution blocks: Run high draw accessories through relays. Use a clean distribution block to avoid a bird’s nest near the battery.
- Grounds: Star-ground your accessories to a common point or the chassis ground point. Poor grounds cause mysterious “electrical system problems” that waste hours.
- Isolation for high draw accessories: Consider a battery isolator or a separate accessory battery if you run a big winch and an amplified sound system.
I also keep an eye on cooling fans, fuel pumps, and any intercooler pump if you run a Turbo RR with mods. These loads add up fast when you creep through rocks in summer heat.
Cost and Value: What I Paid and Why It Was Worth It
The money question shows up in every conversation about upgrades. Here’s the range I’ve seen and paid:
- Stator only: $200 to $450 for an aftermarket high-output unit
- Voltage regulator rectifier: $150 to $300 for a quality replacement
- Gaskets, sealant, oil, filter: $50 to $100
- Professional installation: $300 to $600+ depending on labor rates and whether additional diagnosis is needed
A DIY upgrade can land between $250 and $850 depending on what you replace. A shop-installed upgrade usually runs between $550 and $1,500+. Your region and parts choice drive the total.
Is it worth it? If you run multiple high current draw accessories the upgrade pays for itself in reliability. A flat battery 20 miles from camp can turn a weekend into a recovery mission. I treat the stator and VRR as reliability mods rather than just repairs.
FAQs About Can-Am X3 Stator Upgrades
How do I know if my X3 stator is failing?
- Look for dimming lights, poor charging at idle, battery not holding charge, and engine stalling or misfires when voltage dips. Perform the stator resistance check and AC output test. If one phase reads off or continuity to ground shows up the stator likely failed.
Can I just upgrade my battery instead of the stator?
- A bigger or newer battery helps for a short time. It does not fix a weak charging system. If your Can-Am X3 charging voltage is low at idle and cruise under load you need a stator and probably a VRR.
What’s the difference between a stator and a rectifier?
- The stator generates three-phase AC power. The voltage regulator rectifier converts that AC to DC and regulates voltage to your battery and electronics. Both must work correctly.
Is a high-output stator necessary for just LED lights?
- Maybe not if you run a small bar. A 30 to 50 inch LED light bar can draw 10 to 30 amps which is significant. If you add a sound system, heated seats, radios, and a winch you want a high-output stator.
How long does a Can-Am X3 stator typically last?
- Many last for years. Heat, load, and riding style matter. I treat 300 to 500 hours as a review period if I run heavy electrical loads. I inspect connectors and monitor voltage long before that.
Where is the voltage regulator rectifier located on the X3?
- On most X3 trims it sits near the front of the engine bay on a bracket with good airflow. Exact placement varies by year. Follow the stator harness and you’ll find it.
Can I upgrade to an alternator on the X3?
- Yes. Alternator conversion kits exist. They add significant output for racing or audio builds. They add weight and complexity too. I chose a high-output stator because it fit my needs.
Do I need special tools to change the stator?
- You need a flywheel puller that fits the X3 and basic hand tools. A torque wrench is a must. A multimeter helps you test before and after the swap.
What about warranty?
- Check your warranty terms. Some aftermarket parts offer their own warranty. Keep receipts. Document your install. My rule is to buy from brands with clear warranty support.
Does cold weather change anything?
- Cold starts hit batteries hard. If you wheel in winter plan for idle time with heaters and lights. A stator upgrade helps maintain voltage when you crawl in the cold where output at idle matters.
Quick Answers to Popular X3 Charging Questions
- Can-Am X3 charging issues after adding a winch: Check total draw. A winch can pull 50 to 200 amps at peak. Upgrade the stator and VRR if your voltage drops below 12.5 under load.
- Maverick X3 charging system diagram and components: Stator, flywheel magnets, VRR, battery, wiring harness, fuse box, ECU, and accessories like fans and pumps.
- X3 stator test procedure in the field: Resistance across phases, ground test, AC voltage test at idle and 3,000 RPM. Compare the three phases.
- X3 stator vs OEM output: Aftermarket high-output stators claim 15 to 50 percent gains. Some kits exceed 500 watts.
- Can-Am X3 voltage drop test: Measure voltage at the battery vs at the accessory under load. Big drops point to undersized wire or poor grounds.
- Why upgrade the Can-Am X3 stator: Support more accessories, reduce battery drain, and stabilize voltage for the ECU and fuel system.
- Maverick X3 bad stator signs: Burnt smell, coil discoloration, uneven AC output, continuity to ground, dim lights at idle.
- X3 stator overheating and heat management: Higher grade laminations and varnish help. Clean oil flow and a healthy VRR reduce stress.
- Can-Am X3 rectifier upgrade: Do it with the stator if you see charging instability or if the unit runs hot and browns connectors.
- X3 lighting upgrades power draw: Large light bars and multiple pods add up fast. Budget 10 to 30 amps for lighting alone on big setups.
- Maverick X3 SSV audio power: Amplified systems can draw 10 to 40 amps. That’s a big chunk of your stock output.
- X3 full-throttle stator output: Peaks at higher RPM yet heat rises. A good VRR and airflow help.
- X3 stator gasket replacement: Always use a new gasket. Clean the surfaces. Add sealant in the corners as the service manual shows.
- Can-Am X3 engine side cover removal: Drain oil first. Keep the area clean. Watch for dowel pins and wire routing.
- X3 stator oil leak at the wire grommet: Seat the grommet fully and use the correct sealant if the manual calls for it.
- Maverick X3 electrical system diagnosis: Start with battery and grounds. Test stator. Verify VRR. Check accessory wiring and fuses.
- X3 stator for multiple batteries: A high-output stator helps keep both charged. Use an isolator if you run a dedicated accessory battery.
- Can-Am X3 lithium battery charging: Verify VRR compatibility. Keep an eye on voltage in cold weather.
- X3 stator upgrade for turbo models and racing: Turbo and Turbo RR builds benefit from higher output especially with intercooler pumps and larger fans.
- Can-Am X3 charging system preventative maintenance: Inspect connectors and grounds, monitor voltage, and avoid overloading a single circuit.
- Maverick X3 stator life expectancy and failure rates: Conditions vary. Heat, load, and build quality drive lifespan more than the calendar.
- Can-Am X3 charging system best practices: Use proper wire gauge, fuse every circuit, and keep connections tight and clean.
Conclusion: Power Your Adventures With Confidence
When I upgraded my Can-Am Maverick X3 stator I stopped worrying about dim lights, weak winching, and random ECU tantrums. I matched the stator to my accessory load, I replaced the voltage regulator rectifier, and I cleaned up the wiring with the right wire gauge and fusing. My charging voltage sits where it should now. The battery lasts longer. The whole electrical system feels calm even when I flip on everything at once.
If you see signs of poor charging or you plan to add big accessories don’t wait for a trail-side failure. Test the stator. Check the VRR. Choose a high-output stator with strong materials and clear specs. Follow the service manual during installation. Then enjoy the peace of mind that comes with a charging system built for how you actually ride.
I built this guide around the problems I ran into and the fixes that worked. If you wire accessories cleanly, upgrade the charging system thoughtfully, and keep an eye on voltage your X3 will reward you with reliable power and brighter nights on the trail.