Are Stators Interchangeable? The Definitive Guide to Stator Compatibility
Table of Contents
- The short answer
- What a stator does and why it matters
- Key factors that determine interchangeability
- Mechanical fit
- Electrical specifications
- Connectors and wiring
- Application-specific design
- Materials and laminations that change performance
- When stators might be interchangeable
- Risks of using an incompatible stator
- How I make sure I get the right stator
- Common replacement scenarios and what to watch
- Motorcycles and ATVs
- Automotive alternators
- Small engines and generators
- Marine engines
- Industrial and BLDC motors
- Troubleshooting: symptoms of a bad stator and common misdiagnoses
- Upgrades, rewinding, and “universal” stators
- Three quick case notes from my bench
- Conclusion: precision beats guesswork every time
The short answer
I get this question a lot. Are stators interchangeable. In my experience the honest answer is no in most cases. Direct swaps without careful cross-checks are rare. Two stators can look identical. They can even bolt up. Then they fail within minutes or they never charge. Why. Because stators are married to their rotors and to their charging or ignition systems. The engine designer set pole count to match a flywheel. They set winding configuration to feed a specific rectifier regulator. They set the dimensions to clear the flywheel by a hair. Change any one of those and you roll the dice with sparks and smoke.
A simple yes or no misses the point. You can sometimes cross a stator between close sibling models. You can sometimes run a reputable aftermarket unit that matches your exact OEM part number. You can sometimes upgrade output with a matched kit. You cannot treat a stator like a universal brake pad. The consequences get expensive fast.
What a stator does and why it matters
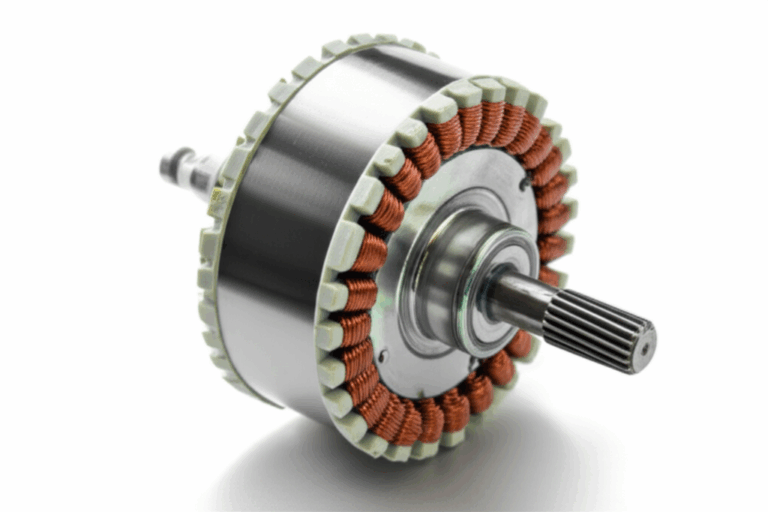
A stator is the stationary part of an alternator, generator, or motor. It holds copper windings around a laminated steel core. In vehicles the stator usually sits inside an engine cover. A flywheel or rotor spins around it with permanent magnets. That spinning magnetic field induces AC voltage in the stator windings. A rectifier regulator converts that AC to DC for the battery and the electrical system. In some small engines a “magneto” stator also provides ignition trigger pulses or even spark energy directly.
So the stator sits at the heart of two critical systems:
- The charging system that keeps your battery alive and your lights bright.
- The ignition system that tells coils when to fire and sometimes generates that energy.
If the stator is wrong you can undercharge or overcharge. The battery dies. Headlights dim. Accessories cut out. If the ignition windings or pickup signals do not match you get misfires, hard starts, or no spark. The engine can stall on throttle. You might even cook the rectifier or the ECU.
Key factors that determine interchangeability
Over time I started using a simple mental checklist. Mechanical fit. Electrical specs. Connectors and pinout. Application design. Materials and cooling. If I do not get a clean green check next to each of those I do not install the part. Here is why.
Mechanical fit
I never assume a stator fits just because the gasket pattern looks right. I measure.
- Diameter and thickness. A stator that is a millimeter too thick rubs on the flywheel. You will hear it. Then you will see aluminum dust.
- Mounting bolt pattern. Three-hole vs four-hole patterns vary. Bolt diameters and thread pitch vary. Offset shoulders and stand-offs vary.
- Air gap and clearance to the flywheel or rotor. That air gap determines magnetic coupling and heat. Too tight and you get contact. Too loose and you starve output.
- Wire exit path and grommet size. A wrong exit angle pinches the harness when you reinstall the cover.
Electrical specifications
This is where most “it should work” attempts die.
- Output voltage and current. The stator’s AC output must match what the rectifier regulator expects and what the vehicle loads demand. A 12 V system still expects a certain AC amplitude at given RPM to produce stable DC. Put in a low-output unit and you chase undercharging forever.
- Number of poles. Pole count sets output frequency at a given RPM because frequency equals RPM times pole pairs. The rectifier regulator and the flywheel magnet layout both expect a specific pole count. Change that and you can get unstable charging or poor output at idle.
- Number of phases. Single-phase vs three-phase matters. Mix them and you get no charge at all because the connector and rectifier do not match the waveform.
- Winding configuration. Star vs delta changes voltage and current balance and heat. OEMs choose one for a reason.
- Coil resistance values. Each charging or ignition coil should fall within a narrow resistance range. Out-of-spec windings point to different wire gauge or turn count which means different output.
- Insulation class and potting. Heat kills stators. The resin, varnish, and epoxy potting compounds matter in high-load applications.
Connectors and wiring
I have seen identical stators with different pinouts. The plugs look the same. The wires share colors. The functions do not. You cannot play color bingo with stator harnesses.
- Connector type and pin count. Multi-pin plugs, bullet connectors, or spades vary by brand and by year.
- Pinout mapping. Which pin carries which phase or trigger signal matters. Always verify with a diagram or continuity test.
- Wire gauge. Thin wires on a high-output stator run hot. That heat shortens life.
- Loom length and routing. A short harness forces sharp bends near the case which can break insulation over time.
Application-specific design
A stator built for charging batteries is not the same as an ignition stator that provides timing signals or spark energy. I treat application as mission critical.
- Charging stators vs ignition stators. Some units bundle both. Others separate them. Swapping across versions that split or combine functions usually fails without an entire harness and flywheel swap.
- Engine type and duty cycle. A dirt bike might run high RPM bursts with brief idle. A cruiser idles long with heavy electrical accessories. A generator runs steady at 3600 RPM. The windings and cooling suit the duty cycle.
- Cooling and heat dissipation. Oil bath vs dry stators need different insulation and thermal design. Vent patterns in the cover matter. So does oil flow.
- Flywheel or rotor magnet design. Magnet strength, count, and spacing must line up with pole count and coil placement. If they do not you get weird ripple, hotspots, or low output.
Materials and laminations that change performance
Under the varnish and the wires sits the core. Those thin stacked steel sheets shape the magnetic path. They also set efficiency and heat. When you mix and match stators you also mix core materials and stack geometry.
- Laminations. The quality of the stator core lamination drives magnetic efficiency and loss. Thin laminations reduce eddy currents. Thicker sheets run warmer.
- Rotor match. The flux path crosses the stator and rotor. If either side uses different steel or geometry the magnetic circuit changes. You see that in idle output and in heat. If you are evaluating a swap study the rotor core lamination as well because the pair works as one.
- Electrical steel grades. Core losses vary with silicon content and thickness. Better electrical steel laminations help efficiency and lower heat at high RPM. That is why two “same spec” stators from different suppliers can behave differently under load.
- Overall motor core design. When I look at industrial or BLDC platforms I check the stack height, tooth shape, and slot insulation. Those choices live upstream of winding count yet they determine temperature rise and saturation. If you want a deeper dive on how lamination stacks affect performance take a look at modern motor core laminations.
When stators might be interchangeable
I do not want to be a complete wet blanket. Swaps can work in narrow situations.
- Exact OEM part number match. If the part number matches your vehicle’s listing you are good. Sometimes the number supersedes. Verify the supersession in the manufacturer’s catalog not on a random forum screenshot.
- Reputable aftermarket cross-reference. Brands that publish explicit fitment lists usually clone the geometry and the electrical spec or they bundle a matched regulator and connector. When they say “fits 2009–2013 Model X” they mean those exact years and versions.
- Shared platforms. Manufacturers often share an engine platform across several models and years. If the microfiche shows the same stator part number on each model you have a green light.
- Minor revisions with confirmed interchangeability. Occasionally an OEM revises potting or wire routing yet keeps the same spec. The updated part drops in. Again verify through official parts lists.
- Matched upgrade kits. If you want higher output use a kit that includes a new flywheel or rotor and a new rectifier regulator. That set shifts the whole system so the pieces still match.
Risks of using an incompatible stator
I learned the hard way that a wrong stator can cost more than a correct one.
Electrical system damage
- Undercharging. The battery drifts low. Cranking slows. Lights dim at idle. EFI systems throw fits.
- Overcharging. The rectifier runs hot then fails. The battery boils. You smell sulfur. The ECU takes a hit if voltage spikes.
- Phase mismatch. No charge at all if you plug a three-phase stator into a single-phase regulator or vice versa.
- Harness meltdown. Wrong pinout equals short circuits. That can blow fuses or cook wires.
Engine performance issues
- No spark or misfires. Ignition windings and pickups must deliver the expected timing pulses. If they do not the engine stumbles or refuses to start.
- Stalling on load. A weak charging stator cannot keep up with fuel pump draw and lights at idle. You pull to a stop and the engine quits.
- Poor fuel economy. EFI systems hate low voltage which skews sensor readings.
Mechanical failure
- Rotor contact. If thickness or air gap is off the flywheel scrapes the stator. You get metal dust then a dead short.
- Mount fatigue. Misaligned bolt patterns pull the core off center. Vibration cracks the case or the stator frame.
Warranty problems
If your vehicle is under warranty the wrong part can void coverage. Even out of warranty you lose peace of mind when you deviate from spec without proof.
How I make sure I get the right stator
Here is my step-by-step process that has saved me from grief.
1) Start with the OEM part number
The OEM part number is my north star. I look it up by year, make, model, and sometimes sub-model. I check the VIN when the year splits mid-production. If the listing shows superseded numbers I track the latest one.
2) Verify the vehicle and engine specifics
Engine size and generation matter. A 650 twin can share a name across years yet carry different flywheels and rectifiers. Marine and ATV engines can split by alternator output options. I confirm everything before I spend money.
3) Inspect the old stator closely
- Measure diameter and thickness with calipers.
- Confirm bolt pattern center-to-center distance and thread size.
- Check the connector type, pin count, and keying.
- Photograph the wire colors and routing.
- Look for stamped or printed identifiers on the core or the harness.
4) Cross-reference the replacement
If I buy aftermarket I cross-reference the OEM number on the manufacturer’s site. Not just a marketplace listing. I read the list of compatible models and years. If the part supports both single-phase and three-phase systems with an adapter I get suspicious. I prefer purpose-built units.
5) Bench test before final assembly
I ohm the windings. I do a continuity check to ground. I verify the resistance values of each coil against the service manual. If the manual calls for 0.2–0.5 ohm between phases I expect to see those numbers. I also test for no continuity to ground. After installation I check AC output at idle and at 3000 RPM per the manual. For ignition stators I scope pickup signals if I can. That quick bench work catches bad units and wrong pinouts before I button up the cover.
Common replacement scenarios and what to watch
Motorcycles and ATVs
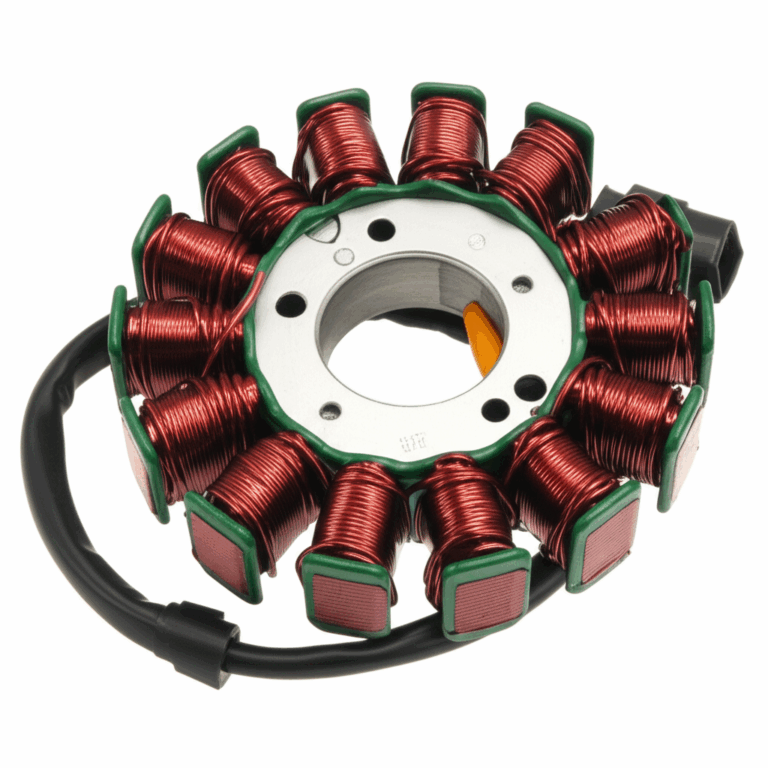
Motorcycle stators vary wildly by engine layout. Sportbikes run compact three-phase charging systems with high output. Off-road bikes often mix charging, lighting, and ignition coils on a magneto plate. ATVs add big accessory loads which pushes amperage. In this space I have seen the most trouble from:
- Wrong number of phases. A three-phase stator plugged into a single-phase rectifier gives you nothing.
- Wrong pickup arrangement. Some engines use one pickup. Others use two pickups offset for timing maps. The mounting tab looks similar yet sits a few degrees off. That small angle shifts timing enough to cause misfires.
- Rotor mismatch. If you pair a stator with the wrong flywheel magnet count you get low or inconsistent output across the rev range.
Honda, Yamaha, Kawasaki, Suzuki, and Harley-Davidson all have models with very specific stators. Honda ATV stator compatibility comes up often because people try to save a buck with a used unit from another year. I only trust a swap if the OEM part number matches or the aftermarket supplier lists the exact year and model.
Automotive alternators
Automotive alternator stators sit inside the alternator housing. Swapping just the stator is less common because rebuilds often replace the entire alternator. Interchangeability improves within a brand family because the housing standardizes the fit. Yet the stator must still match the rotor, rectifier, and regulator inside that unit. Bosch, Denso, Delco Remy, and Mitsubishi Electric each have platform families where parts interchange within a specific alternator model code. I treat the alternator model code like an engine VIN.
Small engines and generators
Small engine stators cover lawnmowers, generators, pressure washers, and compact equipment with Briggs & Stratton, Kohler, and Tecumseh engines. You find single-phase charging coils and separate lighting or ignition windings. In generators the stator pairs with a specific rotor for output and frequency. Even tiny changes to coil turns or wire gauge alter voltage at the rated RPM. You cannot use a “close” stator in a generator that must hold voltage under load at 3600 RPM. Magneto stators for small engines also rely on flywheel magnet strength. I watch for magnet spacing and pickup alignment here more than anywhere else.
Marine engines
Marine stators live hard lives. Salt, spray, heat. They often carry high-output three-phase designs to charge battery banks. Outboard motor stator exchange attempts worry me because harnesses and regulators change mid-series. The stator bolts up then the under-cowl connector does not match. Or it matches yet the regulator is a different type. Marine systems punish guesses because failures can leave you adrift. I only use stators that match the exact engine model and year or an aftermarket unit with a tight cross-reference.
Industrial and BLDC motors
Brushless DC motors in e-bikes, drones, RC cars, and industrial pumps use stators that look similar on paper. Interchangeability is low because the stator slot count, tooth shape, and winding fill tie to a specific rotor and controller. A BLDC stator built for high-speed drones will not behave in a low-speed torque-heavy e-bike hub without heat. When I work on BLDC hardware I match the stator to the controller algorithm and the rotor pole count. I also check the slot insulation and lamination thickness since eddy current loss rises quickly with RPM.
Troubleshooting: symptoms of a bad stator and common misdiagnoses
Before you chase a swap confirm the stator is actually the problem. Here is my quick triage based on real-world headaches.
Charging symptoms
- Dim headlights at idle that brighten with RPM. Could be normal on carbs with weak idle speed. Could be a weak stator. Verify AC output per service manual.
- Battery drains overnight. That is usually a parasitic draw not a stator. Check current with everything off.
- Battery does not charge above 12.6 V while running. Measure AC from stator to rule it in. Then check the rectifier regulator. Many “bad stators” turn out to be failed regulators.
Ignition symptoms
- No spark. Could be kill switch loop to ground. Check that first. Then test pickup coil resistance. Finally test the ignition source coil if present.
- Random misfire at high RPM. Heat can cause coils to open up. Resistance climbs with temperature. A heat gun and a meter can reveal that.
Mechanical clues
- Metallic scraping noise after a stator install. Stop. Pull the cover. You likely have contact or a misrouted harness.
- Burnt smell in the left or right engine cover area after a hard ride. The stator or the rectifier ran hot. Test both.
Upgrades, rewinding, and “universal” stators
Bigger is not always better with charging output. I only upgrade when the stock system cannot support added loads like heated gear, auxiliary lights, or a winch. If I upgrade I insist on a matched kit. That usually means a stator, a flywheel or rotor if pole count changes, and a compatible rectifier regulator. I avoid piecemeal changes because mismatches waste money.
Rewinding a stator has pros and cons.
- Pros. You can restore a discontinued part. You can improve wire quality, insulation, or fill. You can tweak output for a narrow RPM band.
- Cons. You can shift heat into a spot the system cannot cool. You can produce more voltage than the regulator likes at high RPM. You void warranties. Quality varies wildly between shops.
As for “universal stator replacement options.” I skip them unless the application is a custom motor build with a matched controller and rotor. Vehicle electrical systems care about exact specs.
Three quick case notes from my bench
1) The phase mismatch trap
A rider brought me a Yamaha sportbike that would not charge after a DIY stator swap. The old stator failed resistance checks so the diagnosis looked solid. The new stator physically fit. It even used the same connector shell. The charging light stayed on. AC measured near zero. We popped the pins out and discovered a three-phase stator wired into a single-phase regulator harness with two dummy pins. The aftermarket seller copied the connector and wire colors yet changed the internals. A correct single-phase stator fixed it immediately.
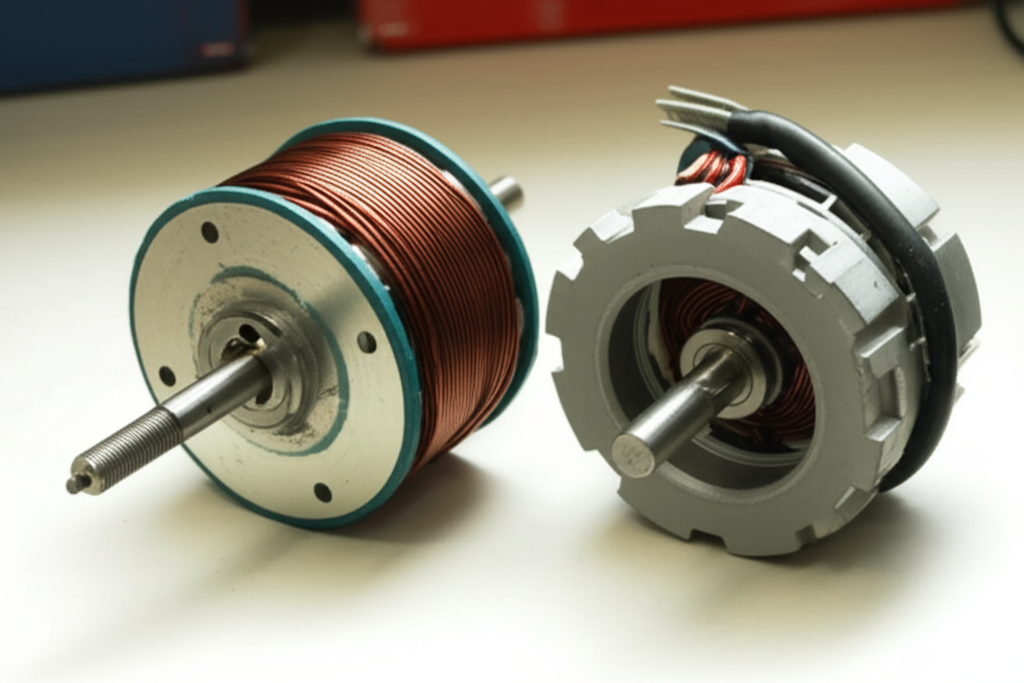
2) The flywheel magnet count surprise
A small ATV arrived with intermittent stalling. The owner had installed a used stator from a similar model year to save cost. The unit charged at high RPM yet stalled at idle. I pulled the flywheel and counted magnets. Twelve on the original. Ten on the replacement model’s flywheel which is what the used stator had been designed to see. The coil placement no longer matched the magnetic field timing which created ugly ripple at idle. A stator matched to the twelve-magnet flywheel solved the issue.
3) The connector pinout switcheroo
An outboard owner swapped a stator that bolted up perfectly. Same mounting, same diameter, same harness length. He plugged it in and blew the main fuse on startup. The pinout had the lighting coil and the charging coil swapped internally which shorted through the regulator. The service manual pinout diagram and a multimeter test would have caught it. We installed the correct unit and replaced the regulator which had failed during the short.
A quick compatibility checklist you can actually use
- Mechanical fit
- Outer and inner diameter
- Thickness and air gap
- Bolt pattern and thread size
- Harness exit path and grommet
- Electrical specs
- Number of phases
- Pole count
- Winding configuration
- Coil resistance and insulation test
- AC output at idle and 3000 RPM
- Connectors and pinout
- Plug type and keying
- Pin mapping with meter and manual
- Wire gauge and harness length
- Application match
- Charging only, ignition only, or combo
- Cooling method and duty cycle
- Flywheel or rotor magnet layout
- Documentation
- OEM part number match or verified cross-reference
- Service manual specs for tests
- Aftermarket support notes if using a kit
Frequently seen LSI topics that matter here
I am going to rapid-fire through common phrases people search because they tie into decisions you will make.
- Generator stator compatibility means matching voltage, frequency at rated RPM, and thermal load. You also match the voltage regulator.
- Motor stator replacement guide steps include measurements, resistance checks, pinout verification, and AC output testing before final assembly.
- Alternator stator types vary by phase count and winding scheme. They also vary by lamination geometry.
- Stator coil winding compatibility is not just wire turns. It is turn count, wire gauge, insulation class, and the core.
- Ignition stator vs charging stator. They do different jobs. Do not cross them.
- Rewinding a stator pros and cons. Useful when parts are discontinued yet risky if you push output without cooling headroom.
- Stator resistance check values come from your service manual. Expect very low ohms on charging phases and specific values on pickup coils.
- Voltage regulator rectifier compatibility is non-negotiable. A mismatch can fry parts or leave you stranded.
- Rotor and stator matching rules. Pole count and magnet layout must align.
- OEM stator vs aftermarket quality. Good aftermarket can match or beat OEM materials. Bad aftermarket fails early.
- Universal stator replacement options are fantasy for most vehicles.
- How to check stator compatibility. Start with part numbers, then specs, then tests.
- Symptoms of a bad stator. Undercharge, overcharge, misfires, heat.
- Cost of stator replacement varies by platform. Bikes often run cheaper parts than marine units. Labor matters because you open engine covers.
- Stator output voltage requirements depend on system load and regulator design. More is not always better.
- Number of poles and phases determine frequency and ripple which decide compatibility.
- Physical dimensions and mounting holes decide whether a stator even fits.
- Connector types and harness pinouts make or break a swap.
- Wire gauge and insulation decide longevity at high output.
- Magneto stators for small engines handle ignition differently and often require exact flywheel pairing.
- Heat dissipation and epoxy potting quality decide durability.
- Part numbers and cross-referencing beat eyeballing every time.
- Aftermarket part lookup helps when OEMs discontinue parts.
- Brand and model specificity rules the day for Honda, Yamaha, Kawasaki, Suzuki, Harley-Davidson, Briggs & Stratton, Kohler, and the rest.
- Efficiency and reliability hinge on materials, lamination quality, and regulator match.
- Safety matters. Electrical fires and component damage follow mismatches.
- Undercharging hurts batteries and ECUs. Overcharging cooks them.
- Dim headlights and engine misfire often trace back to charging or ignition stator issues yet always test the regulator and grounds first.
A compact matrix of what to check and why
Factor or scenario | What I look for | Why it matters | What goes wrong if you miss
Mechanical fit | Diameter, thickness, bolt pattern, wire exit | Prevent rub and vibration | Contact with flywheel, cracked cases, harness pinch
Electrical output | Phase count, pole count, winding scheme, resistance | Match regulator and load | Undercharge, overcharge, heat, no charge
Connector and wiring | Plug type, pinout, wire gauge | Safe connection and correct signals | Shorts, blown fuses, ECU or regulator damage
Application type | Charging vs ignition, cooling method | System-level compatibility | No spark, stalling, heat soak failures
Materials | Lamination quality, insulation, potting | Efficiency and thermal headroom | Early failure under load, hot spots
Final buying and install tips I stick to
- Use a torque wrench on cover bolts and stator screws. Warped covers leak and misalign.
- Replace the cover gasket. Oil leaks ruin connectors.
- Clean all mating surfaces. A stray dowel or leftover gasket can change air gap.
- Route the harness in factory clips. Keep it off exhaust and sharp edges.
- Use dielectric grease on connectors yet do not drown them. You want seal not slop.
- After first ride recheck charging voltage at the battery. Recheck idle and 3k RPM.
Conclusion: precision beats guesswork every time
I love a good parts hunt. I also respect how tightly the charging and ignition systems connect to every piece of your machine’s health. Stators are not interchangeable in the casual sense. Sometimes you can swap within a shared platform or with a verified aftermarket cross-reference. Most of the time you need the exact part number or a matched kit. Measure your old unit. Confirm electrical specs. Verify pinouts. Test before closing the cover. When in doubt chase documentation not hope.
Do that and you avoid undercharging headaches, fried regulators, misfires, and long days tracing melted wires. You also save money because you buy the right part once and you install it with confidence.